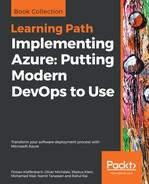
The next important step during the setup is the networking configuration. With the ASDK, all networking relies on a VM called BGPNAT, which simulates the networking switch in the multi-node deployments. As all outgoing or incoming traffic passes this VM, it also represents the bottleneck of ASDK. As only one network interface card is supported, all other available ones need to be disabled, which will be done during the setup itself. This is how to set up:
- In a multi-node environment, the BGPNAT VM is replaced with a physical top of the rack switch:

- For the ASDK, we will need to set up the BGPNAT IP and all other required TCP/IP parameters as shown in the following screenshot:
- With these parameters filled in, all required information is available and the setup is ready to start:

- After having hit the Deploy button, the setup continues. If you have chosen the connected mode, within the next few minutes an authentication request for AAD will be displayed. If no AAD is in place, no further input is needed:

- Depending on the performance of the physical host, the setup may run for four to five hours or more:

- During the first steps of the deployment phase, a Windows cluster will be set up while the ASDK host is rebooting. After this step, it is important to log on as AzurestackAzureStackAdmin to double check the installation progress:
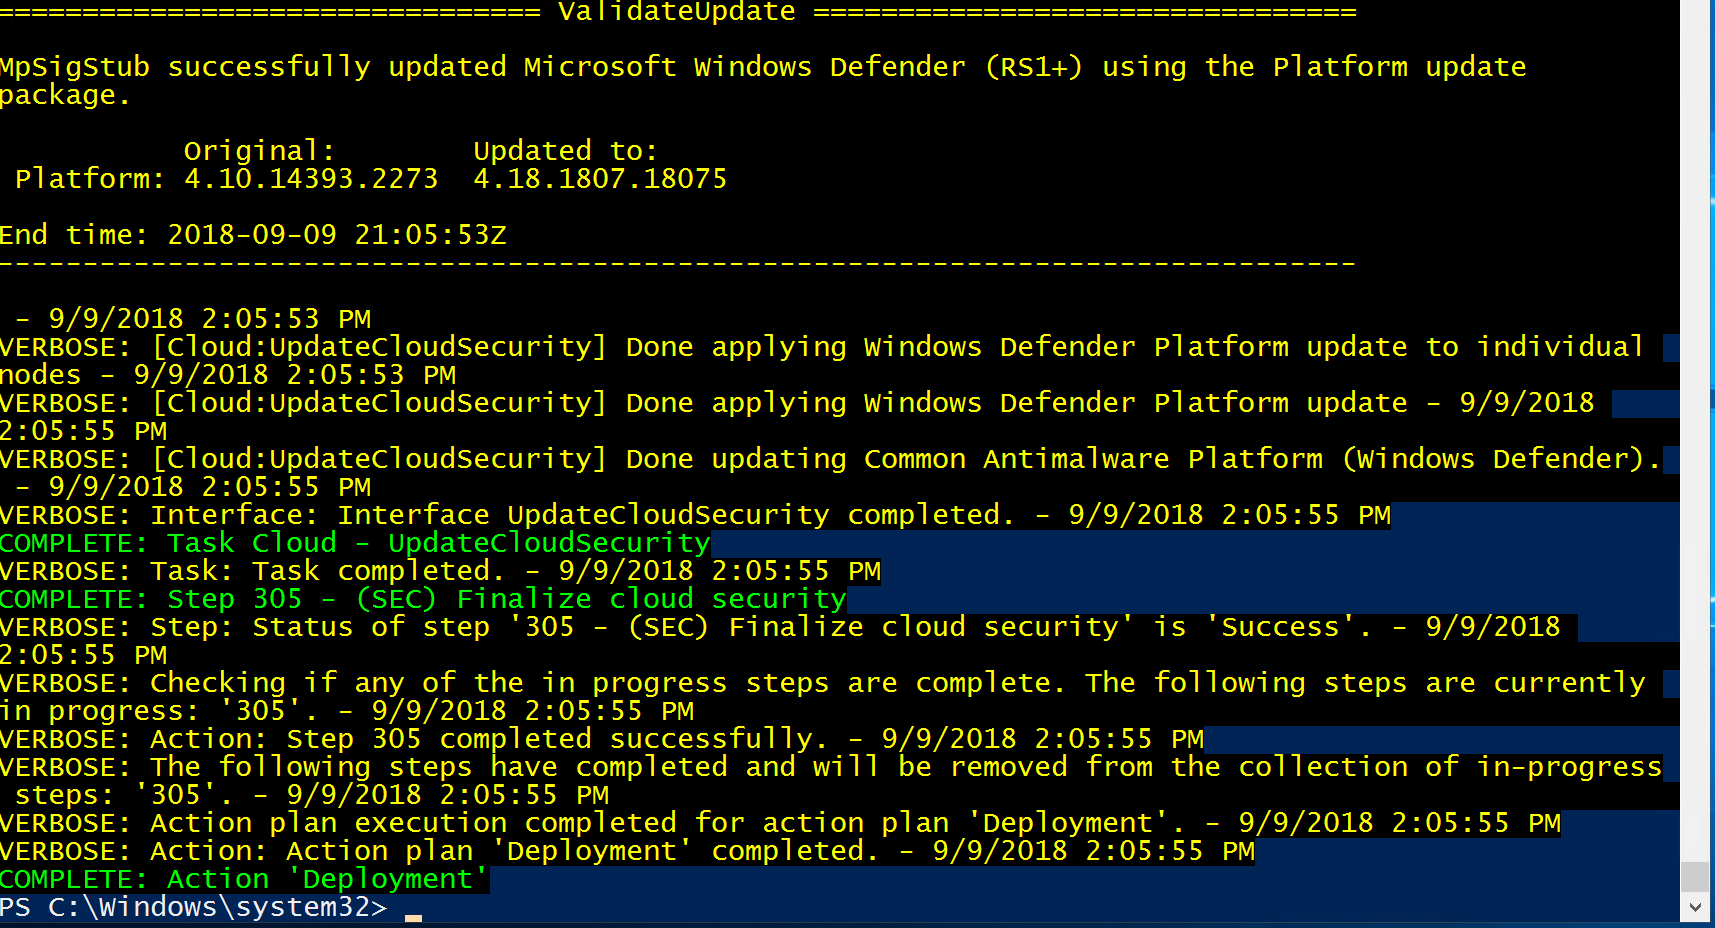
- If no errors occur, the setup will be finished with the preceding screen. If there are any issues, the installation log files (saved to ..CloudDeploymentLogs) are the single point of truth. You can collect them using the following PowerShell command:
Get-AzureStackLog -OutputPath C:AzureStackLogs (or any other folder)
The first and easiest troubleshooting step is to run the setup again using the /rerun parameter.