
To update your board firmware, you'll need to download the Intel Firmware updater tool. If you are running Windows, you should have this tool already. It comes with the Windows drivers. If you don't have it, or you are running another OS, you can download it at https://software.intel.com/en-us/iot/hardware/galileo/downloads. You can find the right download for your OS listed under the Intel® Galileo On-board Flash Firmware Updater section. Download and extract its contents. Execute the firmware-updater-1.0.4.exe file by clicking on it, and the firmware updater interface should be displayed. Ensure you have your Galileo connected to your computer, and in the updater tool, select the USB port you are using. In the same firmware updater tool, check the current and target firmware version. If the current version is lower than the target one, you should update it.
If you need to remove the SD card from the reader, disconnect the USB cable first and then the power cable. Remove the SD card, power the board, and a couple of seconds later, connect the USB cable.
Click on the Update Firmware button to start the firmware update process, and you should see this screen:
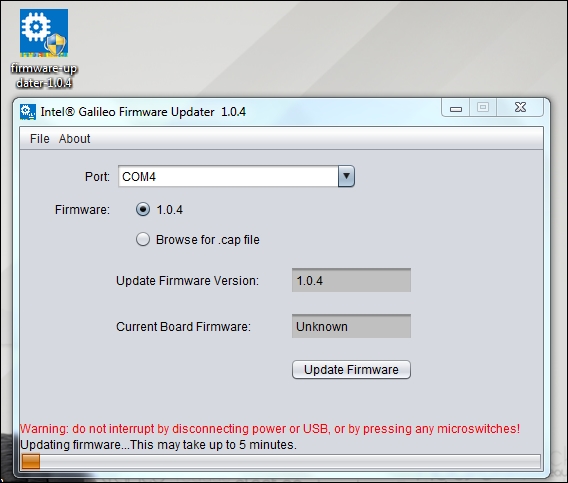
Updating the board firmware
The process should take around five minutes to conclude. During the update process, you can neither power off the board, nor remove the USB cable. Doing this might damage or even brick your board.
Now that we have our board's setup concluded, let's have a look at the Arduino IDE to understand how it works.