
Starting with the control page, we'll build it using HTML, jQuery (https://jquery.com/), and also Bootstrap (http://getbootstrap.com/) for a little help on styling.
We'll build a simple page where we will make three buttons available: one for play, one for next, and the last one for stop.
Inside your project folder (chapter7), create the web page using the vi controls.html command and paste the following code:
<!DOCTYPE html>
<html lang="en">
  <head>
    <meta charset="utf-8">
    <meta http-equiv="X-UA-Compatible" content="IE=edge">
    <meta name="viewport" content="width=device-width, initial-scale=1">
    <title>Animation Controls</title>
    <link href="http://maxcdn.bootstrapcdn.com/bootstrap/3.3.4/css/bootstrap.min.css" rel="stylesheet">
    <script src="https://cdnjs.cloudflare.com/ajax/libs/socket.io/1.3.5/socket.io.min.js"></script>
    <script src="https://cdnjs.cloudflare.com/ajax/libs/jquery/2.1.3/jquery.min.js"></script>
  </head>
  <body>
    <script>
      var socket = io('http://192.168.1.79:8080'),
    </script>
    <div class="container-fluid" style="text-align: center;">

      <div class="page-header">
        <h1>Animation controls</h1>
      </div>

      <div class="row" style="margin-top: 50px;">

        <div class="col-xs-12" style="margin-top: 30px;">
          <button type="button" class="btn btn-primary btn-lg" data-target-action="play">
            <span class="glyphicon glyphicon-play" aria-hidden="true"></span> Play
          </button>
        </div>

        <div class="col-xs-12" style="margin-top: 30px;">
          <button type="button" class="btn btn-primary btn-lg" data-target-action="next">
            <span class="glyphicon glyphicon-step-forward" aria-hidden="true"></span> Skip
          </button>
        </div>

        <div class="col-xs-12" style="margin-top: 30px;">
          <button type="button" class=""btn btn-danger btn-lg" data-target-action="stop">
            <span class="glyphicon glyphicon-stop" aria-hidden="true"></span> Stop
          </button>
        </div>

      </div>
<div class="row" style="bottom:0;position: absolute;">
        Current status
        <span class="badge">
          <span id="stopped" class="glyphicon glyphicon-stop" aria-hidden="true"></span>
          <span style = "display: none;" id="playing" class="glyphicon glyphicon-play" aria-hidden="true"></span>
        </span>
      </div>
    </div>
    <script>
      $(".btn").on("click", function(){
        var action = $(this).data("target-action");
        socket.emit('action', action);
      });

      socket.on('status', function (data) {
        if (data === 'playing') {
          $('#stopped').hide();
          $('#playing').show();
        }

        if (data === 'stopped') {
          $('#stopped').show();
          $('#playing').hide();
        }
      });
    </script>
  </body>
</html>
In the <head> tags, you'll find included the source references to jQuery, Bootstrap, and the Socket.IO client libraries; they are all being imported from a Content Delivery Network (CDN), so you don't have to download them.
The var socket will hold the Socket.IO client. It will be connecting to the Galileo's server when running var socket = io('http://ip_address:8080'). You'll need to replace ip_address with your board IP address.
As you can see in the preceding HTML, we are building three buttons. Each of these buttons has a special tag named data-target-action. In the later part of the code snippet, we are adding an action listener to all the elements having the class btn. By clicking on any of these buttons, the action will be collected from the special data tag and will be emitted to the Socket.IO server under a namespace.
At the bottom of the page, we are adding a current status display, showing a glyph icon, depending on whether an animation is running or not. To receive the real-time updates, we need to listen for a specific event. On this page, we will be listening for the status event. When an animation starts var data, it will be equal to playing and when it stops it, it will be equal to stopped. These definitions are created by us.
The following is a table that explains the emitted and listened events in this page:
This is the protocol we will be using to emit and receive messages in this page. To have a look at the page design, save your code and exit the editor by typing ":wq" out of the insertion mode (press Esc if on insertion mode).
Run the server by typing node index.js. When you see Listening.. printed in the shell, open a browser in your mobile phone (connected to the same network as the Galileo) and type the address: http://my_ip_address:8080/controls.html. Replace my_ip_address with your Galileo IP address. You should now see the following web page:
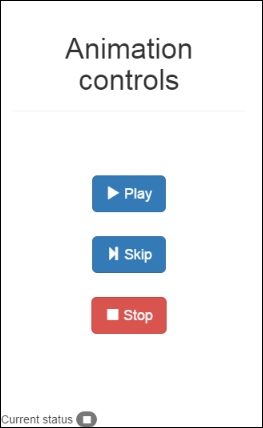
The animation control web page
So far, you'll be able to watch the page that is being served by Galileo, but you won't be able to interact with it yet.