
As you saw in the previous chapter, Arduino Galileo IDE is very simple to use and by now, you should already know how to compile and upload your sketches to the board.
One interesting feature of this IDE is that it allows you to execute command-line operations in the Galileo's Linux shell. This way, it is possible to print useful information in the Galileo serial connection through the Linux shell, such as the board IP address, and in this particular use case, your CPU temperature.
In this chapter, we will create a bootable SD card, connect our board to the Internet using an Ethernet cable or Wi-Fi, read the Galileo CPU internal temperature sensor, and plot the collected data to an online chart.
In this chapter, we will cover the following topics:
- Burning a Linux bootable image to an SD card
- Booting Galileo from a microSD card
- Connecting to the Internet using a wired or wireless connection
- Using Galileo as a Web Client
- Running Linux shell command-line operations using the Arduino IDE
- Discovering Galileo IP address
- Reading from the internal CPU temperature sensor
- Using the Arduino SD library to read from the SD card
- Plotting the gathered temperature data to an online chart
Booting your board from an SD card brings you many advantages. Besides allowing you to connect to the Internet from a Wi-Fi connection and have your application memory increased, it makes your Arduino sketches persistent and also allows you the possibility of using more interesting development tools and languages such as Python.
To burn your image, you'll need:
- A FAT32 formatted microSD card. It can be of any size from 1 GB up to 32 GB.
- A computer.
- An SD card adapter (optional).
Let's start by downloading the Clanton image which is available at https://communities.intel.com/community/makers/drivers; click on the SD-Card Linux Image link to start your download.
When the download completes, you'll have to extract its contents.
For extracting the downloaded file in Linux OS, use the following steps:
- If you don't have
bzip2already installed, you should install it by typingsudo apt-get install bzip2in your terminal. - Extract the file contents using the command
bzip2 -cd downloaded_file.tar.bz2 | tar xvf -, wheredownloaded_file.tar.bz2is your downloaded file. - Find the card mounting point by executing the
df -hcommand and then insert your card in the card reader and execute the same command again. The new entry in the printed list is your SD card mounting point. - Copy the contents of the extracted folder by typing
cp -r * /media/your_mounting_point, with/media/your_mounting_pointbeing the card mounting point that you've found using thedfcommand.
To extract the downloaded file on Mac, open the downloaded file with your system compress utility and extract the folder contents to the top of the SD card drive.
To extract the downloaded file in Windows, you can use WinRAR to extract the downloaded file contents and use the following steps:
- Insert your card in the card reader.
- When the extraction finishes, copy the extracted folder contents and paste them in the top directory of the SD card volume.
Now, you should have your bootable SD card ready and the root of your SD card will now contain the following files:
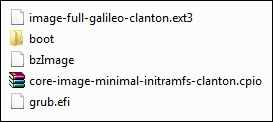
SD card contents
With your Galileo powered off, insert the SD card in the board. You'll need to wait for some time to have the board ready and booted from the SD card.
Now, let's get the board connected to the Internet, so that we can test whether the Galileo had booted properly.