The appliance-based vCenter and PSC can also be deployed separately. We will be deploying the PSC first and then the vCenter Server as separate virtual machines. The appliance based vCenter or it components cannot be installed onto a physical machine.
Unlike the previous version wherein the appliance was deployed from an OVA, with vSphere 6.0, the appliance is deployed onto an ESXi host without the need to connect to an ESXi host using the vSphere client. This would require you to install the VMware Client Integration plugin before the appliance is deployed.
To install the Client Integration plugin, navigate to the vcsa folder of the DVD drive and double-click on VMware-ClientIntegrationPlugin-6.0.0.msi to start the installer. The installation is pretty straightforward, click through the wizard and finish the installation.
Once the Client Integration plugin is installed, you can begin the process of deploying the VCSA-PSC appliance:
- Double-click the HTML file,
vcsa-setup.htmlat the root of the VCSA ISO image, to bring up the setup web page which presents you with two options, Install or Upgrade. Click Install. - Accept the VMware EULA and click Next to continue.
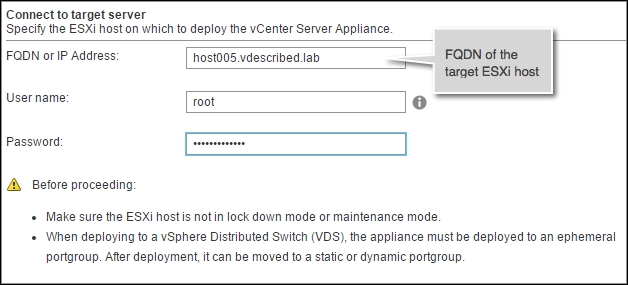
- Supply the FQDN or IP address and the root credentials of the ESXi host onto which you would like to deploy the PSC appliance VM. Click Next to continue:
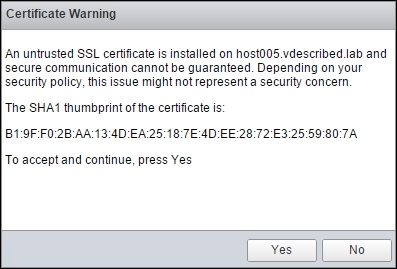
- An SSL Certificate Warning should prompt you to accept its SHA1 thumbprint. Click Yes to accept:
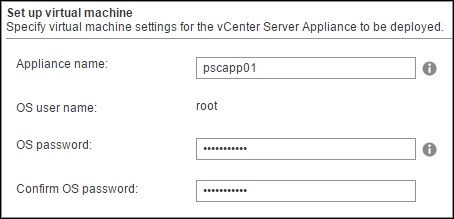
- Supply a virtual machine name for the appliance and a password for its root user. Click Next to continue:
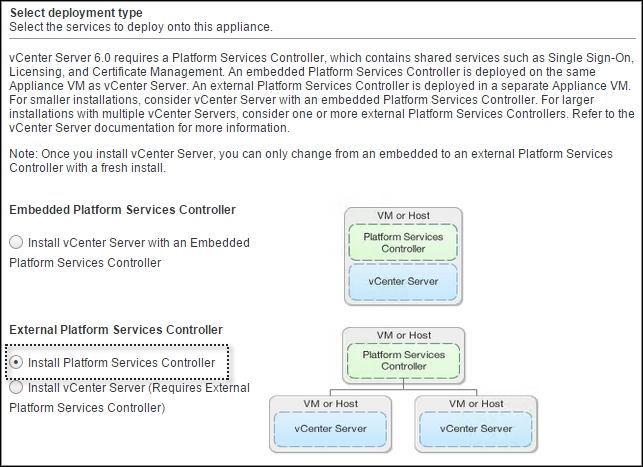
- In the Select deployment type screen, select the Install Platform Services Controller option under External Platform Service Controller and Click Next to continue:
- You will now be prompted to create or join an SSO domain:
- If you choose to create a new domain, then supply a password for the SSO administrator, a domain name (default: vsphere.local), and an SSO Site name
- If you choose to join an existing SSO domain, then supply the FQDN or IP address of a PSC belonging to the domain you intend to join and its SSO administrator password
- In the Select appliance size screen, no user input is needed as the installer will deploy the VM with a default size of 2 vCPUs, 2 GB Memory and 30 GB VMDK. Click Next to continue:

- On the next screen, choose a data store to place the virtual machine files and click Next to continue. You also have the option to enable thin provisioning of the appliance's VMDK by selecting the option Enable Thin Disk Mode.
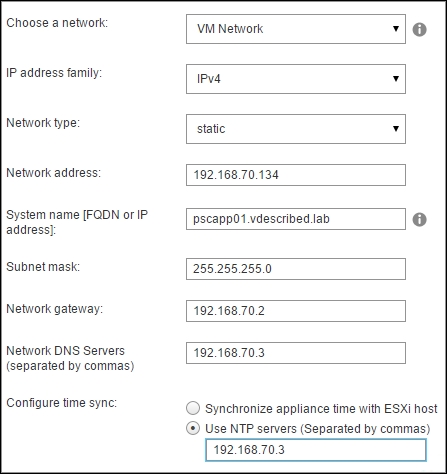
- The Network Settings screen will require you to supply the following network details:
- Standard or distributed switch port group
- IP address version
- Network type-static/dynamic
- IP address
- System name , hostname/FQDN: Make sure the DNS A and PTR records are created for the chosen hostname
- Subnet mask
- Network gateway
- DNS Servers
- Time sync options , sync with ESXi or sync with an NTP server:
- On the Ready to Complete screen, click Finish to carry out the deployment.
- If the installation completes successfully, you will be presented with an Installation Complete screen. Click Close to exit the wizard.
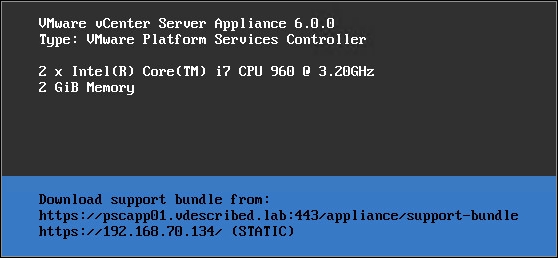
- The console of the appliance VM should show the correct IP and hostname details:
To deploy the VCSA bundled vCenter Server you will need to have the vSphere Client Integration plugin installed on the machine from where the installation will be initiated. If you were to use the same machine used to deploy the PSC then there is no need to install the Client Integration plugin again.
Here is how you can deploy the VCSA-vCenter Server:
- Double-click the HTML file, vcsa-setup.html at the root of the VCSA ISO image.
- The setup web page presents you with two options, Install or Upgrade. Click Install.
- Accept the VMware EULA and Click Next to continue.
- On the Connect to target server screen, supply the FQDN or IP address of the ESXi host onto which you would like to deploy the PSC appliance VM and the host's root credentials. Click Next to continue.
- An SSL Certificate Warning should prompt you to accept its SHA1 thumbprint. Click Yes to accept.
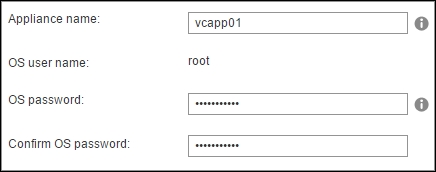
- Supply a virtual machine name for the vCenter appliance and a password for its root user. Click Next to continue:
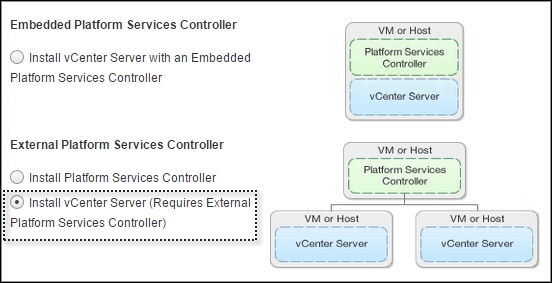
- In the Select deployment type screen, select the option Install vCenter Server (Requires External Platform Services Controller) under External Platform Services Controller and Click Next to continue:
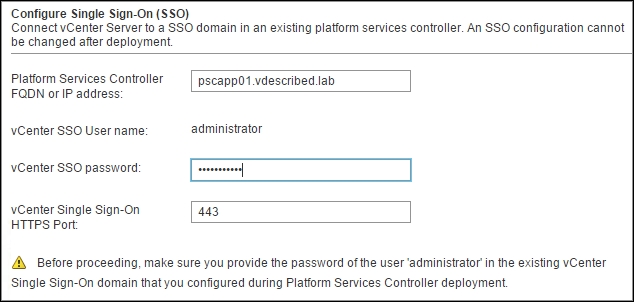
- Supply the external PSC's FQDN or IP address and its SSO administrator password to continue:
- In the Select appliance size screen choose between Tiny, Small, Medium, or Large and the virtual machine will be sized accordingly:
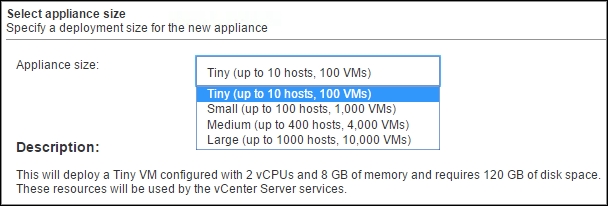
Appliance Size
Number of ESXi hosts
Number of VMs
Tiny
10
100
Small
100
1000
Medium
400
4000
Large
1000
10000
- Choose a data store to put the virtual machine files on and click Next to continue.
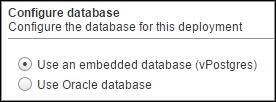
- On the Configure database screen, choose between the embedded vPostGres database or an external Oracle database:
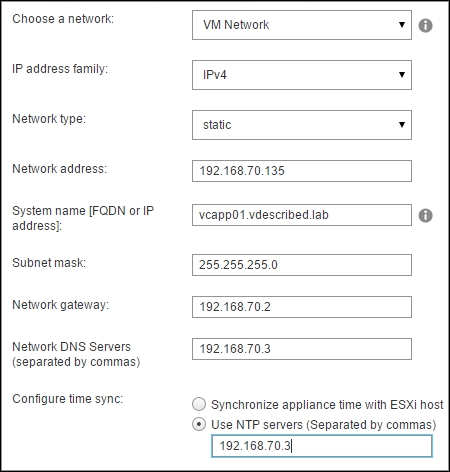
- On the Network Settings screen supply the requested network details. These are similar to what is requested during the deployment of the PSC appliance:
- On the Ready to complete screen, review the settings and click Finish to begin the deployment.
- If the deployment completes successfully you will be presented with an Installation Complete screen. Click Close to exit the wizard.
