
vSphere has many features that can make an administrator's life easier. Host profiles can be used quickly and easily to initially configure new ESXi hosts, and to determine configuration drifts. Image Builder can be used to customize ESXi image profiles in order to avoid having to install drivers or other components post-install. vSphere Auto Deploy allows you to quickly provision a large number of ESXi hosts in your datacenter infrastructure using a PXE infrastructure. vSphere host profile and Auto Deploy are vSphere Enterprise Plus features.
In this chapter, you will learn:
- Host profile overview and use cases
- How to create and edit a host profile
- How to import and export a host profile
- Image Builder use cases
- How to modify and export an image profile
- vSphere Auto Deploy use cases
- Configuring vSphere Auto Deploy rules
Host profiles are a vSphere Enterprise Plus feature that can greatly simplify the host configuration management required as your deployment scales out, by using configuration policies. Host profile policies can be used to eliminate per-host manual configuration, and to maintain configuration consistency across the entire datacenter. Host profiles are essentially blueprints or templates of known, validated gold ESXi configurations. These can be used to manage settings and monitor compliance for networking, storage, security, and other configurations for multiple ESXi hosts. Host profiles can be managed using the vSphere Web Client, PowerCLI, or vSphere APIs.
The workflow for host profiles starts with the reference host. A reference host acts as the template from which the host profile is referenced and created. The process would go as follows:
- Install ESXi and configure the reference host.
- Create a host profile from reference host.
- Modify host profile as needed.
- Attach other ESXi hosts or clusters to the host profile.
- Check compliance to the host profile.
- Remediate (as needed).
- Detach the ESXi hosts or cluster from the host profile.
As of vSphere 6.0, a dedicated reference host is no longer required for host profiles. Previously, vSphere required that a reference host was available for host profile tasks, like importing, exporting, and editing. However, there is now reference host independence.
Host profiles are necessary when using vSphere Auto Deploy, a feature that will be discussed later in the chapter, but can be used independently. If you're new to vSphere management, host profiles are comparable to Group Policy Objects (GPO) in that there are many options that can be configured and applied to many ESXi hosts. Host profiles can be imported as well as created from scratch.
Let's have a look at the advantages of using host profiles:
- Elimination of per host configurations, giving simplified setup and change management for ESXi
- Maintaining configuration consistency and corrections
- Easy detection of non-compliance with a standard configuration
- Automated remediation
Before going through the process of creating a host profile, you want to configure an ESXi host to be the reference, or golden template, of how all similar ESXi hosts should be configured. You can have multiple host profiles which should be used for each different configuration. For example, you wouldn't configure the virtual networking settings the same for an ESXi host with six X 1 Gbps network adapters as you would an ESXi host with two X 10 Gbps network adapters. The same principle applies for blades versus rack mount servers or even different hardware vendors.
Once the reference host has been configured and you are ready to create the host profile, go to the Home area of the vSphere Web Client. Select Host Profiles:

Once you have navigated to Host Profiles, then you will be able to press the + button to create a new host profile:

This will bring up the Extract Host Profile dialog; from here select the correct vCenter Server and which ESXi host the host profile should reference. Press the Next button once the options have been selected:

Specify a Name and optional Description for the profile. Press Next:

Review settings and press the Finish button:

Once the creation process has completed, you should see the host profile you created under Host Profiles | Objects in the Navigator pane:

In order to check the compliance of an ESXi host or cluster of ESXi hosts compared to a defined host profile, the host profile must be attached to the ESXi host or cluster. To attach a host profile, select the host profile and press the Attach/Detach a host profile to hosts and clusters button:

This will bring up a dialog box that allows you to select specific ESXi hosts or to attach an entire cluster. Select the desired objects in the left-hand pane and press the Attach button. Once the objects are located in the right-hand pane, press Next:

The Customize hosts screen will allow you to modify any property that may be unique per individual ESXi host, for example a VMkernel port for iSCSI traffic would be configured with a unique IP address for each ESXi host. Press Finish:

Once a host profile has been attached to an ESXi host and/or cluster, you will be able to check whether remediation is needed. To check compliance, press the Check host profile compliance of associated entities button:

You may also check the compliance and get more detailed information by selecting the host profile in the left-hand navigation pane, then select the Monitor tab and finally press the Compliance button. You will be able to view each host's results independently and get more detailed information regarding compliance:

More detailed information can be viewed by pressing the triangle next to each section in the Compliance pane. This will expand to give you a better idea of what kind of misconfigurations there are and what amount of remediation is needed:

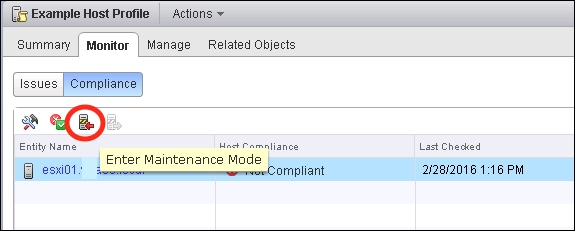
To remediate an ESXi host, it may need to be in maintenance mode. In order to successfully enter maintenance mode, there cannot be any actively running virtual machines on that host. You may suspend, power off/shut down, or evacuate (migrate off the virtual machines) the ESXi host.
Once there are no actively running virtual machines, you may press the Enter Maintenance Mode button:
As demonstrated in the figure below, once the host is in maintenance mode, you may press the Remediate host based on its host profile button to begin the remediation process:

The remediation wizard will prompt you to validate or enter any unique values for the selected ESXi host(s). This effectively creates an answer file. An answer file simply contains the information that preserves the uniqueness across the different ESXi hosts. Press Next once the variables have been entered:

The Review Remediation Tasks pane allows you an opportunity to take a look at all of the configurations that will be made before pressing Finish:

Once you press Finish, the remediation process will begin.
Once you are finished using the host profile, you may detach it from the ESXi host or clusters. To do so, press the Attach/Detach a host profile to hosts and clusters button, as demonstrated in the following image:

Select the hosts or clusters to detach on the right-hand pane and press the Detach button. The hosts or clusters should now appear in the right-hand screen:

Press Next and review all information before hitting the Finish button to complete the wizard.
We've covered how to attach, check compliance, remediate, and detach a host profile but one of the more time-consuming, never-ending parts of using host profiles is the management piece. Host profiles can be edited, as well as imported and exported.
Once you have created a host profile, spend some time going through each of the settings abstracted from the reference ESXi host. You can modify values as well as removing settings from being a part of the compliance check. For example, something that is specific or unique to that reference host, but is not necessarily applicable to the rest of the ESXi host should be something to remove from the profile, like local storage.
To edit a host profile, select the host profile and press the Action drop-down menu; from there, select Edit Settings...:

By selecting Edit Settings, a dialog box will pop up that allows you to go through each of the settings abstracted from the reference ESXi host and do further customization:

As an example, the following image demonstrates the ability to set configurations for vSwitch0 that differ from how the reference host was configured. I could choose to modify the MTU policy or even specify to not create the vSwitch0 at all. I could even dig further into the Link configuration or Number of ports by further expanding the virtual switch:

Continue to customize the host profile until it fits your specific needs and then press Next and then Finish.
At some point you may have the need to share a host profile with another site or with a customer. You have the ability to export a host profile as a .vpf file, which can be imported into another vCenter server. The export method could also be used as a way to backup a host profile.

A security warning will pop up alerting you that passwords are not exported as a part of the host profile. Click the Save button:

The save dialog will appear to allow you to choose a saved location and the name of the .vpf that will be created:

Press Save when finished.
Once there is a .vpf file, you will be able to press the Import Host Profile button and select an available host profile:

When the Import Host Profile dialog appears, select the destination vCenter Server, press the Browse button and select the desired .vpf file. Name the profile to be imported and add an optional description:

Click OK and the host profile will be imported.