
vSphere uses Single Sign-On as its authentication broker and for exchanging security tokens. Authentication is separated from permissions. Single Sign-On authorizes users to authenticate once the user has been validated; however, this does not necessarily mean that the authenticated user has permissions within a vCenter Server. Permissions must be granted within the vCenter Server, separately from Single Sign-On. This section will cover Single Sign-On and its configuration. See the vSphere Permissions section for granting privileges to users.
Single Sign-On is a vSphere component that acts as an authentication broker and is an infrastructure for security token exchange. vCenter Single Sign-On is one of the components that the vSphere 6 Platform Services Controller (PSC) consists of.
Single Sign-On is a required component of the vSphere Platforms Controller (on which the vCenter Server is dependent). This section covers how to configure Single Sign-On identity sources and policies.
Identity sources are collections of user and group data and may be used to attach one or more domains to Single Sign-On. This user and group data is typically stored locally in the Single Sign-On machine's operating system, OpenLDAP, or Active Directory. Single Sign-On also contains an internal security domain, commonly called vsphere.local. This local security domain may also be used for authentication.
To configure a Single Sign-On identity source:
- Navigate to Administration and then select Configuration underneath Single Sign-On. Choose the Identity Sources tab.
- To add an identity source, select the add (+) button:
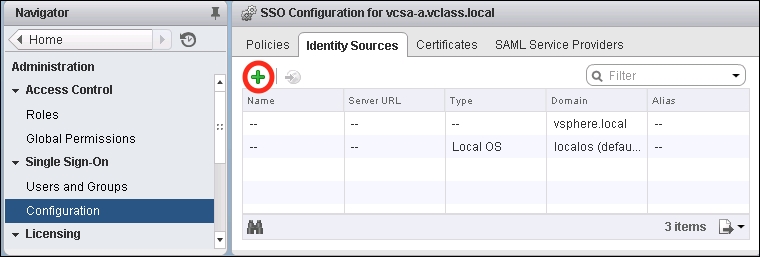
- The Add identity source dialog box will appear. Select an Identity source type and enter the Identity source settings as required. There are several types of identity sources:
- Active Directory (Integrated Windows Authentication): This is ideal for Active Directory 2003 or later. A single domain may be specified as an identity source, though this domain may be a forest root domain or have child domains.
- Active Directory as an LDAP Server: This option is primarily for backwards compatibility for vSphere 5.1 Single Sign-On.
- OpenLDAP: This supports for OpenLDAP 2.4 or later; there is support for multiple OpenLDAP identity sources.
- Local OS: Only a single local operating system identity source may be configured. This option only exists with a simple Single Sign-On deployment, meaning that it is not available if multiple Single Sign-On instances (PSCs) are deployed:
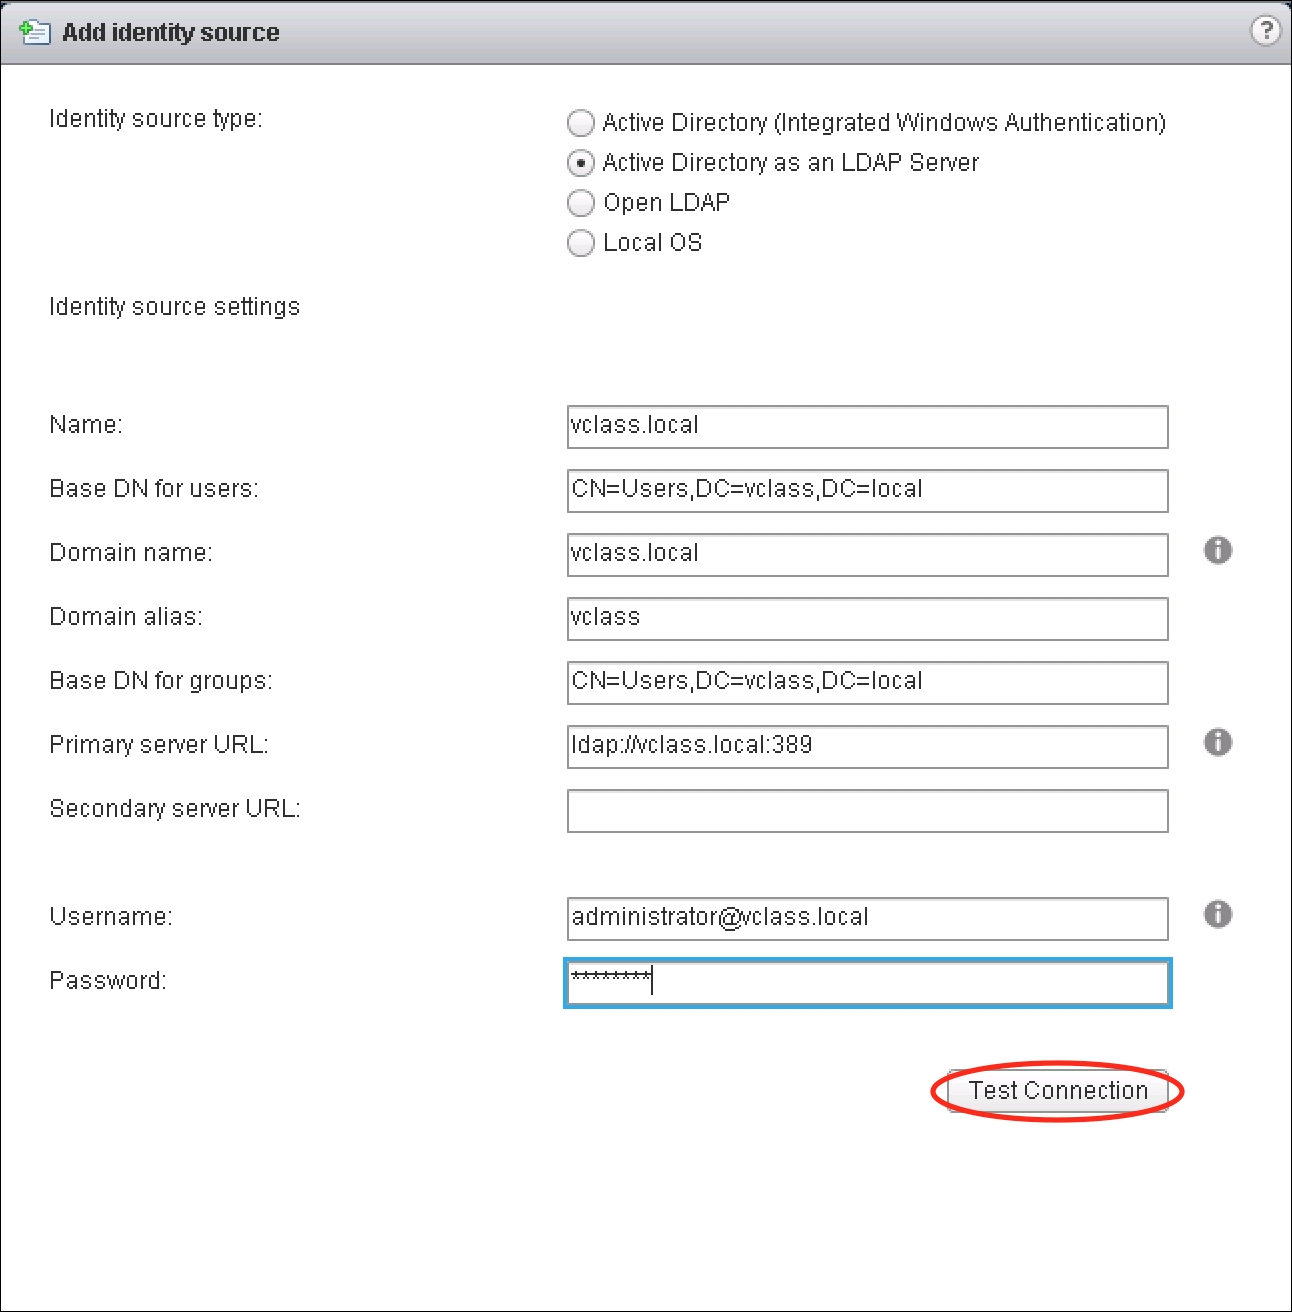
- Once the settings information has been entered, click on the Test Connection button to ensure that Single Sign-On can bind successfully to the identity source.
- A popup will appear, as shown in the following screenshot, to notify you whether the connection was successfully established or not.
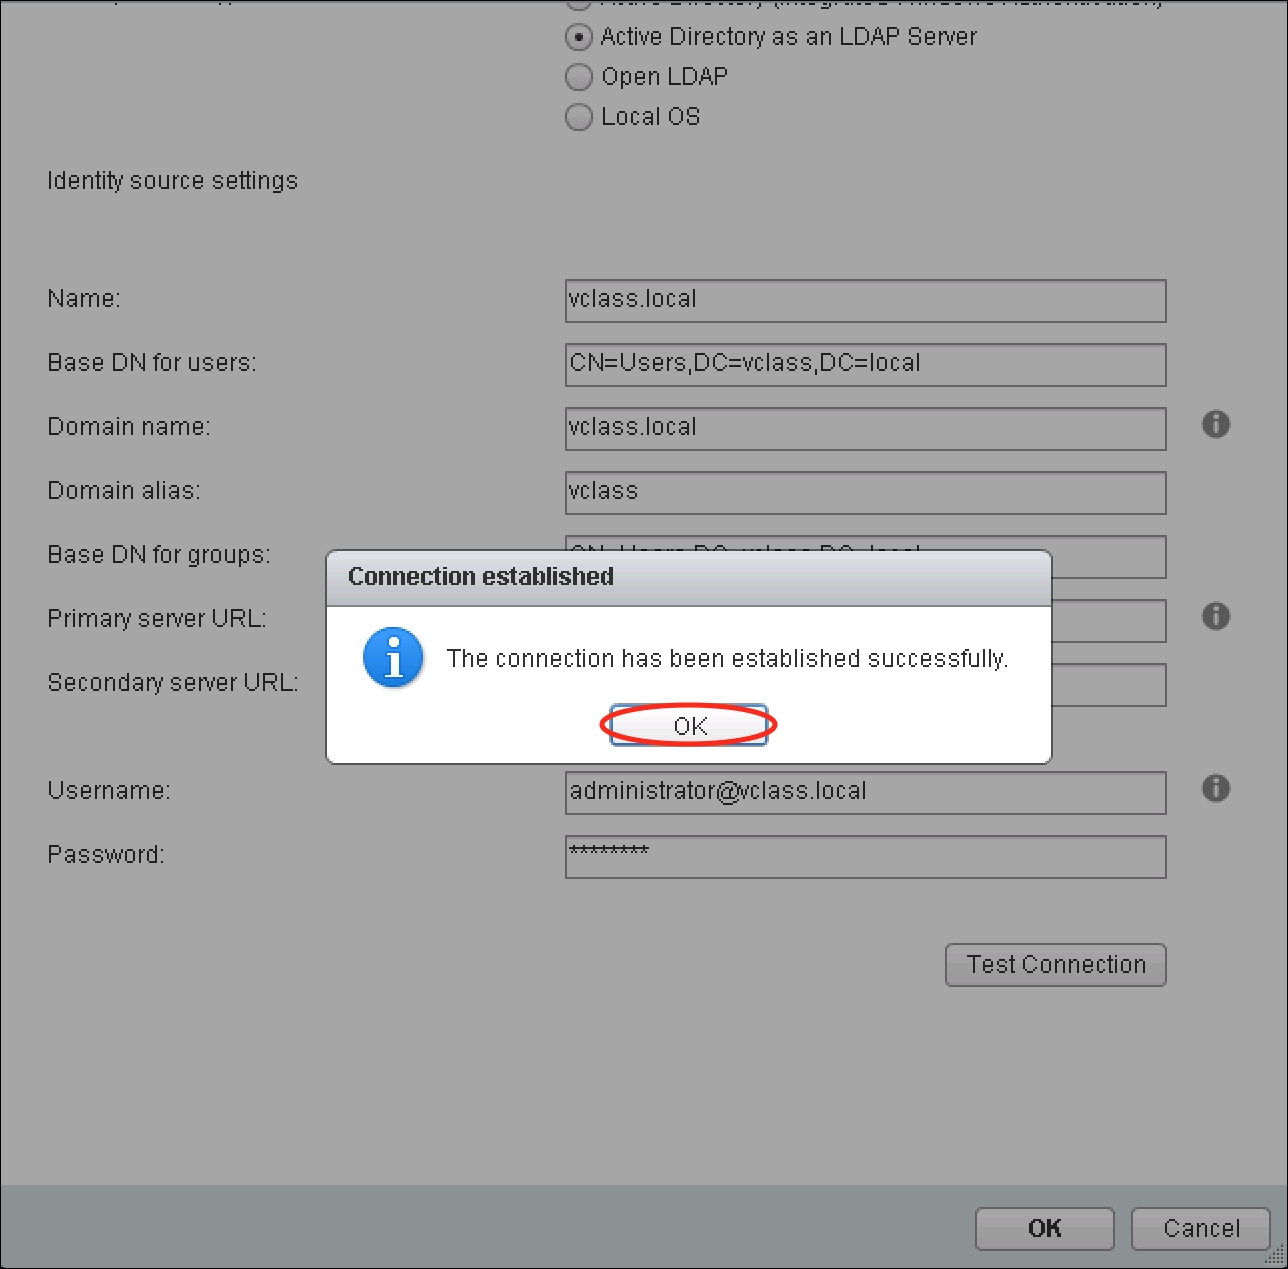
- Once successfully established, click on OK:
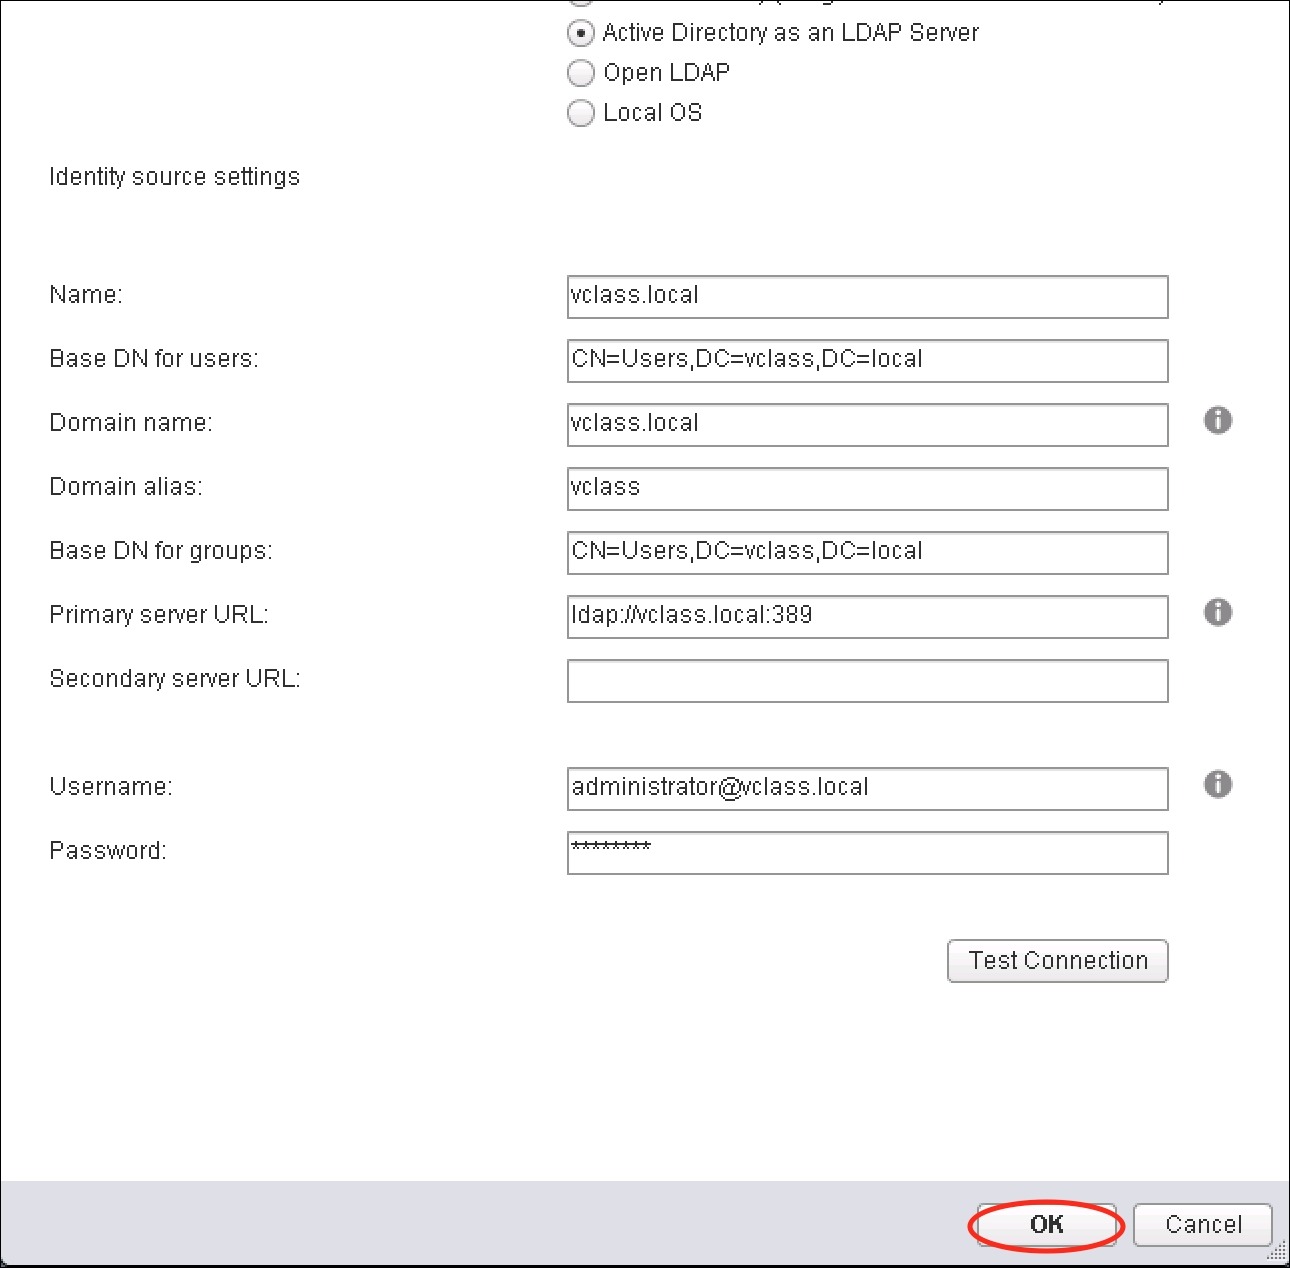
- Once the connection has been established successfully, click on OK in the Add identity source dialog box.
The default domain specifies which domain is used for authentication when a user attempts to log in using Single Sign-On. After installing the Platform Services Controller, the default domain is set to the Single Sign-On security domain vsphere.local. A user signing in from any other domain would have to specify the domain at each login.
To change the default domain:
- Log into the vSphere Web Client as a Single Sign-On administrator.
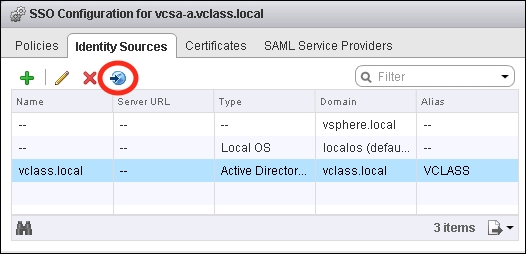
- Navigate to Administration and then select Configuration under Single Sign-On. Choose the Identity Sources tab.
- Select the desired domain. Click on the default domain button (circled in the following screenshot):
- A Warning dialog will appear:
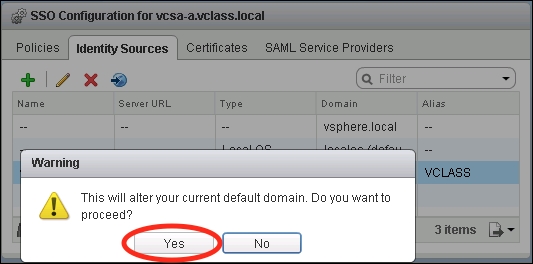
- Click on Yes to change the default domain for authentication.
There are several different Single Sign-On policies that may be configured to enforce various security rules in a vSphere environment. This section will cover password policies, lockout policies, and token policies.
Password policies are a set of restrictions and rules on password expiration and password format for Single Sign-On users. Keep in mind that this policy only applies to built-in Single Sign-On security domain (vsphere.local) users. To modify the password policies:
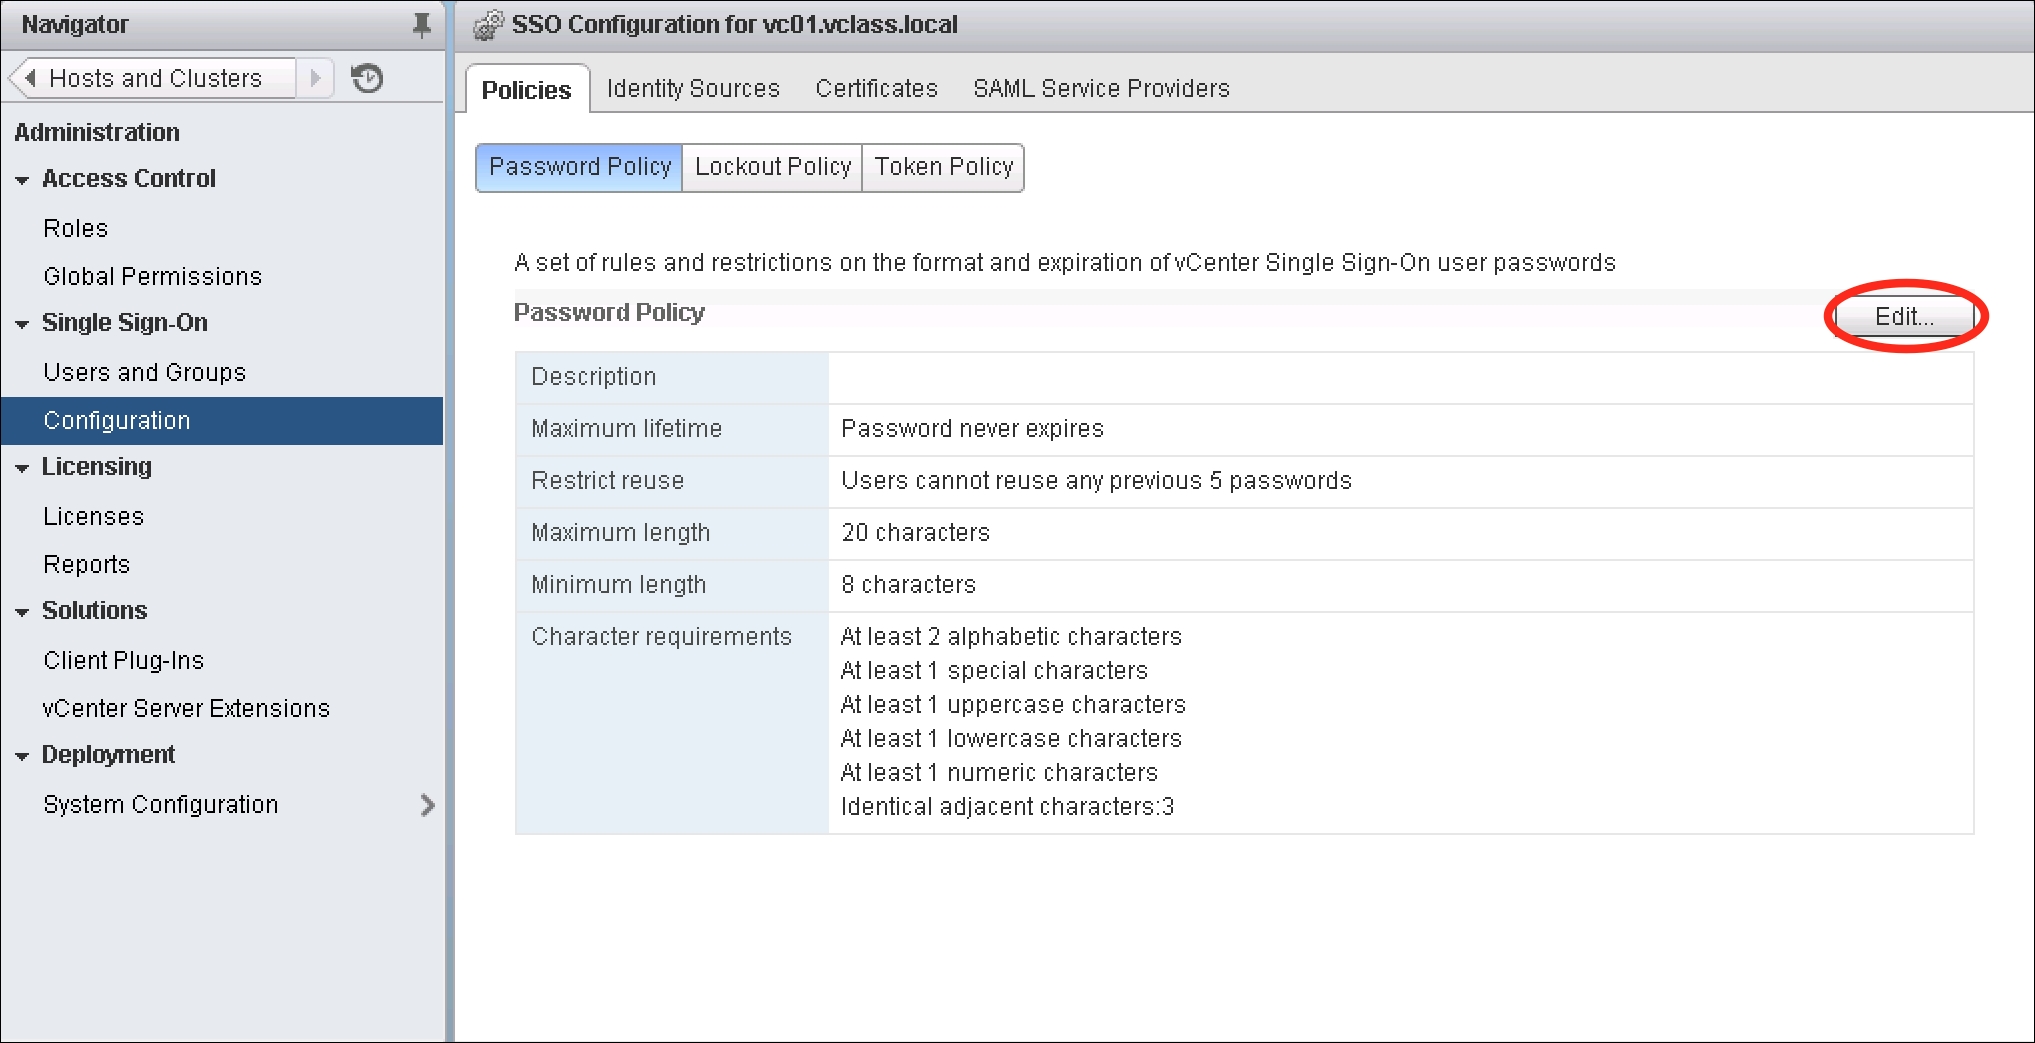
- Log into the vSphere Web Client as a Single Sign-On administrator and navigate to Administration, and choose Configuration under Single Sign-On.
- Select the Policies tab and then click on the Password Policy button.
- Review the policies and click on Edit… to modify:
- The Edit Password Policies dialog box will appear. Modify the settings as needed.
- Maximum lifetime: This setting specifies the maximum number of days before a password must be changed
- Restrict reuse: This setting specifies whether a password can be reused
- Maximum length: This setting specifies the maximum number of characters in a password
- Minimum length: This setting specifies the minimum number of characters in a password
- Character requirements: This setting specifies the minimum number of each character type required in a password
- Identical adjacent characters: This specifies the maximum number of identical characters that are consecutively allowed
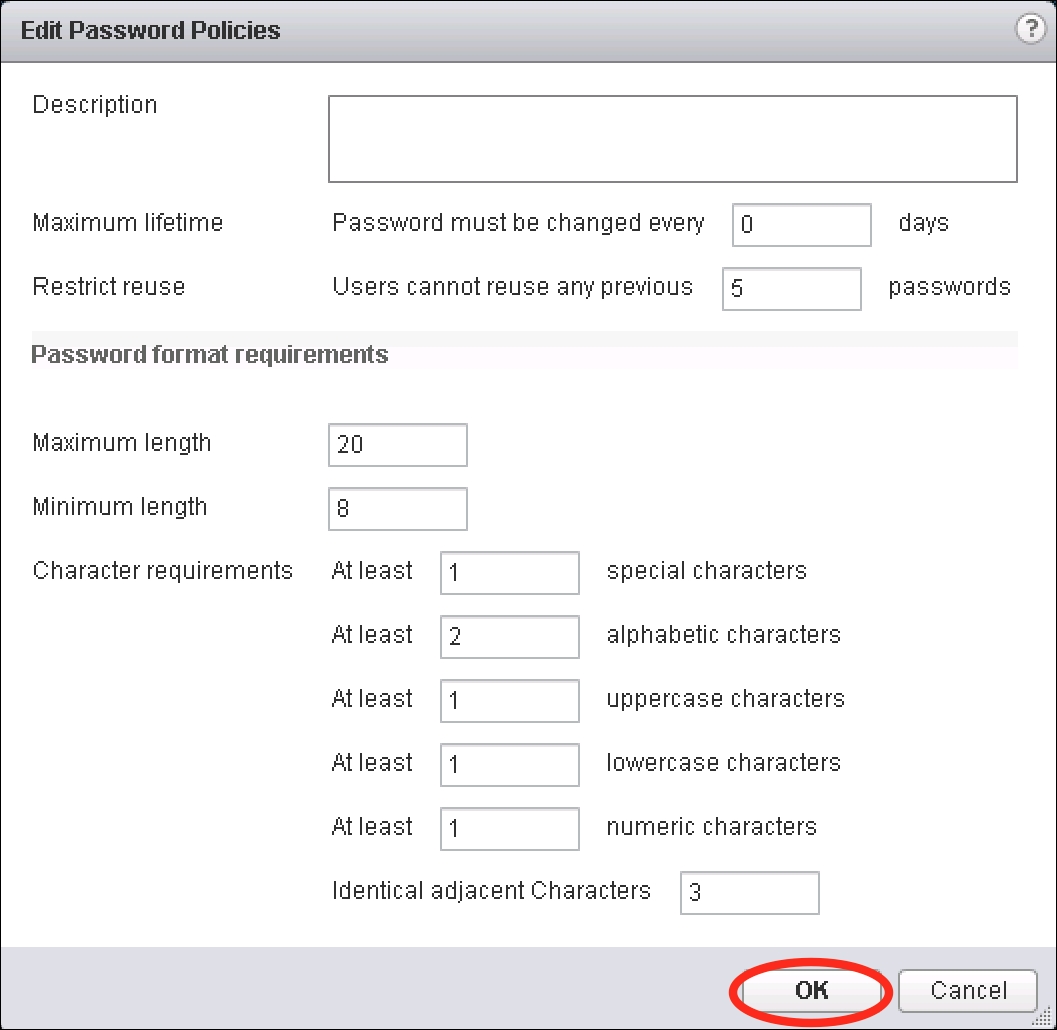
- Once the password policy has been set as desired, click on the OK button.
The Single Sign-On lockout policy specifies the settings surrounding what happens when a vsphere.local user enters the wrong password multiple times. To modify the lockout policy:
- Log into the vSphere Web Client as a Single Sign-On administrator and navigate to Administration, and choose Configuration under Single Sign-On.
- Select the Policies tab and then click on the Lockout Policy button.
- Review the policies and click on the Edit… button if modifying the policies is desired:
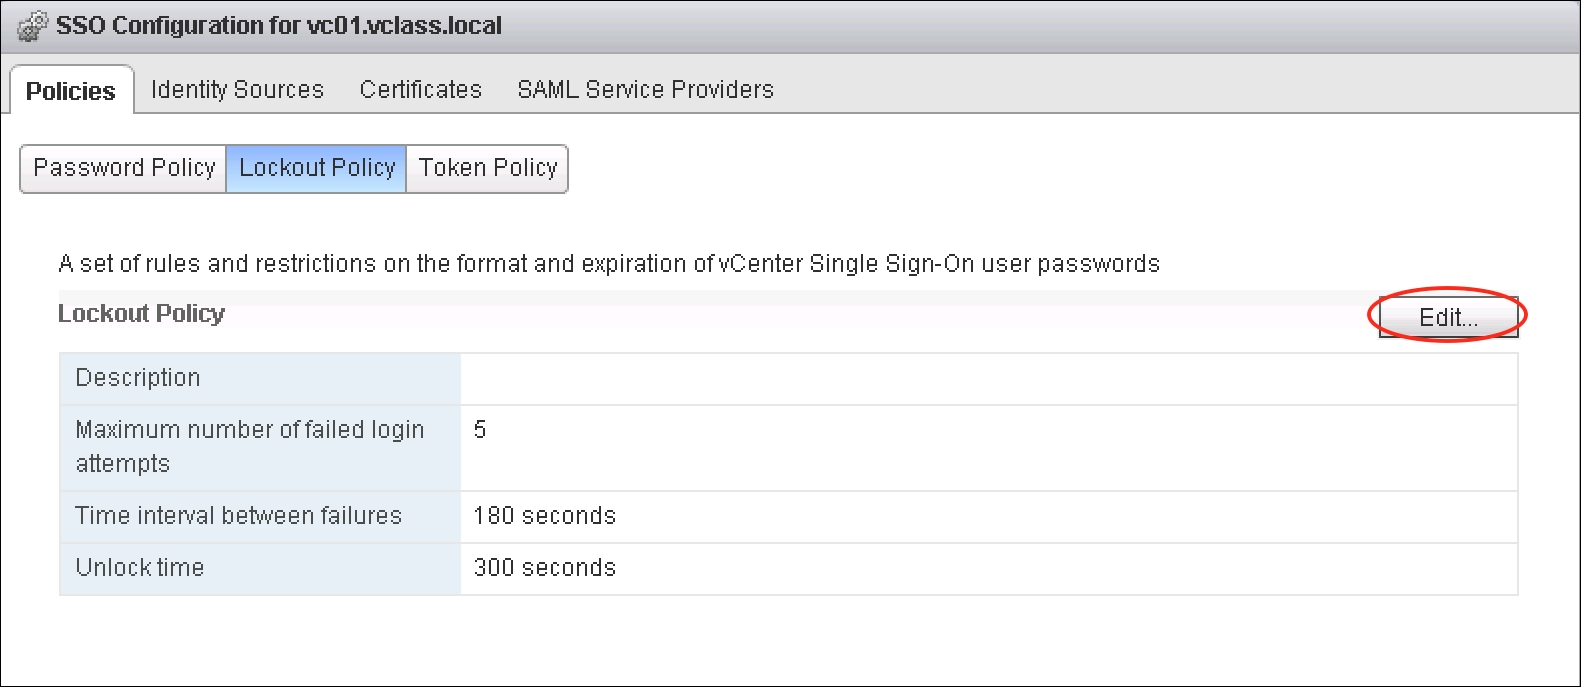
- The Edit Lockout Policy dialog will appear, allowing modifications to the policy. The following policies may be changed:
- Maximum number of failed login attempts: This specifies the maximum number of times that an account may fail to log in before it is locked.
- Time interval between failures: This specifies the allowable time period in which a lockout may be triggered.
- Unlock time: This specifies the length of time in which the lock remains. If set to 0, administration will be required to unlock the account:
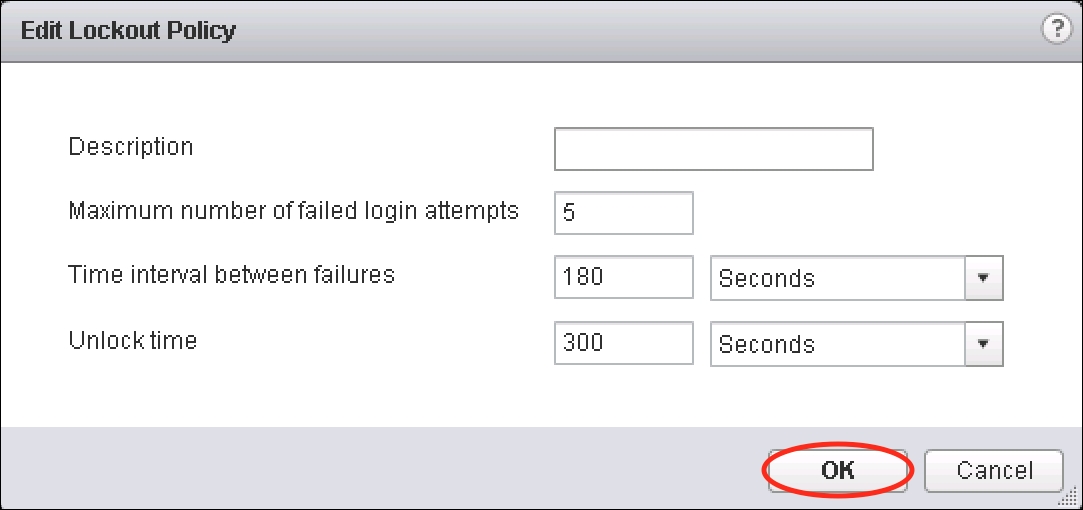
- Once finished editing the policy, click on OK.
The token policy for Single Sign-On specifies such token properties as clock tolerance and renewal count. Like the other Single Sign-On policies, this may be configured to meet different infrastructure requirements. To modify the token policies:
- Log into the vSphere Web Client as a Single Sign-On administrator and navigate to Administration, and choose Configuration under Single Sign-On.
- Select the Policies tab and then click on the Token Policy button.
- If modifying the policies is desired, click on the Edit button:
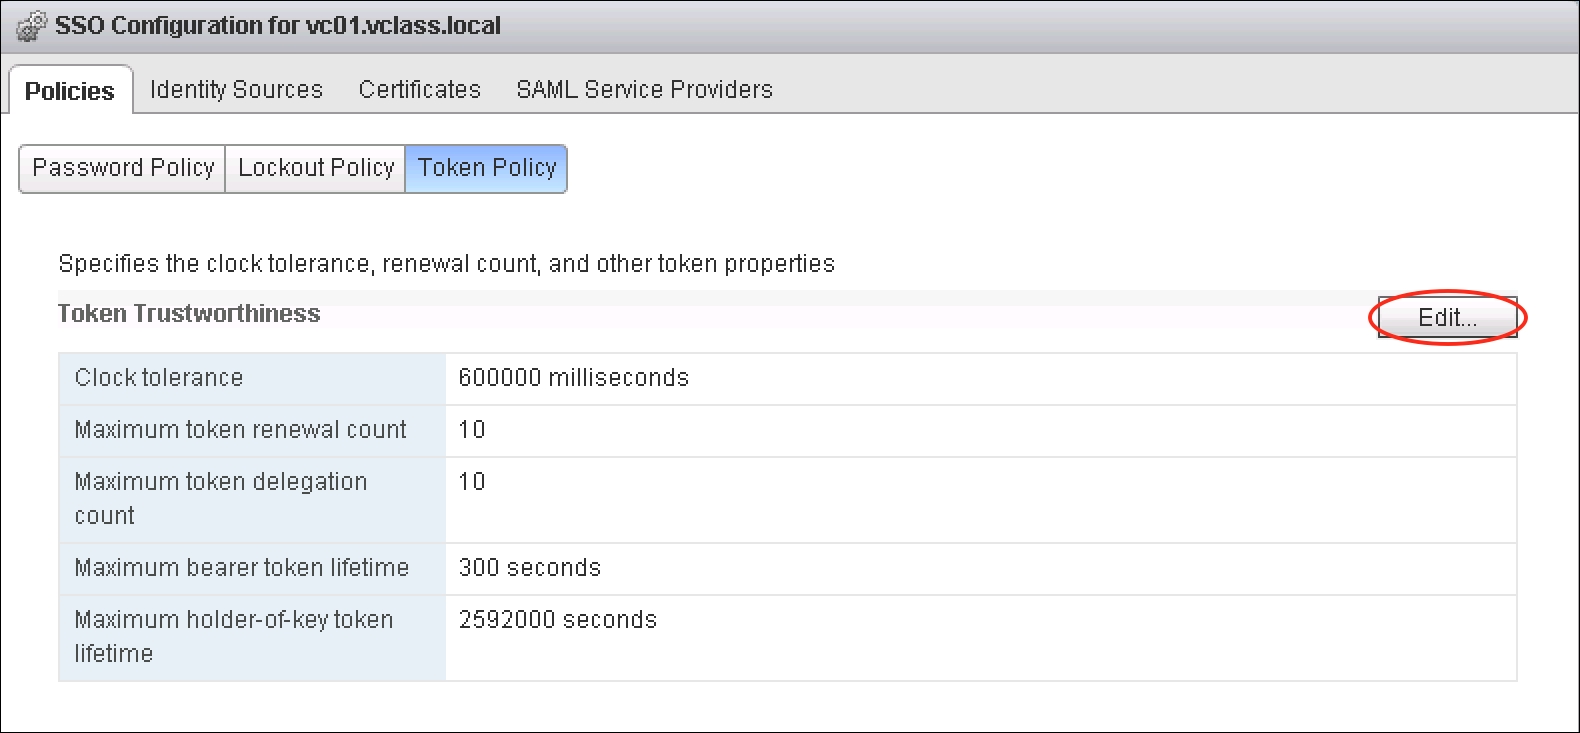
- This will bring up the Edit Token Policy dialog box. The following variables may be modified:
- Clock tolerance: This setting specifies the allowable time difference between the client and the domain controller clock. If the time difference exceeds the configured value then Single Sign-On will declare the token invalid.
- Maximum token renewal count: This setting specifies the maximum allowable times that a token may be renewed. A new security token will be required once the maximum number of renewal attempts is exceeded.
- Maximum token delegation count: This setting specifies the maximum allowable times that a single holder-of-key may be delegated. Holder-of-key tokens may be delegated to vSphere services. A token request may specify a DelegateTo identity, specifying a service that will perform on behalf of the principle that provided the token.
- Maximum bearer token lifetime: This setting specifies the maximum allowable lifetime of the bearer token before reissue is required. A bearer token provides authentication based on its possession. It is meant to be a single use, short-term operation.
- Maximum holder-of-key token lifetime: This setting specifies the maximum allowable lifetime of the holder-of-key token before it is marked as invalid. A holder-of-key token provides security artifact-based authentication that is embedded in the token. These are used for delegation.

- Once finished modifying the values, click on OK.
Users and groups that are internal to the Single Sign-On security domain may be reviewed and additional users may be created on vsphere.local. While it is not possible to add users to other domains using the vSphere Web Client, you may add users to Single Sign-On groups.
To view and create Single Sign-On users:
- Log into the vSphere Web Client as a Single Sign-On administrator.
- Navigate to Administration and then select Users and Groups underneath Single Sign-On.
- Choose the Users tab to view the users within the vsphere.local domain. To view users in different domains, select the drop-down box next to Domain. (Keep in mind that users may not be created in any domain other than
vsphere.local.) - A new user may be created in the Single Sign-On security domain by clicking on the plus sign (+).
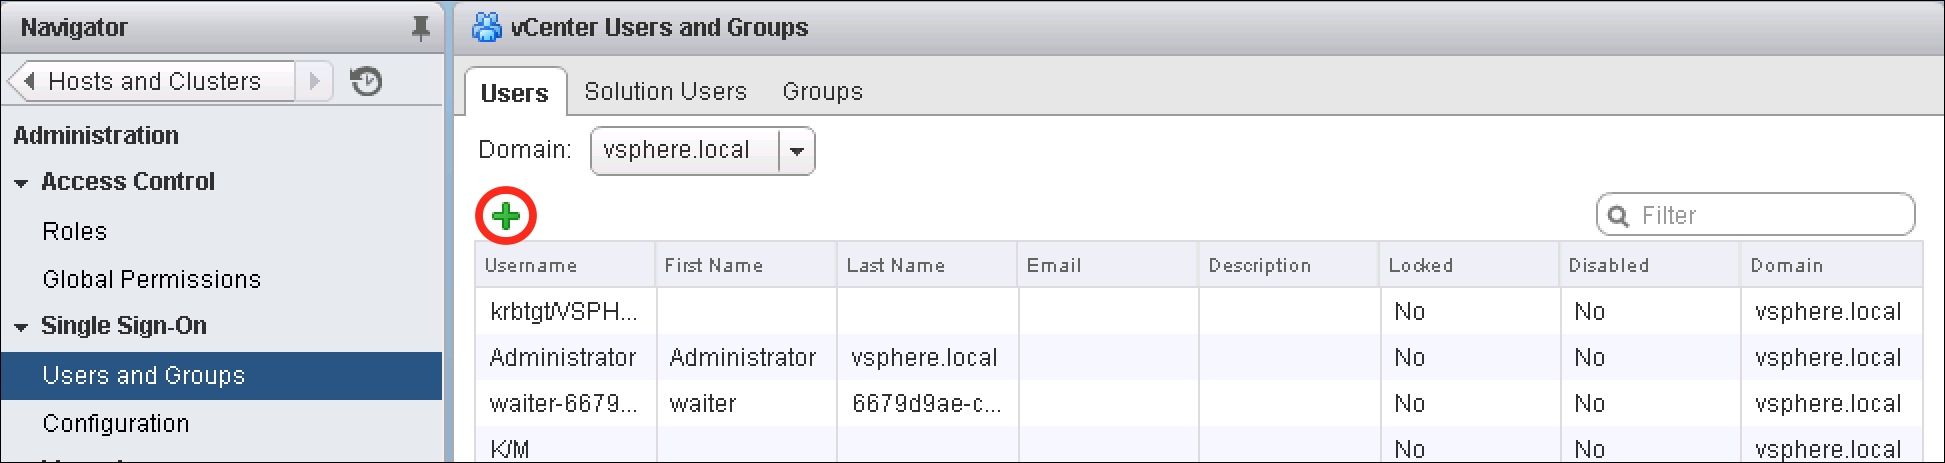
- This will bring up the New User dialog box. Enter a User name, Password, and optionally First name, Last name, and Email address.
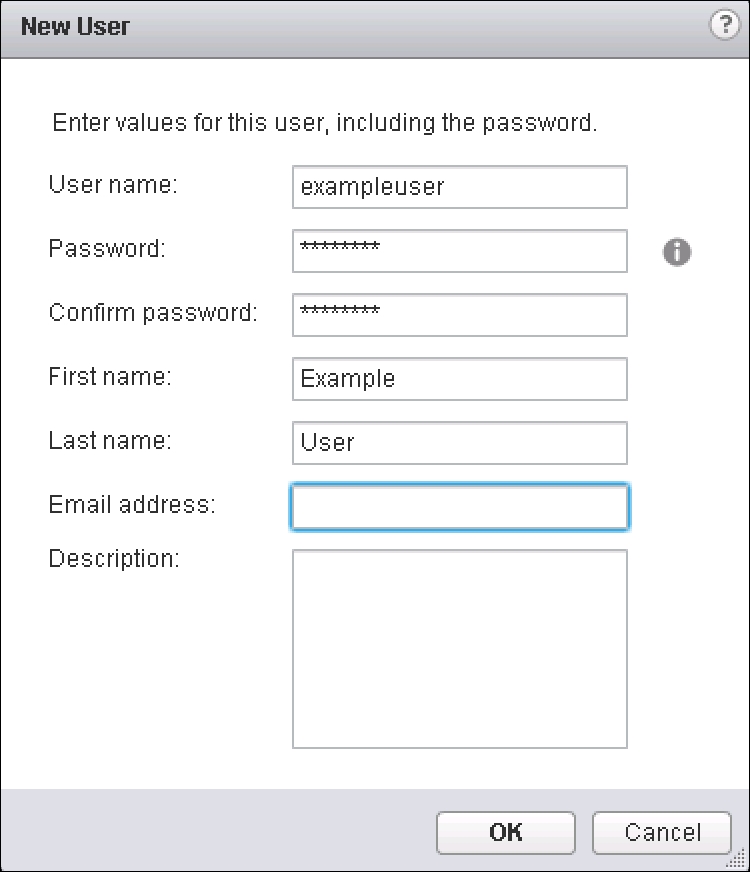
- Once finished, click on OK.
Single Sign-On users can be disabled, enabled, or unlocked if necessary.
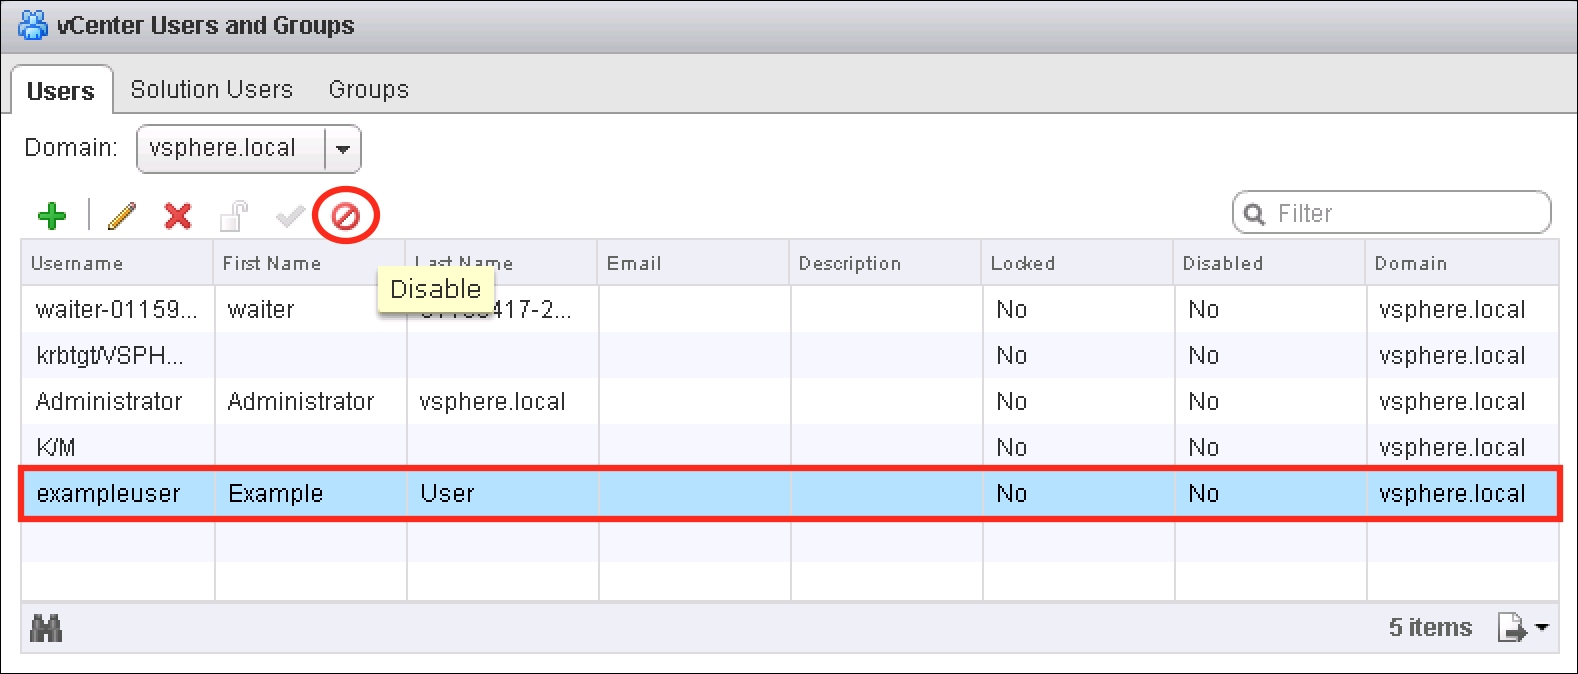
To disable an account:
- Go to the Users tab in Single Sign-On configuration.
- Select the desired user account and then click on the Disable button (circled in the following screenshot):
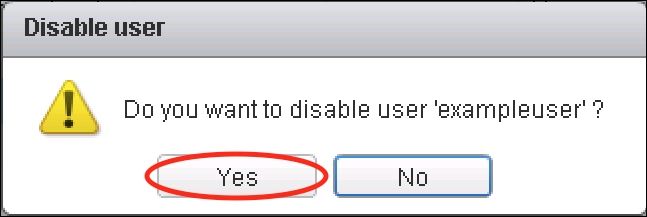
- The Disable user dialog will appear. Click on Yes to disable the account.
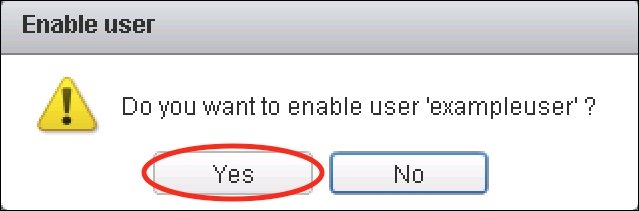
To re-enable a user account:
- Go to the Users tab in Single Sign-On configuration.
- Select the desired user account and then click on the Enable button (circled in the following screenshot).
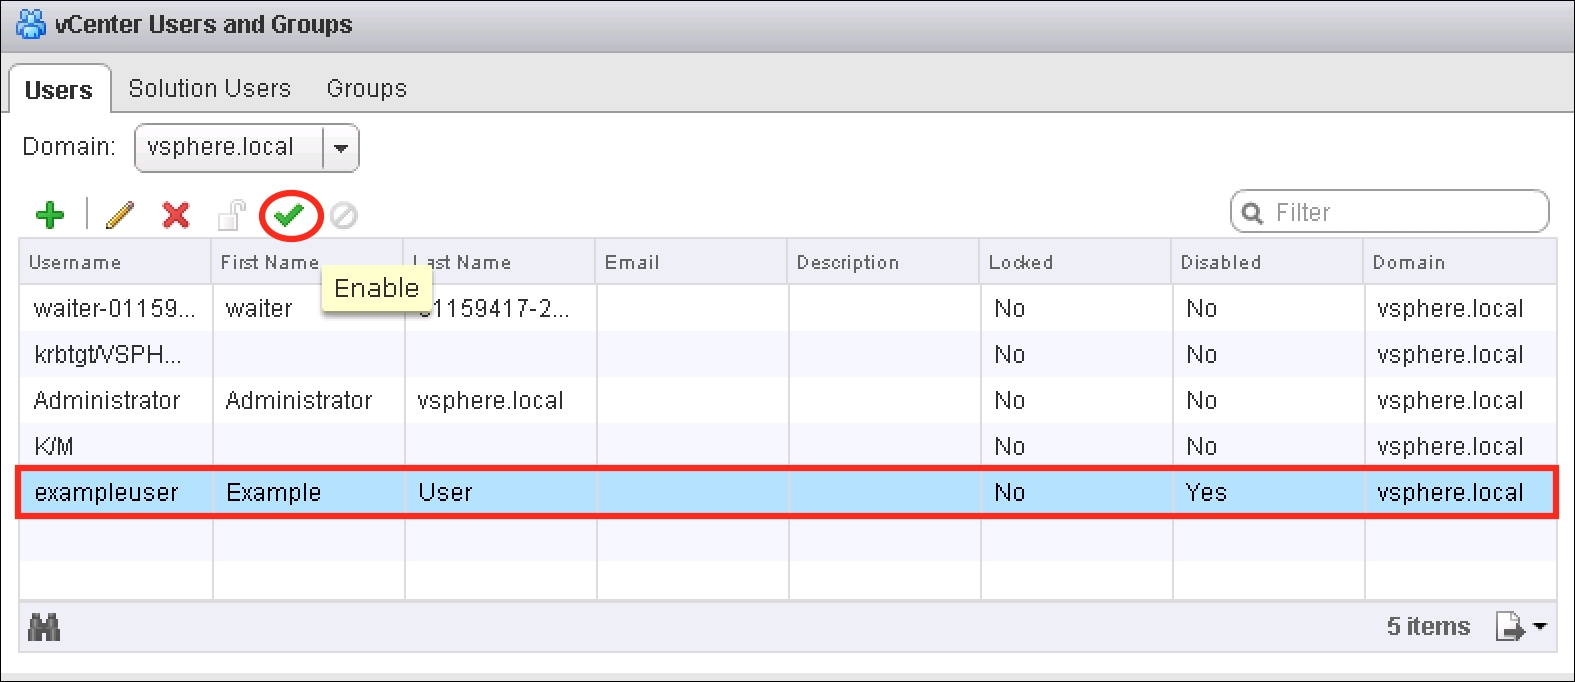
- To re-enable the account, click on Yes.
An account may also be unlocked by clicking on the lock button after selecting a user.
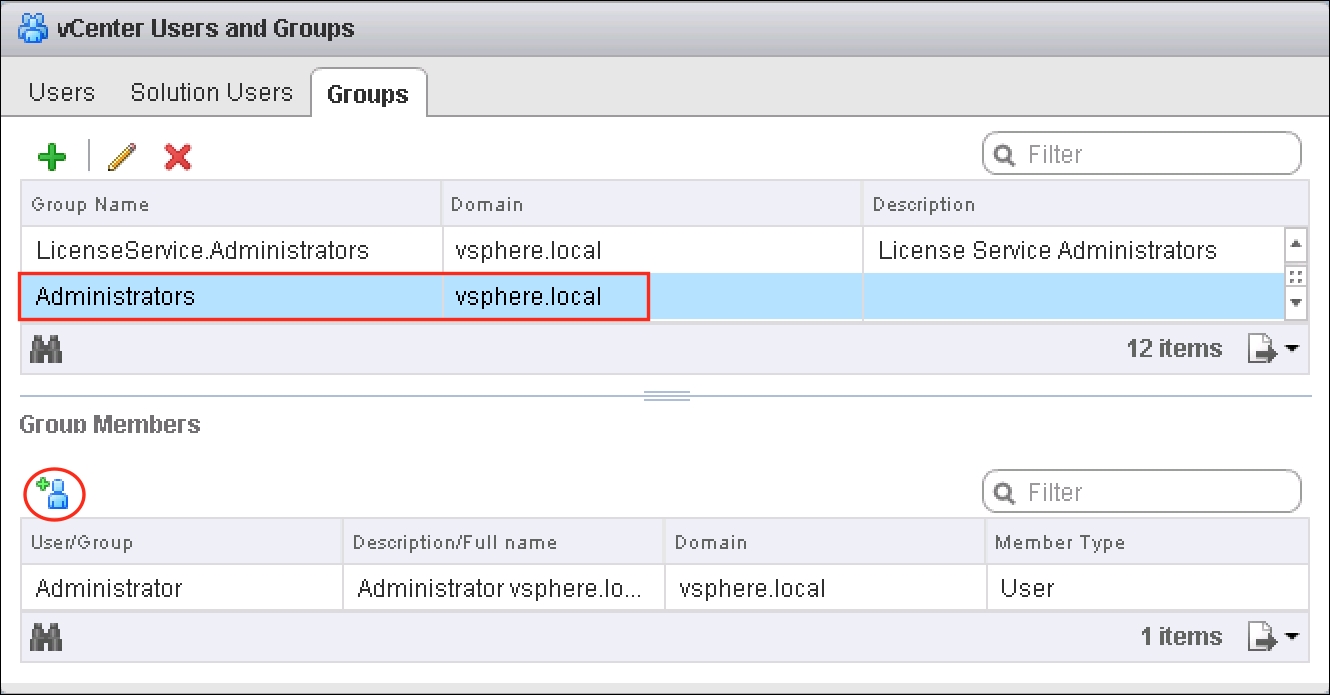
Single Sign-On groups may have members that are users of other groups, and these may come from multiple identity sources. To add a user to a Single Sign-On group:
- Log into the vSphere Web Client as a Single Sign-On administrator account.
- Navigate to Administration and then choose Users and Groups under Single Sign-On.
- Select the Groups tab. Choose the group to which a user will be added.
- Click on the Add Members button under the Group Members area.
- The Add Principals dialog box will appear. Select the Domain and then select the user that should be a group member.
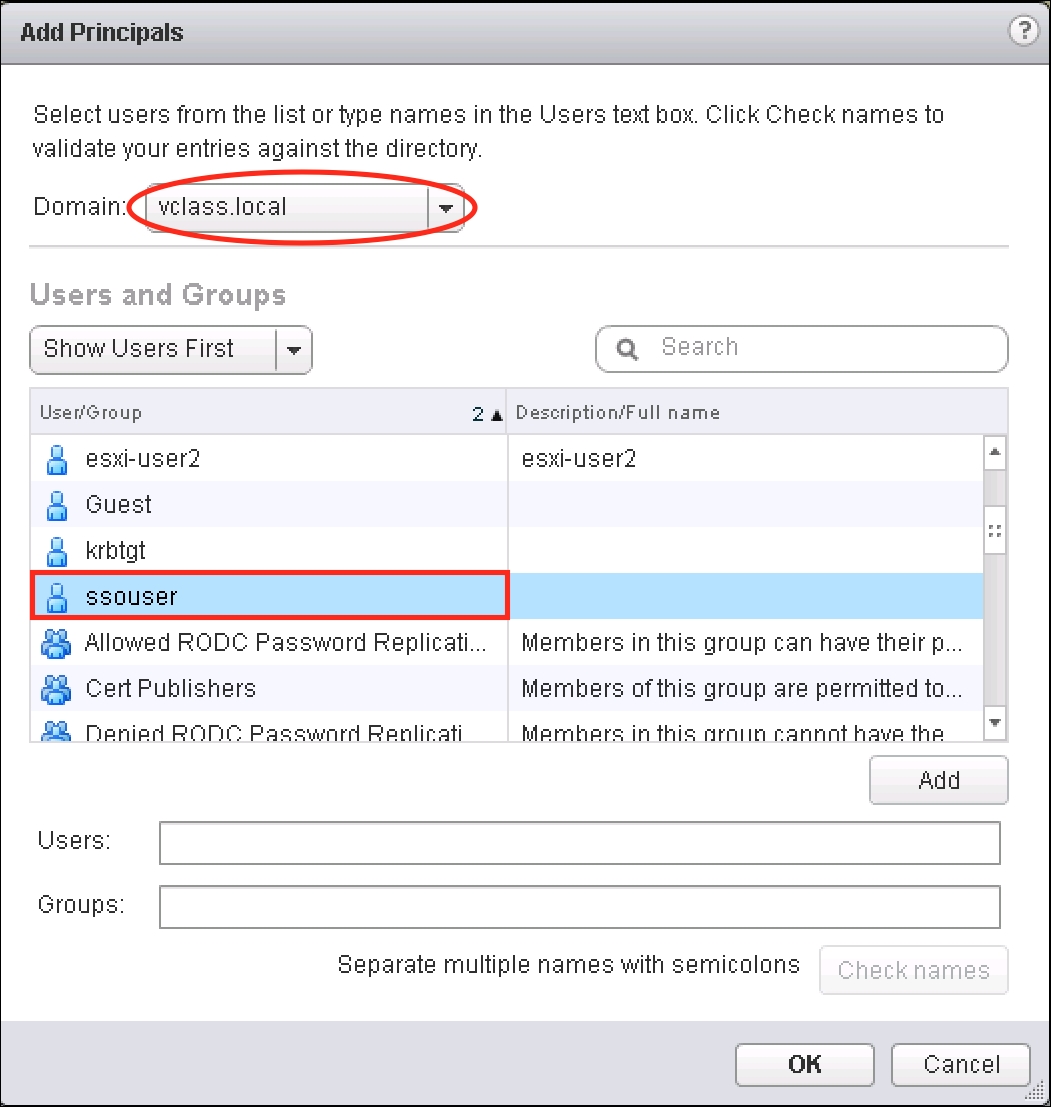
- Once the user has been selected, click on the Add button. Click on the Check names button.
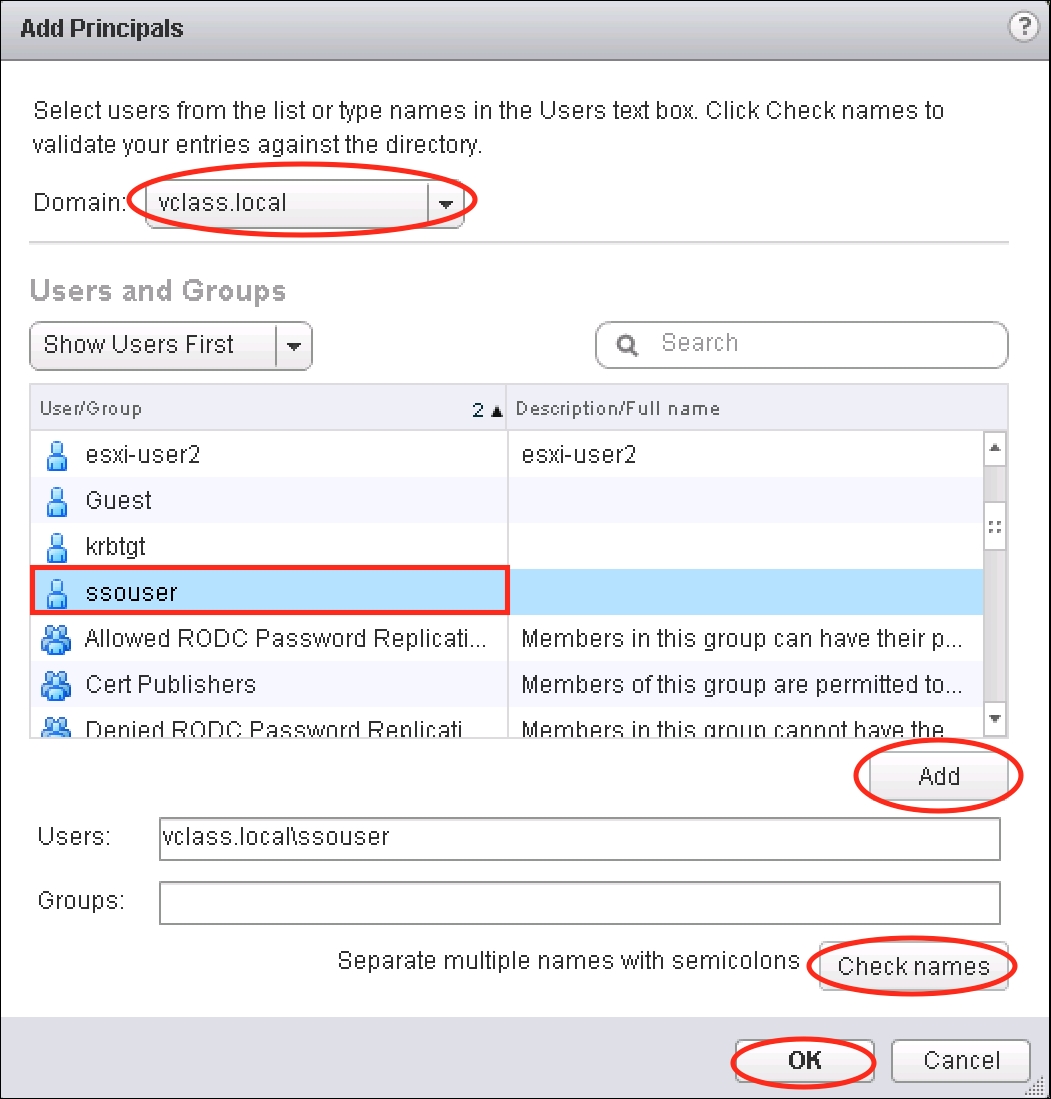
- Click on OK once finished.