
If you want to place a line of text on the screen, you need to create a label. There are two types of labels in Cocos2d: CCLabelBMFont and CCLabelTTF. Bitmap Font labels are the fancy labels created with Glyph Designer, mentioned earlier in this book. TrueType Font labels are regular, unformatted text labels that use either a font file that's already on the phone or a file you've added to your project.
As mentioned earlier, TTF labels are simple, unformatted labels. How are these useful? The answer is, you can quickly get the prototype of your game going, and so you can better understand the flow of the game. Then, once it's ready, you can switch over to using BMFonts to make it look nice. See Chapter 6, Tidying Up and Polishing, to learn more about ways to improve the aesthetics of your game.
Tip
Here's a short note about BMFonts: if you want to use them in your game, which you should do for performance reasons alone, keep in mind the various limitations that BMFonts have and TTF fonts don't. The first is poor quality when upscaling the label. Then, BMFonts can use only the characters that are in the font atlas, and any foreign language support might mean a lot of extra BMFonts, which could add up quickly in terms of space.
The first thing we're going to do is get those labels on the left side going. The following code should be added to MainScene.h (the lbl prefix in the front of the variable will indicate to us that it's a label; similarly, btn for button, num for number, and so on):
@interface MainScene : CCNode
{
  CGSize winSize;
  //Add the following:
  //the labels used for displaying the game info
  CCLabelTTF *lblTurnsSurvived, *lblUnitsKilled, *lblTotalScore;
}
The following code goes into the init method of MainScene.m and will create the labels. We then want to set the position for each label because the default position is in the bottom-left corner. Finally, we add each label to the scene. Remember, the scene is just a node that can have as many children as you want:
CCLabelTTF *lblTurnsSurvivedDesc = [CCLabelTTF labelWithString:@"Turns Survived:" fontName:@"Arial" fontSize:12];
lblTurnsSurvivedDesc.position = ccp(winSize.width * 0.1, winSize.height * 0.8);
[self addChild:lblTurnsSurvivedDesc];

lblTurnsSurvived = [CCLabelTTF labelWithString:@"0" fontName:@"Arial" fontSize:22];
lblTurnsSurvived.position = ccp(winSize.width * 0.1, winSize.height * 0.75);
[self addChild:lblTurnsSurvived];

CCLabelTTF *lblUnitsKilledDesc = [CCLabelTTF labelWithString:@"Units Killed:" fontName:@"Arial" fontSize:12];
lblUnitsKilledDesc.position = ccp(winSize.width * 0.1, winSize.height * 0.6);
[self addChild:lblUnitsKilledDesc];

lblUnitsKilled = [CCLabelTTF labelWithString:@"0" fontName:@"Arial" fontSize:22];
lblUnitsKilled.position = ccp(winSize.width * 0.1, winSize.height * 0.55);
[self addChild:lblUnitsKilled];

CCLabelTTF *lblTotalScoreDesc = [CCLabelTTF labelWithString:@"Total Score:" fontName:@"Arial" fontSize:12];
lblTotalScoreDesc.position = ccp(winSize.width * 0.1, winSize.height * 0.4);
[self addChild:lblTotalScoreDesc];

lblTotalScore = [CCLabelTTF labelWithString:@"1" fontName:@"Arial" fontSize:22];
lblTotalScore.position = ccp(winSize.width * 0.1, winSize.height * 0.35);
[self addChild:lblTotalScore];
Notice that we've used the winSize variable for positioning. This is useful because it not only keeps things in a relative position on the screen but also helps when coding for multiple devices that have different screen sizes (for example, iPhone 4, iPhone 5, iPad, and so on have different dimensions).
Another way to handle this would be to set the positionType of our labels to CCPositionTypeNormalized. Then we can set our position values anywhere from 0 to 1, 0 being the far left (or bottom) of the screen, and 1 being the far right (or top) of the screen.
If you aren't already familiar, let's recall: BMFonts are the nice, stylized fonts that give your game that extra level of polish without requiring too much effort from you. Refer to Chapter 6, Tidying Up and Polishing, to improve the aesthetics of your game. To create BMFont, you have to use a BMFont creator. We're going to use Glyph Designer, as mentioned in Chapter 1, Refreshing Our Cocos2d Knowledge.
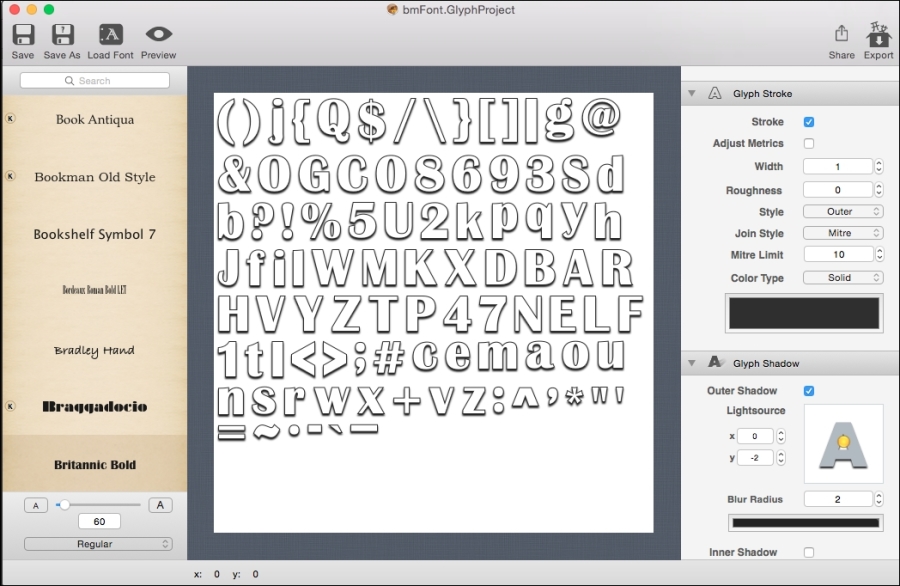
The first thing we're going to do is create the fonts on the left side of our scene. With Glyph Designer open, select a font from the left panel (I chose Britannic Bold, the font in the mock-up). You can mess around with the settings on the right to get a font suitable for your project, but remember that this is only a prototype and you shouldn't spend too much time on it. Have a look at the following screenshot:
When you're satisfied with the settings you have chosen, click on Save As at the top, and select where you want to save the Glyph Designer file (not the actual font file). Now that it has been saved for later use if we decide to edit the font, let's move on to exporting the font so that we can use it in Cocos2d.
Depending on which style of file reading you decided to go with, there are two different ways you'll need to export the font. Make sure you follow the same style as you can use only one of the styles (but not both) within the same project. No matter which route you go by, start with the largest font size you'll need; for example, the preceding screenshot shows a font size of 60 because it's going to be seen on a Retina iPad. If it were only on an iPhone, 60 would be too large.
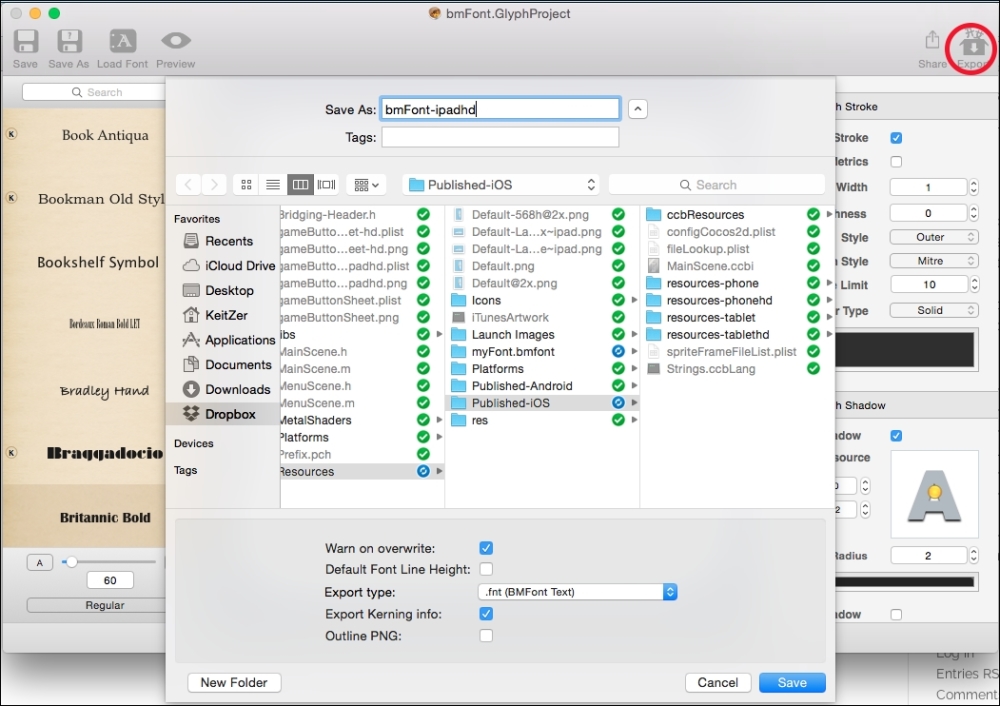
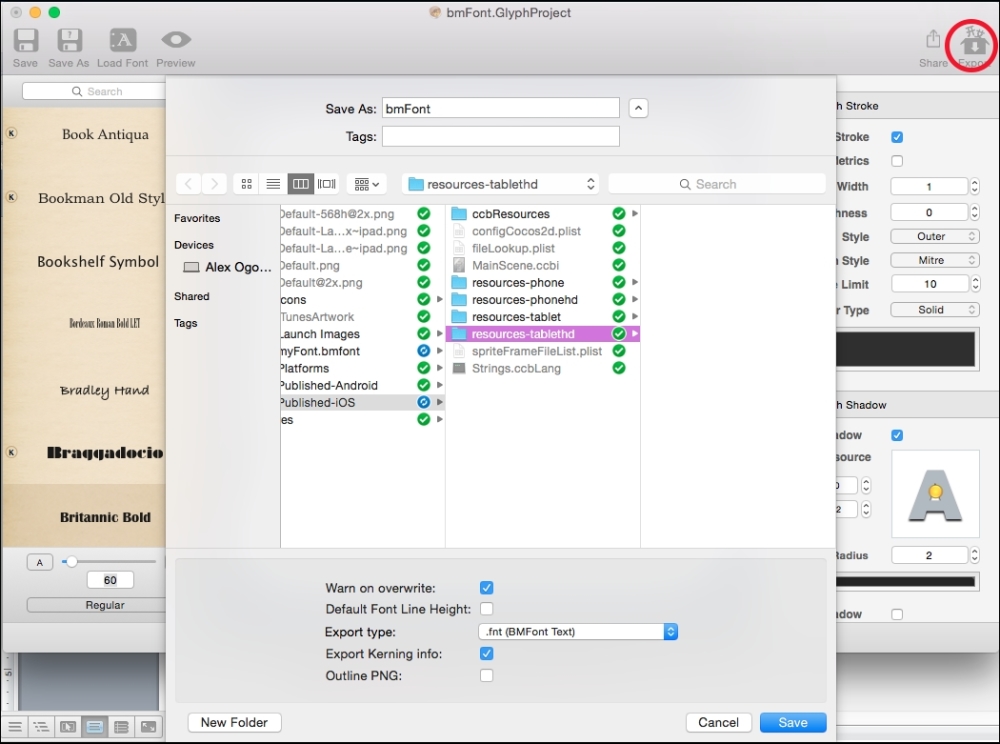
In Glyph Designer, click on Export at the top and navigate to the Resources/Published-iOS folder in your project directory (see the following screenshot). This is where you'll export the font for use with Cocos2d. Notice that because this is the largest font, meant for Retina-sized iPads, the suffix after the filename is -ipadhd. If you weren't designing for iPad, your largest filename suffix would be -hd.
Once you've exported the largest phone, go ahead and adjust the settings for each tier you need. For example, since we're exporting -ipadhd at the 60-point font, we'd also want to make 30-point and 15-point sizes for smaller devices. In addition to reducing the font size, we can also modify the stroke and shadow settings to give relatively the same look for all sizes.
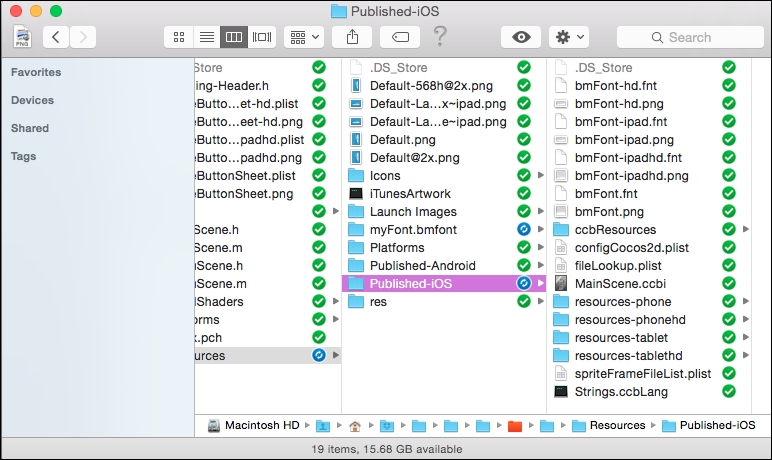
So overall, if you call your font bmFont, you should have the following files (each .fnt file will also have a .png file with it), with the largest font size being 60:
bmFont-ipadhd.fnt - 60-ptbmFont-ipad.fnt - 30-ptbmFont-hd.fnt - 30-ptbmFont.fnt - 15-pt
When using the file extension method, as long as you export your files to the Published-iOS folder, the Xcode project remains set up in a way that includes your fonts in the project. In this way, you don't need to worry about copying anything. That being said, let's begin displaying labels with this new font we just created.
If you chose to go with directories, it's not as simple as just dragging the font files into SpriteBuilder (at the time of writing this book). Instead, you must create four folders within the Published-iOS folder of your project directory:
resources-phoneresources-phonehdresources-tabletresources-tablethd
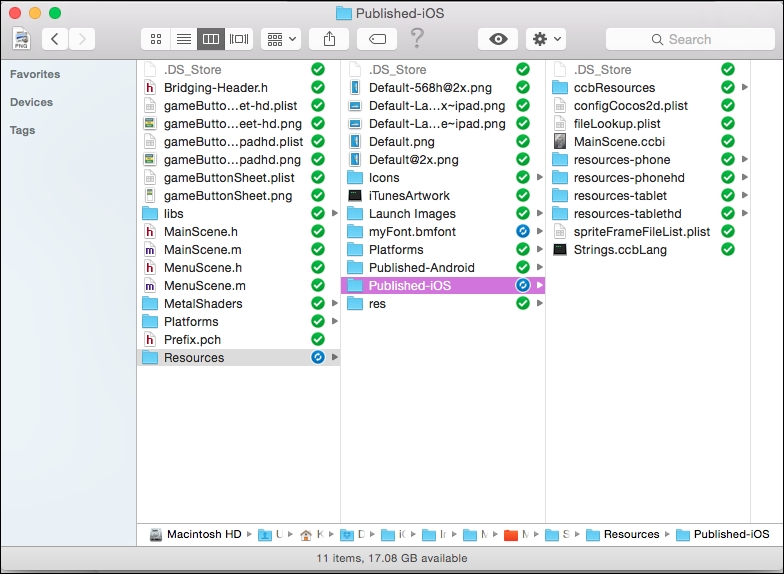
In Glyph Designer, click on Export at the top and navigate to the Published-iOS/resources-tablethd folder in your project directory (see the following screenshot). This is where you'll export the font for use with Cocos2d. The name of the file here is going to be the name of the font.
Once the tablethd version has been exported, do the same export but modify the font size and any other settings you wish to modify. For example, since we're exporting the tablethd size at 60-point font, we'd also want to create 30-point and 15-point sizes for smaller devices. In addition to reducing the font size, we can also modify the stroke and shadow settings to give relatively the same look for all sizes.
So overall, if you call your font bmFont, you should have the following files (each .fnt file will also have a .png file with it), with the largest font size being 60:
resources-tablethd/bmFont.fnt - 60-ptresources-tablet/bmFont.fnt - 30-ptresources-phonehd/bmFont.fnt - 30-ptresources-phone/bmFont.fnt - 15-pt

When using the directory method, if you've exported the font files to the folders mentioned previously, the Xcode project will be set up in such a way that it will automatically include these files, so you don't need to worry about copying anything. That being said, let's begin to display labels with this new font we just created.
Bring up Xcode and open MainScene.h. You're going to add these variables below the line that says CGSize winSize. Again, if you've followed the preceding TTF tutorial, you can delete or comment out the variables we created in that tutorial, as we will be using the same variable names here. We're stating the variable with lbl again so that we can easily identify it as a label:
@interface MainScene : CCNode
{
  CGSize winSize;
//the labels used for displaying the game info
//this line now uses CCLabelBMFont instead of CCLabelTTFFont
CCLabelBMFont *lblTurnsSurvived, *lblUnitsKilled, *lblTotalScore;
}
Then open MainScene.m and add these lines of code below the code for the background layer to display the labels. If you had chosen to export your font with a different name, you must change the fntFile parameter to match whatever you chose:
CCLabelBMFont *lblTurnsSurvivedDesc = [CCLabelBMFont labelWithString:@"Turns Survived:" fntFile:@"bmFont.fnt"];
lblTurnsSurvivedDesc.position = ccp(winSize.width * 0.125, winSize.height * 0.8);
[self addChild:lblTurnsSurvivedDesc];
lblTurnsSurvived = [CCLabelBMFont labelWithString:@"0" fntFile:@"bmFont.fnt"];
lblTurnsSurvived.position = ccp(winSize.width * 0.125, winSize.height * 0.75);
[self addChild:lblTurnsSurvived];
CCLabelBMFont *lblUnitsKilledDesc = [CCLabelBMFont labelWithString:@"Units Killed:" fntFile:@"bmFont.fnt"];
lblUnitsKilledDesc.position = ccp(winSize.width * 0.125, winSize.height * 0.6);
[self addChild:lblUnitsKilledDesc];
lblUnitsKilled = [CCLabelBMFont labelWithString:@"0" fntFile:@"bmFont.fnt"];
lblUnitsKilled.position = ccp(winSize.width * 0.125, winSize.height * 0.55);
[self addChild:lblUnitsKilled];
CCLabelBMFont *lblTotalScoreDesc = [CCLabelBMFont labelWithString:@"Total Score:" fntFile:@"bmFont.fnt"];
lblTotalScoreDesc.position = ccp(winSize.width * 0.125, winSize.height * 0.4);
[self addChild:lblTotalScoreDesc];
lblTotalScore = [CCLabelBMFont labelWithString:@"1" fntFile:@"bmFont.fnt"];
lblTotalScore.position = ccp(winSize.width * 0.125, winSize.height * 0.35);
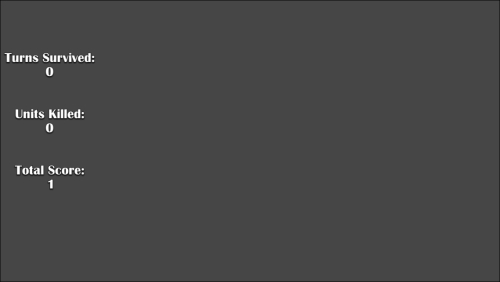
[self addChild:lblTotalScore];With these lines added, you should be able to run the game and see some fancy-looking labels on the left side of the screen, as shown here (this was run on an iPhone 5):
It's not much of a game if it's just displaying text, so let's add some buttons. But first, we must go over how to create sprite sheets using TexturePacker.
If you decide not to use TexturePacker, read the Not using TexturePacker – A brief how-to section and feel free to skip over the section about using sprite sheets with TexturePacker. If that's the case, you should also be using the directory method of file reading, as there's almost no benefit of file extensions except when using a program that automatically maintains them, such as TexturePacker.
As mentioned earlier, if you opt against using TexturePacker, any time it's mentioned to add the image to the sprite sheet, that's your queue to add it to SpriteBuilder and republish it, as it's assumed that you'll be using the directory mode of file reading.
To do this, drag the iPad-retina-sized image into SpriteBuilder, and click on Publish. SpriteBuilder will auto-scale.