Cocos2d 3.0 changed the way buttons are displayed. If you've used previous versions of Cocos2d, you're probably familiar with CCMenu. That is no longer the way to create and display tappable buttons in Cocos2d. Instead, we're going to use CCButton and place them in a node of the CCLayout type. If you skipped the sprite sheet section, I strongly recommend that you go back and read it. It will save you from many frustrating moments as the project progresses.
For the book's project, we'll be adding the menu button in the bottom-left corner. Like I said, it's extremely easy to add the buttons once you have the images included in the project.
Open the MainScene.m file, and add these lines of code below the code for the labels in the init method:
CCButton *btnMenu = [CCButton buttonWithTitle:@""
  spriteFrame:[CCSpriteFrame frameWithImageNamed:@"btnMenu.png"]];
btnMenu.position = ccp(winSize.width * 0.125, winSize.height * 0.1);
[self addChild:btnMenu];
When you run it, you should see the menu button appear in the bottom-left corner. If you used the pvr.ccz format and the button flips horizontally, don't worry. Just go back to TexturePacker, check the box that says Flip PVR, save the file, and then publish. Go back to Xcode and rerun the project. It should look something like this:

Add the Restart button (in this case, btnRestart.png) to either TexturePacker or SpriteBuilder depending on which method you used, click on Save, and then publish to update the files so that the Restart button can be used. With the Restart button's image added, you can modify the MainScene.m file's code to look something like this:
CCButton *btnMenu = [CCButton buttonWithTitle:@"" spriteFrame:[CCSpriteFrame frameWithImageNamed:@"btnMenu.png"]];
CCButton *btnRestart = [CCButton buttonWithTitle:@"" spriteFrame:[CCSpriteFrame frameWithImageNamed:@"btnRestart.png"]];
CCLayoutBox *layoutButtons = [[CCLayoutBox alloc] init];
[layoutButtons addChild:btnRestart];
[layoutButtons addChild:btnMenu];
layoutButtons.spacing = 10.f;
layoutButtons.anchorPoint = ccp(0.5f, 0.5f);
layoutButtons.direction = CCLayoutBoxDirectionVertical;
[layoutButtons layout];
layoutButtons.position = ccp(winSize.width * 0.125, winSize.height * 0.15);
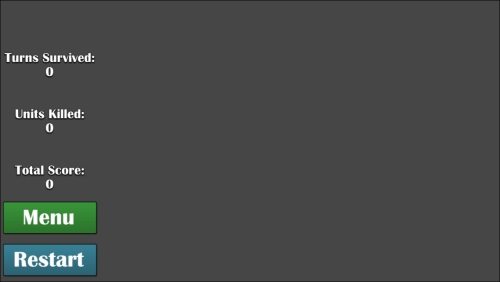
[self addChild:layoutButtons];This will allow the restart button and the menu button to be lined up perfectly. Plus, if you ever decide to move both buttons, but you want them at the same distance relative to each other, just reposition the layout box. And voilà!
What you can do as a quick learning experience is to try messing around with the spacing values; or change the direction, or even the anchor point. You'll get a better understanding of why each line of code is absolutely necessary to create this effect when you try testing different values.
Go ahead and modify some of the values. You can always revert to the preceding code.
So far, using the initial code that you just saw, if you run the project, this is what it will look like: