
Sprite sheets are used to improve the performance of your game, not only reducing the time it takes for the game to load but also improving the performance while the game is running.
Tip
Unfortunately, TexturePacker works with Cocos2d at the time of writing this book, but its use is not supported by SpriteBuilder directly. However, TexturePacker is a great solution when it comes to building sprite sheets effectively. If you wish to use TexturePacker but are currently using the directory method (the default for SpriteBuilder at the time of writing this book), go back and change your style to file extensions.
As mentioned in Chapter 1, Refreshing Our Cocos2d Knowledge, we will be using TexturePacker as the go-to for our sprite sheet creator. TexturePacker is nice for a few reasons:
- It allows exporting to Cocos2d with one click
- It has auto-scaling (up or down) that supports all resolution types
- It makes updating your images later easier to import the images
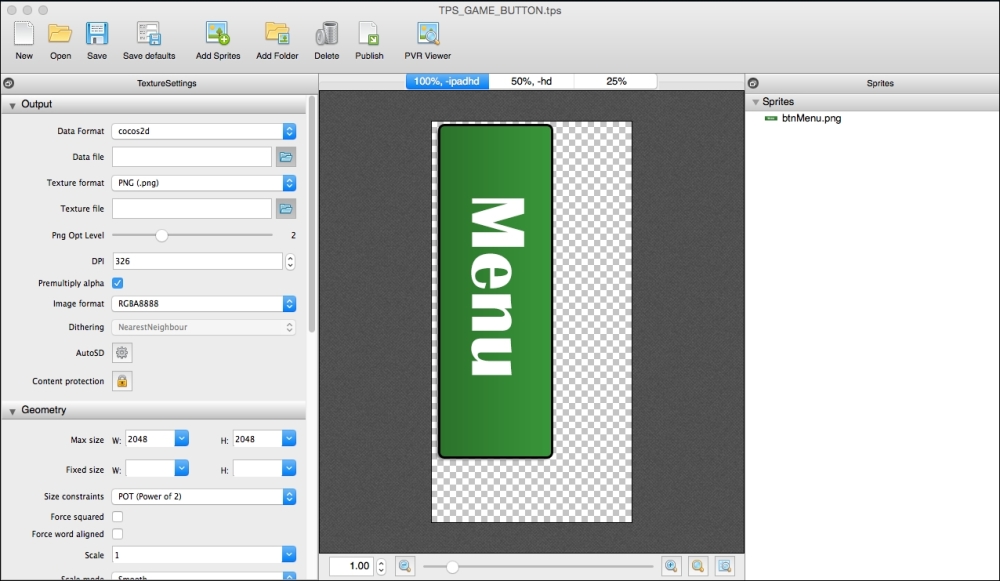
First, open TexturePacker. Then go to the Images Pre-Chapter 6 folder, where you'll see the btnMenu.png image (our menu button image). Drag it into the right column of TexturePacker. It should look something like this:
Before changing any of the file locations, make sure you do the following:
- In the Texture format drop-down box, ensure that PNG is selected. This format should be fine for most games you'll make. However, if you find yourself wanting to make your game's final project size smaller without sacrificing quality, a recommendation is to switch to zlib pvr.ccz compression. This is the most optimal format for Cocos2d, for not only compression per pixel but also performance when drawing the images on the screen.
- Check the box that says Premultiply Alpha. It's not entirely important to know the details of how this works. For now, just know that in Cocos2d, the texture can be rendered faster with this checked.
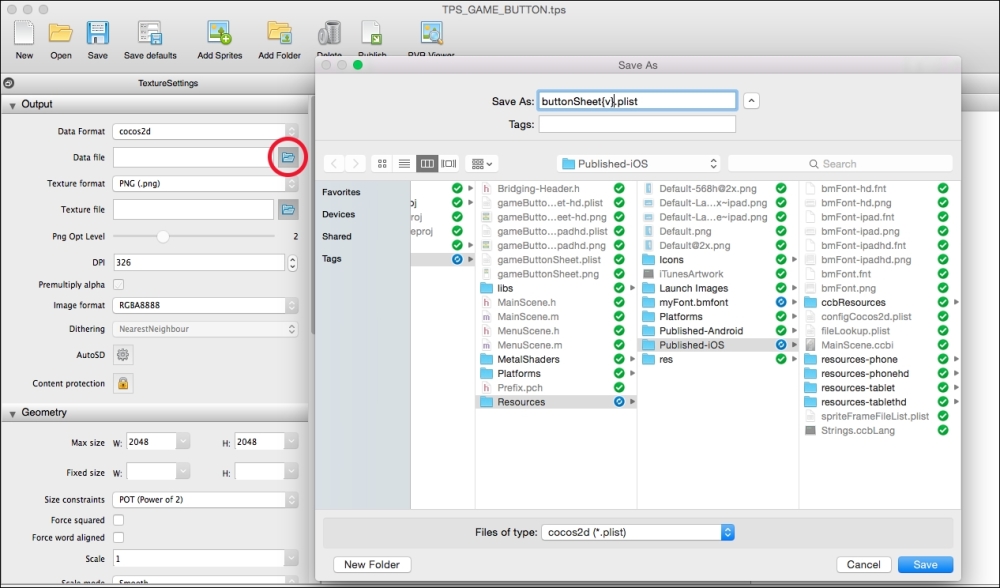
Now that we have the image in TexturePacker, let's modify some of the settings to make sure we can effectively manage any future versions of this sprite sheet. Click on the little folder icon next to the Data file textbox and go to the project's Resources/Published-iOS directory. Feel free to name the file whatever you want, but try to keep it relevant. For this example, we'll call it buttonSheet because it will be the sprite sheet that contains all the buttons in the game. Click on Save when you're ready.
As for image format, it's generally okay to keep it at RGBA8888. However, if your game has a large number of art assets on the screen and is suffering performance-wise, changing this to a lower setting might help.
Now we need to make sure TexturePacker will correctly scale what we need. Click on the gear icon next to AutoSD, and then open the drop-down box at the top labeled Presets. Choose the option that best suits your needs and click on Apply.
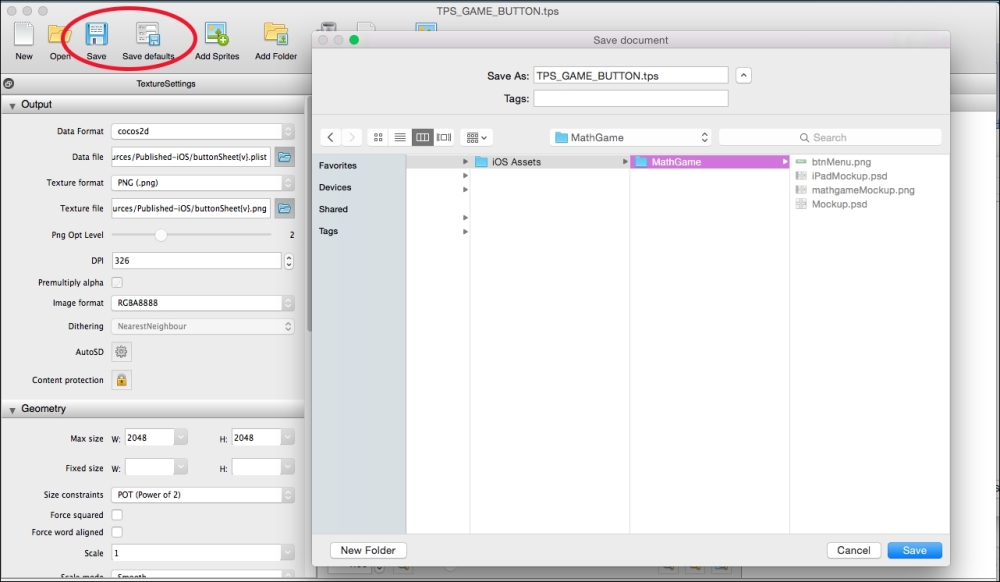
Finally, in the top-left corner of the screen, we click on the Save defaults button, as it allows us to save these settings for any time when we need to create a TexturePacker sprite sheet again. Then click on Save (or press command + S). This will ask you where you want to the save the TexturePacker file (not the sprite sheet). Generally, you'll save this file in the same folder as all your other art assets. For example, we'll have a separate directory for both the project and the individual art assets that will be copied later.
Once you've saved the TPS file in your location of choice, go ahead and click on Publish. Publishing will generate the required sprite sheets for the project based on the various settings we entered earlier.
Finally, once you have published the sprite sheet in the project directory (or anywhere really, but it's best if it's located in the project directory for easy updating later on), the way the Xcode project is set up should cause them to be automatically added to your project.
Once you've published the sprite sheet, open Xcode and go to AppDelegate.m. Add one line of code right above the return statement in the startScene method to make it look something like this:
- (CCScene*) startScene
{
  [[CCSpriteFrameCache sharedSpriteFrameCache] addSpriteFramesWithFile:@"buttonSheet.plist"];

  return [MainScene scene];//[CCBReader loadAsScene:@"MainScene"];
}
Now you're ready to start using the sprite sheet. It took a little bit of work to set it up, but for now, all you need to do is add images to the TexturePacker file, click on Save, and then click on Publish. Your changes will be automatically reflected the next time you run your project. That being said, let's make use of the sprite sheet by turning that menu button image into an actual button.