
We've already got a set of top 20 high scores that are stored on the user's device, so why not make a global leaderboard? In fact, even though many players don't use Game Center when they play games, it is yet another element that drives engagement. Plus (and this is the really cool part)—if you didn't know already—you can actually have players rate your game within Game Center. It's not even an extra feature or anything, as they can just tap the star count at the top of the leaderboard or achievement pane and it'll send the rating to the App Store.
Creating a leaderboard to display in our game isn't just about code, so we have to create the leaderboard in iTunes Connect first. Before we can create the app in iTunes Connect, we need to set up an App ID.
At this point, if you wish to add a leaderboard, you must sign up for an Apple developer account if you don't have one already. In Chapter 1, Refreshing Our Cocos2d Knowledge, the signup process was explained. Otherwise, if you're just following along for practice, feel free to do so, but you cannot create leaderboards or achievements without a developer account.
First, you need to create the App ID from the developer website. Go to https://developer.apple.com/devcenter/ios/index.action and log in to your Apple account that has the iOS developer license on it.
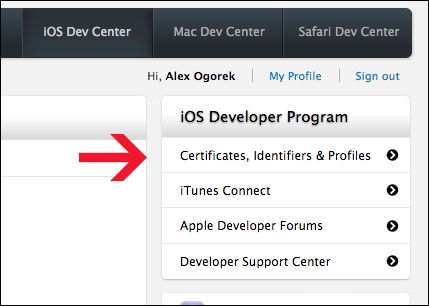
Once logged in, under iOS Dev Center, go to the Certificates, Identifiers & Profiles section, as shown in this screenshot:
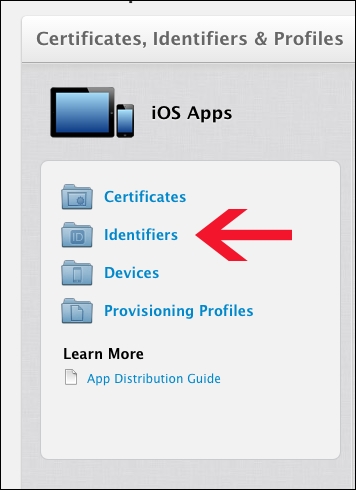
From here, go to the Identifiers section so that we can create an App ID, as shown in the following screenshot:
Then begin to create an App ID by clicking on the + button in the top-right corner. Here, we need to enter a name for the App ID, the name of the bundle identifier (which is generally reverse DNS notation; for example, www.keitgames.com might have com.keitgames.mygame as the bundle ID), as well as any services we want (which we'll leave as the default for now). This is shown in the following screenshot for your reference:
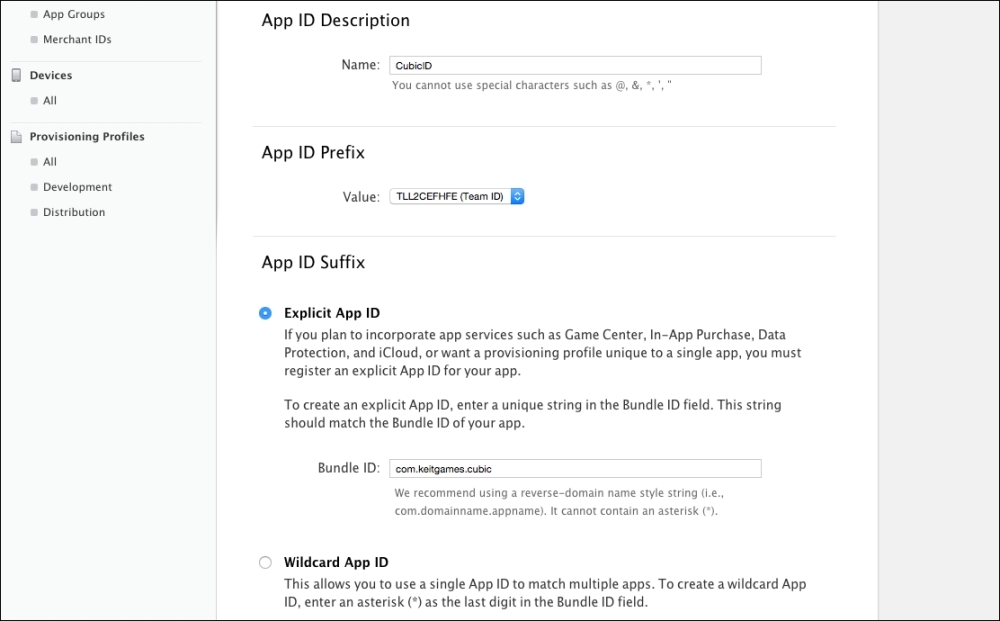
Make sure you use your own bundle identifier (the preceding screenshot simply shows an example and where it all goes).
Once that's done, click on Continue and then on Submit. Then the App ID should be created.
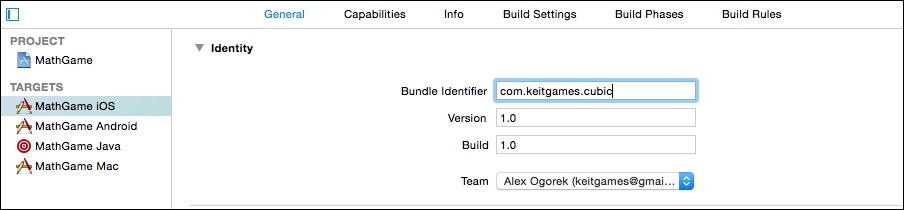
Next, in the Xcode project's settings, select the iOS target and update the bundle identifier to the one you just created.
Now that the bundle ID and App ID are set up, we can create the app in iTunes Connect, and it will allow us to set up and test our leaderboards.
Creating the app in iTunes Connect is relatively simple, and is only going to be used as a wireframe so that we can create the leaderboards. In the next chapter, we'll cover all the details; for now you just need to know that the only reason we're setting it up in iTunes Connect now (instead of later) is for the purpose of setting up a leaderboard.
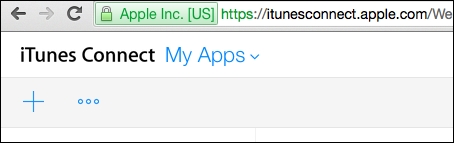
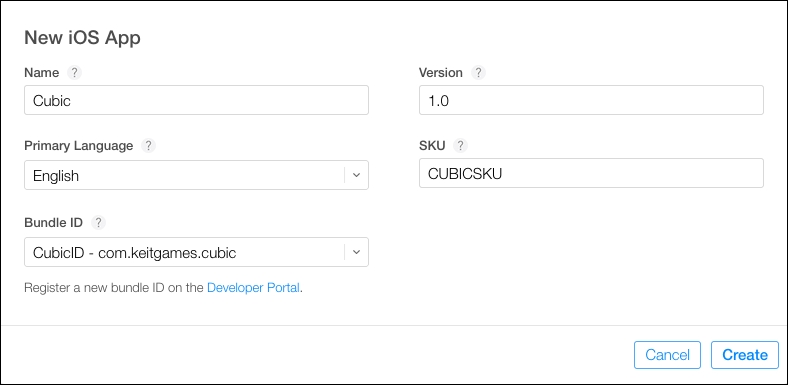
First, go to https://itunesconnect.apple.com/WebObjects/iTunesConnect.woa and sign in to your developer account. Then click on My Apps, create a new app by clicking on the + button in the top-left corner, and click on New iOS App.
Then fill in the information it asks, including the App ID you created earlier. The SKU doesn't really matter, as it's for your own internal use.
Once the app has been created in iTunes connect, click on Game Center.

When it asks whether it's for a single game or multiple games, that's up to you to decide when creating projects on your own. But for the purpose of this book's project, we're going to create it for a single game.
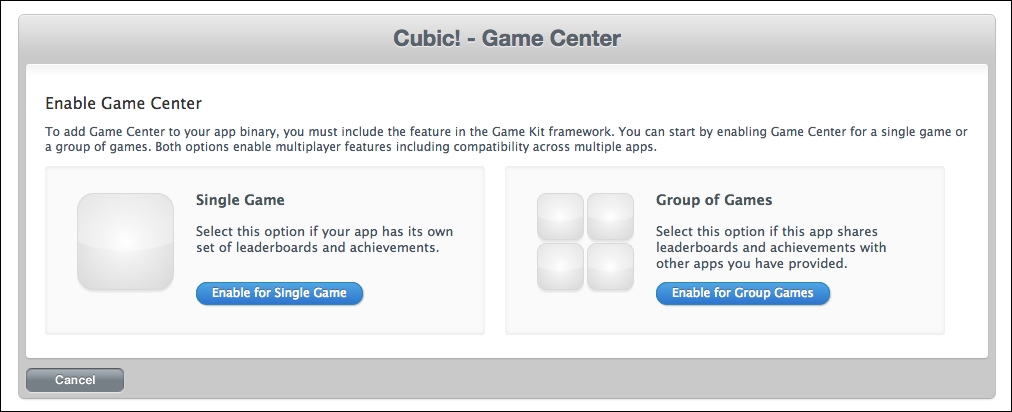
After that, you'll be taken to the Game Center setup screen, and you're ready to move on to the next step.
From the Game Center setup section within iTunes Connect, click on the Add Leaderboard button and then on Single Leaderboard.

The leaderboard reference is for internal use within iTunes Connect, just in case you wish to search for it (or know at a glance which leaderboard it is). The Leaderboard ID will be used within the code, so it should be something unique and distinct from your other leaderboards (if you've created any). The score format is only whole numbers, so we'll use the Integer format. We want only the best score to be submitted (as only one score per person can exist in a leaderboard) and sorted from High to Low. Finally, we want the range to be from 0 to 999,999. Technically, we don't have to set this, but we're going to anyway.
Next, we add a language. Here's an example showing English:
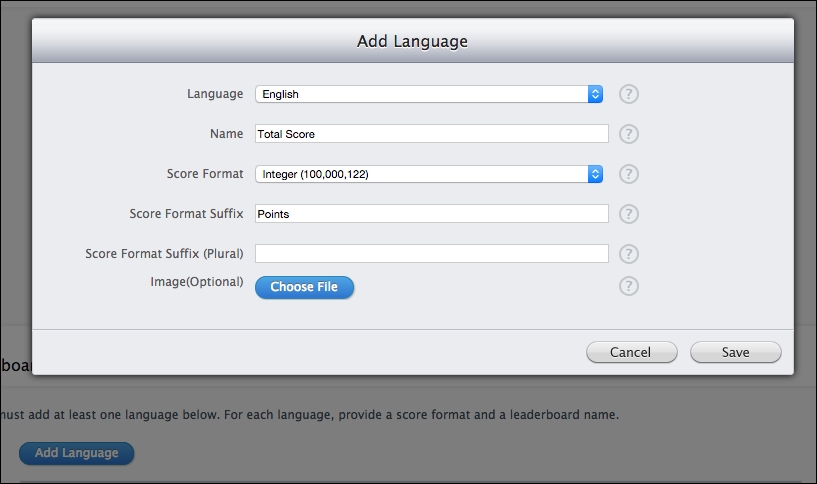
The Name is the title at the top of the leaderboard that the users will see, so we want it to be obvious which leaderboard it is. The Score Format is the same as what you just saw. The Score Format Suffix works as follow: since we have Points, a score of 625 will look like 625 Points in the leaderboard. If you think it would look weird to include the word Points in every score, feel free to leave it out, but for now, we're going to have it in there.
Once all of this information has been entered, click on Save at the bottom. And voilà! It's created! What comes next is coding the Game Center login, authentication, leaderboard presentation, submitting the score, and everything else that comes with handling Game Center.
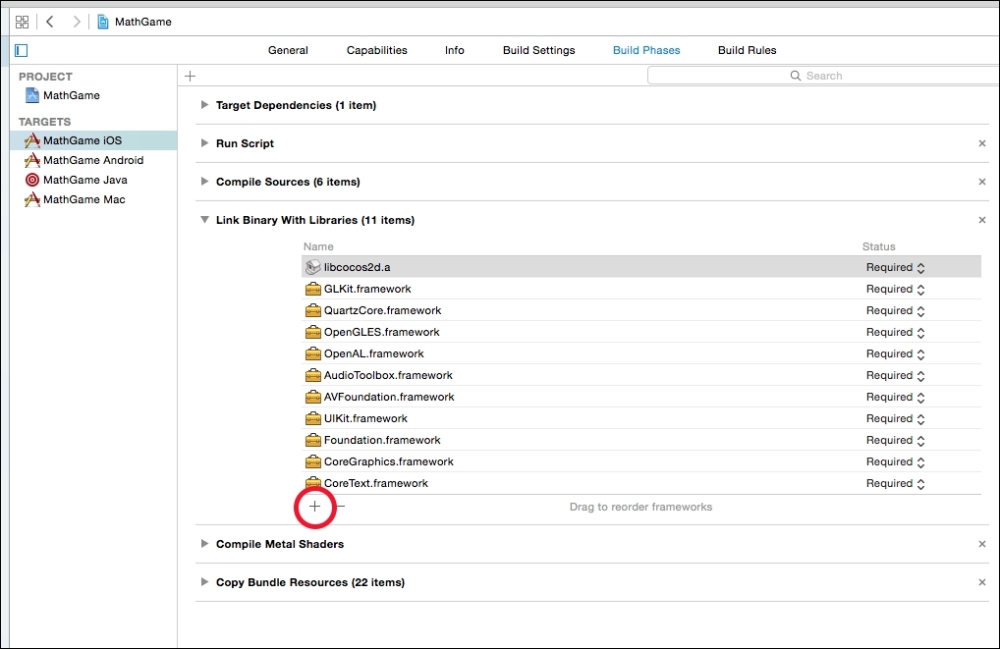
Before we do any coding, we need to include the GameKit framework in our project. So, in your project's settings, go to the iOS target, then go to Build Phases, and in the Link Binary With Libraries section, click on the + button to add a framework to the project, as shown in this screenshot:
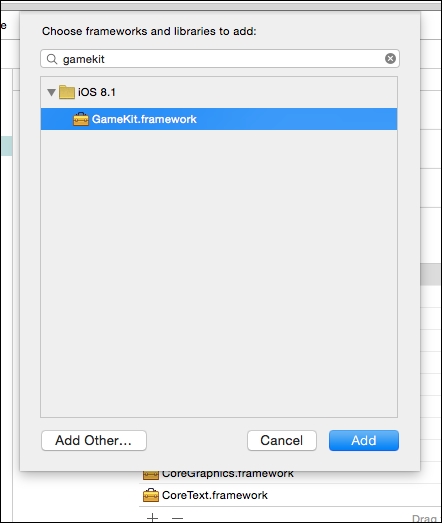
Then, search for gamekit (case insensitive), click on the GameKit.framework result, and then click on Add.
For the sake of simplicity, you can just copy the GKHelper files to your project (make sure you have the Copy checkbox selected). It's not that coding the Game Center stuff is hard—it's the same for literally every project that has Game Center. So why waste time manually typing the code when you can just have the files ready?
Essentially, what the GKHelper singleton class does is manage your GKLocalPlayer (the currently logged-in user in Game Center on the device), any calls to and from the server, and any leaderboard score posting and achievement tracking.
Tip
The GKHelper class was created using the online tutorial http://www.raywenderlich.com/23189/whats-new-with-game-center-in-ios-6, if you're looking for more explanation. There is another guide at http://www.appcoda.com/ios-game-kit-framework/ that covers Game Center in depth. Refer to it if you're getting stuck, or still need extra help (as it can be confusing for those new to coding Game Center).
This is important: Suppose you're getting this error message:
GameKitHelper ERROR: {
NSLocalizedDescription = "The requested operation could not be completed because this application is not recognized by Game Center.";
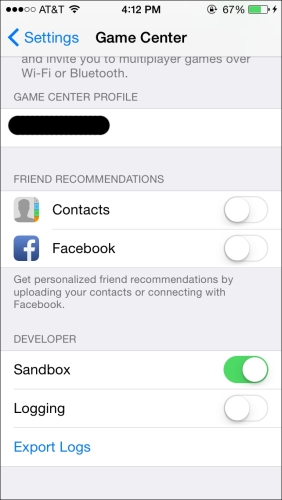
}Then you must go to device Settings | Game Center and enable Sandbox, as shown in this screenshot:
Now that everything is in place, created, and ready for use, we can begin to code the actual leaderboard and make it appear when users sign in to Game Center.
First, we need to authenticate the local player; that is, have them sign in if they aren't signed in already, or just send a request for the GKLocalPlayer.
We're going to do this at the beginning of our app, so in AppDelegate.m, import the GKHelper.h file and add the following method call to the top of the startScene method:
[[GKHelper sharedGameKitHelper] authenticateLocalPlayer];
If everything was done correctly, when you run the game at this point, you should see a banner going across the top of your screen welcoming the currently logged-in player. If not, it will ask them to log in.
If you're getting an error message that says something along the lines of a requested operation being cancelled or disabled, go to the Settings app and then to Game Center. Try either logging in and out again, or enabling the Sandbox mode at the bottom (see the preceding screenshot). This should fix it.
We want a button for access to the leaderboards and other Game Center stuff, so in the GameOverScene.m file's init method, add the following code. It will create a button in the bottom-right corner of the screen:
//add Game Center buttons
CCButton *btnGameCenter = [CCButton buttonWithTitle:@"" spriteFrame:[[CCSpriteFrameCache sharedSpriteFrameCache] spriteFrameByName:@"btnGameCenter.png"]];
[btnGameCenter setTarget:self selector:@selector(viewGameCenter1)];
btnGameCenter.position = ccp(0.75, 0.1);
btnGameCenter.positionType = CCPositionTypeNormalized;
[self addChild:btnGameCenter];
We also want to display the leaderboards, and this requires the GKHelper, so at the top of GameOverScene.m, import the GKHelper.h file:
#import "GKHelper.h"
Then create the viewGameCenter method, which is simply a call for presenting the leaderboards:
-(void)viewGameCenter
{
  [[GKHelper sharedGameKitHelper] presentLeaderboards];
}
If you run the game at this point and get to the game over scene, you'll see a button for Game Center in the bottom-right corner, and when clicked on (and if you're signed in to Game Center), it'll open the leaderboard. The only thing left to do now is to submit the score to Game Center so it can be seen in the leaderboard.
Since our GKHelper class can do all of the score reporting for us, all we need to do is call the respective function. Since we know GameOverScene will contain the total score from the most recent game, we can use the passed-in dictionary as the score value we submit to the leaderboard.
So, in the init method of GameOverScene.m, add a call to the submitScore function:
[[GKHelper sharedGameKitHelper] submitScore:[dict[DictTotalScore] integerValue]];
And that's it! It took a while to set up, and about 10 lines of code, but we have a global leaderboard.
There are two things to note here:
- You may want to implement achievements, but that code has not been implemented in the
GKHelperclass yet, so unfortunately, you're on your own. Although this is not too difficult, it wasn't necessary for this game, so it was skipped. As linked earlier, there's a great resource at http://www.appcoda.com/ios-game-kit-framework/ that explains how to implement achievements. It was written in March 2014, so the code should still work by the time you read this book. - While implementing leaderboards, if you ever run into an issue, make sure that everything, from the iTunes Connect setup to the Game Center to Sandbox mode and the code itself, is all in line. Game Center can be tricky and annoying. It's gotten better over the years, but can still be a bit finicky. If you're still having issues, it's likely that you're not the only one. A great place to start searching is Stack Overflow. If you aren't familiar with the site, don't worry. They have a question-and-answer format where tons of people have asked questions about code and other issues, and many more have given correct answers.
And that's it for Game Center! The last thing to do to polish our project includes creating a custom transition between scenes to make the game feel more robust, instead of just instantly shifting back and forth between scenes.