
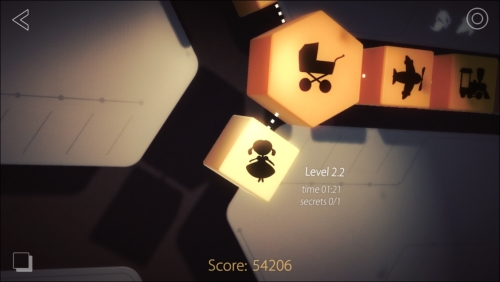
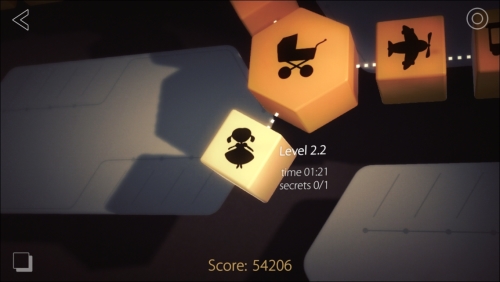
Something that can increase the cool factor of your game without really changing the game is a depth-perception-like feel when the user tilts the device. This can be seen in games such as Shadowmatic and Jump! Chump!, the checklist Wunderlist, or a lock screen background image with Perspective Zoom set to On. Although it's subtle, it can make your game feel a lot more polished and increase user engagement, as it's just one more thing they'll find cool or interesting about the game.
Here is Shadowmatic game's tilt effect seen on the menu. As you can see, it's a three-dimensional object, and the camera rotates around the object, as well as the shadows.
The first one is as follows:
The following is Jump! Chump! game's tilt effect seen in the game, where you can see the shadows of the main characters and enemies being shifted.
The first one is as follows:
The second one is as follows:
This is similar, but slightly different from parallax scrolling. Parallax scrolling—if you're unfamiliar—is when there are multiple background layers and each moves across the screen at a different rate to create the feeling of a more realistic movement. Cocos2d even has something called CCParallaxNode, which basically allows different relative movement speeds among the node's children. As an example, suppose you add a background image, a middle-ground image, and a foreground image with different ratios. When you move the CCParallaxNode object, it will automatically move the children as per the ratio set by each individual child.
Parallax scrolling is similar because there will still be multiple layers moving around, and they will be moving slightly in one direction or another based on the tilt of the device. Thus, the user feels as if there are objects (buttons, for example) that are literally in front of others (the grass in the background, for example).
Let's begin implementing some simple depth perception effects.
Download the Depth sample project from the code repository and run the project. You'll notice there are some background mountains, grass, and a few buttons that don't go anywhere. We're going to change this so that the buttons move around the screen to give a bit of depth.
In MainScene.h, add the the variables listed here, as well as import the CoreMotion framework:
#import <CoreMotion/CoreMotion.h>
@interface MainScene : CCNode
{
  CGSize winSize;

  //add these
  CCParallaxNode *parallax;
  CMMotionManager *motionManager;
  CGFloat xFiltered, yFiltered ;yFiltered
}
The CCParallaxNode is obvious. The motionManager is meant for tracking the accelerometer data, and xFiltered and yFiltered are going to be used as filters for the accelerometer so that it doesn't become too jittery.
Now, in the init method of MainScene.m, comment out the line that adds the layoutbox to the scene. Add the code that initializes the parallax node, adds the layoutbox to it, and adds the parallax node to the scene:
//[self addChild:layout];

parallax = [CCParallaxNode node];
//Ratio: For every 1 pixel moved, move the child that amount
parallax.position = ccp(winSize.width/2, winSize.height/2);
[parallax addChild:layout z:0 parallaxRatio:ccp(1,1) positionOffset:ccp(0,0)];
[self addChild:parallax];
If you're wondering what the ratio parameter is, it's like what the comment says: for every one pixel that the parallax object is moved, it will move the child by that amount. For example, if the parallax node was moved 100 pixels to the left, and if the child has a ratio of 0.5, the child will move to the left by 50 pixels. Does this make sense? So, for our buttons, we want the ratio to be 1:1. This means that, for every pixel the parallax node moves, the buttons will move by the same amount.
Running the project now won't do anything, however, so let's get the accelerometer data going so that we can shift the menu buttons by tilting the device.
In the init method of MainScene.m, add the following block of code, which will set up the motion manager so that it can start collecting accelerometer data:
//60 times per second. In theory once per frame
CGFloat interval = 1/60.f;
motionManager = [[CMMotionManager alloc] init];
motionManager.accelerometerUpdateInterval = interval;
[motionManager startAccelerometerUpdates];
[self schedule:@selector(getAccelerometerData:) interval:interval];
For the accelerometer to affect the parallax node's position, we must create the getAccelerometerData method, and modify the position there:
-(void)getAccelerometerData:(CCTime)delta
{
  CMAcceleration accel = motionManager.accelerometerData.acceleration;

  CGFloat filterValue  = 0.8f;

  xFiltered = filterValue * xFiltered + (1.0 - filterValue) * accel.x;
  yFiltered = filterValue * yFiltered + (1.0 - filterValue) * accel.y;

  parallax.position = ccp(winSize.width/2 + 50 * yFiltered, winSize.height/2 - 50 * xFiltered);
}
This method basically reads the accelerometer's data 60 times per second, sends it through a filter (if you want steadier movement, increase the K value, which we called filterValue in the preceding code, up to a maximum of 1), and assigns the parallax's position based on the filtered x and y values.
Tip
If this is the entirety of the effect you want in your own project, feel free to stop here. The key thing to note if you're using this in your own project is the fact that the parallax node affects every child's position based on the ratio it was given. Plus, if you're using the tilt mechanic, make sure you put a filter on the accelerometer data, or else it will be very jittery and actually hurt your game instead of helping it.
Next, we're going to equalize the parallax node so that the buttons aren't always being pushed up or off to the side.
After the user adjusts their phone to a new position, you would want to slowly bring their equilibrium to the way they're holding the device. For example, if they start with the device flat on a table, and then tilt it towards themselves by about 45 degrees, you will shift the items as necessary. You'll then need to slowly make the 45-degree position look the same as it did when it was flat.
This is easy to do, as long as we have a variable to hold what the equilibrium is. To do so, open MainScene.h and add the following code:
CGFloat avgXValue, avgYValue;
These two values will store the average of the last 100 xFiltered and yFiltered values recorded.
Then in MainScene.m, modify the three relevant lines in your getAccelerometerData method to look like what you see here:
avgXValue = (avgXValue * 99 + xFiltered)/100.f;
avgYValue = (avgYValue * 99 + yFiltered)/100.f;

parallax.position = ccp(winSize.width/2 + 50 * (yFiltered - avgYValue), winSize.height/2 - 50 * (xFiltered - avgXValue));
At first, the math probably makes no sense, so let's go over it.
First, avgXValue and avgYValue calculate the average by slowly adding one point at a time to the average in an estimation sort of way. This is not 100 percent accurate in the true "average" sense, but it comes close enough. It's also slightly better to do it this way as it means less code, less memory, and faster execution. Since we're doing this 60 times per second, it's not entirely important to get an accurate average. Within a few seconds, you'll have hundreds of points that will get you close enough.
Second, the subtraction of xFiltered/xFiltered and avgYValue/avgXValue is done to slowly bring it back to the center. For example, if your yFiltered value is -1, and avgYValue is 0, it will quickly jump down to its new position. But if the device is held at -1 for long enough, avgYValue will come so close to -1 that subtracting the two variables will yield a zeroed-out position, which is exactly what we want.
Tip
The key thing to note here if you are implementing the calibration effect into your own project is to subtract the two values. Whether you use a single-value calibration or a pseudo-average value (like what was used here), if you don't subtract the filtered x and y values, you won't see any change.
For slow calibration, the preceding method is the way to go. If you want instant calibration (for example, with a button that realigns when the user says so), simply store the single accelerometer value when the button is pressed rather than store the average value.
Since we're covering the topic of parallax scrolling, let's quickly go over a simple example of parallax scrolling as it was intended. In MainScene.m (or the header; it doesn't really matter), import the GameScene.h file:
#import "GameScene.h"
Then, in the buttonPressed method, add the following line of code. It will go to the game scene:
[[CCDirector sharedDirector] replaceScene:[GameScene scene]];
Now let's add the CCParallaxNode to GameScene.h:
@interface GameScene : CCScene
{
  CGSize winSize;

  //add this:
  CCParallaxNode *parallax;
}
Then, in the GameScene.m file's init method, set up the parallax node and add a few sprites to the node:
CCSprite *bg1 = [CCSprite spriteWithImageNamed:@"mountains.png"];
CCSprite *bg2 = [CCSprite spriteWithImageNamed:@"mountains.png"];

CCSprite *mg1 = [CCSprite spriteWithImageNamed:@"midground.png"];
CCSprite *mg2 = [CCSprite spriteWithImageNamed:@"midground.png"];

CCSprite *fg1 = [CCSprite spriteWithImageNamed:@"foreground.png"];
CCSprite *fg2 = [CCSprite spriteWithImageNamed:@"foreground.png"];
fg1.anchorPoint = fg2.anchorPoint = ccp(0.5,0);

CCSprite *sun = [CCSprite spriteWithImageNamed:@"sun.png"];

parallax = [CCParallaxNode node];
parallax.anchorPoint = ccp(0,0);
parallax.position = ccp(0,0);

[parallax addChild:bg1 z:0 parallaxRatio:ccp(0.35,0) positionOffset:ccp(winSize.width/2, winSize.height/2)];

[parallax addChild:bg2 z:0 parallaxRatio:ccp(0.35,0) positionOffset:ccp(winSize.width/2 + winSize.width - 2,winSize.height/2)];

[parallax addChild:sun z:1 parallaxRatio:ccp(0.5,0) positionOffset:ccp(winSize.width, winSize.height * 0.8)];

[parallax addChild:mg1 z:1 parallaxRatio:ccp(0.5,0) positionOffset:ccp(winSize.width/2, winSize.height/2)];
[parallax addChild:mg2 z:1 parallaxRatio:ccp(0.5,0) positionOffset:ccp(winSize.width/2 + winSize.width, winSize.height/2)];

[parallax addChild:fg1 z:2 parallaxRatio:ccp(1,0) positionOffset:ccp(winSize.width/2, 0)];
[parallax addChild:fg2 z:2 parallaxRatio:ccp(1,0) positionOffset:ccp(winSize.width/2 + winSize.width, 0)];

[self addChild:parallax];
Just in case you're wondering what positionOffset does, it moves the node to the position given as a parameter before any parallax ratios get applied. This is useful when first setting up your scene (just as we're doing here).
Then, we want to enable touching, so we add this line to the init method:
[self setUserInteractionEnabled:YES];
But first, we need to create a variable to hold the previous position the finger was at so that we know how far to move the parallax node. Therefore, in GameScene.h, add the following:
CGPoint previousPosition;
Finally, add the touchBegan and touchMoved methods so that the parallax node moves according to the touchMoved distance, while also making sure that the scrolling never goes beyond the bounds:
-(void)touchBegan:(CCTouch *)touch withEvent:(CCTouchEvent *)event
{
  previousPosition = [touch locationInNode:self];
}

-(void)touchMoved:(CCTouch *)touch withEvent:(CCTouchEvent *)event
{
  CGPoint newPosition = [touch locationInNode:self];

  parallax.position = ccp(parallax.position.x + (newPosition.x - previousPosition.x), 0);

  if (parallax.position.x < -winSize.width)
    parallax.position = ccp(-winSize.width,0);
  if (parallax.position.x > 0)
    parallax.position = ccp(0,0);

  previousPosition = newPosition;
}
From here onwards, you can run the project, and when you click on Play, you'll be taken to the game scene, which now has a (rather crude) set of background, middle-ground, and foreground elements. When you drag your finger across the screen, you'll notice the grass scrolling at the same speed while the mountains, trees, and sun all scroll at different speeds.
Tip
If you're implementing a parallax scrolling background in your own project, the key thing to note is the difference in ratios between the added objects. Once you have that squared away, all you have to do is move the parallax node with respect to a finger dragging, a character moving, or whatever.