
Customizing SharePoint Sites
SharePoint sites by default have a consistent look and feel and are created from templates that are included with the out-of-the-box installation of Microsoft Office SharePoint Server 2007 and Microsoft Windows SharePoint Services 3.0. SharePoint Designer provides the tools you need to customize your sites to meet your branding and visualization needs. Utilizing the master page capabilities of ASP.NET 2.0 you can build and change entire SharePoint sites quickly and easily.
As you create team sites, department-level sites, blog sites, and various other SharePoint-based sites from the wide variety of included site templates, you may find that they function and look adequate for your immediate needs. In some scenarios, however, you might find it useful or important to customize the look and feel of a page, site, or entire site collection. For example, if you want to create a site to publish materials to get your organization’s field sales team trained and excited about new services your company is offering, you can create the site from a SharePoint Team Site template. Then you can use SharePoint Designer to add graphics, change colors and fonts, rearrange the layout, and apply changes to the navigation across the site or on individual pages. The next section will walk you through the steps to accomplish these tasks.
Note
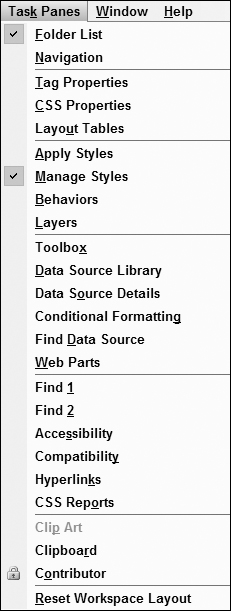
Your screen may look different than the screenshots in these steps depending on which task panes you have open. If you do not see a task pane referenced here, click Task Panes on the menu bar in SharePoint Designer and click the missing task pane to open and dock it as shown in Figure 19.1.
Figure 19.1. Selecting the Task Panes
Opening a SharePoint site from Office SharePoint Designer 2007
You can open your SharePoint site directly from within SharePoint Designer. Once you have launched SharePoint Designer, execute the following steps to get started.
Note
To open a SharePoint site, you must have at least the View permission for that site. This permission is included by default in the Full Control, Design, Contribute, and Read SharePoint Groups.
1. | On the File menu, click Open Site. |
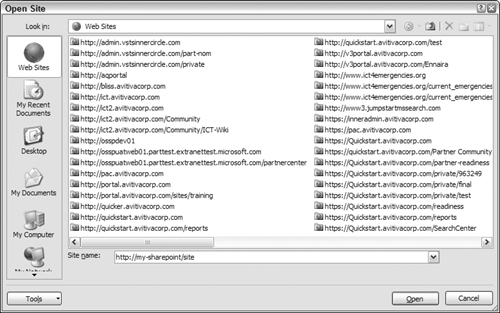
2. | The Open Site dialog box appears. By default, the Open Site dialog box opens with Web Sites visible in My Network Places list and displays all sites that have been opened using Office SharePoint Designer 2007. |
3. | In the Open Site dialog box, shown in Figure 19.2, do one of the following:
|
If you already have a page open on another site, the site will open in a new window.
Tip
When you Launch Office SharePoint Designer 2007, by default it automatically opens the last site that you were working on. To change this behavior, on the Tools menu, click Application Options. On the General tab, under Startup, clear the check box labeled Open last Web site automatically when SharePoint Designer starts.
To remove a site from the list in the Open Site dialog box, right-click the site, click Remove on the shortcut menu, and then click Yes to confirm. This action does not delete the site itself, only the link to that site presented here.
Once you have selected the site you would like to open, click the Open button to see all of the lists, libraries, and sites you have access to represented in the Folder List task pane, as shown in Figure 19.3.

Note
Your screen may look different depending on which task panes you have open. If you do not see the List task pane, you can click on the Task Panes menu and select Folder List.
Tip
If you have already opened the site before using SharePoint Designer, you can point to Recent Sites from the File menu and select the site you would like to open, as shown in Figure 19.4.

Opening a SharePoint site from Internet Explorer
One way to begin customizing is to navigate to any page in a SharePoint site using Internet Explorer.
Note
To open a SharePoint site, you must have at least the View permission for that site. This permission is included by default in the Full Control, Design, Contribute, and Read SharePoint groups.
In Internet Explorer, navigate to a page in your SharePoint site and then, from the File menu, click Edit with Microsoft Office SharePoint Designer as shown in Figure 19.5.
Figure 19.5. Opening a SharePoint site from Internet Explorer

Editing and publishing master pages
SharePoint 2007 is built on the ASP.NET 2.0 platform, which opens up a brilliant new way for you to manage the layout and look and feel of an entire site collection from a central gallery of master pages. All site master pages are accessible to you via SharePoint Designer. The role of master pages is to provide the design and layout of a page that you want to repeat across multiple pages in your sites. This allows you to give your sites a more consistent appearance, keeping common elements in their expected locations on every page. If you decide later that you want to move an element or functional area to a different location on the page, your change can immediately be seen across all pages that have been assigned your master page. For example, after receiving feedback that it would be nice to have an issue tracking report on every page as people navigate through your site, you could add that element to your master page and every site will instantly have that element in every page. In an enterprise deployment, this could mean saving countless hours of manually adding the new feature to every page if a change needs to be deployed across hundreds of pages.
By default, every site has one master page assigned to it which is stored in the Master Page Gallery. You can store as many master pages in the Master Page Gallery as you want, but you can select only one master page as the Site Master and one as the System Master.
To see which master page is currently assigned to your site:
1. | Navigate to the home page of your site. |
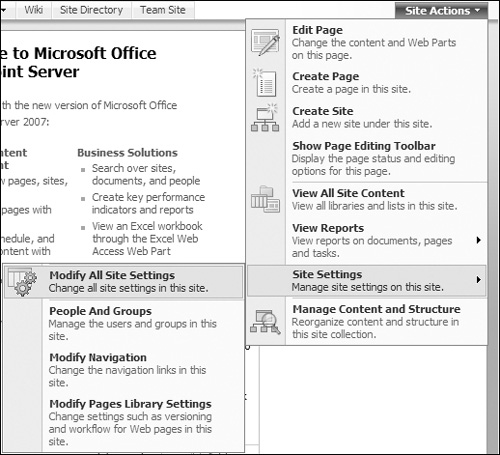
2. | For Windows SharePoint Services 3.0 sites, on the Site Actions menu, click Site Settings. For SharePoint Server 2007 sites, on the Site Action menu, hover over Site Settings and select Modify All Site Settings. |
3. | In the Look and Feel section, click Master Page. |
In the drop-down list you can see which master page is assigned to your site and system as well as others that are available, and apply any one of them to your site.
A good way to get familiar with using SharePoint Designer 2007 to customize the look of your site is to start by editing a copy of an out-of-the-box master page. By default, your site will be assigned the default.master. Start by creating a working copy of default.master and assign it to the site as the master page.
Note
By default the Master Page Gallery has versioning and approval workflow turned on.
When you open a master page for editing, you must check it out before you can make any changes. Users won’t be able to see the changes you have made and saved until you check the page back in and publish a major version.
To check out a master page, you can simply right-click the page to be edited and select Check Out. If the file you want to work on is not checked out, you will be prompted to check it out if you attempt to open it for editing.
To check in master pages, you can right-click the file and select Check In. The process is similar to publish your work. Once the page has published a major version, users will be able to see changes that have been made.
After following the instructions in the “Opening a SharePoint site from Office SharePoint Designer 2007” section of this chapter, try these steps:
1. | In the Folder List task pane, locate and expand the
_catalogs
folder. |
2. | Expand the masterpage folder to expose the list of master and layout pages. |
3. | Right-click default.master and choose Copy. |
4. | Right-click default.master and choose Paste. You will find that a copy of the default.master master page has been created with the name of default_copy(1).master in your Master Page Gallery. |
5. | Right-click the new file, choose Rename, and type SharePointBible.master. |
You have now successfully created a good working copy of the default.master that your site is using. Now you can navigate to the Site Settings pages of your site and assign the SharePointBible.master page to your site. You can choose to reset all subsites to inherit from this site’s master page settings to push the change to all sites in your site collection. Without any changes made to this master page at this point, you shouldn’t see changes in the way your sites appear. With the site open to the home page in your browser, you can click Refresh to quickly see how the customizations you do in the next section affect the look and feel of your site.
Common SharePoint customizations
This section provides step-by-step instructions for personalizing the look and feel of your SharePoint sites.
Publishing your company logo and brand to your SharePoint sites
Organizations commonly want to brand all of their SharePoint sites with their company logo. The image you use for this needs to be universally accessible to all site users. It is a good idea to upload your logo to a picture library within the same site collection in which you are working. For this example, we have our company logo stored in the out-of-the-box PublishingImages picture library at the root of the site.
1. | In the Folder List task pane, double-click SharePointBible.master to open it in SharePoint Designer (see Figure 19.6). Figure 19.6. SharePointBible.master open in Split view for editing in SharePoint Designer
|
2. | Click Yes in the dialog box asking you if want to check the file out. |
3. | Click the SharePoint people icon (the blue, yellow, green, and red-colored people icons). |
4. | Press Delete to remove the default image. |
5. | In the top menu, click Insert. |
6. | Hover over Picture. |
7. | Choose From File. |
8. | In the Picture dialog box, find and double-click PublishingImages. |
9. | Locate your image file and double-click it. You can preview the image in design mode as shown in Figure 19.7. |
10. | From the File menu, click Save. |
11. | Right-click SharePointBible.master in the Folder List and choose Check In. |
12. | In the Check In dialog box, check in a minor version and select the Keep files checked out check box. |
13. | Click OK. |

To see the change to your site, refresh the home page of your site in your browser.
Add a global footer to your site
The following steps add a global footer to your site pages highlighting how to contact the help desk for support and how users can submit feedback about their experience on the sites. You may want to include copyright information or privacy policies as other examples.
1. | In the Folder List task pane, double-click SharePointBible.master to open it in SharePoint Designer. |
2. | Click Yes in the dialog box asking if you want to check the file out. (If you are continuing from the previous section you can skip this step). |
3. | Switch to Code view and select
<TABLE.ms-main>
in the menu above the code window. |
4. | Scroll to the bottom of the highlighted code and place your cursor at the end of the last highlighted
</TABLE>
HTML tag. |
5. | Press Enter and add the following code: <table class="ms-globallinks"style="width: 100%" cellspacing=
"0" cellpadding="3">
<tr>
<td><a href="mailto:[email protected]">Submit
Feedback</a></td>
<td class="ms-alignright"> <a href="mailto:
[email protected]">Contact Helpdesk</a></td>
</tr>
</table>
|
6. | |
7. | From the File menu, click Save. |

Now you can go to the home page of your site and see the new custom footer. For this custom footer we used existing styles included in the default core.css style sheet. You may want to create your own custom style sheet to control the way your footer looks throughout your site (see Figure 19.9). Navigate around your site and see how the pages in your site are affected by the changes to your custom master page.
Figure 19.9. Custom footer shown on the site, driven from strictly SharePointBible.master customization

Cascading Style Sheets
With Microsoft Office SharePoint Designer 2007, you can customize the look and feel of a single SharePoint site by making changes to the default styles that are applied to that site. You can also apply your customized styles to other sites or choose at any time to remove all customized styles and revert to the default style sheet that resides on the server for that site collection. You can make any of these changes for Windows SharePoint Services 3.0 sites and Office SharePoint Server 2007 sites.
By default, the styles for all SharePoint sites in a single site collection are defined in a single style sheet that resides on the server. In Windows SharePoint Services 3.0, the name of this file is Core.css. In Office SharePoint Server 2007, this file may have any of several names. For example, the styles for the custom master page named BlackBand.master are defined in a style sheet named Band.css.
Office SharePoint Server 2007 comes with several sample style sheets for you to work from. The default style sheet is called core.css. It resides and is protected on the file system of each Web front end server. It is applied to all pages and elements in your site and site collection. With SharePoint Designer it is easy to begin changing the way pages look to end users to match your organization’s branding requirements.
SharePoint Designer 2007 automatically generates style references as you customize elements in pages. This makes it easier to manage the graphical look and feel of the visual elements in your site from a central location, affecting pages across your site instead of having to edit each page individually.
Customize the default style sheet
This example will get you familiar with editing the default styles by changing the look top navigation in your SharePoint site. To get started, edit the core.css file that comes with SharePoint. Start by opening your site in SharePoint Designer and then the master page assigned to your site. For this exercise, use SharePointBible.master from the previous section of this chapter.
1. | In the Folder List task pane, double-click
SharePointBible.master
to open it in SharePoint Designer. |
2. | Click Yes in the dialog box asking if you want to check the file out. (If you are continuing from the previous section you can skip this step.) |
3. | Make sure to switch your view to Split after you have successfully opened the master page. |
4. | Click the TopNavigation menu control in the Design view. The code will automatically be selected in the code window, as shown in Figure 19.10. Figure 19.10. <SharePoint:Aspmenu#TopNavigation...> shown selected in Split view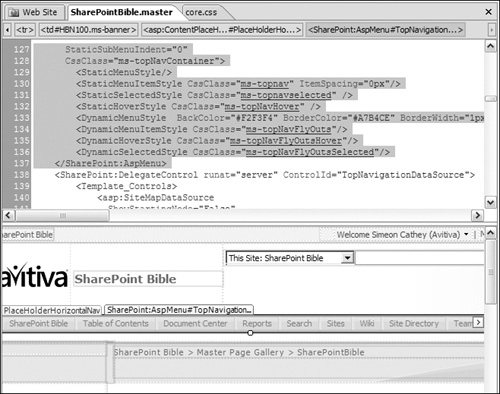
|
5. | |
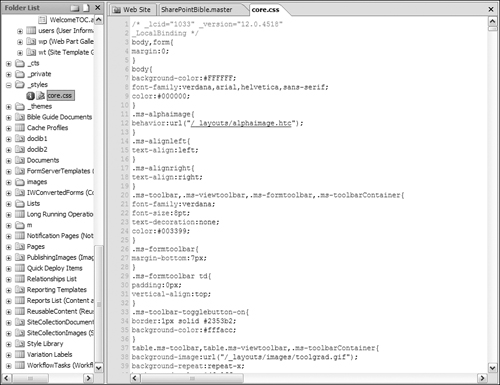
6. | Press and hold the Ctrl key and click
ms-topnav
. SharePoint Designer opens a copy of
core.css
for you to edit. |
7. | From the File menu, click Save (see Figure 19.11). Note The first time you modify and save any style on a page in any site, Office SharePoint Designer 2007 automatically opens a new local copy of the default style sheet and updates it with your changes. When you save or close the page or the copy of the default style sheet, you are prompted to confirm your customizations. |
8. | Click Yes in the Stylesheet Customization Warning dialog box. |
9. | On the Edit menu, click Find (Ctrl+F). |
10. | Type ms-topnav a in the Find what text box. |
11. | Click the Find Next button until you find the class entry in the style sheet. SharePoint Designer highlights the style in Code view and also highlights it in the Manage Styles tool pane. If you are not familiar with CSS syntax, you can use the wizard to help you. |
12. | In the Manage Styles task pane, right-click the highlighted
.ms-topnav
links style and select Modify Style. |
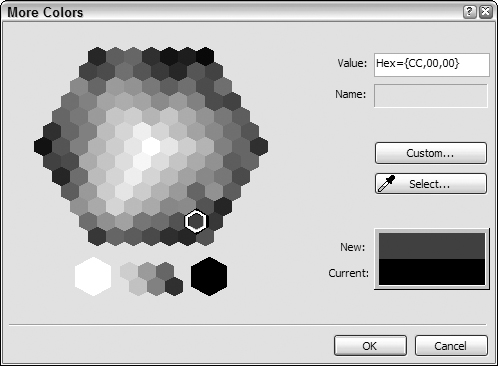
13. | Click the blue color box to the right of color in the Modify Style dialog box. (see Figure 19.12). Figure 19.12. The Modify Style dialog box with the More Colors dialog
|
14. | Select a maroon font color and click OK. |
15. | Click OK in the New Style dialog box. |
16. | From the File menu, click Save. |
You can preview your changes by clicking the SharePointBible.master tab in SharePoint Designer or by refreshing the home page of your site in your browser (see Figure 19.13).

Reverting back to the default SharePoint styles
After you customize the default style sheet (Core.css) so that a new copy appears in the _styles folder of your Folder List task pane, the customized style sheet will be used on all of the pages in your site. If you decide you would like to return to the default look, you can revert to using the default style sheet at any time by either renaming or deleting Core.css in the _styles folder.
Note
After you’ve customized a style sheet, do not move the customized file or the _styles folder. If you accidently do move or delete the file or the folder, each page in your site will appear with a broken link to the style sheet. No styles will be applied on any page at that point.
To recover your customized look you can either:
Reapply your customized style sheet, locate it, and move it back into the _styles folder at the top level of the site directory in your Folder List task pane.
Restore the site to the out-of-the-box default look, move the customized style sheet back into the _styles folder at the top level of the site directory in the Folder List task pane, and then either delete the style sheet or rename it.
If you cannot recover the style sheet you customized (if it is permanently deleted), create a new blank file that has the same name (for example, Core.css) in the _styles folder of the site, and then either delete the empty file or rename it. This initiates the process of reverting back to the default style sheet of the site.
After you have customized a stylesheet to your requirements, you can apply it to other sites. By default, a customized local style sheet is applied to only the site or subsite in which it is customized.
If you want to apply a single customized local style sheet both to the site you are working on and to more or all of that site’s subsites, you may find it easiest to create the customized style sheet in the site you are working on and then to use one of the following methods to apply it to other sites.
Attaching a style sheet to another single site
In Windows SharePoint Services 3.0 sites or an Office SharePoint Server 2007 deployment, you can manually attach a customized style sheet that is located in one site to another site.
1. | In Office SharePoint Designer 2007, open the site to which you want to apply an existing customized style sheet. |
2. | In the site, locate and double-click the default master page. |
3. | On the Format menu, hover over CSS Styles, and then click Attach Style Sheet. |
4. | In the Attach Style Sheet dialog box, click Browse to locate and select the customized style sheet that you want to apply. |
5. | In the Attach to section, click Current page. |
6. | In the Attach as section, click Link, and then click OK. |
The specified customized style sheet is applied to the default master page and to all content pages attached to that master page.
Tip
In SharePoint Designer, to see the updated styles in Design view, you may have to press F5 to update the view.
To save the master page with the new style sheet link, on the File menu, click Save. (Alternatively, you can press Ctrl+S.)
To apply the same style sheet to other sites, repeat this procedure for each site, one site at a time. If you are working in an Office SharePoint Server 2007 environment and you want to apply a single customized style sheet to a site and all of its subsites, see the following section.
Apply a style sheet to a site and all of its subsites
In an Office SharePoint Server 2007 site collection, you can use your browser to apply a customized style sheet to multiple or all of your sites in a single operation.
Note
You are able to do this only in Office SharePoint Server 2007 but not in Windows SharePoint Services 3.0.
In Microsoft Office SharePoint Server 2007, sites can inherit style sheet and master page settings. This functionality is appropriately named inheritance. A site can be set to inherit the styles it uses from its parent site, which is the site directly above it in the site structure or hierarchy.
If you have customized the style of one site and would like to propagate the customization to all of that site’s children or subsites:
1. | From your browser, navigate to the home page of the Office SharePoint Server 2007 site whose styles you have customized. |
2. | Click Site Actions and hover over Site Settings. |
3. | |
4. | In the Look and Feel section of the Site Settings page, click Master page. |
5. | On the Site Master Page Settings page, in the Alternate CSS URL section, click Specify a CSS file to be used by this publishing site and all sites that inherit from it, and then type the full path for the customized style sheet, including the file name, in the box (for example,
http://servername /_styles/core.css). Tip Because the _styles folder is a hidden folder and cannot be viewed in the browser, you cannot use the Browse button to locate it. |
6. | Select the Reset all subsites to inherit this alternate CSS URL check box, and then click OK, as shown in Figure 19.15. |

You have forced all subsites, or children of this site, to inherit from your current site.
Tip
You may have to refresh your browser to see the updated style in your sites.
Configure a subsite to inherit styles from its parent site
In an Office SharePoint Server 2007 site collection, you can use your browser to configure a single site to inherit its style from the parent site directly above it.
Note
You are only able to do this in Office SharePoint Server 2007 but not in Windows SharePoint Services 3.0.
To configure a single subsite to inherit the styles used by the site immediately above it:
1. | From your browser, navigate to the home page of the Office SharePoint Server 2007 site that you want to inherit from its parent. |
2. | Click Site Actions. |
3. | |
4. | In the Look and Feel section of the Site Settings page, click Master page. |
5. | On the Site Master Page Settings page, in the Alternate CSS URL section, click Inherit Alternate CSS URL from parent of this site. |
6. | Make sure the Reset all subsites to inherit this alternate CSS URL check box is unchecked. |
7. | Click OK. |

Tip
You may have to refresh your browser to see the updated style in your sites.
Content pages
In Microsoft Office SharePoint Products and Technologies, content pages consist of ASP.NET pages, which have the .aspx file extension. Each page contains an @page directive, which identifies the master page assigned to it. The following is an example of an @page directive:
<%@ Page MasterPageFile="~masterurl/default.master" %>
A content page is not a valid stand-alone page; a master page must be referenced in order to be rendered. Although there can be ContentPlaceHolder controls in your master page, you can override them on the content page.
By default, a SharePoint site includes several available content pages. Examples of these content pages are the Web Part, List View, and List Form pages. Each of these pages contain the content to be displayed in the body of the page. As a user accesses a page from the browser, the content page is merged with the assigned master page to produce the rendered page. Each content page uses the same page structure and common features defined by the master page to which the content page is attached.
In Microsoft Windows SharePoint Services 3.0, Default.master is applied to all of the default content pages, including:
Default.aspx (the home page for each site)
Default content pages which contain list views and list forms including:
AllItems.aspx
DispForm.aspx
NewForm.aspx
EditForm.aspx
Default content pages that contain views and forms for document libraries including:
Upload.aspx
WebFldr.aspx
Creating a content page from a master page and adding Web Part zones
When you create new custom content pages, you can easily start from an existing master page. That way, the new page has the same look and feel as the rest of the pages in your site that are derived from the same master page.
The content regions on the content page cannot be edited by default when you create a content page from a master page. To add custom content to the content page, you must first locate the region to which you want to add content—this includes the main content region that will likely contain the bulk of your content—and then make it editable.
Note
If you want to use a Web Part zone, you must insert it on a content page. Web Part zones cannot be inserted on a master page.
1. | On the File menu, point to New, and then click Create from Master Page, as shown in Figure 19.17. Tip You can also right-click the master page in the Folder List task pane, and then click New from Master Page on the shortcut menu. |
2. | In the Select a Master Page dialog box, do one of the following:
|
3. | Click OK. |

Note
All content pages link off the default.master page. The _layouts directory isn’t site specific and isn’t affected by the default.master page. The _layouts directory relies on a different master page.
By default, the new content page that has been created contains the code below:
<%@ Page masterpagefile="~masterurl/custom.master" language="C#"
   title="Untitled 1" inherits="Microsoft.SharePoint.
   WebPartPages.WebPartPage, Microsoft.SharePoint,
   Version=12.0.0.0, Culture=neutral, PublicKeyToken=
   71e9bce111e9429c" meta:webpartpageexpansion="full"
   meta:progid="SharePoint.WebPartPage.Document" %>
The code is referencing the master page from a content page. You now have a content page that has the same look and feel as the rest of the site. To add content, you can customize an existing content placeholder exposed by the master page. For this example use the PlaceHolderMain content placeholder.
1. | In Design view, click PlaceHolderMain(Master). |
2. | After you have it highlighted, click the arrow to the right of the placeholder and select Create Custom Content, as shown in Figure 19.18. |
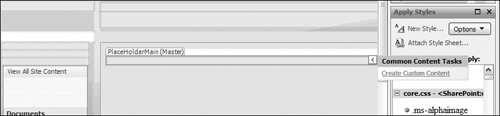
The title of the placeholder control has been changed to PlaceHolderMain(Custom).
From Code view you will see these additions to the code:
<asp:Content id="Content1" runat="server" contentplaceholderid=
   "PlaceHolderMain">
</asp:Content>
With the PlaceHolderMain content placeholder now ready for customization, you can add any content you want to that area. Keep in mind that anything you add in becomes static within that content placeholder and appears on the page. To add an area where you can add Web Parts and manage from the browser interface, start by adding a Web Part zone.
1. | From Code view, add the following code within the content placeholder tags: <WebPartPages:WebPartZone runat="server" FrameType= "TitleBarOnly" ID="Main" Title="Top Zone"> </WebPartPages:WebPartZone> |
2. | From the File menu, click Save. |
3. | Name the file Testpage.aspx. |
If you navigate to the new content page in your browser, you will see the new custom content page. Notice that now you can click Site Actions Edit Page, and here you can see your newly added Web Part zone. Users can now start adding Web Parts into that zone, as shown on Figure 19.19.

You can also easily accomplish the same results in Design view. After you’ve created the content page and made PlaceHolderMain customizable, you can add Web Part zones and other content without writing any code. For example, you may want to create a content page with an area for a top Web Part zone, four columns for Web Part zones just below, and a Web Part zone at the bottom of the page. The next steps explain how to accomplish this:
1. | Switch to Design view. |
2. | Place your cursor in the custom PlaceHolderMain(Custom) placeholder. |
3. | From the top menu, click Table and choose Insert Table. |
4. | In the Insert Table dialog box, set the following (as shown in Figure 19.20):
Figure 19.20. Insert Table dialog settings
|
5. | Click OK. |

The table is created in your content placeholder. Next, add the four-column table underneath.
1. | Press the right arrow key on your keyboard or place the cursor just outside the right side of your new table. |
2. | From the top menu, click Table and choose Insert Table. |
3. | In the Insert Table dialog box, set the following:
|
4. | Click OK. |
A new table is created with four columns. Next, create a place to put the bottom Web Part zone.
1. | Press the right arrow key on your keyboard four times or place the cursor just outside the right side of your new table. |
2. | From the top menu, click Table and choose Insert Table. |
3. | In the Insert Table dialog box, set the following:
|
4. | Click OK. |
You have just created a custom structure that allows you to place content in the page in a specified custom layout. Following the next steps will create Web Part zones in which end users can display Web Parts.
Tip
Right-click in each of the four columns and select Cell Properties to change the Vertical Alignment from Default to Top. If you leave the Vertical Alignment as Default, Web Parts that are taller than others in the four columns will end up looking like they are floating and out of place.
1. | Place your cursor in the top table cell you created. |
2. | On the top menu, click Task Panes and choose Web Parts. |
3. | If the Web Part tool pane is docked by default when it opens, you can drag it to any area of SharePoint Designer to dock it and make it easy to access. |
4. | At the bottom of the Web Part tool pane, click the New Web Part Zone button. |
5. | Repeat Step four in the remaining five cells in the tables you created. |
6. | From the File menu, click File and choose Save. |
Now each of the cells has its own Web Part Zone, as shown in Figure 19.21.

Navigate to your custom content page from the browser to see what the rest of your organization will see. You can view the page in edit mode to see how the Web Part zones render on the page. See Figure 19.22 for an example.

Content placeholders
Content placeholder controls, which are indicated in Code view by <asp:ContentPlaceHolder> tags, are regions of replaceable content on your master pages. If you modify the content placeholders on a master page that is attached to your site, the changes affect every page in your site. Alternatively, you can override any of the default content placeholders on a single content page by inserting custom content. The custom content then appears in place of the default content for that single page when viewed in the browser.
When you are customizing a content page in SharePoint Designer, you can easily locate content placeholders in Design view by using the Master Page toolbar.
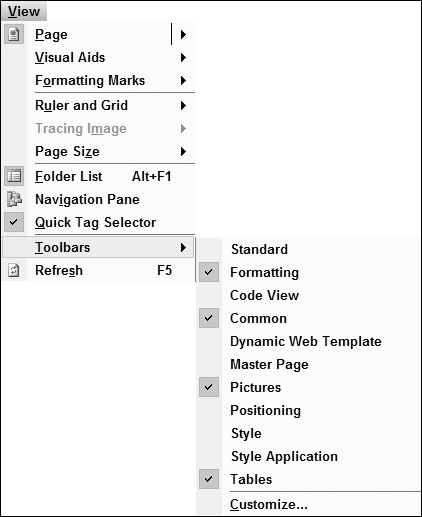
1. | To open the Master Page toolbar, on the View menu, hover over Toolbars, and then choose Master Page. |
2. | To select a content placeholder control, click the arrow, and then click the content placeholder control that you want to locate. |
The following table represents the default content placeholders for Windows SharePoint Services 3.0 content pages. This table also includes explanations of what each content placeholder represents on content pages.
Most of the default content placeholders on Default.master are required for the collaboration features of Windows SharePoint Services 3.0 (such as SharePoint lists and libraries) and therefore should not be deleted. Table 19.1 lists and describes the default content placeholders.
| Content placeholder | Description |
|---|---|
| PlaceHolderBodyAreaClass | Additional body styles in the page header |
| PlaceHolderBodyLeftBorder | Border element for the main page body |
| PlaceHolderBodyRightMargin | Right margin of the main page body |
| PlaceHolderCalendarNavigator | Shows a date picker for navigating in a calendar when a calendar is visible on the page |
| PlaceHolderFormDigest | The “form digest” security control |
| PlaceHolderGlobalNavigation | The global navigation breadcrumb |
| PlaceHolderHorizontalNav | Top navigation menu for the page |
| PlaceHolderLeftActions | Bottom of the left navigation area |
| PlaceHolderLeftNavBar | Left navigation area |
| PlaceHolderLeftNavBarBorder | Border element on the left navigation bar |
| PlaceHolderLeftNavBarDataSource | Data source for the left navigation menu |
| PlaceHolderLeftNavBarTop | Top of the left navigation area |
| PlaceHolderMain | Main content of the page |
| PlaceHolderMiniConsole | A place to show page-level commands, for example, Wiki commands such as Edit Page, History, and Incoming Links |
| PlaceHolderNavSpacer | The width of the left navigation area |
| PlaceHolderPageDescription | Description of the page contents |
| PlaceHolderPageImage | Page icon in the upper left area of the page |
| PlaceHolderSearchArea | Search box area |
| PlaceHolderSiteName | Site name |
| PlaceHolderTitleAreaClass | Additional styles in the page header |
| PlaceHolderTitleAreaSeparator | Shows shadows for the title area |
| PlaceHolderTitleBreadcrumb | Main content breadcrumb area |
| PlaceHolderPageTitleInTitleArea | Page title shown immediately below the breadcrumbs |
| PlaceHolderTitleLeftBorder | Left border of the title area |
| PlaceHolderTitleRightMargin | Right margin of the title area |
| PlaceHolderTopNavBar | Top navigation area |
| PlaceHolderUtilityContent | Extra content at the bottom of the page |
| SPNavigation | Empty by default in Windows SharePoint Services 3.0—can be used for additional page editing controls |
| WSSDesignConsole | The page editing controls when the page is in Edit Page mode (in the browser click Site Actions, and then click Edit Page) |
Page layout and design
Office SharePoint Server 2007 with publishing turned on allows you to create sites using a publishing template. Publishing sites enables users to edit and publish Web pages using only their browser. Page layouts are page templates that define how a page should look, what page fields and content fields are available, and exactly which elements should be present on the page (such as lists and libraries). For example, you can set up one page layout for trip reports, another page layout for newsletter articles, and a third page layout for plan updates. Authorized users can then create new publishing pages that are based on these page layouts, and their new pages for each specific type of content will follow a consistent format.
After getting familiar with the features available in Microsoft Office SharePoint 2007, you may decide that you want to create a set of custom layouts to apply to pages in your site for different types of content. For example, you may want to publish a monthly executive newsletter to your site based on a specific layout. After you create your executive newsletter page layout, you can fully customize it using Office SharePoint Designer 2007.
Open a page layout for editing
All publishing pages in a publishing site are stored in the provided Pages document library, where you can identify which page layout was used to create each page. To see all of the publishing pages for your site from your browser, follow these steps:
1. | On the Site Actions menu, click View All Site Content. |
2. | Click the Pages document library heading. |
The Pages document library is created automatically by the publishing feature and contains all of the pages in a site that are created from page layouts. You can see which page layout is applied to your pages by looking in the Page Layout column, as shown in Figure 19.23. To view the page in the browser, you can click the page title.

To open and customize a page layout with Office SharePoint Designer 2007, do one of the following:
1. | Find a page in the Pages document library that is assigned the page layout you want to edit. |
2. | Click the page in the Pages document library. |
3. | From the File menu, choose Edit in Microsoft Office SharePoint Designer. As SharePoint Designer opens the page for editing, you will be prompted to choose whether you want to edit the content on the page in the browser or edit the layout of the page. |
4. | When prompted, click Edit Page Layout. |
5. | You will be prompted to choose whether or not to check the file out; click Yes. |
SharePoint Designer opens the layout page that was assigned to the page you selected to edit.
Add custom content to a page layout
After you have successfully opened the page layout for editing in Office SharePoint Designer 2007, you can edit it as you would a content page that is attached to a master page. Adding custom content to a page layout causes the customized content to appear on all publishing pages that have that page layout assigned to them.
Warning
If you remove a component from a layout page, any page that has that layout assigned to it and content residing in that component causes the content to disappear.
With the page layout open in SharePoint Designer in Design view, click to highlight the placeholder in which you want to customize content, click the arrow that appears to the right, and then click Create Custom Content to unlock the placeholder for editing.
With the placeholder unlocked and ready for customization, you can edit this section of the page by using the features that you commonly use to edit content or master pages, such as:
Tables: Click the Insert Table option on the Table menu to create tables to help align content.
Graphics: Click and drag images from the images folder into this section of the page.
Text: Click and then type where you want text to appear.
Web Part Zone: Insert a Web Part zone to give visitors to the page the option to add or remove Web Parts, such as views of document libraries and lists.
Web Parts: Insert views of document libraries, lists, and more into the page.
After you have customized the layout page, save the page by clicking Save on the File menu.
Insert a page field
In some cases, you may want the page layout to display information about the Web page itself on that Web page. For example, on an articles page you might want to display not just the article content, but also a contact name, or the file name, or the date that the article is scheduled to be published or pulled from the site. These examples can be accomplished by inserting page fields into your page layout.
Page fields can also be used to enable content managers to enter information in these fields from the browser. For example, with publishing you can set a Scheduling Start Date so that you can specify when the page should be automatically published. You can also set a Scheduling End Date so that when the expiration date is reached, the page will no longer appear on your site. Because the Scheduling Start Date and the Scheduling End Date are page fields that you can add to your layout page, a content manager can change these dates via a browser for an immediate update to the scheduling engine in the publishing system.
To insert page fields into editable regions of a page layout that is open in SharePoint Designer, click the placeholder in which you want to add content, click the arrow that appears, and then click Create Custom Content to unlock the placeholder for editing.
Tip
When you are creating a table that you want to add to an existing layout page, it is sometimes easier to first create the table on a blank page. That way, you can get the formatting and structure for the information set up just how you want it, copy the table, and then paste it into the placeholder on the page where you want to publish it. Then you can follow the rest of these steps to insert the page fields into the allocated spaces in the table.
1. | If the Toolbox task pane is not visible, on the Task Panes menu, click Toolbox. |
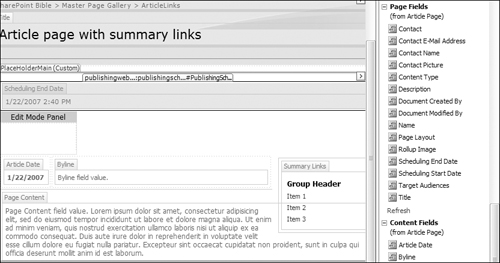
2. | Scroll down to the Page Fields section and drag Scheduling End Date to the editable region as shown in Figure 19.24. |
Figure 19.24. Scheduling End Date page field added to the Article Links page layout
Note
If the items in the Page Fields section of the Toolbox are not visible, it is probably because you are not editing a page layout. Page Fields and Content Fields are available only for page layouts.
Insert a content field
You can add content fields for displaying information about the page content that you have inserted into a page layout. For example, you may want to add a byline to an article on each page that uses your custom layout page. If your page includes a field for publishing the body of an article, you could add another field to display the author’s name. This is done by adding a content field to a page layout. Follow these steps to add the Byline Content Field:
1. | With the page layout open in SharePoint Designer 2007, click the placeholder in which you want to add content, click the arrow that appears, and then click Create Custom Content to unlock the placeholder for editing. |
2. | If the Toolbox is not visible, on the Task Panes menu, click Toolbox. |
3. | From the Content Fields section, drag the content field that you want to insert into the editable region, as shown in Figure 19.25. |

Note
If the items in the Content Fields section of the Toolbox are not visible, it is probably because you are not editing a page layout. Page fields and content fields are available only for page layouts.
Web Part zones and Web Part customization
On Web Part pages, Web Part zones are Web Part containers that can be configured to control the organization and format of the assigned Web Parts. Web Part zones enable you to group, arrange, and customize Web Parts in the browser. They also allow you to control who can modify them. Web Parts, though controlled by the Web Part settings when assigned, can also live on a page outside a Web Part zone.
Web Parts located in Web Part zones
Inside a Web Part zone, Web Part settings are stored in the content database in SharePoint, not in the ASPX code in the page. Inserting a Web Part inside a Web Part zone makes it possible for users to interact with or modify Web Parts through the browser.
Web Parts not located in a Web Part zone
When a Web Part is not located inside a Web Part zone, users can still view the Web Part contents. This can be useful if you do not want users to be able to make any changes, and eliminates the ability to interact with or modify the Web Part properties or the way it is displayed. In this scenario, the Web Part configuration settings are stored in the ASPX page code and not in the content database.
Web Part pages, Web Part zones, and Web Parts are nested containers. The Web Parts themselves contain the data that you want to present on a page, and perhaps modify or interact with. Web Part zones are optional sub containers to Web Part pages, each of which can house one or more Web Parts. This enables you to group and arrange Web Parts on the page, modify them from the browser interface, and manage what users have permissions to view and modify. Web Part pages house both Web Parts and Web Part zones.
Note
Within a given Web Part zone, you can control whether Web Parts can be arranged horizontally or vertically.
Insert and customize a Web Part zone
The following steps will guide you through adding a Web Part zone to an existing page and configuring it to control the arrangement and user access of Web Parts that will ultimately live there.
1. | In Office SharePoint Designer 2007, open the page in which you want to insert the Web Part zone. |
2. | If the Web Parts task pane is not already open, click the Task Panes menu and choose Web Parts. |
3. | In Design view, click the location on the page where you want to insert the Web Part zone. |
4. | If necessary, scroll to the bottom of the Web Part task pane and click New Web Part Zone. |
The new Web Part zone is inserted on the page, as shown in Figure 19.26.
Figure 19.26. New Web Part zone inserted into a Web Part page
One of the properties that you can control for all Web Parts in a single Web Part zone is whether the Web Part displays a title bar only, both a title bar and a border, or neither.
Web Part zones also allow you to control whether users are allowed to:
Add, delete, resize, and move Web Parts
Manage their own personal Web Part settings
Change Web Part settings for all users
The following steps will guide you through the process of accessing and modifying your Web Part Zone properties.
1. | Right-click the new Web Part Zone, and then click Web Part Zone Properties on the shortcut menu. |
2. | In the Web Part Zone Properties dialog box, do any of the following (see Figure 19.27 for reference):
Figure 19.27. Web Part Zone Properties dialog box
|
3. | When you finish, click OK. |

Warning
If you change the Zone Title property in the General settings section of the Web Part Zone Properties dialog box and users have already assigned Web Parts to that Zone, the Web Part will be deleted.
Deleting a Web Part zone
Although you can delete a Web Part zone from a page, you must realize that you are also deleting any Web Parts assigned to that zone in that Web Part page.
When selecting a Web Part zone that you would like to delete, make sure that you select only the zone and not any other elements. The Quick Tag Selector makes this easier to do by identifying the precise object that you have selected. The Quick Tag Selector is located at the top of the document window and is updated every time you select an object anywhere in the page, as shown in Figure 19.28.
Figure 19.28. Web Part zone selected and highlighted in the Quick Tag Selector
Tip
The arrow keys on your keyboard may be more useful than the mouse for changing your selection, especially when elements overlap other objects. Each time that you press an arrow key, check the Quick Tag Selector to see which element is selected.
1. | In Office SharePoint Designer 2007, open the page from which you want to delete a Web Part Zone. |
2. | If the Quick Tag Selector is not visible, click Quick Tag Selector from the View menu. |
3. | In Design view, click the Web Part zone that you want to delete. |
4. | Check the Quick Tag Selector to make sure that you have selected only the Web Part zone. |
5. | Press Delete. |
6. | From the File menu, select Save. |
Add and configure a Web Part
In this section, you will add a Web Part to the Web Part page outside any existing Web Part zones to display content that cannot be edited by users accessing your site through the browser.
In this example, follow these steps to add copyright information to the bottom of the home page of your site:
1. | In Office SharePoint Designer 2007, open the page in Design view to which you want to add a Web Part. |
2. | If the Master Page toolbar is not visible, from View the menu, hover over Toolbars, and select Master Page as shown in Figure 19.29. Figure 19.29. Opening the Master Page toolbar
|
3. | Click on the arrow, and from the list select PlaceHolderUtilityContent. |
4. | Click the arrow on the right of PlaceHolderUtiltyContent(Master) and select Create Custom Content. The content placeholder changes from PlaceHolderUtiltyContent(Master) to PlaceHolderUtiltyContent(Custom). |
5. | Place your cursor in the PlaceHolderUtiltyContent content placeholder. |
6. | If the Web Parts task pane is not visible, from the Task Panes menu select Web Parts. |
7. | Scroll through the Web Part Gallery until you find Content Editor Web. |
8. | Drag and drop the Content Editor Web Part into the PlaceHolderUtiltyContent(Custom) place-holder. The Content Editor Web Part is now inserted into the content placeholder area. By default, you see the Web Part header (Content Editor Web Part) and text that notifies you “to add content, select this text and replace it by typing or inserting your own content.” You can see an example of this in Figure 19.30. Figure 19.30. Content Editor Web Part added to the PlaceHolderUtiltyContent(Custom) content placeholder
|
9. | Delete the editable text in the Web part and type Copyright 2007, all rights reserved. |
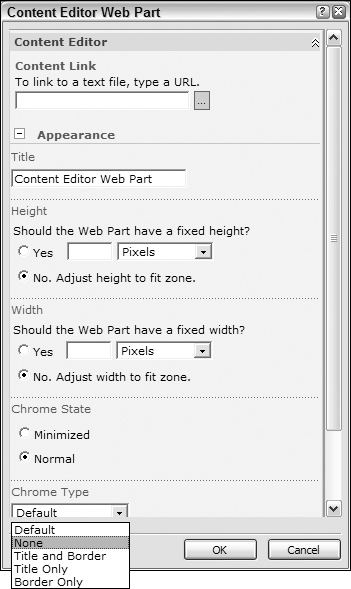
10. | Right-click the Content Editor Web Part header and choose Web part properties. |
11. | Click the plus sign next to the Appearance section. |
12. | Click on the Chrome Type dropdown and select none as shown in Figure 19.31. Figure 19.31. Content Editor Web part Appearance properties
|
13. | Scroll down to the Layout section and select Right to Left from the Direction drop-down. |
14. | Click OK. |
15. | From the File menu, click Save. |
You can see your changes persist in the Design view of Office SharePoint 2007. To review and test, navigate to the home page of your site in the browser. You should see the changes reflected.