
Securing Client Communications
Having a secure network and server is not enough to ensure the security of your data. With users working in coffee shops, airports and hotels, we also need to be sure that their data is encrypted on its way from their clients to the servers in your datacenter. Once we have made sure that the packets going from the client to the server are secure, we then need to turn our attention to the authentication mechanism being used to determine who is at the other end of the connection as well as what they will be able to do once connected. Some authentication methods are more secure, while others will perform better across a network. Business and environmental factors must be assessed before selecting the best method for an organization.
In this section we review the various authentication methods available and provide suggestions and guidance to help you select the best way to communicate with the clients in your environment. We wrap the section up with the steps need to successfully configure SSL.
Authentication
A client connecting to MOSS or WSS can take the form of a Windows PC saving a document from Word or the same PC uploading a document to a WSS site via a browser. A client may also be a hand-held device accessing MOSS via a mobile URL or a Mac PowerBook accessing a site page via a Mac browser. There are many client options for access to MOSS and WSS, but only a limited number of supported authentication methods.
The default method is Windows Authentication, but MOSS 2007 supports multiple authentication methods as shown in Table 10.2.
| Authentication Method | Description | Examples |
|---|---|---|
| Windows | The standard Windows authentication method that is selected by default. | Anonymous, Basic, Digest, Certificates, Kerberos, NTLM (Windows) |
| ASP.NET forms | MOSS 2007 can support non-Windows-based systems via integration with ASP.NET forms authentication. This authentication allows MOSS 2007 to interact with systems where the MembershipProvider interface has been implemented. | Lightweight Directory Access Protocol (LDAP), SQL Server or other database systems, any other ASP.NET forms authentication solutions |
| Web Single Sign-On (SSO) | MOSS 2007 supports the storage and mapping of credentials including account names and passwords. SSO provides a way for users to authenticate one time while accessing data from other applications and systems. | Active Directory Federation Services (ADFS), Additional Identity Management Systems |
Windows Authentication versus KerberosAlthough the default/recommended authentication method is stated in the product as “Windows Authentication,” there are some compelling reasons to choose Kerberos instead. Windows or NTLM is a more familiar challenge-response authentication mechanism and is easier to develop against as well as configure and administrate. Kerberos is a ticket-based authentication method that authenticates both the client to the server and the server to the client. Kerberos is more secure and has the ability to increase performance, but is also a challenge to set up properly. The reason Kerberos performs better is that it caches information about the client after the client authenticates. NTLM issues its challenge and response for each request, which places additional demands on the servers and network. This issue starts to have more impact in large farm environments. Kerberos also can delegate the client’s credentials from front-end to back-end servers. If you have ever had to log in multiple times when accessing a SharePoint server that is getting data from another server, then you have experienced the pain of not having Kerberos delegation. Basically, Kerberos is a better authentication option and large environments that have the expertise available should seriously consider selecting it instead of NTLM. See the Knowledge Base article located at http://support.microsoft.com/?kbid=832769 for information on configuring Kerberos authentication. |
Forms-based authentication
Another of the exciting features of MOSS is forms-based authentication. This is a pluggable feature based on ASP.NET 2.0 that allows your users to authenticate without an NT Login prompt. Instead, you could build a customized signup/login process to obtain information about your users. Forms authentication uses encrypted cookies and authentication tickets.
Scenarios for successful forms-based authentication implementation are broad, but would include:
Allowing anonymous and unauthenticated users access to unrestricted, public areas of your sites—an ecommerce store for example.
Allowing users to fill out a custom form to create a user profile, where they could then log in and access restricted areas of your site—to view previous orders, for example, or to add new items to the catalog if the user had the appropriate role.
The following steps detail how to configure forms-based authentication:
1. | Choose Central Administration
|
2. | Navigate to Application Management
|
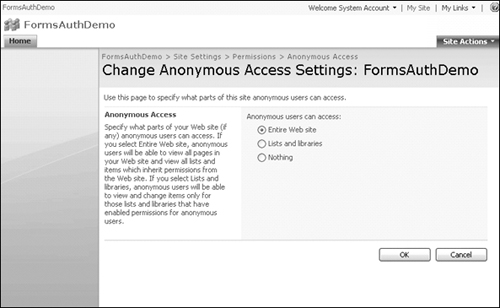
3. | Before you change the Authentication Provider, go to your newly created site and log in with the normal NT prompt. Append the URL _layouts/setanon.aspx to the root of your site, which takes you to the Change Anonymous Access Settings page, as shown in Figure 10.6. Set your anonymous access level and click OK. |
4. | Go to Application Management
|
5. | You can get SQL Server Express and SQL Management Studio from http://msdn.microsoft.com/vstudio/express/sql/. Open a Visual Studio Command Prompt and run aspnet_regsql. This opens the ASP.NET SQL Server Setup Wizard, as shown in Figure 10.7. Select Configure SQL Server for application services and click Next. Add your connection information and click Next. Confirm your settings summary and click Next again to create the database. Click Finish. |
6. | The next step is editing your web.config files—the one in your SharePoint virtual directory folder and also the web.config for SharePoint Central Administration. You need to add the <connectionStrings> node to both of these files, with the credentials you set up for the database in the previous step. Outside and directly below the <system.web> node in each web.config file, add the <connectionStrings> node: <connectionStrings>
<remove name="LocalSqlServer" />
<add name="LocalSqlServer"
connectionString="Server=servername;Database=aspnetdb;uid=usern
ame;pwd=pass;" providerName="System.Data.SqlClient" />
</connectionStrings>
|


Now we will add a role and a user to the aspnetdb with which you can log into your site. The painless way of doing this is to open Visual Studio and create a new Web site.
7. | Open Microsoft Visual Studio 2005 and choose File
<authentication mode="Forms" /> Save the file and build your project. |
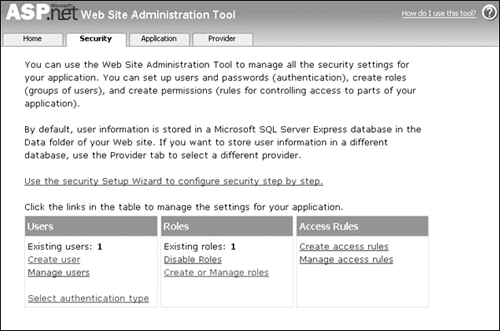
8. | From the Website menu, select ASP.NET Configuration to open the ASP.Net Web Site Administration Tool (Configuration Manager). Click the Security tab. If Roles are not enabled, click Enable roles as shown in Figure 10.8. |
9. | When roles are enabled, click Create or Manage roles. You will see the Create New Role screen as shown in Figure 10.9, and then you can add your new role. |
10. | Click Backto return to the Security tab. Click Create user and fill out the fields as shown in Figure 10.10. |
11. | Select the role you created and ensure the Active User box is checked. Click Create User. The Security tab should now show one user and one role created, as shown in Figure 10.11. |
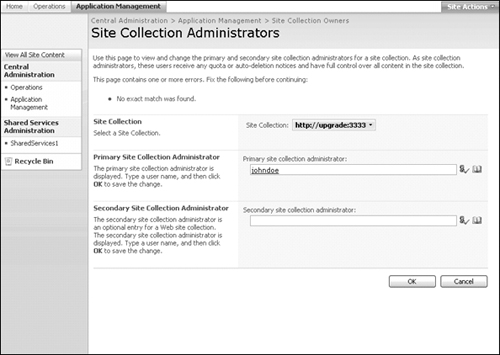
12. | The last step to take is adding the user you created as the Site Collection Administrator in Central Administration. Navigate to Application Management
|
13. | Open a new browser and navigate to the root of the site collection you created. You should have access to the site without having logged in because you enabled anonymous access. Click Sign In to open the Login Form, and enter your user credentials you created with Visual Studio, as shown in Figure 10.13. |


Web Single Sign-On
The Single Sign-On (SSO) capabilities provided with MOSS allow you to configure stored application passwords for individuals and groups. This offers smooth, integrated access between applications without continual password prompts to irritate users. Additionally, SSO gives you the capability to provide application access to groups of users that you would not normally give individual access to without having to distribute the username and password information. You can embed application integration within SharePoint and provide seamless information access.
The following components of MOSS can leverage SSO capabilities:
Excel Services
InfoPath Services
Business Data Catalog
Key Performance Indicators
SharePoint Designer DataForm Web Part
Custom Web Parts
To configure SSO, follow these steps:
1. | Use terminal services or directly log on to the physical machine that will be the SSO master secret server. |
2. | Open SharePoint Central Administration from Start
|
3. | Click the Operations tab. |
4. | Select Manage settings for single sign-on in the Security Configuration section. |
5. | Select Manage server settings and enter the farm admin account in the Account name field in the Single Sign-On Administrator Account section and the Enterprise Application Definition Administrator Account section. |
6. | Enter the timeout value in the Ticket time out (in minutes) field for how long you would like the ticket to stay valid between the time it is issued and the time the enterprise application validates it. The recommended value is 2 minutes. |
7. | Click OK. |
Starting the Single Sign-On Service
To start the Single Sign-On Service, follow these steps:
1. | For each front-end server and application server, go to Start
|
2. | Configure the Startup type selection as automatic as shown in Figure 10.14. Figure 10.14. Setting the Microsoft Single Sign-on Service to start automatically
|
3. | Click the Log On tab, select the This account radio button, and enter your farm admin service account and password, and then confirm the password again. |
4. | Click Apply. |
5. | Click the General tab and click the Start button. |
6. | Click OK. |

To create a new SSO encryption key, follow these steps:
1. | Use terminal services or directly log on to the physical machine that will be the SSO master secret server. |
2. | Open SharePoint Central Administration from Start
|
3. | Select the Operations tab. |
4. | Select Manage settings for single sign-on in the Security Configuration section. |
5. | Select Manage encryption key. |
6. | Click Create Encryption Key and click OK on the Create Encryption Key page to re-encrypt stored credentials with the new key. This allows user credentials to be stored with the new key without the users having to re-enter their passwords. |
Note
It is a good idea to back up the encryption key every time a new one is created. You can back up the key to a local drive and then store it so that it is available if you need to restore or move the security credentials.
To create an enterprise application definition, follow these steps:
1. | Open SharePoint Central Administration. |
2. | Click the Operations tab. |
3. | Select Manage settings for single sign-on in the Security Configuration section. |
4. | Select Manage settings for enterprise application definitions. |
5. | Click New Item in the top navigation bar. |
6. | Enter a name for your enterprise application definition in the Display Name field. |
7. | Enter the application name that is used in your BDC application in the Application name field. |
8. | Enter a contact e-mail address for the application definition. |
9. | Select Group if you would like to allow all users to connect with the credentials stored in SSO. If you would like users to enter credentials the first time they connect to the application, select Individual. |
10. | If your application supports window authentication, select the Windows authentication check box. |
11. | Use the fields in the Logon Account Information section to define what authentication fields are required for the application. For each, decide whether you would like the fields to be masked (hidden like when you are entering a password) when the user types in the value. |
To set the password for the application definition, follow these steps:
1. | Open SharePoint Central Administration. |
2. | Click the Operations tab. |
3. | Select Manage settings for single sign-on in the Security Configuration section. |
4. | Select Manage account information for enterprise application definitions. |
5. | Select the application for which you want to enter credentials. |
6. | Enter the group that will be allowed to use this application definition in the Group account name field. |
7. | Select Update account information. |
8. | Click Set. |
9. | Enter the value for the fields that you defined on the “Provide Account Information” page. |
10. | Click OK. |
11. | Click Done. |
Modifying your application definition to use SSO
After SSO has been configured, you will need to modify the LOBSystemInstance parameters to use SSO authentication.
 <LobSystemInstances>
  <LobSystemInstance Name="AdventureWorksSampleInstance">
   <Properties>
    <Property Name="AuthenticationMode"
Type="System.String">WindowsCredentials</Property>
    <Property Name="DatabaseAccessProvider"
Type="System.String">SqlServer</Property>
    <Property Name="RdbConnection Data Source"
Type="System.String">ServerName</Property>
    <!-- If you are connecting to an instance use format
       servernameinstance -->
    <Property Name="RdbConnection Initial Catalog"
Type="System.String">DatabaseName</Property>
    <Property Name="RdbConnection Integrated Security"
Type="System.String">SSPI</Property>
    <Property Name="RdbConnection Pooling"
Type="System.String">false</Property>
    <Property Name="SsoApplicationID"
Type="System.String">ApplicationDefinitionName</Property>
<! —This name should match the Application Definition name as
   defined in SSO. -->
    <Property Name="SsoProviderImplementation"
Type="System.String">Microsoft.SharePoint.Portal.SingleSignOn.Sps
   SsoProvider, Microsoft.SharePoint.Portal.SingleSignOn,
   Version=12.0.0.0, Culture=neutral, PublicKeyToken=
   71e9bce111e9429c</Property>
   </Properties>
  </LobSystemInstance>
 </LobSystemInstances>
Implementing SSL
We highly recommend implementing Secure Sockets Layer (SSL) to secure the communications between your client and server computers. If you don’t use SSL, passwords and other sensitive data are at risk as they are sent from the client to the server because the data packets can be picked up by a network-sniffing type of device.
Configuring SSL
The following is a simple example that would apply for some environments. The intent is for you to be able to apply and substitute the steps for your unique situation. Configuring SSL is generally composed of the following steps:
Creating a server certificate using the certificate wizard. You can also obtain a certificate from a certification authority or from any publicly trusted authority.
Assigning an existing certificate.
Creating alternate access mappings in Central Administration.
Creating a new certificate
To create a new certificate, follow these steps:
1. | Right-click Web site in IIS and choose Properties. |
2. | On the Directory Security tab click the Server Certificate button as shown in Figure 10.15. Figure 10.15. Directory Security
|
3. | The Web Server Certificate Wizard opens; click Next to continue. |
4. | Select Create a new certificate and click Next. |
5. | Select Prepare the request now but send it later, and click Next. |
6. | Enter a name for the new certificate (should probably include the site name) and click Next, as shown in Figure 10.16. Figure 10.16. IIS Certificate Wizard – Name and Security Settings
|
7. | Select or enter your Organization name and Organizational unit and then click Next. |
8. | Enter a common name for your site (this is the name with which users will access the site, and so it needs to be valid) and click Next. |
9. | Enter the geographical information and click Next. |
10. | Select an output location and filename for your certificate and click Next. |
11. | Review the request file summary, click Next, and then click Finish. |
12. | Use the contents of the outputted certificate request file to process a certificate request either with a local certificate authority (if you are accessing this site only on the local network), or with a third-party certificate issuer that processes certificates for Web servers (if you are going to access this site via the Internet). |
13. | Once you have processed your certificate request you can complete the request process. (If this is a third-party certificate, follow the instructions provided by the issuer because you may need to install root certificates.) |
14. | Right-click Web site in IIS and choose Properties. |
15. | On the Directory Security tab click Server Certificate. |
16. | The Web Server Certificate Wizard opens; click Next to continue. |
17. | Select Process the pending request and install the certificate and click Next. |
18. | Browse to the file location of your processed certificate request, as shown in Figure 10.17, select the file, and click Next. Figure 10.17. IIS Certificate Wizard—Process a Pending Request
|
19. | Select the port for your SSL site (443 is the default port) and click Next. |
20. | Review the certificate summary, as shown in Figure 10.18, and click Next. Figure 10.18. Certificate Summary
|
21. | Click Finish to complete the certificate wizard. |


Assigning an existing certificate
To assign an existing certificate, follow these steps:
1. | Right-click your Web site in IIS and choose Properties |
2. | On the Directory Security tab click the Server Certificate button. |
3. | The Web Server Certificate Wizard opens; click Next to continue. |
4. | Select Assign an existing certificate and click Next. |
5. | Select the existing certificate that you want to use for the site and click Next. |
6. | Select the port for your SSL site (443 is the default port) and click Next. |
7. | On the Certificate Summary screen, review certificate details, click Next, and then click Finish to complete the certificate wizard. |
Creating alternate access mappings
After you have SSL enabled on your IIS site, you need to add an alternate access mapping so that the site can be accessed via https.
1. | Go to Operations on the Central Administration site and click Alternate access mappings under the Global Configuration heading. |
2. | From the drop-down menu, select the site to which you need to add the new alternate access mapping. |
3. | After the proper collection is selected, click Edit Public URLs. |
4. | Enter the new URL in the appropriate zone:
|
Click Save to complete the process.