
Designing Web Pages
There are many ways to design, deploy, and manage Web pages. This process can be daunting, especially when you have the challenge of maintaining a custom enterprise portal, which in many cases involves many content authors and must tie into both the internal and external presence of a typical business. Though there may be many solutions and opinions in your organization of how Web publishing should be done, you must still ensure a uniform experience for users at all levels. Providing a consistent look and feel can be challenging, but in our Web-enabled lives, it is completely necessary and useful given the amount of time we spend sharing and consuming knowledge via Web technologies.
Microsoft Office SharePoint Server 2007 simplifies the design process by breaking down the Web pages into modular elements for ease of customization and authoring. This is the result of including the powerful content management features of Microsoft Content Management Server in the SharePoint platform.
Master Pages, Page Layouts, and Field Controls are the primary elements of the publishing infrastructure in Microsoft Office SharePoint Server 2007.
Master Pages: Master pages define the site’s look and feel. In addition, master pages reveal the global elements of the site, such as the top navigation in a default deployment.
Page Layouts: Page layouts provide the definition of the content on each page, as well as the means by which content is stored and made available to content authors and visitors of the site. Page layouts also contain the policies that determine the published content scope and availability, as well as field controls.
Field Controls: Field controls serve the dual purpose of representing content to site users and enabling users to author and revise the content.
Working with master pages
Master pages encompass controls that are responsible for rendering shared elements across virtually every page in a SharePoint site. The elements of a typical site may include:
Navigation menus
Logos
Search fields
Text/HTML controls
Access controls
Custom controls
Master pages also contain references to cascading style sheets (CSS) that define the look and feel of pages in a site. Most of the pages in a site collection use the same master page to apply a consistent brand, although a single site collection may also utilize multiple master pages for different sites in the site collection. In this case it may be necessary to create a custom master page to apply a unique look and feel for the site and its pages.
The master page gallery provides storage for the master pages at the site collection level. A master page gallery is available upon installation of Microsoft Office SharePoint Server 2007 and the creation of a site collection.
The master page gallery is a document library, and as such has all the features of a document library including versioning, page creation, approval, and workflow. Every site in the site collection is linked to its master page gallery. You can access the master page gallery by following these steps:
1. | From any page within the top-level site of your MOSS 2007 site collection, click Site Actions. |
2. | Choose Modify All Site Settings from the Site Settings menu. |
3. | Within the Galleries section, click the Master pages and page layouts link. |
The master page gallery lists all of your master pages and layout pages available to the site collection.
Modifying a master page
Modifying a master page demonstrates how powerful and useful the master page is for Web publishing. In this exercise, you will modify the Global Links area in the top right portion of an existing master page to include a link to a privacy policy for the site.
1. | Open Microsoft Office SharePoint Designer 2007. |
2. | Click File
|
3. | In the Folder List, expand the _catalogs node, and then expand the masterpage (Master Page Gallery) folder. Note The best practice for modifying master pages at the site collection level is to create a new master page in the master page gallery by copying and pasting the source master page to a new name. Tip It is also possible to open the master page for editing by opening the Master Page Gallery, and then selecting Edit in Microsoft Office SharePoint Designer from the drop-down menu. |
4. | |
5. | Click Yes when prompted to check out the master page for editing. |
6. | Open the master page in Split view to so that you can see both the page code and page design, as shown in Figure 11.2. |
7. | In the Design pane, click the location on the page where you want to insert your privacy link. |
8. | In the Code pane, add a table cell and the hyperlink to the privacy policy page, as shown in Figure 11-3. |
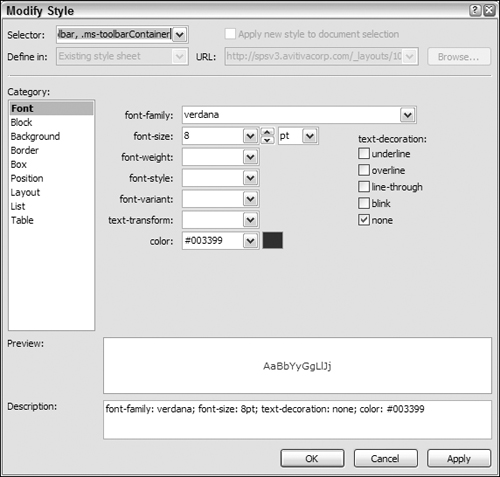
9. | Switch to the Design pane and highlight the new table cell. Choose the CSS class to be applied to the new cell in the Apply Styles pane, and then click to apply the class, as shown in Figure 11.4. |
10. | Save the page and then click Yes in the Site Definition Page Warning box. |
11. | Right-click the customized page and check it in to the Master Page Gallery, adding notes if you want to track what changes were made on the version. |
12. | Refresh the page and review the changes made. Verify that the link appears throughout the site. |


Discovering page layouts
A page layout provides a structured approach for displaying authored content on pages within a portal site by provisioning elements on the page. These may include rich HTML controls that allow authors to add and edit content through a Web browser, or they could be the building blocks of a custom Web Part page depending on your requirements. The combination of master pages and page layouts further the simple but powerful possibilities of your publishing portal.
When a SharePoint page is opened in a browser, the corresponding layout page is first combined with the master page. The page contents are then rendered into the field controls on the layout page. Because layout pages display content from a content type’s stored columns, they must be designed for that specific content type. As with master pages, any changes you make to an existing page layout are immediately reflected on all the Web pages that use the page layout, enabling you to update your page authoring framework without having to revise all pages that were previously published.
Administrators may restrict the ability to format Web page content or to add additional elements including images or hyperlinks to site pages to only a select group of page layout administrators. This may be necessary in a controlled environment where style elements are controlled by a centralized CSS so as to provide a uniform experience for the user.
Managing ContentBecause the page layout is applied to the content, the content itself is stored in the columns of the page library. The columns can be site columns or columns defined for just that page library but only content that is stored in site columns can be added to the page layout. To manage the content, you can edit the properties of each page in the page library. This can even be done in bulk mode by showing the library in data sheet mode and editing the columns through the data sheet interface. This functionality is very helpful especially if you want to update a field for several pages like the contact field or scheduling fields. The separation between content and layout also allows you to modify the page layout that is applied to your page content. You can do this by editing the page and selecting a new page layout in the page settings. |
It is possible for administrators to grant or remove these permissions by using Microsoft Office SharePoint Designer or Microsoft Visual Studio 2005 to edit the tags associated with the field controls on a particular layout page. An example of this would be if the page properties for an HTML control are redefined to false, the associated editing commands in Microsoft Office SharePoint Server are removed.
Content types
Content types are reusable definitions of document types. Content types provide definition to documents that share common sets of attributes. These may include many different facets of the content, including:
Document templates
Specific metadata
Document conversion types
Site columns
Defined policies
Workflows
SharePoint document libraries and lists may support multiple content types. Content types relate to page layouts because page layouts use site columns to store the page layout content, and content types define those site columns.
Cross-Ref
For more information about using content types, see Chapter 18.
Creating custom page layouts
In this example, you will create a custom page layout for a corporate newsletter. The first step will be to create custom content types to associate with the new page layout. You’ll create this content type at the site collection level of your publishing site.
1. | Choose Site Actions from the top right corner on the portal home page. |
2. | Choose Modify All Site Settings from the Site Settings menu. |
3. | Choose Site content types in the Galleries section. |
4. | Click Create from the Site Content Type Gallery toolbar. |
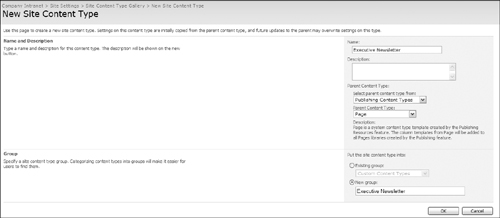
5. | |
6. | Choose Publishing Content Types in the Select parent content type from drop-down menu of the Parent Content Type field. |
7. | Choose Page in the Parent Content Type drop-down menu of the Parent Content Type field. |
8. | Select the New group radio button and enter Executive Newsletter as a name for the new group. Now add columns to the new content type from the Site Columns gallery. |
9. | Click Add from existing site columns from the bottom of the Columns section. |
10. | Add Article Date, Byline, and Page Content from the Available Columns field. Click OK when warned that the Page Content control must be updated by using a Web browser. |
11. | Choose No from the Update List and Site Content Types section and click OK. |
The page layout template will be used to author new executive newsletters. Because new page content is authored within the page layout, all site columns that you want users to fill out for the page must be visible on the page. New page layouts may be created from the site Master Page Gallery or in Microsoft Office SharePoint Designer. Do the following:
1. | Open your portal site in Office SharePoint Designer. |
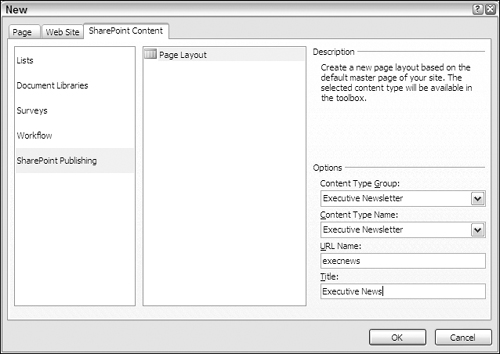
2. | Choose SharePoint Content from the New option in the File menu. |
3. | Choose SharePoint Publishing from the list. |
4. | Choose Executive Newsletter from the Content Type Group and Content Type Name drop-down menus, as shown in Figure 11.6. |
5. | Enter a URL and Title for the new page layout. |
6. | Click OK. |
7. | In the Toolbox pane at the top right, expand the SharePoint Controls (field) node. |
8. | Expand the Pages Fields node, as shown in Figure 11.7. Figure 11.7. Expanding the page fields for use on your page layout
|
9. | Drag the Article Date, Byline, and the Page Content fields into the PlaceHolder Main content placeholder. |
10. | Drag Rollup Image and Title fields from the Page Content section onto the page. |
11. | Save and check in the new page layout. |

Creating pages
Now that you have created a new page layout using a custom content type, you can create a new publishing page ready for use on the site. To do this, follow these steps:
1. | On the site in which you want to publish your new page, choose Create Page from the Site Actions menu. |
2. | Enter today’s date as the Title of the new page. The URL will autopopulate with the title; change the URL if necessary. |
3. | |
4. | Fill out the content fields and click Publish. |

You have now created a new Web-based newsletter using your page layout, ready for content authors to update and publish as needed, and consistently branded for your organization.
Associating page layouts with libraries
Upon creation, the top-level site collection can use any page layouts in the Master Pages and Page Layouts gallery. You can specify which page layouts and subsite templates can be used for this site and any subsites from the top-level site collection settings page. To do this, follow these steps:
1. | Click Site Actions in the top right corner of any page in your top-level site collection site. Choose Modify All Site Settings from the Site Settings menu. |
2. | Choose Page layouts and site templates from the Look and Feel category. |
3. | Choose from the options below:
|
4. | Click OK. |

Enabling page scheduling
Page scheduling allows you to set the start date and end date for each published article. Publishing pages do not have scheduling enabled out-of-box. If this is required in your organization, perform the following steps:
1. | On the site that stores your page library, click View All Site Content from the Quick Launch navigation. |
2. | Choose the Pages library. |
3. | From the Settings menu on the top navigation bar, choose Document Library Settings. |
4. | Choose Versioning settings and enable content approval; verify as well that both major and draft versions are allowed, as shown in Figure 11.10. These settings must be activated in order to enable item scheduling. |
5. | Click OK. |
6. | Choose Manage Item Scheduling. |
7. | |
8. | Click OK. |


You are now able to schedule the publication of pages in this document library. To do this, follow these steps:
1. | On the site that stores your page library, click View All Site Content from the Quick Launch navigation. |
2. | Choose the Pages library. |
3. | On the item that you want to edit the scheduling, choose Edit Properties. |
4. | Enter the Scheduling Start Date (or choose Immediately) and the Scheduling End Date, as shown in Figure 11.12. |
5. | Click OK. |
