
Using Site Templates
Site templates can help users be more productive by creating sites that are already populated with lists, functionality, and some design elements. The product provides many templates for collaboration, meetings, and enterprise functionality. If you design a specific site layout and lists that are helpful to other users, you can publish your own template to the site template gallery as well.
Site templates can be applied to both sub-sites and site collections. The Enterprise site templates are not available in WSS-only installations.
Using collaboration templates
Collaboration templates are focused on creating the elements most often used to facilitate team collaboration. As with all the templates, the goal is to provide something for teams to start with so that they are not looking at a blank site and wondering what to do next.
Team site template
The Team Site Template is the most versatile and most used template, probably because it is the default, top-of-the-list selection. This template hasn’t changed from the WSS v2 template and still provides a basic structure for team collaboration. When you select the Team Site Template, SharePoint creates a site that has a document library, four empty lists, and a discussion board. These are
Shared Documents
Announcements
Calendar
Links
Tasks
Team Discussion
SharePoint also populates the home page with the announcements, calendar, site image, and links list Web Parts on it, as shown in Figure 3.1.

Cross-Ref
For more information about lists, see Chapter 4, and for information about Web Parts, see Chapter 5.
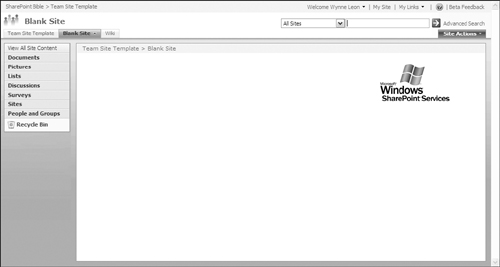
Blank site template
The Blank Site template creates a blank site. No lists and libraries are created, and the default home page is only populated with a site image Web Part. This site is a blank page ready to be populated with your Web Parts of choice. Figure 3.2 shows a site created with the Blank Site template.
Wiki site
As the launch page on a wiki site tells you when you create your first wiki site, wiki means “quick” in Hawaiian and is shown in Figure 3.3. A site created from the Wiki site template has a wiki page library created and is intended for quick Web page editing and collaboration by nontechnical users.

This template is very popular for documenting knowledge because everyone that has rights can contribute content and edit contributed content for accuracy. The Wikipedia project that has been in existence on the Internet since 2001 now boasts 1.3 million entries (August 2006) for English language entries.
There are several typical SharePoint operations that the Wiki template does not support. You cannot change the default text or format on a new wiki page and you cannot make a template of a wiki site. In fact, you can make a template of a wiki site, but creating new sites from that template does not work. The editor in a wiki page works a little differently than the rich text editor that you find in other Web Parts such as the Content Editor Web Part because it does not allow you to pick styles, but you can change font, font size, and font color as well as insert links to other wiki pages, hyperlinks to non-wiki pages and add pictures.
You can create a wiki library on any site and get the same wiki functionality. However, you will have a different left-hand navigation and default page look and feel than a wiki site, which are small differences. If you create a wiki site, your default page has the intro to wiki text on the home page and links for how to use the wiki and recent wiki changes in the left-hand navigation. If you add a wiki library to a different site (a blank site, for example), you will still have a blank home page and the left-hand navigation will be the quick-launch navigation.
Blog
Another new collaboration template in the SharePoint 2007 site gallery is the Blog template. Sites created from the Blog template are ready for you to start adding postings for others to read and comment on. The template creates one library and five lists:
Photos: Image library for storing pictures that you want to share.
Other Blogs: Links list for pointers to other blogs.
Categories: List of categories that you can use to organize your blog. See Chapter 4 to find out more about customizing lists.
Comments: This list stores the comments that are made about a post.
Links: Links list for helpful or related sites.
Posts: The posts list stores the posts made by the author.
The default page is populated with Web Parts that show these lists, as shown in Figure 3.4.

The Blog site template has specialized logic built into it to tie all the lists together (the posts with the comments and categories) so if you want a blog, start with a blog site and add the other site functionality to it. This is different than wikis where you can add a wiki library to just about any site with very similar functionality. The blogs are more touchy, so use the Blog site template if you need one and customize from there.
Records Center (MOSS only)
The Records Center site template creates a site intended to store records that are part of the records management process. Records management is discussed in detail in Chapter 12.
This site template creates four libraries and six lists:
Hold Reports: This library stores the records included in a hold.
Missing Properties: The missing property library stores the documents awaiting users to enter missing metadata.
Records Pending Submission: This library stores records that are missing required metadata.
Unclassified Records: This document library is intended to store records submitted to the records repository but do not match any other record routing entry.
Holds: This list is used to track external actions like litigations, investigations, or audits that require a suspension of record disposition. By listing an item in one or more holds, that item will be suspended until it is no longer managed by holds.
Links: Links lists for resources that you want to share.
Record Routing: The record routing list provides the structure to route incoming records to the appropriate document library.
RecordsCenter: This is an announcement list intended to post messages for your home page audience.
Submitted E-mail Records: This list temporarily stores the received e-mail records.
Tasks: The task list stores the tasks assigned by workflow.
The Record Routing list is integral to the functionality of the Records Repository site template and is viewed on the home page of the site, as shown in Figure 3.5. The list allows you to specify the type of record, the associated title and description of that record type, and the location where you want to store records of that type. In addition, you can specify aliases of other record types that also should be stored in the same location.

Using Publishing Templates
The publishing templates are designed to create sites used for Web publishing so that they have the publishing feature turned on and are populated with the Web Parts and lists to support the publishing process.
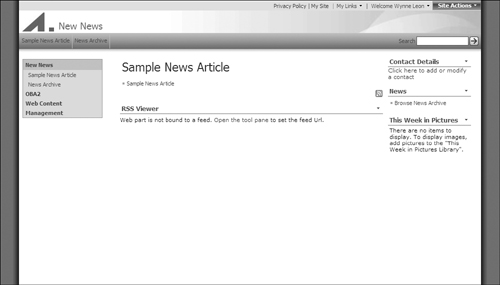
News site template (MOSS only)
The News site template is designed to be a center for news. This includes providing a place for publishing news within an organization and a place for consuming news that is published by other sources. The template creates four libraries and one list:
Documents: Document library for storing documents that might be referenced in news articles published on the site.
Images: Image library for storing images that might be used in news articles published on the site.
Pages: Page library for storing the published pages on the site.
Image Library: Image library for storing images that you use on the site. These images are consumed by the Week in Pictures Web Part that is populated on the home page of the template.
Workflow Tasks: Custom list that stores the workflow tasks assigned by pages published on the site.
The page library on the site is configured to accept all page layouts in the page layout gallery. This can be configured to accept only the page layouts that you want for your news articles. For more detailed information on page layouts and page libraries, see the section “Using Pages and Page Libraries” later in this chapter.
The News site template also populates the home page with the RSS viewer Web Part as shown in Figure 3.6. This is the easiest method to consume news that is published on other sites. If a news source is RSS enabled, you can use the link to subscribe to the RSS feed to populate the RSS viewer Web Part. See Chapter 5 for more information about the RSS viewer Web Part.
Note
Any site with publishing features turned on cannot be saved as a template and reused.
Publishing site with workflow (MOSS only)
The Publishing site template is designed to be a center for publishing pages using the available page layouts. The template creates four libraries:
Documents: Document library for storing documents that might be referenced in pages published on the site.
Images: Image library for storing images that might be used in pages published on the site.
Pages: Page library for storing the published pages on the site.
Workflow Tasks: Custom list that stores the workflow tasks assigned by pages published on the site.
The home page created by the template is a publishing page created with a welcome page layout, as shown in edit mode in Figure 3.7. This page is under publishing control just as other pages created in the page library. For more information on these publishing features, see the “Using Pages and Page Libraries” section in this chapter.
Figure 3.7. A SharePoint site created from the Publishing and team collaboration site template

The team collaboration portion of the site is not populated by the site template, but all the list and library templates are available to create the team collaboration infrastructure necessary for your team.
Note
Any site with publishing features turned on cannot be saved as a template and used.
Publishing site (MOSS only)
The publishing site template is designed to be a center for publishing pages using the available page layouts. The template creates four libraries:
Documents: Document library for storing documents that might be referenced in pages published on the site.
Images: Image library for storing images that might be used in pages published on the site.
Pages: Pages library for storing the published pages on the site.
Workflow Tasks: Custom list that stores the workflow tasks assigned by pages published on the site.
The home page created by the template is a publishing page created with a welcome page. This page is under publishing control just as other pages created in the page library. For more information on these publishing features, see the “Using Pages and Page Libraries” section in this chapter.
This site template limits the lists and libraries that can be created to only those necessary for publishing. However, you can create a sub-site of any template of a publishing site.
Note
Any site with publishing features turned on cannot be saved as a template and used.
Using meeting templates
The meeting templates are designed to enable successful meetings within an organization by providing a workspace for commonly used meeting items. This helps provide meeting organizers and attendees a template for how to prepare and participate in meetings.
Basic meeting workspace
The Basic Meeting template creates a collaborative space for a basic organizational meeting. The template creates four libraries:
Agenda: List storing the agenda items for your meeting.
Attendees: This list stores the attendee names and information about their attendance.
Document library: This library stores documents that support the agenda and topic of the meeting.
Objectives: This list stores the objectives for your meeting.
No left navigation is provided with this template; however, you can create new pages from the Site Actions menu to create a tab across the top navigation, as shown in Figure 3.8. This allows you to expand your meeting space across topics or meeting dates.

Blank meeting workspace
The Blank Meeting template is true to its name. The template creates the attendees list that stores the attendee names and information about their attendance and creates a site with a blank home page. This is one of our least favorite site templates because it is literally a blank page that does not help the user think about the purpose and content of the meeting.
If you use the Blank Meeting workspace, you will want to create additional lists and libraries, and this is possible from the Edit Page options in the Site Actions menu, as shown in Figure 3.9. Unlike most SharePoint sites, the Meeting template sites allow you to create lists from the Web Part menu so that they are created and added to the page at the same time. This is fairly useful if you want to create one of the frequently used meeting lists that are available via that menu. However, if you want to create a list or library other than those, you need to click through to the list creation page. To do this, follow these steps:
1. | On the home page, click the Site Actions menu in the top right corner and select Site Settings. |
2. | From the Site Administration menu, click Site libraries and lists. |
3. | Click Create new content and create new lists and libraries for your meeting. |
Figure 3.9. Creating lists from the Add Web Parts tool pane in a Blank Meeting site

Decision meeting workspace
The Decision Meeting workspace is intended to help organizers and participants drive decisions when participating in a meeting. The template creates five lists and one document library to support this goal:
Agenda: This list stores the agenda items for your meeting.
Attendees: This list stores the attendee names and information about their attendance.
Decisions: This list stores the decisions that are made in the meeting. This is helpful for documenting the contact information for and status of decisions.
Document library: This library stores documents that support the agenda and topic of the meeting.
Objectives: This list stores the objectives for your meeting.
Tasks: This list is created to support the tasks that are assigned during the meeting. Every member of the meeting site can be assigned tasks, and the list will e-mail the assignment to the owner as a reminder. You can modify the e-mail behavior and workflow for tasks; see Chapter 4 for more information.
The site home page is populated with the Web Parts for these lists and libraries so that all the Decision meeting information is visible to participants at a glance, as shown in Figure 3.10.

Social meeting workspace
The Social meeting workspace template is centered on collaborating on the right information for social events. The site template creates one library, three lists, and a discussion board.
Picture Library: This image library stores photos of the event.
Attendees: This list stores the attendees, their responses (accepted, tentative, or declined), their attendance status (required, optional, or organizer) and comments. The attendees are added from the address book.
Directions: The Directions list is a multi-line text field used to store directions to the event.
Things to Bring: This list stores the items that were assigned or volunteered and their owners.
Discussion Board: The Discussion Board is designed to store discussion topics and the associated replies.
The site template populates three pages with the Web Parts for these lists and libraries and provides navigation between the pages via the tabs at the top of the page, as shown in Figure 3.11. The home page is designed for the essential event information and the discussion, and photo tabs display their associated information.
Figure 3.11. A SharePoint site created from the Social meeting workspace template

Multipage meeting workspace
The Multipage meeting template creates a meeting collaborative space that has two pages added when the site is created. The template creates three lists:
Agenda: This list stores the agenda items for your meeting.
Attendees: This list stores the attendee names and information about their attendance.
Objectives: This list stores the objectives for your meeting.
You can rename the pages from the Manage Page option under the Site Actions menu, as shown in Figure 3.12.
Figure 3.12. Managing page names in a multipage site.

Using Enterprise Site templates
The Enterprise Site templates are primarily designed to deploy the features that are available with MOSS, such as search and site directories. The only template in this grouping that is available with WSS is the document center, which appears in the collaboration tab.
Document Center (under Collaboration tab in WSS)
The Document Center template creates lists and libraries focused on sharing and collaborating on documents. The template creates one library and two lists:
Documents: This document library stores documents that you are sharing with your team. The document center creates this as a version-enabled list, and you can also add other SharePoint features such as workflow to the library. See Chapter 8 for more information on workflows.
Announcements: This list stores the announcements for use on the site.
Tasks: This list stores the tasks that are assigned to all team members and can support a workflow created on documents in the document library.
The Document Center home page is focused on showing users the information that they need to see, like their tasks and their documents, as shown in Figure 3.13.

Personalization site
Personalization sites are designed to provide a distinct personalization experience that connects your portal to users’ My Sites. Use this site to push personalized and targeted information to your users based on who they are and why they visit your portal. You should publish information on personalized sites that can be targeted to the individual user or user role, such as performance indicators or business metrics. The personalization site is designed to help you target that information to your users.
The personalization site template creates three libraries and one list:
Documents: This document library stores documents that you are sharing with your team. The Document Center creates this as a version-enabled list with workflow approval enabled. See Chapter 8 for more information on workflows.
Images: Image library for storing images that might be used in pages published on the site.
Pages: This library stores the published pages on the site.
Workflow Tasks: Custom list that stores the workflow tasks assigned by pages published on the site.
After your personalization site is developed, register your site as a Personalization site so that it shows up in the My Site navigation bar for all users. For information about registering your personalization see Chapter 6.
Site Directory area template
The Site Directory area template is designed to help you manage the sites in your organization and the self-service site creation capability. Sites created via self-service are assumed to be associated with the overall portal but not part of the structured navigation of the portal since they are created by end users. The site directory serves to make these loosely structured sites findable, and also allows users to enter links to sites that were created outside the self-service site creation process (perhaps on another portal) that are relevant to the organization.
All sites created from the self-service site directory will be sub-sites to the site directory path. Because of this, a popular place to create a site directory site is at http://<portalname>/sites so that sites created from the site directory site would have a URL like http://<portalname>/sites/<sitename>.
The main functionality of the Site Directory area template comes from the lists that are created, but three document libraries are also created by the Site Directory area template.
Documents: This document library stores documents that you are sharing with your team.
Images: Image library for storing images that might be used in pages published on the site.
Pages: This library stores the published pages on the site.
Sites: The site list is used to store links to sites. You can modify the Division, Region, and Tasks and Tools columns to change the category options presented to the user when creating a new site. This list is configured to require approval so qualified administrators can review links to sites published in the site directory.
Tabs: This list stores links to pages on the site and populates the tab navigation control that can be added on pages, such as the category page shown in Figure 3.14, which is the default page for the site. The links should be to pages that are in the pages document library.
Workflow Tasks: Custom list that stores the workflow tasks assigned by pages published on the site.

Report Center site
The Report Center site template is designed to be a center for metrics associated with your organization. This site should be used to publish information that measures your initiatives and encourages your employees to participate through constant and regular feedback. The features associated with this site template are very powerful and are described in depth in Chapter 15.
The Report Center site template creates six libraries and five lists:
Data Connections: This document library stores files that enable users to connect to external data sources.
Documents: This document library stores documents that you are sharing with your team.
Images: This library stores images that might be used in pages published on the site.
Pages: This library stores the published pages on the site.
Reference library: This library stores information for your users to instruct them how to use the Report Center.
Reports library: The Reports library provides enhanced support for storing and managing reports such as MS SQL Server Reporting Services reports. Reports stored in this library simplify the creation of dashboard pages.
Announcements: This list stores the announcements for use on the site.
Report Calendar: The Report Calendar is intended to store the publishing dates for report items.
Sample KPIs: This list stores some sample key performance indicators stored in SharePoint format. For more information about Key Performance Indicators, see Chapter 16.
Sample Dashboard KPI Definitions: This list stores some sample key performance indicators based on Excel spreadsheets that are included in the Report Center template.
Workflow Tasks: Custom list that stores the workflow tasks assigned by pages published on the site.
The Report Center template not only creates these report-specific lists but also provides a sample of what a Report Center home dashboard might be populated with, as shown in Figure 3.15.

Search Center with tabs
The Search Center template creates pages populated with the search Web Parts so that you create a site that is dedicated to finding content via search. The template creates three libraries and three lists and populates the pages libraries with pages to support simple search, people search, and advanced search.
Documents: This document library stores documents that you are sharing with your team.
Images: This library stores images that might be used in pages published on the site.
Pages: This library stores the published pages on the site.
Tabs in Search Pages: This list stores links to pages on the site and populates the tab navigation control for pages that support the search control. The links should be to pages located in the pages document library.
Tabs in Search Results: This list stores links to pages on the site and populates the tab navigation control for pages that display search results. The links should be to pages that located the pages document library.
Workflow Tasks: This is a custom list that stores the workflow tasks assigned by pages published on the site.
Creating a custom site template
If you customize a site that you want to reuse within your portal as a template, you can make a custom site template and place it in the site template gallery so that other users within the site collection can also access it. The site template includes all the lists and libraries and site customizations such as additional Web Part pages, applied themes, and quick launch customizations. When you create a site template, you choose whether or not you want to include the site content. As noted in the site template descriptions earlier, you cannot create a site template from wiki sites or sites with publishing enabled. Membership of the site is not included as part of the site template, nor is any personalization or alerts. Web Parts that were imported to the site and Web discussions are not included in a site template.
To create a custom site template, you must be an administrator of the site that the template is being created from. Follow these steps:
1. | From the Site Actions menu in the top right corner, select Site Settings. |
2. | Under Look and Feel, click Save site as template. |
3. | Enter the filename that you want to use for the site template in the File name box. Site templates have an .stp file extension. |
4. | Enter the title that you want to use for the template in the site template gallery in the Template name box. |
5. | Enter a description for the site template (optional) in the Template description box. |
6. | If you want to include content, select the Include Content box. |
7. | Click OK. |
8. | From the Site Action menu in the top left corner, select Site Settings. |
9. | From the Galleries menu, select Site templates. |
10. | Right-click your site template file and select Save Target As to save the file to your local machine. |
If you have created a template in a sub-site or different site collection, you will need to upload the file created in the previous steps to the site gallery of the site collection that you want to make the template available in. It is only possible to use a custom template on the same server that the template was created from, so this is not a viable method of moving sites between servers.
To save the site to the site template gallery, you must have “Add item” permissions for the site template gallery. Follow these steps:
1. | Go to the top-level site in the site collection in which you want the template to appear and select Site Settings from the Site Actions menu in the top-left corner. |
2. | From the Galleries menu, select Site templates. |
3. | Click Upload. |
4. | |
5. | Click OK on the edit item menu. |