
When you use forms with items that are foreign keys to other tables, it would be handy to derive the primary key from the lookup table instead of having to enter this ID manually in the text field. Or, when dealing with lots of similar, predefined data, you don't want to enter the same values over and over again. In those cases, you would want to use items like listboxes, quick picks, or lists of values which display the data of the lookup items where the user can easily pick the right value.
In this recipe, we'll create a list of values. A list of values can be a list of predefined static values but it can also be a dynamic list with data retrieved from a table. We will create a static list of values. A list of values is a shared component so it can be used in more pages.
Starting point is an existing application like the one we created. To define a list of values you don't need to have a page. However, to make use of a list of values, you must define an item with a reference to the list of values. We will make a list of values on the JOB column.
There are two ways to start the Create List of Values wizard. The first one is in the edit page.
On the right side of the screen, under shared components, click on the Add icon under list of values.
The second one is via the shared components:
- In the application builder, go to the shared components and then list of values. On the list of values page, click the Create button.
- You can create a list of values from scratch or you can copy an existing list of values and make some modifications to the newly created list of values. In our case, we will create a list of values from scratch. Click Next.
- Enter a name for the list of values, Jobs for example, and select dynamic or static. Choose static and click Next.
In the next step, you can enter the desired values. There are two types of values: the display value and the return value. The display value indicates how it is displayed and the return value is the value which will be returned into the text item the list of values is called from.
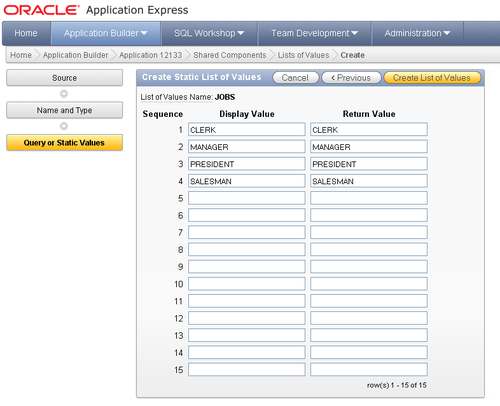
After you have entered the values, click on the Create List of Values button.
The list of values is created and can now be used by items. To assign an existing item to the list of values, go to the page where you want to include your list of values. In this case, we go to the tabular form based on the EMP table, that we created in the recipe called "Create a simple form page" in Chapter 1.
- Click in the regions section on the report link. Click on the pencil icon near the Job column.
- In the tabular form element section, select "select list (named lov)" at the "display as" field.
- Next, in the list of values section, at the named lov field, select the list of values you just created.
- Click on the apply changes button.
- Run the form to see the result. It should look like the following:
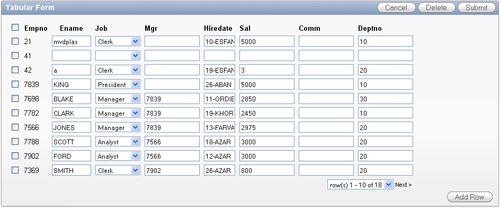
The list of values serves as a source for items types like a list box or pop-up list of values. A list of values contains two columns: a display column and a column with the return value. This return value will be the actual data which will be stored in the item which is assigned to the list of values.
A list item can also be created directly upon a report column or item, but then is not reusable.
Another possibility is to use a previously defined List of Values as a basis when creating a new item. This is useful in situations where you want to reuse a List of Values on more than one occasion. A question that requires the answer Yes or No for example, can return on many pages in an application.
- Go to the page where you want to have the item.
- Right-click on the Items section of the region where the item should go and select Create Page Item.
- In the Select Item Type dialog, click on the Select List.
- In the next step, enter a name for the item. You may also enter a sequence number and the region where the item should appear. Click Next.
- In this step, provide some additional information such as the label, the height, and the alignment. Click Next.
- Next, define what APEX should do when you select some value from the list. You can redirect the user to another page or you can submit the page. Another option in this step is the indication whether APEX should allow multi selection. Leave this option to No and click Next.
- In the next step, enter the name of the existing List of Values that you want to use in the Named LOV field. Leave the other options and click Next.
- In the last step, define the source of the item. Leave the options and click on the Create Item button.