
A web application will look better when you use images. Of course, APEX 4.0 supports the use of images in web pages. You can easily upload images to the APEX host with your FTP client. To connect to the APEX host, see the description at the beginning of this chapter. You should copy your images to the images directory. APEX uses a shortcut or prefix for this path. Mostly it is /i/ but you can change that. Go to shared components and click on the edit definition link on the right side of the screen, under Application. In the name section you can find this image prefix text item where you can modify the prefix. It is advised to always use the substitution string #IMAGE_PREFIX# instead of /i/ when referring to images in templates or button images to safeguard the URI to the images when modifying the virtual directory on the HTTP server (EPG or Apache).
There is another way to upload images to the APEX environment. In the application builder, go to the application you are working on. Click on the Shared components icon. In the Files section, click on the Images link. You have workspace and application images.
- First you have to import the images into the APEX environment.
- There are two ways to import images. We will discuss the images upload via APEX.
- Go to the application builder and select an application.
- Click on the Shared components icon.
- Click on the Images link in the files section at the bottom of the screen.
- Click on the Create button.
- In the next step, you can choose whether the image should be available just for one application or for the entire workspace. If you want your image to be available throughout the entire workspace, leave the application list box to no application associated. Otherwise, select an application. We want the image to be available to the entire workspace, so select No application associated in the Application list box. Click the File button to locate and select the image to be uploaded from your file system.
- Click the Upload button to upload the image. The image will be uploaded and after that you see the icon of the image to indicate that the image file has been successfully uploaded.
- If you want more images to be uploaded, repeat these steps.
First, let's include an image of the company's logo. To include a logo in the top-left corner, follow these steps:
- In the application builder, go to the shared components by clicking the Shared components icon.
- Click the Edit definition link on the right side of the screen, under application.
- Go to the Logo section and select Image as the Logo Type.

- In the logo text field, enter the name of the image. It can be any image file type like a Bitmap (.bmp), a JPEG (.jpg), a PNG (.png) or a GIF (.gif) file. The image filename should be prefixed
#IMAGE_PREFIX#when the image resides as an external resource,#APP_IMAGES#when uploaded as application image and#WORKSPACE_IMAGES#when uploaded as workspace image. We uploaded a workspace image so prefix the image filename with#WORKSPACE_IMAGES#. - In the Logo Attributes text field, you can define the width and height of the image. The logo area in the top-left corner is a fixed height area so if your image is too large, you might set the width and height. In this case, we set it to the following:
Width="200" height="30"
[Img_size.txt]
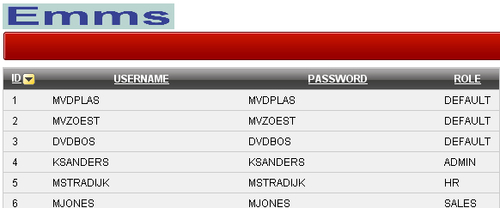
- Run the page. You should see a logo, something like this:
- Now we will include an image in a region, just for the illustration.
Suppose you have an HTML region, you can use the following to show an image:
[Img_wsi_emms.txt]
If you uploaded the image with an application specified, you can use #APP_IMAGES# as well:
<img src="#APP_IMAGES#emms.GIF">
[Img_ai_emms.txt]
However, if you uploaded the image for the workspace, so with no application specified, you can only use #WORKSPACE_IMAGES#.
If you uploaded the images to the images directory using FTP, you can use #IMAGE_PREFIX#. This is a substitution string for the images directory or /i/ if you specified the image prefix.
You can also include images by specifying the complete URL from another website. Create a HTML region and include the following in the region source:
<img src="http://www.example.com/frontpageimage.jpg">
[Img_ex.txt]
Where http://www.example.com/frontpageimage.jpg is the reference to an image on a host. Be careful though, as some website owners don't like it when images on their webpages are used on another webpage. Loading images can be very bandwidth consuming, which in the end can lead to extra costs for the website owners.
When you upload images to APEX, the images are stored in the database. When you use images copied via FTP or copied to the webserver, the files are actually physically there. However, the images that are stored on the webserver load faster and can be cached by the browser.