
Cascading Stylesheets offer an easy way to quickly change the look and feel of a web application. They hold information about colors, sizes, borders, and fonts. Working with stylesheets is a good way to separate the style and the actual content of a webpage. The HTML document should only contain text and HTML tags.
In this recipe, we will make a simple stylesheet, upload it to the APEX environment, and use it in our application. We will change the buttons and the background of the region. All this is done by referencing classes in the stylesheet.
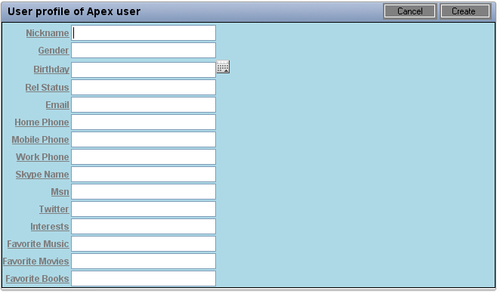
We will use the user profiles page we made in Chapter 1, so make sure this page is ready. For the buttons we will use other background images. You can make them yourself or you can copy some from the Internet (mind the copyrights). You can find them anywhere. Make sure these buttons have the same size as the original buttons. Once you have made the images you have to upload them using the FTP client. Copy the images to the /images/ directory.
For this example, we will use theme 1. If you haven't installed theme 1 yet, follow these steps:
- Go to the shared components.
- In the user interface section, click the themes link.
- Click the Create button.
- Select From the repository and click Next.
- Select theme 1.
- Click the Create button. The theme will now be created but it still isn't the active theme, so click the Switch theme button.
- In the Switch to theme list box, select theme 1 and click Next.
- In the next dialog you see the templates and the status. If the status is OK for all templates, click Next.
- In the last step, click the Switch theme button. Theme 1 is now the active theme and this is indicated by an asterisk (*) near the theme.
- Create a new text file and put the following in it:
.bgregion {
border: 1px solid;
background-color:lightblue;
}
button {
border: 0;
cursor: pointer;
font-weight: normal;
padding: 0 10px 0 0;
text-align: center;
}
button span {
position: relative;
display: block;
white-space: nowrap;
font-size: 13px;
padding: 0 4px 0 15px;
}
button.button_custom {
background: transparent url('../images/rb_a.GIF') no-repeat scroll top right;
color: black;
display: block;
float: left;
font: normal 12px arial, sans-serif;
font-face:bold;
height: 24px;
margin-right: 6px;
padding-right: 18px; /* sliding doors padding */
text-decoration: none;
}
button.button_custom span {
background: transparent url('../images/rb_span.GIF') no-repeat;
display: block;
line-height: 14px;
padding: 5px 0 5px 18px;
}
[buttons.css]
- Save the file and give it a name, that is,
custom_theme.css. - In the application builder, go to the application you are working on.
- Click on the Shared components icon.
- In the Files section, click on the Cascading style sheets link.
- Click the Create button.
- In the next step, click on the File button.
- A file dialog appears. Locate your created custom theme stylesheet and select this file.
- You can also enter some comments in the notes text area. After that, click the Upload button.
- The stylesheet will be uploaded and if you have succeeded, you will see an icon with the name custom_theme.css.
- Go to the application and click on the Userprofiles page.
- In the page section, click on the Edit icon (the pencil on the upper right corner).
- Click Show all.
- In the HTML header and body attribute section, enter the following in the HTML header text area:
<link href="#WORKSPACE_IMAGES#custom_theme.css" rel="stylesheet" type="text/css">
[Link_css.txt]
- This tag will be included in the webpage so that we can reference the styles from the stylesheet. Click the Apply changes button.
- In the Templates section, click on the region template.
- Replace rc-content-main with bgregion. You can find rc-content-main in the div just before the
#BODY#substitution string. - Click the apply changes button.
- Click on the button template.
- In the definition section, replace button-gray with button_custom in the template text area.
- Click the Apply changes button.
- Run the page. You should see other buttons and a light blue background.
In the HTML tags, you can reference to the stylesheet. This can be done in three ways:
- Declare tags in the stylesheet, such as :
H1{font-family: verdana, arial; font-size: 200%; color: darkblue}[Font_verdana.css]
- This causes every <H1> tag in the HTML document to be formatted with an Arial-like font, a font-size of 200%, and in the color dark blue.
- Name the objects in the HTML document and give it the same name as declared in the stylesheet:
#reportarea {background-color:lightyellow}[Bg_ly.css]
- Include a
divin your HTML document and name itreportarea:<div id="reportarea">some text</div>
[Div_reportarea.txt]
- This causes to display a
divwith a light yellow background. - Reference by using classes
- Declare a class in the stylesheet:
.divbackground{border: 1px solid;
background-image:url(background.gif);
background-position:left top;}
[div_bkg.css]
- Include a
divin your HTML document and use the class attribute to reference todivbackground:<div class="divbackground">some text</div>
[Div_class_bkg.txt]
This displays a div with a solid line and a background image with the name background.gif. The image starts at the upper-left corner of the div.
In our webpage, we referenced using classes in the stylesheet. First, we referenced to the bgregion class and for the buttons we referenced the button_custom class.
There are two images used for the buttons. The first image, bg_span.gif is the actual background with the button label. The second image, bg_a.gif will be put on the right side of the first image. In this way, you will see two images that together look like one button. In this way, the button width is variable and dependent on the length of the label.
Be careful when you switch to another theme. You will possibly lose your template settings. You can avoid this by exporting the theme.