
One of the world's most recognized standards in localization is the XLIFF format. XLIFF is the abbreviation for XML Localisation Interchange File Format. As the name explains, it's an XML standard and it has been adopted by Application Express as the format in which different language files can be exported from and imported into APEX applications.
This recipe will show how we can use XLIFF to quickly translate an application from its default language to a new language.
Start with the translatable application that we have built in the first recipe of this chapter. By doing that, we have a good and clean starting point for the first translation.
- Navigate to Shared Components.
At the bottom of the page we can see a section called Globalization. This section holds all options that are needed to translate the current application.
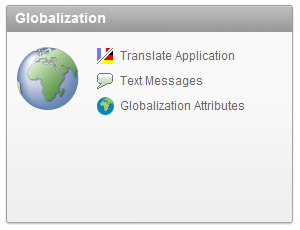
- Click on the link that is labelled Translate Application.
This will open up a new page with several options to use when translating an application. In fact, it's a list of all steps necessary to fully translate the application in APEX.
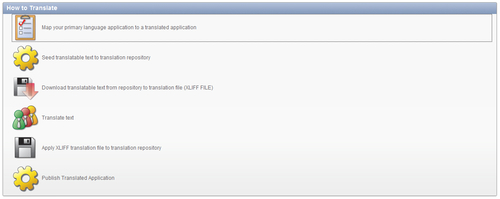
- Click on the first link Map your primary language application to a translated application. This will tell APEX the new language that is going to be used.
- Click the Create button.
- Enter a new application ID that is not yet used by your APEX environment.
- Select the language code that you want to translate to. In this example, we will use 'Dutch (Netherlands) (nl)'.
- Click Create.
The fundament for the new translation is now in place and we can proceed to the next step.
- Return to the Application Translation Home by clicking on the Translate link in the breadcrumb.
- Click the second step called Seed Translatable Text to translation repository.
- Select the Language Mapping that we just created.
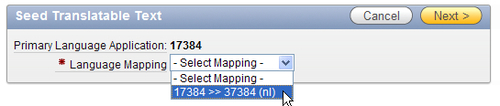
- Click Next.
- Click Seed Translatable Text.
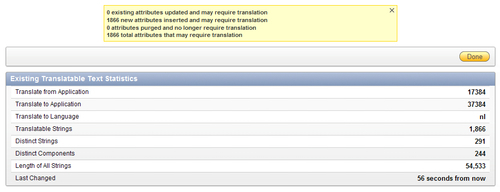
This will create entries in the APEX repository for every translatable text in the application. These entries will be used later to generate the XLIFF files.
After the seeding process is completed, APEX shows an overview with summaries of all relevant figures. Click Done to close this screen.
- Return to the Application Translation Home again by clicking on the Translate link in the breadcrumb.
- Click the third step called Download translatable text from repository to translation file (XLIFF FILE).
The following screen offers two options; download an XLIFF file for the complete application or download a file for a specific page. We will use the second option to get a feeling of what is required to use an XLIFF file.
- In the bottom section called Download XLIFF file for Application Page use the first select list to select the application we are working on.
- In the second select list select page 101 Login.
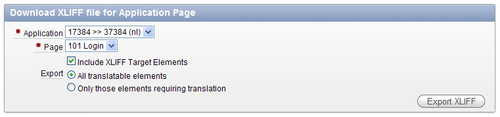
- Press the button Export XLIFF.
- Use the dialogs to save the file to a location on the hard drive.
The XLIFF file has now been downloaded and is ready to be edited. This is the fourth step in the Translation process.
- Use your file browser program to locate the downloaded
.xlffile and open it for editing in your favourite text editor. - Scroll down to the bottom and find the entries with
UsernameandPassword. Change the text between the 'target' tags to the following:<source>Username</source> <target>Gebruikersnaam</target> <source>Password</source> <target>Wachtwoord</target>
By changing these two entries, we will at least be able to see the changes. Feel free to change all other translations as well to see the effect on the login page, but this is not necessary for this recipe.
We will now upload the altered file back into APEX.
- Save the XLIFF file and return to the APEX Application Translation Home.
- Click on the fifth step called Apply XLIFF translation file to translation repository.
- Click the button labelled Upload XLIFF.
- Enter the title en_nl_translation and use the Browse button to find the
.xlffile that we have just edited. - Click Upload XLIFF File.
- Click on the title of the XLIFF file we just uploaded.
- In the next screen, select the translation mapping to apply the XLIFF file to.
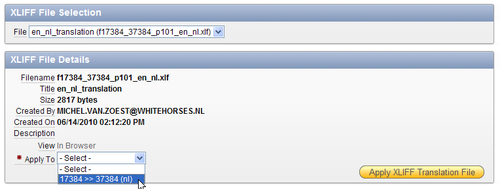
- Click Apply XLIFF Translation File to finish connecting the file to the mapping.
- In the next screen, select the translation mapping again in the select list labelled Publish Application Translation. Note that this is equal to Step 6 in the list on the Application Translation Home.
- Click Publish Application.
We are done with the translation of all APEX texts in this application.
All translatable text is saved in the Application Express Repository. It's possible to directly alter these entries by navigating to a special page.
- Go to Shared Components.
- Go to Translate Application.
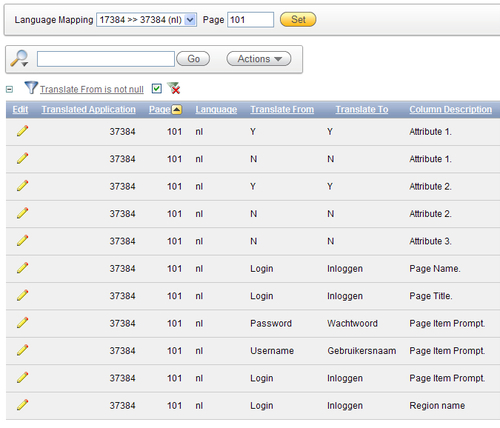
- In the bottom section called Translation Utilities, click on the item Manually Edit Translation Repository.
From there, we can select the right mapping and if desired a single page. Because this is an Interactive Report, we can use filters and other features to find the desired text to translate.
The quickest way to translate a lot of text is still using the XLIFF file. Because this is an international standard, an XLIFF file can be handled by any translation service.
An XLIFF file is always built the same way; a header and a body. The first part of the header shows some information about the file, the original application, and the translation target application. Because this is commented, it will not be used by a processing application.
<?xml version="1.0" encoding="UTF-8"?>
<!--
******************
** Source : 17384
** Source Lang: en
** Target : 37384
** Target Lang: nl
** Filename: f17384_37384_en_nl.xlf
** Generated By: [email protected]
** Date: 15-JUN-2010 14:05:34
******************
-->
The second part of the header shows the version of the XLIFF standard that is used. The latest specification version is 1.2, but APEX still uses 1.0 by default.
<xliff version="1.0">
The third part of the header holds some more information about the file, the source language, and the target language. This information is used by APEX when importing the file.
<file original="f17384_37384_en_nl.xlf" source-language="en" target-language="nl" datatype="html">
<header></header>
After the header the body starts.
<body>
The following part is repeated for every text in the APEX repository: an identification for the item that holds the text, a source in the original language, and a target in the new language.
<trans-unit id="S-2-27846723888160713-17384">
<source>Logout</source>
<target>Uitloggen</target>
</trans-unit>
Finally, the file is closed.
</body>
</file>
</xliff>
There is one thing that you will always have to keep in mind when using XLIFF files for translating an application. Every time something is changed in the application, you will have to repeat the process of seeding, exporting, translating, and importing. Otherwise, not all changes will be visible in the translated version of the application.
So when the translating itself is done by an external company, it would be wise to send them the XLIFF file after the application in the default language is completely done. This could save a lot of money.