
Determining when Sprites Collide with Other Objects
One key programming requirement of many computer games is the ability to determine when a sprite collides with another sprite, the edge of the screen, or the mouse-pointer. Scratch provides the ability to perform collision detection using the three sensing code blocks shown in Figure 6.6.
Figure 6.6. These sensing blocks can be used to look for collisions.
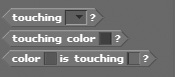
The first code block shown in Figure 6.6 can be used to determine when a sprite makes contact with a specified sprite, the edge of the stage, or the mouse-pointer. The list of objects that this code block can detect is accessible in the block’s drop-down list. As an example of how to work with this code block, modify the previous Scratch application by replacing its script with the one shown here.
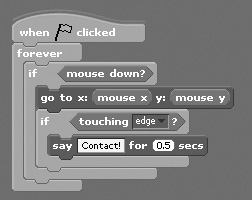
This script demonstrates how to determine when a sprite comes into contact with the edge of the stage. This script executes whenever the green flag button is clicked and uses a forever block to set up a loop that repeatedly executes all embedded code blocks. Within the loop, you’ll find a conditional if block that executes embedded statements when the mouse’s left-button is being pressed.
When this is the case, a motion block is used to make the application’s sprite follow the mouse-pointer around the stage. A second sensing code block is used within another conditional if code block to detect when the sprite makes contact with the edge of the stage. When this occurs, a looks code block is executed, displaying a text message in a voice bubble.
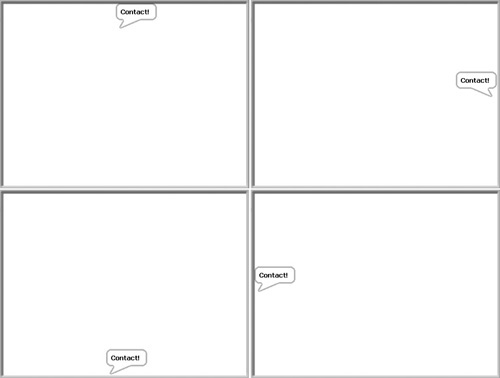
Figure 6.7 demonstrates the output that is displayed when you rerun the application with this new script and move the mouse-pointer to one of the edges of the stage.
Figure 6.7. An example of the text that is displayed whenever the sprite makes contact with the edge of the stage.
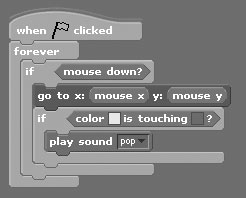
Next, let’s take a look at an example of how to work with the second sensing block shown in Figure 6.7. This code block can be used to detect when a sprite makes contact with a specific color on the stage. To see a working example of how to work with this code block, create a new Scratch application and then create and add a new sprite in the shape of a red rectangle (using the Paint Editor), placing it in the middle of the stage. Next, add a second sprite to the application by clicking on the Choose New Sprite from File button, opening the New Sprite window. Next, drill down into the Fantasy folder and select the dragon1-b sprite and then click on OK. The stage for your new application should now look like the example shown in Figure 6.8.
Figure 6.8. This red square will be used to demonstrate the ability to detect a collision with a specific color on the stage.

Next, add the following script belonging to the sprite representing the dragon. When executed, this script plays an audio file whenever the sprite is moved into contact with the red square in the center of the stage.

Note that to correctly set the color specification in the sensing block, you must click on the color block embedded within the control. This displays a small eyedropper graphic that you can then move to the area on the stage that contains the color you want to detect. Click on that color, and Scratch will automatically change the code block’s color to match the color that you clicked on.
At this point you should have everything set up and ready to run. Go ahead and run the application and then press and hold the left mouse button and move the mouse-pointer on and off of the red rectangle in the middle of the stage and listen for the audio file to be played.
Using the previous code block, you can set up an application to detect a collision any time any part of a sprite comes into contact with a specific color on the stage. In the previous example, this occurs whenever any part of the dragon sprite (head, tail, wings, flames, etc.) comes into contact with the red rectangle sprite.
However, if you prefer, you can use the third sensing code clock shown in Figure 6.6 to set up a more specific type of collision test. Specifically, what this code block does is allow you to specify a color on the sprite that must make contact with another color on the stage for a collision to occur. To get a better understanding of the difference between this code block and the previous sensing code block, look at the following script.
The following script demonstrates how to use the second of these sensing blocks in a script that plays an audio file whenever a specified color within a sprite comes into contact with a specified color on the stage.
In this example, the sensing code block has been replaced. Now, for a collision to occur, the yellow color on the sprite must come into contact with the red color on the stage. If you were to replace the script in the previous application with this script, then the only time a collision will occur is when the yellow flames coming out of the dragon’s mouth touch the red rectangle sprite, as demonstrated in Figure 6.9.
Figure 6.9. Setting up a more restrictive collision test.
