
Creating the Mr. Wiggly’s Dance Application
The rest of this chapter is dedicated to leading you through the development of the Mr. Wiggly’s Dance application. In this Scratch application, a short, round, and comical cartoonish character named Mr. Wiggly dances around the stage to music, as demonstrated in Figure 4.1.
Figure 4.1. Mr. Wiggly practices his dance moves, dancing back and forth across the stage.

Because Mr. Wiggly is bashful, his skin changes color as he dances, as demonstrated in Figure 4.2. Although not immediately obvious when viewed in black and white, if you compare the color of Mr. Wiggly in Figures 4.1 and 4.2, you will notice that he has definitely begun to blush, betraying his discomfort at dancing in front of an audience.
Figure 4.2. The bashful Mr. Wiggly’s skin color changes as he dances.

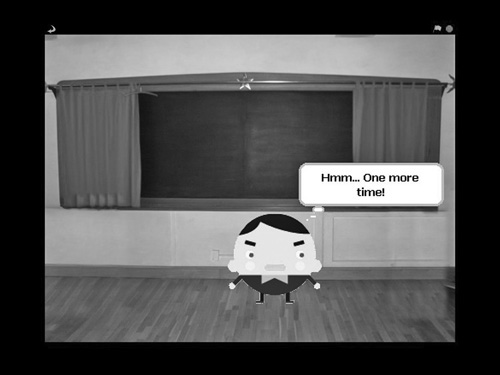
At the end of each dance, Mr. Wiggly pauses for a moment to reflect on how things are going before deciding to keep on dancing, as demonstrated in Figure 4.3.
Figure 4.3. Mr. Wiggly pauses at the end of each dance only to decide to keep dancing.
The Mr. Wiggly’s Dance application project will be created by following a series of steps, as outlined here:
1. | Creating a new Scratch application project. |
2. | Adding a project background. |
3. | |
4. | Importing a music file into the application. |
5. | Scripting audio playback. |
6. | Adding the programming logic required to make Mr. Wiggly dance. |
7. | Saving and executing your work. |
Since this book has yet to provide a detailed explanation of how to work with all of the Scratch code blocks used in this application project, brief explanations will be provided. You will learn the ins and out of programming with code blocks in Chapters 5 through 12. As you make your way through each of the steps in this project, try and keep your focus on the overall process being followed and do not get caught up in the specifics. Later, once you have finished reviewing Chapters 5 through 12, you can always return and review this project again and clear up any questions you may have.
Step 1: Creating a New Scratch Project
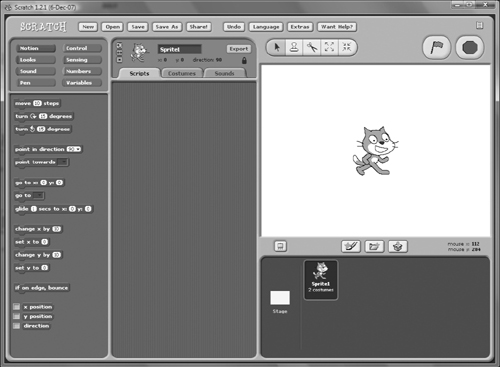
The first step in creating a Scratch project is to start Scratch. Doing so results in the automatic creation of a new Scratch project. New Scratch projects come equipped with a single sprite with two costumes representing a cat. You can choose to incorporate this sprite into your application or to remove it. If, on the other hand, Scratch has already been started and you have been working with it for a while, you can create and open a new Scratch application project by clicking on the New button located on the Scratch menu bar. In response, a new project is opened in the IDE, as shown in Figure 4.4.
Figure 4.4. New Scratch application projects come supplied with a single sprite.
Step 2: Adding a Background to the Stage
With your new Scratch application project now created, it is time to get to work. Let’s begin by adding a suitable background to the stage that will help set the mood of the application. Backgrounds are associated with the stage, so to add a background to your application, you must click on the blank stage thumbnail located in the sprite list. Once selected, the stage thumbnail is highlighted with a blue outline, as shown in Figure 4.5.
Figure 4.5. Selected thumbnails in the sprite list are highlighted with a blue outline.

Once you have selected the stage thumbnail, you can modify its background by clicking on the Backgrounds tab located at the top of the scripts area. When you do so, the currently assigned stage background is displayed, as shown in Figure 4.6.
Figure 4.6. The Backgrounds tab provides the ability to create, import, edit, and rename backgrounds.
To replace the currently assigned blank background with something more interesting, click on the Import button. This will open the Import Background window. Once opened, click on the Indoors folder, select the chalkboard thumbnail, as shown in Figure 4.7, and click on the OK button.
Figure 4.7. Importing a new background into your Scratch application project.

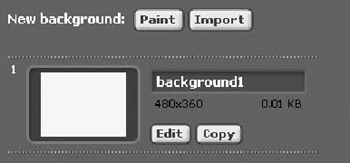
Once imported, the new background will be added to the application’s current list of background files, as shown in Figure 4.8. As you can see, the thumbnail is automatically assigned a name and a number.
Figure 4.8. Scratch applications can have any number of backgrounds and can switch between them during execution.

Since this application only requires one background, you can remove the default blank background named background1 from your project by clicking on the Delete This Costume button, which is located to the right of the background’s picture and represented by a round X button.
Tip
Removing backgrounds, costumes, and sound files no longer needed by your Scratch applications will reduce their size. This can be of critical importance should you decide to upload them to the Scratch website. There is a 10MB project size limit at that site. Graphic and audio files tend to be relatively large, so removing any that you do not need can have a significant impact on the size of your applications.
Step 3: Adding and Removing Sprites
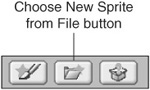
The next step in the development of this Scratch project is to add a sprite representing Mr. Wiggly to the project and to remove the cat sprite, which is not needed in this application. To add the sprite representing Mr. Wiggly, click on the Choose New Sprite from File button, as shown in Figure 4.9. This button is the middle button that makes up the collection of new sprite buttons, located just beneath the stage and just above the sprite list.
Figure 4.9. Click on the Choose New Sprite from File button to access a collection of ready-made sprites.
Scratch provides ready access to all kinds of sprites, organized into the following six folders:
The sprite that you want to use to represent Mr. Wiggly is located in the People folder. Once clicked, the Choose New Sprite from File button instructs Scratch to display the New Sprite window, which provides access to the six folders listed above. Open the People folder and then scroll down until you locate the roundman sprite, as shown in Figure 4.10.

Select the roundman sprite by clicking on it and then click on the OK button. The New Sprite window will close and the new sprite will be added to the middle of the stage, as shown in Figure 4.11.
Figure 4.11. A thumbnail representing the sprite is also added to the sprite list.

When contrasted against the stage’s background, Mr. Wiggly’s default placement in the middle of the stage makes it look like he is floating on air. To put things into proper perspective, drag and drop Mr. Wiggly about one inch lower down the stage, so that it looks like he is standing on the floor.
Since the Mr. Wiggly’s Dance application does not need the default cat sprite, go ahead and remove this sprite from the application project by selecting the Delete button on the Scratch toolbar and then clicking on the thumbnail for the cat located in the sprite list.
Tip
You can also remove the cat sprite from the application by right-clicking on its thumbnail and then selecting Delete from the popup menu that is displayed.
Step 4: Adding Mr. Wiggly’s Music
Now that you have taken care of the sprites needed by the application, it is time to import the sound file. To do this, click on the thumbnail representing the stage in the sprite list and then click on the Sounds tab in the scripts area. In response, Scratch will display all of the sound files belonging to the sprite. By default, every sprite in a Scratch application is assigned a common sound file named pop, as shown in Figure 4.12.
Figure 4.12. All sprites supplied by Scratch come equipped with the same sound file.

Scratch provides ready access to all kinds of prerecorded audio files. The name of the sound file that Mr. Wiggly will dance to is Eggs. To add this file to the sprite, click on the Import button. In response, Scratch will display the Import Sound window, which by default contains eight folders, listed next, in which Scratch stores its audio files.
Animal
Effects
Electronic
Human
Instruments
Music Loops
Percussion
Vocals
Drill down into the Music Loops folder by double-clicking on it. Locate and click on the Eggs file, as shown in Figure 4.13. Scratch will immediately play the file, so you can hear what it sounds like.
Figure 4.13. Importing a sound file into a Scratch application project.

Click on the OK button to import the sound file into your application project, as demonstrated in Figure 4.14. Note that for each sound file, a number of pieces of information are displayed. You can see the name of the file, the length of time that it takes to play the file, and the file’s size. Note that the Eggs sound file takes 16 second to play. You will need to remember this information a little later when programming the playback of this sound file.
Figure 4.14. You can add any number of sound files to a sprite.
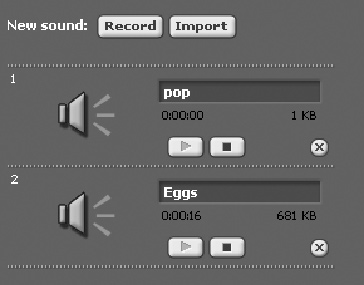
The default pop sound file is not needed by this application; therefore, you can delete it by clicking on the round Delete This Sound button located at the bottom-right side of the sound file entry.
Step 5: Playing the Dance Music
It is time to begin putting together the program code logic required to make your new application work. In total you will need to create two scripts for this project: one for the stage and another for the sprite representing Mr. Wiggly. The script belonging to the stage will be made up of code blocks that are responsible for playing the application’s background music. The script belonging to the sprite will contain the programming logic required to make Mr. Wiggly dance.
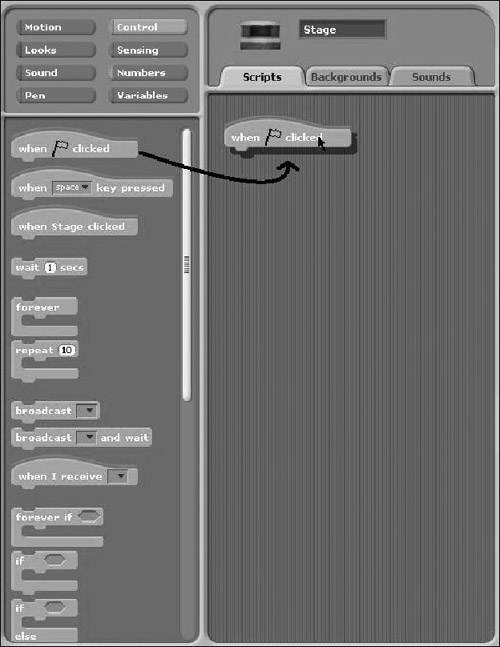
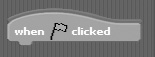
The first step in the development of the stage’s script is to click on the Control button in the blocks palette and then to drag and drop an instance of the when green flag clicked block onto the scripts area, as demonstrated in Figure 4.15. This hat code block will automatically execute the script to which it is attached whenever the green flag button is clicked.
Figure 4.15. This block will be used to automatically execute the script whenever the green flag button is clicked.
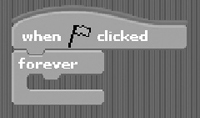
Since the application’s background music is supposed to be played over and over again for as long as the application runs, you need to set up a loop that will repeatedly play the sound file. To set this up, drag and drop an instance of the forever code block to the scripts area, attaching it to the bottom of the when green flag clicked block, as shown in Figure 4.16.
Figure 4.16. The forever block will repeat the execution of any code block that you embed within it.

Now that you have the loop set up, click on the Sound button located at the top of the blocks palette and then drag and drop an instance of the play sound code block onto the scripts area, embedding it inside the forever code block. Next, click on the pull-down menu located on the right-hand side of the code block and select Eggs from the list that appears. At this point the script that you are developing should look like the example shown in Figure 4.17.
Figure 4.17. Using the play sound code block to play back the Eggs sound file.

Note
Scratch automatically populates the play sound code block with a list of all of the sound files that you added previously to the stage, making it easy for you to access them when working with sound code blocks.
At this point you only need to add one last code block to the script to finish it up. To do so, click on the Control button located at the top of the blocks palette and then drag and drop an instance of the wait secs code block over the scripts area, inserting it inside the forever code block, immediately following the play sound block, as shown in Figure 4.18. This block is needed to pause the loop for 16 seconds, allowing for the complete playback of the sound file, before the loop repeats and begins playing it again.
Figure 4.18. Pausing loop execution to allow playback of the sound file to complete.

Note
Now that this script has been written, you can test it out by double-clicking on it. In response, Scratch will repeatedly play back the sound file. Once you are convinced that everything is working correctly, click on the red Stop Everything button to halt the script’s execution so that you can move on to the next step in the development of this application.
Note
In addition to playing an audio file using the combination of the sound and control blocks shown in Figure 4.18, you can instead use the code block shown here, which does the same thing as these two code blocks.
![]()
Step 6: Making Mr. Wiggly Dance
Now that you have finished work on the stage’s script, it is time to write the script that makes Mr. Wiggly dance. To do so, click on the thumbnail of the sprite representing Mr. Wiggly (in the sprite area). In response, Scratch should clear out the script’s area and automatically select the Scripts tab for you so that you can begin script development.
The first step in the development of this is to click on the Control button in the blocks palette and then to drag and drop an instance of the when green flag clicked block onto the scripts area, as demonstrated in Figure 4.19. This hat code block will automatically execute the script to which it is attached whenever the green flag button is clicked.
Figure 4.19. Setting up the script to execute when the green flag is clicked.
In this application, Mr. Wiggly is supposed to dance over and over again without stopping (until the user stops running the application). To set this up, drag and drop an instance of the forever code block onto the scripts area and attach it to the bottom of the when green flag clicked block, as shown in Figure 4.20.
Figure 4.20. Adding a loop to the script to repeat the execution of embedded code blocks.
Next, it is time to add a pair of code statements that will move Mr. Wiggly 25 steps to the right and then pause for two seconds. This is accomplished by dragging and dropping the move steps and wait secs blocks to the scripts area, embedding them inside the forever code block, as shown in Figure 4.21. Note that by default the move steps block is set to 10. You will need to replace this with a value of 25.
Figure 4.21. Adding the programming logic that makes Mr. Wiggly dance his first step.

Next, you need to add a series of move steps and wait secs code blocks, which, when executed, will move Mr. Wiggly 25 steps to the right followed by four moves to the left at 25 steps each and then another two moves back towards the right. This is accomplished by adding seven sets of a code block, as shown in Figure 4.22.
Figure 4.22. Adding the remaining code blocks required to complete Mr. Wiggly’s dance routine.

To complete the development of this script, you need to add two looks blocks, as shown in Figure 4.23. The change effect by code block is used to modify Mr. Wiggly’s color each time the loop finishes its execution, simulating the feeling of embarrassment that Mr. Wiggly experiences when he dances. Lastly, the think for secs code block is used to display a text message in a popup bubble that shows Mr. Wiggly thinking about and then deciding to keep dancing.
Figure 4.23. Modifying Mr. Wiggly’s color and displaying his thoughts.

Step 7: Saving and Executing Your New Scratch Application
At this point your copy of the Mr. Wiggly’s Dance application should be complete. All that remains is for you to save the application and then to execute it and see how it looks when running. To save your application, click on the Save button located on the IDE’s menu bar. In response, Scratch will display the Save Project window, as demonstrated in Figure 4.24, prompting you to specify the name and location where you want to store your new application.
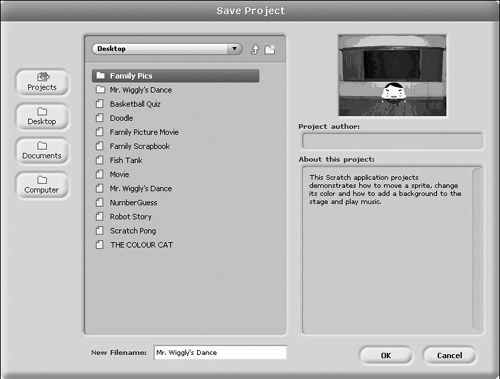
In addition, Scratch provides the opportunity to enter your name as the project author and to enter notes describing the project in the Project Author and About This Project text fields. Once you are done, click on the OK button to save your Scratch application project.
Once you have saved your work, run the application to see how it works. Since both of the application’s scripts are configured to execute whenever the green flag button is pressed, all you have to do is click on that button and sit back and watch as the bashful Mr. Wiggly dances about the stage for your amusement.