
Creating the Family Picture Movie
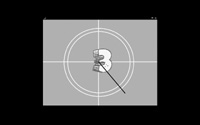
The rest of this chapter is dedicated to showing you how to develop your next application project, the Family Picture Movie. The development of this application provides the opportunity to work further with different sound blocks, controlling sound volume, playback, and playback termination. In total, the application will be made up of 8 sprites and 13 scripts. Figure 11.11 shows how the application looks when initially started.
Figure 11.11. The application begins by displaying a series of numbers, from 5 to 1, on an orange radar screen.
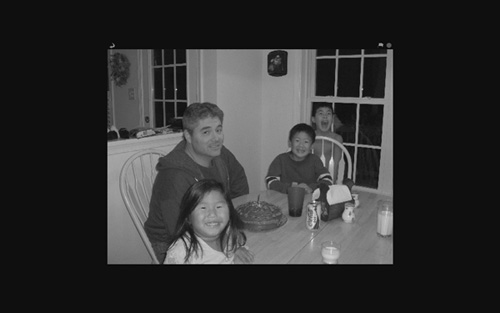
To run the application and view its picture show, all you have to do is click on the green flag button. Once clicked, the application begins an animation sequence that counts down from five and then starts displaying a series of pictures representing the contents of the movie, as demonstrated in Figure 11.12.
Figure 11.12. As the movie plays, a series of pictures is displayed at three-second intervals.
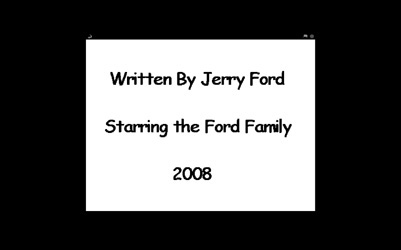
Background music is played to help set a friendly tone as the pictures are displayed. The Family Picture Movie is capable of displaying any number of pictures. Once the movie ends, credits are displayed, as shown in Figure 11.13.
Figure 11.13. Credits are displayed at the end of the movie.
The development of this project will be created by following a series of steps, as outlined here:
1. | Creating a new Scratch project. |
2. | Adding and removing sprites and backgrounds. |
3. | Adding the variable needed by the application. |
4. | Adding an audio file to the application. |
5. | Adding the programming logic to control application execution. |
6. | Saving and executing your work. |
Step 1: Creating a New Scratch Project
To begin the development of the Family Picture Movie, you must create a new Scratch project. If Scratch is not already running, start it up, and you will be ready to go. Otherwise, if you already have Scratch open, click on the New button located on the Scratch menu bar, and a new project will be created for you.
Step 2: Adding and Removing Sprites and Backgrounds
The Family Picture Movie is made up of 8 sprites and 13 scripts, as shown in Figure 11.14.
Figure 11.14. An overview of the different components that make up the Family Picture Movie application.

The application consists of two separate backgrounds: Counter, which is displayed when the application is first started and begins its countdown, and the default blank stage background. A copy of the Counter background can be found on this book’s companion CD. To add it, click on the Stage thumbnail located on the sprite list and then click on the Backgrounds tab located at the top of the scripts area. Next, click on the Import button and use the Import Background window to locate and select the Counter background file. Since the Counter background is going to be used as the application’s initial background, drag and drop its thumbnail from the bottom of the list of background files to the top position.
In addition to the background, the Family Picture Movie makes use of a number of sprites. As shown in Figure 11.15, the first of these sprites is a black line. You can create this sprite yourself using the Paint Editor program, or you can import the Line sprite located on this book’s companion CD. To add this sprite, click on the Choose New Sprite from File button, opening the New Sprite window, and then locate and import the sprite. Once the sprite is added, you need to position it exactly as shown in Figure 11.14.

Note
If you elect to create your own version of the Line sprite, you will need to set the rotation center for the sprite as shown in Figure 11.15.
Next, you need to add five sprites representing numbers displayed during the application’s opening animation sequence. To add the first of these five numbers, click on the Choose New Sprite from File button and then drill down into the Letters folder followed by the Stone folder. Next, select the 5 sprite and click on the OK button. As you will see, the sprite is colored black and white. However, it is supposed to be red and yellow. To fix this, you need to edit the sprite and change its colors. To do this, select the thumbnail representing the sprite and then click on the Costumes tab located at the top of the scripts area. Next, select the sprite’s thumbnail and click on its Edit button, opening it in the Paint Editor program. Using the Fill tool located in the Paint Editor’s toolbar, modify the black portions of the sprite and make them red. Then modify all of the white portions of the sprite, making them yellow. Using the steps outlined above, add the 4, 3, 2, and 1 sprites to the application, editing each one so that they are red and yellow.
Once the initial animation sequence has finished, the Family Picture Movie begins displaying a series of graphics pictures. To add the first of these pictures, click on the Choose New Sprite from File button and then add any graphic files that you want. If you do not have a suitable graphic file handy, you can use the Pics file located on this book’s companion CD. The rest of the pictures shown in the application will be displayed by changing this sprite’s costume. To add additional costumes to the sprite, select the sprite, click on the Costumes tab located at the top of the scripts area, and then click on the Import button, opening the Import Costume window. If you do not have any suitable pictures to be used as backgrounds, you can import the background files provided on this book’s companion CD. These background files have names like IM000327.
The last sprite to be added to the application is a graphic file that displays the application’s credits. You can create and add your own sprite using the Paint Editor program, or you can import the Credits sprite located on this book’s companion CD. Once this sprite has been added, the stage should be filled with different sprites. However, of all of these sprites, only the Line sprite needs to remain visible. To temporarily remove each of the remaining sprites from view, select each sprite one at a time, click on the Looks button located at the top of the blocks palette, and then double-click on the Hide code block. By the time you are done, the stage should look like the example shown in Figure 11.14.
Step 3: Adding a Variable Required by the Application
In order to execute, the Family Picture Movie requires that you define a single variable. To add this variable, click on the Variables button located at the top of the blocks palette, click on the Make a Variable button, and then create a new variable named Counter, as shown in Figure 11.16.
Figure 11.16. The Family Picture Movie uses one variable to help control the opening animation sequence.
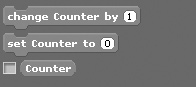
The application will use the variable to control the execution of the application’s opening countdown sequence, coordinating the display of the numbers used during the countdown process.
Step 4: Adding an Audio File to the Application
As it executes, the Family Picture Movie plays background music to set the mood for the application. The script responsible for playing this music belongs to the Pics sprite. To add this audio file to the Pics sprite, select the sprite’s thumbnail in the sprite list and then click on the Sounds tab located at the top of the scripts area. Next, click on the Import button to display the Import Sound window, double-click on the Music Loops folder, select the GuitarChords2 audio file, and then click on OK.
Step 5: Developing the Application’s Programming Logic
The programming logic that drives the execution of the Family Picture Movie is organized into 13 separate scripts, assigned to each of the application’s sprites and to its background. The overall execution of all of this application’s scripts is coordinated through the use of broadcast messages and through the use of control blocks that monitor the value assigned to the application’s variable, executing only when the variable reaches a predefined value.
Setting Up the Opening Animation Sequence
The Family Picture Movie begins running when the player clicks on the green flag button. When this occurs, a number of the scripts within the application begin executing. One of these scripts is responsible for managing the animated sequence that plays when the application first begins executing. This script, shown next, must be added to the Line sprite.

As you can see, this script begins by setting the direction of the Line sprite and then makes it visible. Next, the Counter variable is assigned a starting value of 6, after which a loop is set up to execute five times. Within this loop, a second loop executes 36 times (for a total of 360 degrees), rotating the Line sprite by 10 degrees and pausing .005 second after each turn. The value assigned to Counter is then decremented by a value of –1.
By the time the outer loop has executed five times, five other application scripts, monitoring the value assigned to Counter, are executed. Each of these five scripts is responsible for displaying a number on the stage. The end result is an animated sequence that emulates the countdown that is often displayed at the beginning of old movie reels. Once the countdown has been completed, a second loop executes, rotating the Line sprite one final time around the center of the stage. Once the last loop has finished, the value of Counter is reset to 6 and pointed back to its initial direction. A one-second pause then ensues, and the Line sprite is hidden. Lastly, a control block is used to send a broadcast message of Start Movie. This broadcast message will be used to trigger the execution of two scripts belonging to the Pics sprite, which is responsible for displaying the pictures that make up the application’s picture show.
Displaying the Numeric Countdown
As the previous script executes, it modifies the value assigned to the Counter variable, changing its value from 6 to 1, one number at a time. Each of the five sprites representing the numbers displayed during the opening animation sequence is displayed by scripts belonging to those sprites. The scripts belonging to each sprite are nearly identical. The following script belongs to the Sprite5
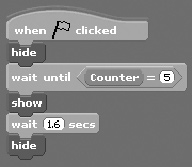
As you can see, it starts executing when the player clicks on the green flag button, which begins by making sure that the sprite is hidden from view. The script then goes into a loop that waits until the value of Counter is set to 5. Once this occurs, the script displays the sprite for 1.6 seconds and then hides it again. After creating this script, drag and drop an instance of it onto the Sprite4, Sprite3, Sprite2, and Sprite1 sprites and then modify the scripts belonging to each sprite by changing the value that is looked for to 4, 3, 2, and 1, respectively.
Switching Costumes and Playing Background Music
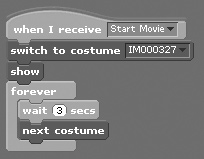
As has been previously stated, the application displays different pictures by changing costumes. In addition, background music is played to help set the mood as the picture show begins. Two separate scripts, belonging to the Pics sprite, are responsible for managing the switching of costumes and the playing of the application’s audio file. Both of the scripts are automatically executed when the Start Movie broadcast message is received.
The first of these two scripts, shown next, manages costume switches. It begins by displaying a default costume of IM000327, which is then displayed on the stage. Next a loop is set up that pauses three seconds and then switches the sprite’s costume to the next costume in the list.
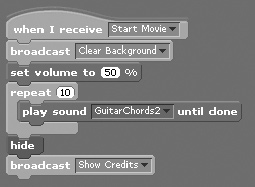
The second script, shown next, begins by sending out its broadcast message of Clear background and then sets the sprite’s value to half its current level. Next, a loop is set up that executes 10 times. Each time the loop executes, an audio file named GuitarChords2 is played. At the end of its tenth execution, the loop halts, and the Pics sprite is hidden. The script ends by sending out a broadcast message of Show Credits.
Note
The Show Credits broadcast message is used as a trigger that executes a script belonging to the Credits sprite.
Displaying the Closing Credits
The Credits sprite has two scripts, as shown next. The first script executes when the green flag button is pressed and is responsible for removing the display of the sprite from the stage.
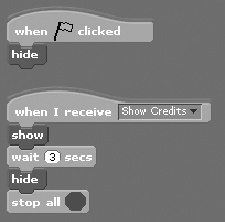
The second script is automatically executed when the Show Credits broadcast message is received. It displays the Credits sprite, waits three seconds, and then hides the sprite, leaving the stage blank. The script ends by executing a control block that halts the execution of the application’s scripts.
Switching Backgrounds
The last two scripts belong to the stage. These scripts are shown next. The first script executes when the green flag button is clicked. Its job is to switch the stage’s background to Counter, readying the application to begin its five-second countdown sequence.
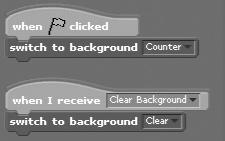
The second of the stage’s scripts automatically executes when the Clear Background broadcast message is received. Once executed, it switches the stage back to the default Clear background.
Step 6: Saving and Executing Your Scratch Project
Assuming you have followed along carefully with the instructions that have been provided, your copy of the Family Picture Movie should be ready for testing. If you have not already saved your new application, do so now. When you are ready, click on the green flag button to run the application and watch the movie. In the event that you run into any problems, go back and recheck your work against the instructions outlined in this chapter.