
Developing the Number Guessing Game Quiz Project
The remainder of this chapter is focused on the development of your next Scratch application, the Number Guessing game. This application will make use of numbers code blocks to generate random numbers for the player to guess and to compare the player’s guesses against the game’s randomly generated number.
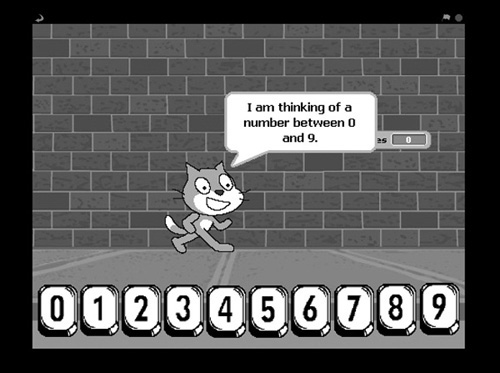
In total, the application is made up of a background, 11 sprites, and 12 scripts. When run, the game will challenge the player to guess a randomly generated number in the range of 0 to 9 in as few guesses as possible. Figure 8.9 shows an example of how the game looks when first started.
To enter a guess, the player must click on one of the button sprites located at the bottom of the stage. The cat provides immediate feedback after each guess, as demonstrated in Figure 8.10.
Figure 8.10. The cat lets the player know when guesses are too high or too low.
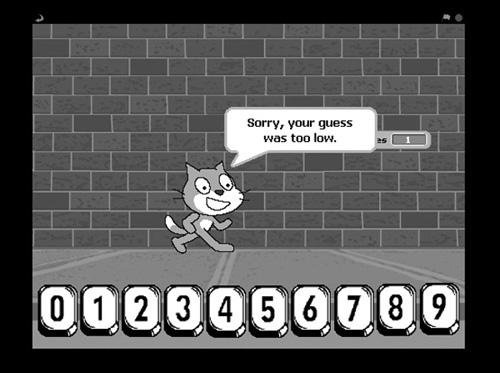
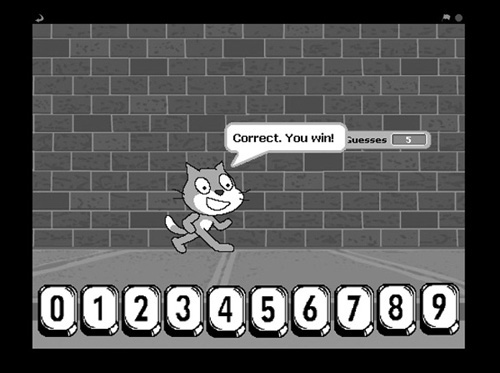
Figure 8.11 shows how the game looks once the player finally manages to guess the game’s secret random number.
The game automatically generates a new random number at the end of each game, in order to ready the game to be played again. The development of this application project will be created by following a series of steps, as outlined here:
1. | Creating a new Scratch application project. |
2. | Adding a background to the stage. |
3. | Adding and removing sprites. |
4. | Adding variables needed by the application. |
5. | Adding an audio file to the application. |
6. | Adding scripts to each button to collect player guesses. |
7. | Adding the programming logic required to process player guesses. |
8. | Saving and executing your work. |
Step 1: Creating a New Scratch Project
The first step in the development of the Number Guessing game is to create a new Scratch application project. To do so, start Scratch, automatically creating a new Scratch project or, if Scratch is already running, click on the New button located on the Scratch menu bar.
Step 2: Adding a Stage Background
The next step in the development of the Number Guessing game is to add a background to the stage. To do so, click on the blank stage thumbnail located in the sprite list and then change its background by clicking on the Backgrounds tab located at the top of the scripts area. Next, click on the Import button and when the Import Background window opens, click on the Outdoors folder. Then select the brick-wall1 thumbnail and click on the OK button. Since the application only needs one background, remove the default blank background, named background1, from your project by clicking on the Delete This Costume button.
Step 3: Adding and Removing Sprites
The Number Guessing game is comprised of the default Cat sprite plus 10 button sprites and a variable monitor, as shown in Figure 8.12.
Figure 8.12. An overview of the different parts of the Number Guessing game.
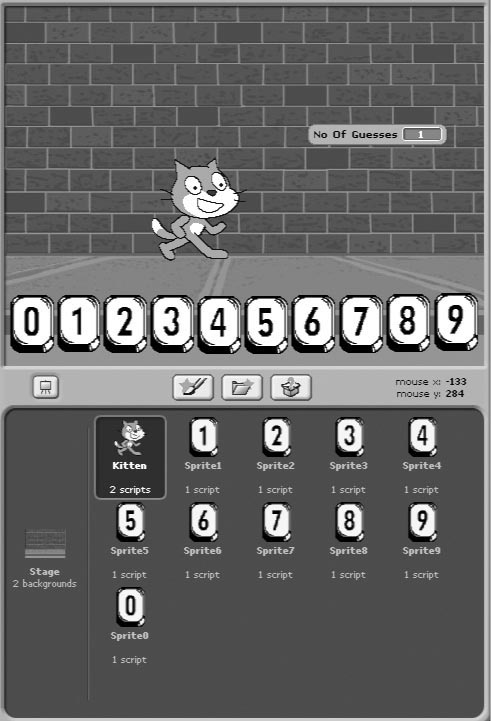
To add the first of the sprites representing the 10 input buttons, click on the Choose New Sprite from File button to open the New Sprite window. Drill down in to the Letters folder and then the Keys folder to select the 0 sprite. Then click on the OK button. Place the sprite in the lower-left corner of the stage, as shown in Figure 8.12. Following this same process, add sprites 1 through 9 to the bottom of the stage as well. At this point, all that is left in the design of the application’s user interface is the display and repositioning of the monitor, which you will do in the next step.
Step 4: Adding Variables Required by the Application
In order to execute, the Number Guessing game requires three variables, as shown in Figure 8.13. To add these variables to the application, click on the Variables button located at the top of the blocks palette and then click on the Make a Variable button three times to define variables named Guess, No Of Guesses, and RandomNo.
Figure 8.13. The Number Guessing game requires three variables.
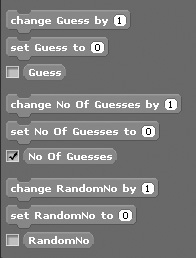
The variable named Guess will be used to store the most recent guess made by the player. The variable named No Of Guesses will be used to keep track of the number of guesses made by the player during each game. The variable named RandomNo will be used to store the game’s randomly generated secret number. Once added, clear the check box controls belonging to the Guess and No Of Guesses variables to prevent their monitors from being displayed. Lastly, drag and drop the monitor for the No Of Guesses variable to the middle right-hand side of the stage.
Step 5: Adding an Audio File to the Application
The Number Guessing game makes use of two audio files that are played as sound effects when the player makes incorrect and correct guesses. The audio file played when the player enters a missed guess is the default pop file, which is automatically included as part of each of the button sprites used in the application. The second audio file is the Fairydust file, which is played whenever the player manages to correctly guess the mystery number.
To add the Fairydust audio file, select the Cat sprite thumbnail in the sprite list and then click on the Sounds tab located at the top of the scripts area. Next, click on the Import button to display the Import Sound window, and then double-click on the Electronic folder, select the Fairydust file, and click on OK.
Step 6: Adding Scripts to Capture Player Input
The programming logic that drives the Number Guessing application is divided into a series of scripts belonging to the application’s sprites. Specifically, small scripts must be added to each of the button sprites to capture and save player guesses. In addition, two scripts must be added to the Cat sprite. These two scripts, which are responsible for starting the game and processing player guesses, will be covered in Step 7.
To begin work on each of the scripts belonging to the button sprites, select the sprite representing the 0 button and then add the following code blocks to it:
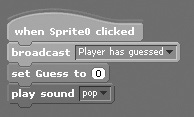
The script begins with a hat block that executes whenever the sprite is clicked (when the player clicks on it as a guess). When this occurs, the second code block in the script sends a Player has guessed broadcast message to the other sprites as a signal that the player has submitted a guess. The Player has guessed must be typed into the control block exactly as shown. A third code block is then used to assign a value to the Guess variable, recording the player’s guess. Note that in this example, setting Guess to 0 indicates that the player has submitted a guess of 0. The last code block in the script plays the default pop audio file, which lets the player know that the guess has been processed.
Note
A broadcast message is a message exchanged between sprites that signals when an event of some type has occurred within an application. Broadcast messages are generated by and received using various control code blocks, which you will learn all about in Chapter 10, “Changing the Way Sprites Look and Behave.” For now, all you need to know is that this application uses broadcast messages in order to coordinate activity and keep track of what is occurring within the game.
The scripts that need to be added to the rest of the button sprites are almost identical to the script that you just added. The only difference is that you need to modify the value that is set in the third code block to properly reflect which button sprite each script belongs to. The easiest way to add these scripts to the other nine button sprites is to drag and drop an instance of the first script onto each of the nine other sprites and then to select each sprite, one at a time, and modify the value of the third code block accordingly.
Step 7: Processing Player Guesses
Once scripts have been added to all 10 of the button sprites, it is time to create the two scripts belonging to the Cat sprite. The first of these scripts is shown next and is responsible for initializing the game and getting it ready to play.
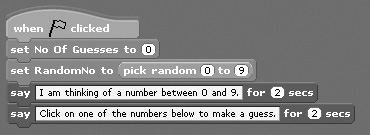
This script is executed when the player clicks on the green flag button. It begins by assigning an initial value of 0 to No Of Guesses and then assigns a randomly generated value in the range of 0 to 9 to a variable named RandomNo. Lastly, it displays a pair of messages that inform the player that the cat is thinking of a number and challenges the player to try to guess it.
The second and final script to be added to the Cat sprite is shown next. This script is automatically executed whenever the Player has guessed broadcast message is received. This happens when the player clicks on one of the 10 button sprites. First, the script modifies the value assigned to No Of Guesses by increasing it by 1. This allows the application to keep track of the number of guesses that the player has made in the current game.

The rest of the script is made up of code blocks embedded within a control block. The control block begins by evaluating the value assigned to the Guess variable to see if it is equal to the value assigned to the RandomNo variable. If this is the case, a series of code blocks embedded within the upper portion of the control block are executed. If this is not the case, code blocks embedded in the bottom of the control block are executed.
The code statements located in the upper half of the control block, which execute when the player enters a correct guess, perform the following actions:
Play the Fairydust audio file that was added to the Cat sprite back in Step 5
Notify the player that the game has been won
Pause script execution for one second
Reset the value of No Of Guesses to 0
Challenge the player to play again
If, on the other hand, the player enters an incorrect guess, the code blocks embedded at the bottom of the script are executed. These code blocks are organized into two separate control blocks. The first control block evaluates the value assigned to Guess to see if it is less than RandomNo, and if it is, a message is displayed that informs the player that the guess was too low. The second control block determines if the value assigned to Guess is less than RandomNo, and if it is, a message is displayed that informs the player that the guess was too high.
Step 8: Saving and Executing Your New Scratch Application
At this point, you now have all the information that you need to create your own copy of the Number Guessing game. If you have not already done so, save your new Scratch project. Once saved, switch to Presentation mode, run the game, and put it through its paces. Remember to begin game play by clicking on the green flag button and following the instructions provided by the Cat sprite.