Uploading Your Scratch Applications
The first step in sharing a Scratch application is to click on the Share! button located at the top of the Scratch IDE, displaying the window shown in Figure 13.4. Begin by keying in your account name and password and then provide a name for your project. Next, enter any notes that you think other Scratch programmers visiting the Scratch website will need to know to work with your application.
Figure 13.4. You can provide detailed information about your applications when uploading them.

Note
In addition to providing instructions about how to work with your application, you should also use the Project Notes area to acknowledge the source of any audio or graphic files that you use in your application.
Scratch also supports an optional tagging feature that you can use to help other Scratch programmers locate your applications when searching the Scratch website. By default, Scratch lets you select any of six predefined tags covering the following categories.
Animation
Art
Game
Music
Simulation
Story
In addition, you can also create as many as four custom tags by supplying keywords that you think best describe your application and its purpose. Once you have finished filling out this window, click on the OK button, and the upload process will begin.
Note
Note the option located at the bottom of the Upload to Scratch Server window. This option is automatically selected by default. It instructs Scratch to compress any sound and image files that make up your application before uploading them to the Scratch website. Compressing audio and image files during upload has no effect on the files stored on your computer. This is in direct contrast to the compress sounds and compress images commands provided by the Extras button on the Scratch IDE. These two commands compress any audio and graphic files used in your application.
Once it is compressed, you cannot uncompress a sound or graphic file, so you should plan on maintaining an original copy of your media files someplace for safekeeping. Given the ability to automatically compress sounds and images on the fly when uploading your Scratch applications, there is very little need for the commands provided on the Extras button.
Once an upload is started, a dialog window similar to the one shown in Figure 13.5 is displayed, allowing you to track the progress of the upload process.
Figure 13.5. Scratch keeps you abreast of what is happening as it uploads your applications.

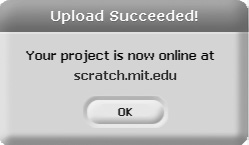
One the upload process has completed, the dialog window shown in Figure 13.6 will be displayed.
Figure 13.6. You can click on the scratch.mit.edu link to launch your browser and view your uploaded applications.

If you want, you can click on the blue scratch.mit.edu link located in the middle of the dialog window to automatically open your browser and log yourself into the home page of the Scratch website, where you will find your uploaded application waiting on you, as demonstrated in Figure 13.7.

