
Creating the Family Scrapbook Application
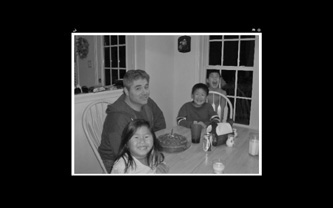
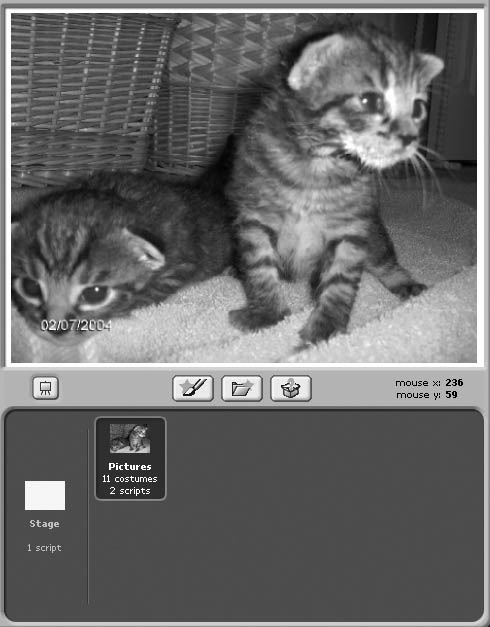
The remainder of this chapter will guide you through the development of your next Scratch application, an electronic family scrapbook. In total, this application will consist of one sprite, a blank stage, and three scripts. Once created, you can use this application to display any number of electronic photographs in an automated photo album that displays pictures at three-second intervals. Each picture in the application is actually just a costume added to the application’s sprite. Figures 6.16 and 6.17 show how the application looks when displaying two of the photo book’s pictures.
Figure 6.16. An example of one of the sprite’s costumes.
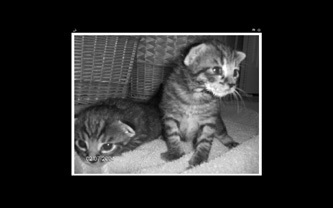
Figure 6.17. Another example of one of the sprite’s costumes.
The development of this application project will be created by following a series of steps, as outlined here:
1. | Creating a new Scratch application project. |
2. | Adding and removing sprites and costumes. |
3. | Importing a sound file into the application. |
4. | Adding the programming logic required to play background music. |
5. | Adding the programming logic required to manage the display of photographs. |
6. | Saving and executing your work. |
Step 1: Creating a New Scratch Project
The first step in creating the Family Scrapbook project is to create a new Scratch application project. Do so either by opening Scratch, thereby automatically creating a new Scratch application project, or by clicking on the New button located on the Scratch menu bar.
Step 2: Adding and Removing Sprites and Costumes
This application consists of a single sprite, which will be used to display all of the application’s photographs (as costumes). Therefore, the default cat sprite will not be needed and should be removed. After removing the cat sprite, click on the Choose New Sprite from File button to open the New Sprite window. Using this window, navigate to the folder containing the electronic image files (photographs) that you plan on displaying, and then select one of these files to be used as the application’s sprite.
Click on the thumbnail representing the new sprite (in the sprites list) and then click on the Costumes tab located at the top of the scripts area. Next, click on the Import button, opening the Import Costume window. Using this window, add another picture to the application. Repeat this process as many times as necessary to add all of the image files that you want to be included as part of the family scrapbook, as demonstrated in Figure 6.18.
Figure 6.18. You can add as many pictures as you want to the sprite’s list of costumes.

Step 3: Adding a Suitable Audio File to the Stage
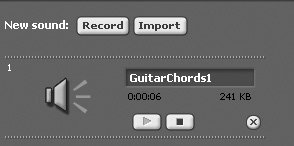
To make the Family Scrapbook application more enjoyable, let’s add a little background music to help set the mood. To add the music file, select the stage thumbnail in the sprites list and then click on the Sounds tab located at the top of the scripts area. Next, click on the Import button to display the Import Sound window and then double-click on the Music Loops folder and then select the GuitarChords1 audio file and click on OK, adding the sound file to the application project, as shown in Figure 6.19.
Figure 6.19. Adding background music to be played when the application executes.
Step 4: Playing the Audio File
The next step in the development of the application project is to begin adding the programming logic. In total, you will need to add three scripts to the project, one for the stage and two for the application’s sprite.
The script to be added to the stage will be responsible for playing the application’s background music. To create this script, click on the stage thumbnail located in the sprites list and then select the Scripts tab located at the top of the scripts area. Next, add and configure the following code blocks exactly as shown here.
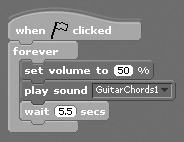
This script manages the repeated playback of the application’s audio file for as long as the application is run. Audio file playback is performed using a pair of sound blocks, which you will learn about in Chapter 11, “Spicing Things Up with Sounds.”
Step 5: Displaying the Photographs
Now it is time to add the programming logic that is responsible for displaying all of the photographs that make up the Family Scrapbook. To set this up, you need to add a small script to the application’s sprite that specifies the programming logic required to automate the display of all of the application’s photographs, at three-second intervals. In addition, you will add a second script to the application that will allow the user to manually control the display of the application’s photographs.
Scripting the Operation of the Family Scrapbook
The code blocks that are responsible for automating the operation of the scrapbook are shown here:
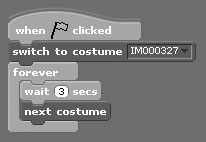
This script is automatically executed when the user clicks on the green flag button. When this happens, a looks block is executed. This block specifies a specific costume to be displayed when the application is first started (the first costume in the costume list). Next, a loop is set up that repeatedly executes the two statements embedded within it. The first code block located inside the loop pauses the script’s execution for three seconds, after which a second looks block is used to switch the sprite’s costume to the next costume in the sprite’s costume list.
Allowing for the Manual Operation of the Family Scrapbook
If the user prefers, rather than viewing photographs in the Family Scrapbook as an automated slideshow, the contents of the scrapbook can be manually browsed by clicking on the application’s sprite, which causes the next costume (photograph) to be displayed. To provide the user with this manual option, add the following script to the application’s sprite.

Step 6: Saving and Executing Your New Scratch Application
Okay, assuming that you have been following along and creating your copy of the Family Scrapbook application as you made your way through this chapter, then your copy of the Family Scrapbook application should look something like the example shown in Figure 6.20.
Figure 6.20. The completed application consists of a blank stage and a single sprite with 11 costumes and two scripts.
So, if you have not done so yet, save your new application by clicking on the Save button located on the Scratch menu bar. This will display the Save Project window, allowing you to name the application and specify the location where you want to store it. Once saved, switch to Presentation mode, click on the green flag button, and kick back and enjoy listening to and watching your new application. Alternatively, start clicking on the application’s sprite and go through the contents of the Family Scrapbook at your own pace.