Right out of the box, Mac OS X comes with a healthy assortment of nearly 50 freebies: programs for sending email, writing documents, doing math, even playing games. Some are dressed-up versions of Mac programs that have been around for years. Others, though, are new programs that not only show off some of Mac OS X’s most dramatic new technologies, but also let you get real work done without having to invest in additional software.
These programs reside in two important folders on your hard drive: Applications (in the main hard drive window) and Utilities (within the Applications folder). The Applications folder houses the productivity programs; Utilities holds a couple of dozen maintenance programs for setting up printers and network connections, fixing problems on your hard disk, and so on.
Tip
You can jump straight to the Applications folder in the Finder
by pressing Shift-![]() -A, or by clicking the Applications button in
the Finder Sidebar (it’s the icon that looks like an
A). Similarly, Shift-
-A, or by clicking the Applications button in
the Finder Sidebar (it’s the icon that looks like an
A). Similarly, Shift-![]() -U takes you to the Utilities folder.
-U takes you to the Utilities folder.
You might consider adding the Application and Utilities folders’ icons to the right side of your Dock, too, so that you can access them no matter what program you’re in.
This chapter guides you through the most important items in your new software library, one program at a time. (Depending on your Mac model, you may find other programs in your Applications folder; Apple occasionally licenses software from other companies to spice up the collection for certain Mac models.)
The Address Book is a database that stores names, addresses, email addresses, phone numbers, and other contact information. Chapter 6 covers the process of importing your Windows contacts into Address Book, and Chapter 11 can help you use them once they’re there.
This folder contains all of the scripts and tools pertaining to the Mac’s remarkable AppleScript langauge.
Now, AppleScript may be hard for a Windows switcher to grasp right away, because there’s simply nothing like it in Windows. It’s a programming language that’s both very simple and very powerful, because it lets Mac programs send instructions or data to each other.
A simple AppleScript program might perform some simple daily task for you: backing up your Documents folder, for example. A more complex script can be pages long. In professional printing and publishing, where AppleScript enjoys its greatest popularity, a script might connect to a photographer’s hard drive elsewhere on the Internet, download a photo from a predetermined folder, color-correct it in Photoshop, import it into a specified page-layout document, print a proof copy, and send a notification email to the editor—automatically.
Mac OS X comes with several dozen prewritten scripts that are genuinely useful—and all you have to do is choose their names from a menu. “Playing back” an AppleScript in this way requires about as much technical skill as pressing an elevator button.
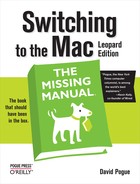
To sample some of these cool starter scripts, you must first bring the Script menu to your menu bar. To do so, see Figure 16-1.
Some of the scripts in this menu operate on familiar components of the Mac OS, like the Finder; others show off applications or features that are new in Mac OS X. Here are a few of the best:
Basics→Open Script Editor launches Script Editor, a program that you can use to edit and write your own AppleScript programs.
Finder Scripts→Add to File Names, Finder→Add to Folder Names. These scripts tack on a prefix or suffix to the name of every file or folder in the frontmost Finder window (or, if no windows are open, on the desktop). Now you’re starting to see the power of AppleScript: You could use this script to add the word draft or final or old to all of the files in a certain folder.
Finder Scripts→Replace Text in Item Names lets you do a search-and-replace of text bits inside file names, folder names, or both. When one publisher rejects your 45-chapter book proposal, you can use this script to change all 45 chapter files from, for example, “A History of Mouse Pads—A Proposal for Random House, Chapter 1" to “A History of Mouse Pads—A Proposal for Simon & Schuster, Chapter 1.”
Info Scripts→Font Sampler is designed to show you what all your fonts look like.
Mail Scripts→Crazy Message Text is Apple at its wackiest. When you run it, a dialog box asks you what message you want to send (“Happy Birthday,” for example). Mail then creates a colorful, zany, outgoing formatted message in which each letter has a random typeface, style, color, and size. It’s ideal for making people think you spent a long time with your Format menu for their entertainment.
Tip
If you’re interested in learning to write your own scripts on the Mac—to control Photoshop, Word, and iChat automatically, for example—a book like AppleScript: The Missing Manual is a near-necessity.
Automator is another program that lets you teach your Mac what to do, step by step. But it’s easier to use than AppleScript, because you don’t have to type any commands. Instead, you assemble a series of visual building blocks called actions. Drag actions into the right order, click a big Run button, and your Mac faithfully runs through the list of steps you’ve given it.
This, too, is a program that most Mac fans will rarely explore. But if you’re curious, by all means download the free appendix to this chapter, called “Automator.pdf.” It’s available on this book’s “Missing CD” at www.missingmanuals.com.
The Mac OS X Calculator is useful for performing quick arithmetic without having to open a spreadsheet, but it can also act as a scientific calculator for students and scientists, a conversion calculator for metric and U.S. measures, even a currency calculator for world travelers.
Here’s everything you need to know for basic math:
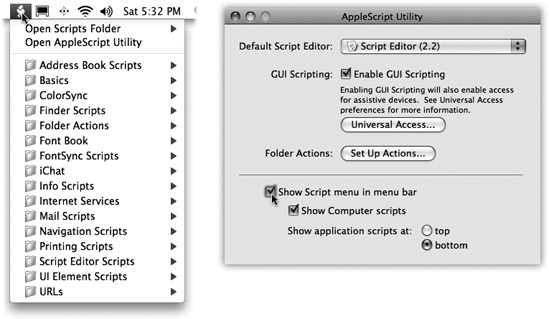
The calculator has three modes: Basic, Advanced (Figure 16-2), and Programmer. Switch among them by choosing the appropriate commands from the View menu (or, more conveniently, using the keyboard shortcuts
 -1, -2, and -3).
Figure 16-2. The Calculator program offers a four-function Basic mode, a full-blown scientific calculator mode, and a programmer’s calculator (shown here, and capable of hex, octal, decimal, and binary notation). The first two modes offer a “paper tape” feature (View→Show Paper Tape) that lets you correct errors made way back in a calculation. To edit one of the numbers on the paper tape, drag through it, retype, and then click Recalculate Totals. You can also save the tape as a text file by choosing File→Save Tape As, or print it by selecting File→Print Tape.
You can operate the Calculator by clicking the onscreen buttons, but it’s much easier to press the corresponding number and symbol keys on your keyboard.
Tip
If you have an older Mac laptop, don’t miss the embedded numeric keypad, superimposed on the right side of the keyboard and labeled on the keys in a different color ink. When you press the Fn key in the lower-left corner of the keyboard, typing these keys produces the numbers instead of the letters.
As you go, you can make your calculator speak each key you press. This is a sensational feature; the Mac’s voice ensures that you don’t mistype as you keep your eyes on the receipts in front of you, typing by touch.
Just choose Speech→Speak Button Pressed to turn this feature on or off. (You can choose the voice in the Speech pane of System Preferences.)
Once you’ve calculated a result, you can copy it (using File→Copy, or
-C) and paste your answer directly into
another program.If you don’t need anything more than a basic calculator, just use the calculator Dashboard widget instead (Dashboard). You can access it from any program by pressing F12 (and, if the calculator isn’t already on the screen, dragging it there from the bar that appears when you click the + button).
Calculator is more than a calculator; it’s also a conversion program for meters, grams, inches, miles per hour, and so on. Proceed like this:
Clear the calculator. Type in the starting measurement.
To convert 48 degrees Celsius to Fahrenheit, for example, type 48.
From the Convert menu, choose the kind of conversion you want.
In this case, choose Temperature. A little dialog box appears.
Use the pop-up menus to specify which units you want to convert to and from.
To convert Celsius to Fahrenheit, for example, choose Celsius from the first pop-up menu, and Fahrenheit from the second.
Click OK.
That’s it. The calculator displays the result—in Fahrenheit, in this example.
Calculator is especially amazing when it comes to currency conversions—from pesos to American dollars, for example—because it does its homework. It goes online to download up-to-the-minute currency rates to ensure that the conversion is accurate. All you have to do is choose Convert→Update Currency Exchange Rates. Then, when you use the Convert→Currency command, your numbers will be the very latest.
Tip
Again, the Dashboard offers a unit-converter widget that’s more useful, because you can access it from any program with a single keystroke (F12).
The Calculator even offers Reverse Polish Notation (RPN), a system of entering numbers that’s popular with some mathematicians, programmers, and engineers, because it lets them omit parentheses. Choose View→RPN to turn it on and off.
Tip
How cool is this? In most programs, you don’t need
Calculator or even a Dashboard widget. Just highlight an
equation (like 56*32.1−517) right in your document, and press
![]() -Shift-8. Presto—Mac OS X replaces the
equation with the right answer. This trick works in TextEdit,
Mail, Entourage, FileMaker, and many other programs.
-Shift-8. Presto—Mac OS X replaces the
equation with the right answer. This trick works in TextEdit,
Mail, Entourage, FileMaker, and many other programs.
And if you ever find that it doesn’t work, remember that the Spotlight menu is now a calculator, too. Type or paste an equation into the Spotlight search box; instantly, the answer appears in the results menu.
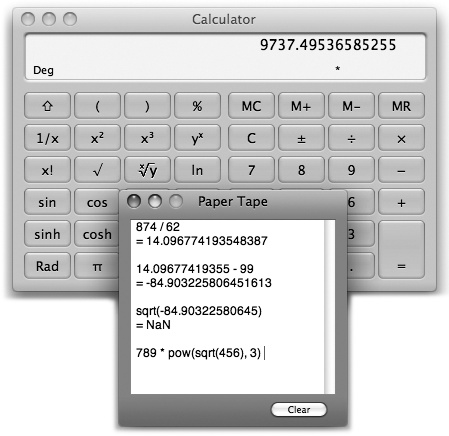
Mac OS X comes with only one game, but it’s a beauty (Figure 16-3). Chess is a traditional chess game played on a gorgeously rendered board with a set of realistic 3-D pieces. You can rotate the board in space, as described in Figure 16-6.
The program is actually a 20-year-old Unix-based chess program, GNU Chess, that Apple packaged up in a new wrapper.
Figure 16-3. You don’t have to be terribly exact about grabbing the chess pieces when it’s time to make your move. Just click anywhere within a piece’s current square to drag it into a new position on the board (shown here in its Marble incarnation). And how did this chess board get rotated like this? Because you can grab a corner of the board and rotate it in 3-D space. Cool!
When you launch Chess, you’re presented with a fresh, new game that’s set up in Human vs. Computer mode—meaning that you (the Human, with the light-colored pieces) get to play against the Computer (your Mac, on the dark side). Drag the chess piece of your choice into position on the board, and the game is afoot.
If you choose Game→New Game, however, you’re offered a pop-up menu with choices like Human vs. Computer, Human vs. Human, and so on. If you switch the pop-up menu to Computer vs. Human, you and your Mac trade places; the Mac takes the white side of the board and opens the game with the first move, and you play the black side.
Tip
The same New Game dialog box also offers a pop-up menu called Variant, which offers three other chess-like games: Crazyhouse, Suicide, and Losers. The Chess help screens (choose Help→Chess Help, click “Starting a new chess game”) explain these variations.
On some night when the video store is closed and you’re desperate for entertainment, you might also want to try the Computer vs. Computer option, which pits your Mac against itself. Pour yourself a beer, open a bag of chips, and settle in to watch until someone—either the Mac or the Mac—gains victory.
In Leopard, Dashboard is a true-blue, double-clickable application. Its behavior doesn’t actually change much as a result—it works exactly as described in Chapter 5, and exactly as it always has. But one perk is that you can remove its icon from your Dock, which you couldn’t do in the pre-Leopard days.
For word nerds everywhere, the Dictionary (and Thesaurus) is a blessing—a handy way to look up word definitions, pronunciations, and synonyms. To be precise, Leopard now comes with electronic versions of seven reference works in one:
The entire New Oxford American Dictionary.
The complete Oxford American Writers Thesaurus.
A new dictionary of Apple terms, from A/UX to widget. (Apparently there aren’t any Apple terms that begin with X, Y, or Z.)
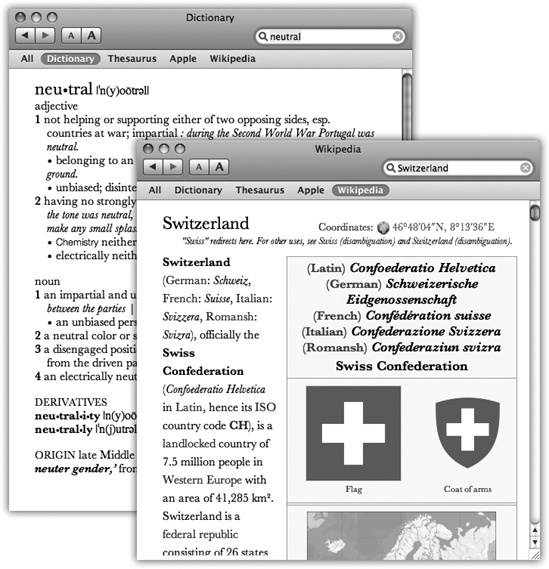
Wikipedia. Of course, this famous open-source, citizen-created encyclopedia isn’t actually on your Mac. All Dictionary does is give you an easy way to search the online version, and display the results right in the comfy Dictionary window.
A Japanese dictionary, thesaurus, and Japanese-to-English translation dictionary.
Tip
You don’t ordinarily see the Japanese reference books. You have to turn them on in Dictionary→Preferences.
Mac OS X also comes with about a million ways to look up a word:
Double-click the Dictionary icon. You get the window shown at top in Figure 16-4. As you type into the Spotlight-y search box, you home in on matching words; double-click a word, or highlight it and press Enter, to view a full, typographically elegant definition, complete with sample sentence and pronunciation guide.
Tip
And if you don’t recognize a word in the definition, click that word to look up its definition. (Each word turns blue and underlined when you point to it, as a reminder.) You can then double-click again in that definition—and on, and on, and on.
(You can then use the History menu, the ◂ and ▸ buttons on the toolbar, or the
-[ and -] keystrokes to go back and forward in
your chain of lookups.)It’s worth exploring the Dictionary→Preferences dialog box, by the way. There, you can choose U.S. or British pronunciations and adjust the font size.
Figure 16-4. When you open the Dictionary, it generally assumes that you want a word’s definition (top left). If you prefer to see the Wikipedia entry (lower right) at startup time instead, for example, choose Dictionary→Preferences—and drag Wikipedia upward so that it precedes New Oxford American Dictionary. That’s all there is to it!
Press F12. Yes, the Dictionary is one of the widgets in Dashboard (Dashboard).
Right-click a highlighted word in a Cocoa program. From the shortcut menu, choose Look Up in Dictionary. The Dictionary program opens to that word. (Or visit the Dictionary’s Preferences box and choose “Open Dictionary panel.” Now you get a panel that pops out of the highlighted word instead.)
Point to a word in a Cocoa program, and then press Control-
-D. That
keystroke makes the definition panel sprout right from the word
you were pointing to. (The advantage here, of course, is that you
don’t have to highlight the word first.)
Tip
Here’s a trick for the informationally thirsty Mac fan (or
speed reader). Once you’ve invoked the Control-![]() -D keystroke, keep the Control and
-D keystroke, keep the Control and
![]() keys pressed. Now drag the cursor across the
text. As you push the mouse around, the definition pops up for every
word you touch.
keys pressed. Now drag the cursor across the
text. As you push the mouse around, the definition pops up for every
word you touch.
Got a big screen or poor eyesight? Then bump up the type size. Dictionary’s toolbar has bigger/smaller buttons, and there’s a Font Size pop-up menu in the Preferences window.
DVD Player, your Mac’s built-in movie projector, is described in Chapter 9.
Like Dashboard, Exposé (Exposé: Death to Window Clutter) has an icon all its own in Applications. Double-clicking it triggers the F9 effect, which means shrinking and moving all open windows around so you can see them simultaneously.
This delightful program lets you install or uninstall fonts, or sets of fonts, as the whim suits you. It’s also great for examining your fonts to see what they look like. Details in Font Book: Installing and Managing Fonts.
For the last few years, most new Mac models have come with a peculiar accessory: a slim white remote control, looking for all the world like an iPod that’s lost too much weight. If you point it at the Mac and press the remote’s Menu button, you’re catapulted into the magic world of Front Row, a special overlay that provides access to your music, photos, movies, and DVD player—with super-big fonts and graphics that are visible from the couch across the room.
It might seem a little bit weird, then, to hear that Front Row, the software, now comes on all Macs, even the ones that didn’t come with a remote control and don’t have an infrared sensor.
That’s because you can operate Front Row entirely from the keyboard—even from across the room, if you have a Bluetooth wireless one. So now even infrared-less Macs like the Mac Pro are invited to the Front Row party.
As shown in Figure 16-5, Front Row is all about drilling down from one menu into another.
Use the arrow keys or the + and − buttons on the remote to choose the activity you’re interested in: Music, Photos, DVD, or Videos. Use the Space bar or the ▸ button as the Enter key to choose that kind of entertainment. You’ll find, to your delight, that Front Row lets you fire up not only all the music you’ve got in iTunes, all the photos in iPhoto, and so on, but also all the music, photos, and videos stored on other Macs on your network (assuming you’ve left iPhoto and iTunes running on those Macs).
Your Mac is now an entertainment center that can be operated from across the room.

Figure 16-5. Front Row is all about drilling down through the menu screens, exactly as on an iPod. Start here, on the main menu. Use the center button on the remote, or the Space bar on your keyboard, to select a command or category and open the next screen. Keep going like that until you’re watching your movies or slideshows, or listening to your music.
Here, then, is the cheat sheet for navigating your Mac’s entertainment collections—whether you have a Front Row remote or not.
How to | Using the Remote | Using the Keyboard |
|---|---|---|
Open and close Front Row | Menu | |
Navigate menus and lists | +, − | |
Return to a previous menu | Menu | Esc |
Select an item in a menu or list | Space bar or Return | |
Play and pause audio or video | Space bar or Return | |
Change volume | +, − | |
Go to the next/previous song, photo, or DVD chapter | ||
Rewind/fast-forward (DVD or movie) |
GarageBand, Apple’s do-it-yourself music construction kit, isn’t actually part of Mac OS X. If you have a copy, that’s because it’s part of the iLife suite that comes on every new Mac (GarageBand, iMovie, iPhoto, iWeb). It’s described in the free 85-page iLife appendix to this chapter, available on this book’s “Missing CD” page at www.missingmanuals.com.
In many ways, iCal is not so different from those “Hunks of the Midwest Police Stations” paper calendars people leave hanging on the walls for months past their natural life span. But iCal offers several advantages over paper calendars. For example:
It can automate the process of entering repeating events, such as weekly staff meetings or gym workout dates.
iCal can give you a gentle nudge (with a sound, a dialog box, or even an email) when an important appointment is approaching.
iCal can share information with your Address Book program, with Mail, with your iPod or iPhone, with other Macs, with “published” calendars on the Internet, or with a Palm organizer. Some of these features require one of those .Mac accounts described in .Mac Services. But iCal also works fine on a single Mac, even without an Internet connection.
iCal can subscribe to other people’s calendars. For example, you can subscribe to your spouse’s calendar, thereby finding out when you’ve been committed to after-dinner drinks on the night of the big game on TV.
Tip
iCal’s Dock icon now displays today’s date—even when iCal isn’t running. That’s reason enough to upgrade to Leopard right there, n’est-ce pas?
When you open iCal, you see something like Figure 16-6. By clicking one of the View buttons above the calendar, you can switch among these views:
Day shows the appointments for a single day in the main calendar area, broken down by time slot.
If you choose iCal→Preferences, you can specify what hours constitute a workday. This is ideal both for those annoying power-life people who get up at 5 a.m. for two hours of calisthenics and the more reasonable people who sleep until 11 a.m.
Week fills the main display area with seven columns, reflecting the current week. (You can establish a five-day work week instead in iCal→Preferences.)
Tip
If you double-click the date above the calendar, you open the day view for that day.
Month shows the entire month that contains the current date (Figure 16-9). Double-click a date number to open the day view for that date.
To save space, iCal generally doesn’t show you the times of your appointments in Month view. If you’d like to see them anyway, choose iCal→Preferences, click General, and turn on “Show time in month view.”
Tip
If your mouse has a scroll wheel, you can use it to great advantage in iCal. For example, when entering a date, turning the wheel lets you jump forward or backward in time. It also lets you change the priority level of a To Do item you’re entering, or even tweak the time zone as you’re setting it.
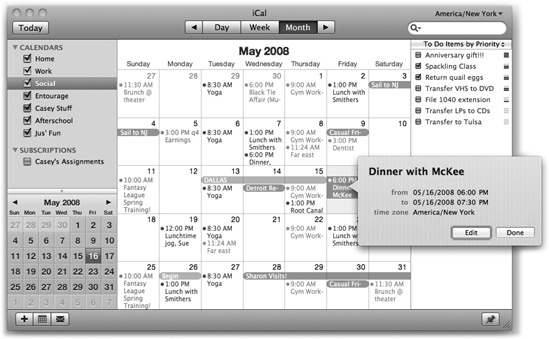
Figure 16-6. In iCal, the miniature navigation calendar (lower left) provides an overview of adjacent months. You can jump to a different week or day by clicking the ◂ and ▸ buttons, and then clicking within the numbers. Double-click any appointment to see the info balloon shown here. You can hide the To Do list either by using the Window→Hide To Dos command or by clicking the thumbtack button identified here.
Calendar (categories)
Summary balloon
Hide/Show notifications
Hide/Show mini-calendar
Add calendar
Hide/Show To Do list
In any of the views, double-click an appointment to see more about it. The very first time you do that, you get the full-blown editing panel shown in Figure 16-7.
After that, double-clicking an event produces only the summary balloon shown in Figure 16-6. If you want to make changes, you can then click the Edit button.
The basic iCal calendar is easy to figure out. After all, with the exception of one unfortunate Gregorian incident, we’ve been using calendars successfully for centuries.
Even so, there are two ways to record a new appointment: a simple way and a more flexible, elaborate way.
You can quickly record an appointment using any of several techniques, listed here in order of decreasing efficiency:
Double-click the appointed time on the calendar, in any view. A colored box appears; this is where you type the name for your new appointment.
When viewing a day or week view, drag vertically through the time slots that represent the appointment’s duration, and then type inside the newly created colored box.
Using the month view, double-click in a blank area of the appropriate date’s square, and then type in the newly created colored bar.
Choose File→New Event (or press
-N). A new appointment appears on the
currently selected day, regardless of the current view.In any view, right-click a date and choose New Event from the shortcut menu.
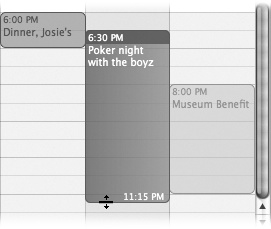
Unless you use the drag-over-hours method, a new event believes itself to be one hour long. But in Day or Week view, you can adjust its duration by dragging the bottom edge vertically. Drag the dark top bar up or down to adjust the start time.
In many cases, that’s all there is to it. You have just specified the day, time, and title of the appointment. Now you can get on with your life.
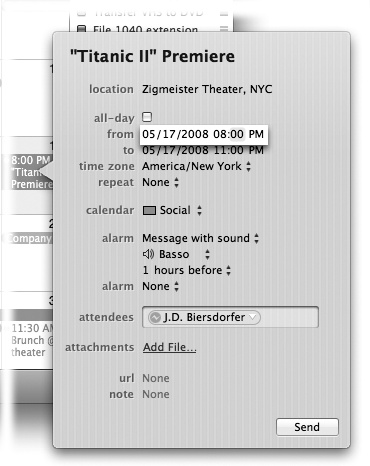
The information balloon shown in Figure 16-7 contains much more detailed information about a certain appointment. It appears when you double-click a newly created appointment.
Tip
After you’ve already edited an appointment once, the full info balloon is a little more effort to open; double-clicking an event produces only the summary balloon shown in Figure 16-6.
The short way to open the full balloon is to click the
appointment, and then press ![]() -E (which is short for Edit→Edit Event).
The long way is to double-click the appointment to get the
summary balloon, and click Edit inside
it.
-E (which is short for Edit→Edit Event).
The long way is to double-click the appointment to get the
summary balloon, and click Edit inside
it.
For each appointment, you can Tab your way to the following information areas:
Subject. That’s the large, bold type at the top—the name of your appointment. For example, you might type Fly to Phoenix.
Location. This field makes a lot of sense; if you think about it, almost everyone needs to record where a meeting is to take place. You might type a reminder for yourself like My place, a specific address like 212 East 23, or some other helpful information like a contact phone number or flight number.
All-day. An “all-day” event, of course, refers to something that has no specific time of day associated with it: a holiday, a birthday, a book deadline. When you turn on this box, you see the name of the appointment jump to the top of the iCal screen, in the area reserved for this kind of thing; see Figure 16-6.
From, to. You can adjust the times shown here by typing, clicking buttons, or both. Press Tab to jump from one setting to another, and from there to the hours and minutes of the starting time.
For example, start by clicking the hour, then increase or decrease this number either by pressing your up and down arrow keys or by typing a number. Press Tab to highlight the minutes and repeat the arrow-buttons-or-keys business. Finally, press Tab to highlight the AM/PM indicator, and type either A or P —or press the up or down arrow key—to change it, if necessary.
Tip
If you specify a different ending date, a banner appears across the top of the calendar.
Time zone. This option appears only after you choose iCal→Preferences→Advanced, and then turn on “Turn on time zone support.” And you would do that only if you plan to be traveling on the day that this appointment comes to pass.
Once you’ve done that, a “time zone” pop-up menu appears. It starts out with “America/New York” (or whatever your Mac’s usual time zone is); if you choose Other, a tiny world map appears. Click the time zone that represents where you’ll be when this appointment comes due. From the shortcut menu, choose the major city that’s in the same zone you’ll be in.
Tip
The “time zone” pop-up menu remembers each new city you select. The next time you travel to a city you’ve visited before, you won’t have to do that clicking-the-world-map business.
Now, when you arrive in the distant city, use the Time Zone pop-up menu at the top-left corner of the iCal window to tell iCal where you are. You’ll see all of iCal’s appointments jump, like magic, to their correct new time slots.
Repeat. The pop-up menu here contains common options for recurring events: every day, every week, and so on. It starts out saying None.
Once you’ve made a selection, you get an end pop-up menu that lets you specify when this event should stop repeating. If you choose “Never,” you’re stuck seeing this event repeating on your calendar until the end of time (a good choice for recording, say, your anniversary, especially if your spouse might be consulting the same calendar). You can also turn on “After” (a certain number of times), which is a useful option for car and mortgage payments. And if you choose “On date,” you can specify the date that the repetitions come to an end; use this option to indicate the last day of school, for example.
“Custom” lets you specify repeat schedules like “First Monday of the month” or “Every two weeks.”
Calendar. A calendar, in iCal’s confusing terminology, is a subset—a category—into which you can place various appointments. You can create one for yourself, another for family-only events, another for book-club appointments, and so on. Later, you’ll be able to hide and show these categories at will, adding or removing them from the calendar with a single click.
Tip
Use this same pop-up menu to change an appointment’s category. If you filed something in “Company Memos” that should have been in “Sweet Nothings for Honey-Poo,” open the event’s information balloon and reassign it. Quick.
Alarm. This pop-up menu tells iCal how to notify you when a certain appointment is about to begin. iCal can send any of four kinds of flags to get your attention. It can display a message on the screen (with a sound, if you like), send you an email, run a script (AppleScript), or open a file on your hard drive. (You could use this unusual option to ensure that you don’t forget a work deadline by flinging the relevant document open in front of your face at the eleventh hour.)
Once you’ve specified an alarm mechanism, a new pop-up menu appears to let you specify how much advance notice you want for this particular appointment. If it’s a TV show you like to watch, you might set up a reminder only five minutes before airtime. If it’s a birthday, you might set up a two-day warning to give yourself enough time to buy a present. In fact, you can set up more than one alarm for the same appointment, each with its own advance-warning interval.
Tip
In iCal→Preferences→Advanced, you can opt to prevent alarms from going off—a good checkbox to inspect before you give a presentation in front of 2,000 people. There’s also an option to stifle alarms except when iCal is open. In other words, just quitting iCal is enough to ensure that those alarms won’t interrupt whatever you’re doing.
Attendees. If the appointment is a meeting or some other gathering, you can type the participants’ names here. If a name is already in your Address Book program, iCal proposes autocompleting the name for you.
If you separate several names with commas, iCal automatically turns each into a shaded oval pop-up button. You can click it for a pop-up menu of commands like Remove Attendee and Send Email. (That last option appears only if the person in your Address Book has an email address, or if you typed a name with an email address in brackets, like this: Chris Smith <[email protected]>.)
Once you’ve specified some attendees, a Send button appears in the Info balloon. If you click it, iCal fires up Mail and prepares ready-to-send messages, each with an iCal.ics attachment: a calendar-program invitation file. See the box below.
Attachment. This new option lets you fasten a file to the appointment. It can be anything: a photo of the person you’re meeting, a document to finish by that deadline, the song that was playing the first time you met this person—whatever.
Url. What Apple really means here, of course, is URL—a Uniform Resource Locator, better known as a Web address like www.apple.com. If there’s a URL relevant to this appointment, by all means type it here. Type more than one, if it’ll help you; just be sure to separate each with a comma.
Note. Here’s your chance to customize your calendar event. You can type, paste, or drag any text that you like in the note area—driving directions, contact phone numbers, a call history, or whatever.
Your newly scheduled event now shows up on the calendar, complete with the color coding that corresponds to the calendar category you’ve assigned.
Once you’ve entrusted your agenda to iCal, you can start putting it to work. iCal is only too pleased to remind you (via pop-up messages) of your events, reschedule them, print them out, and so on. Here are a few of the possibilities.
To edit an event’s details, open its Info balloon, as described in Figure 16-7.
Tip
If you just want to change an event’s name, Option-double-click it right in place.
And if you want to change only an appointment’s “calendar” category, right-click anywhere on the appointment, and, from the resulting shortcut menu, choose the category you want.
In both cases, you bypass the need to open the Info balloon.
You don’t have to bother with this if all you want to do is reschedule an event, however, as described next.
If an event in your life gets rescheduled, you can drag an appointment block vertically in a day- or week-view column to make it later or earlier the same day, or horizontally to another date in any view. (If you reschedule a recurring event, iCal asks if you want to change only this occurrence, or this and all future ones.)
If something is postponed for, say, a month or two, you’re in trouble, since you can’t drag an appointment beyond its month window. You have no choice but to open the Info balloon and edit the starting and ending dates or times—or just cut and paste the event to a different date.
If a scheduled meeting becomes shorter or your lunch hour becomes a lunch hour-and-a-half (in your dreams), changing the length of the representative calendar event is as easy as dragging the bottom border of its block in any column view (see Figure 16-8).
Tip
In week view, if you’ve grabbed the bottom edge of an appointment’s block so that the cursor changes, you can drag horizontally to make an appointment cross the midnight line and extend into a second day.
You should recognize the oval text box at the top of the iCal screen immediately: It’s almost identical to the Spotlight box. This search box is designed to let you hide all appointments except those matching what you type into it.
Just as iTunes has playlists that let you organize songs into subsets, and iPhoto has albums that let you organize photos into subsets, iCal has calendars that let you organize appointments into subsets. They can be anything you like. One person might have calendars called Home, Work, and TV Reminders. Another might have Me, Spouse ‘n’ Me, and Whole Family. A small business could have categories called Deductible Travel, R&D, and R&R.
To create a calendar, double-click any white space in the Calendar list (below the existing calendars), or click the + button at the lower-left corner of the iCal window. Type a name that defines the category in your mind.
Tip
Click a calendar name before you create an appointment. That way, the appointment will already belong to the correct calendar.
To change the color-coding of your category, right-click its name; from the shortcut menu, choose Get Info. The Calendar Info box appears. Here, you can change the name, color, or description of this category—or turn off alarms for this category.
You assign an appointment to one of these categories using the pop-up menu on its Info balloon, or by right-clicking an event and choosing a calendar name from the shortcut menu. After that, you can hide or show an entire category of appointments at once just by turning on or off the appropriate checkbox in the Calendars list.
Tip
iCal also has calendar groups: calendar containers that consolidate the appointments from several other calendars. Super-calendars like this make it easier to manage, hide, show, print, and search subsets of your appointments.
To create a calendar group, choose File→New Calendar Group. Name the resulting item in the Calendar list; for the most part, it behaves like any other calendar. Drag other calendar names onto it to include them. Click the flippy triangle to hide or show the component calendars.
iCal’s Tasks feature lets you make a To Do list and shepherds you along by giving you gentle reminders, if you so desire (Figure 16-9). What’s nice is that Mac OS X maintains a single To Do list, which shows up both in iCal and in Mail.
To see the list, click the pushpin button at the lower-right corner of the iCal screen. Add a new task by double-clicking a blank spot in the list that appears, or by choosing File→New To Do. After the new item appears, you can type to name it.
To change the task’s priority, alarm, repeating pattern, and so on, double-click it. An Info balloon appears, just as it does for an appointment.
Tip
Actually, there’s a faster way to change a To Do item’s priority—click the tiny three-line ribbed handle at the right side of the list. Turns out it’s a shortcut menu that lets you choose Low, Medium, or High priority (or None).
To sort the list (by priority, for example), use the pop-up menu at the top of the To Do list. To delete a task, click it and then press the Delete key.
Tip
You have lots of control over what happens to a task listing after you check it off. In iCal→Preferences, for example, you can make tasks auto-hide or auto-delete themselves after, say, a week or a month. (And if you asked them to auto-hide themselves, you can make them reappear temporarily using the Show All Completed Items command in the pop-up menu at the top of the To Do list.)
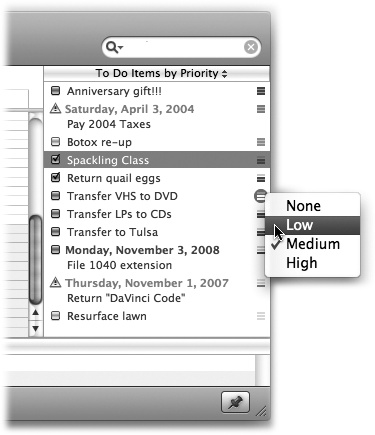
Figure 16-9. Using the To Do Info balloon, you can give your note a priority, a calendar (category), or a due date. Tasks that come due won’t show up on the calendar itself, but a little exclamation point triangle appears in the To Do Items list.
Sorting pop-up
Priority pop-ups
Hide/Show To Do list
Details on the iChat instant-messaging program are in Chapter 12.
iDVD isn’t really part of Mac OS X, although you probably have a copy of it; as part of the iLife software suite, iDVD comes free on every new Mac. iDVD lets you turn your digital photos or camcorder movies into DVDs that work on almost any DVD player, complete with menus, slideshow controls, and other navigation features. iDVD handles the technology; you control the style.
For a primer on iDVD, see the free, downloadable iLife appendix to this chapter, available on this book’s “Missing CD” page at www.missingmanuals.com.
Here’s another pair of the iLife apps—not really part of Mac OS X, but probably kicking around on your Mac because iLife comes with all new Macs.
A basic getting-started chapter for these programs awaits, in free downloadable 85-page PDF form, on this book’s “Missing CD” page at www.missingmanuals.com.
Tip
If that basic guide isn’t enough for you, keep in mind that masterfully written, in-depth guides are available in the form of iMovie ’08 & iDVD: The Missing Manual and iPhoto ’08: The Missing Manual. (Corresponding Missing Manual titles are available for earlier versions of these programs, too.)
iTunes is Apple’s beloved digital music-library program. Chapter 9 tells all.
See Chapter 11 for the whole story.
It may be goofy, it may be pointless, but the Photo Booth program is a bigger time drain than Solitaire, the Web, and Dancing with the Stars put together.
It’s a match made in heaven for Macs that have a tiny video camera above the screen, but you can also use it with a camcorder, external iSight camera, or Webcam. Just be sure that the camera is turned on and hooked up before you open Photo Booth.
Open this program and then peer into the camera. Photo Booth acts like a digital mirror, showing whatever the camera sees—that is, you.
But then click the Effects button. You enter a world of special
visual effects—and we’re talking very special.
Some make you look like a pinhead, or bulbous, or a Siamese twin;
others simulate Andy Warhol paintings, fisheye lenses, and charcoal
sketches (Figure 16-10).
In the Leopard version, in fact, there are five
pages of effects, nine previews on a page; click the left
or right arrow buttons, or press ![]() -left or right arrow key, to see them all. (The
last two pages hold backdrop effects, described
below.)
-left or right arrow key, to see them all. (The
last two pages hold backdrop effects, described
below.)
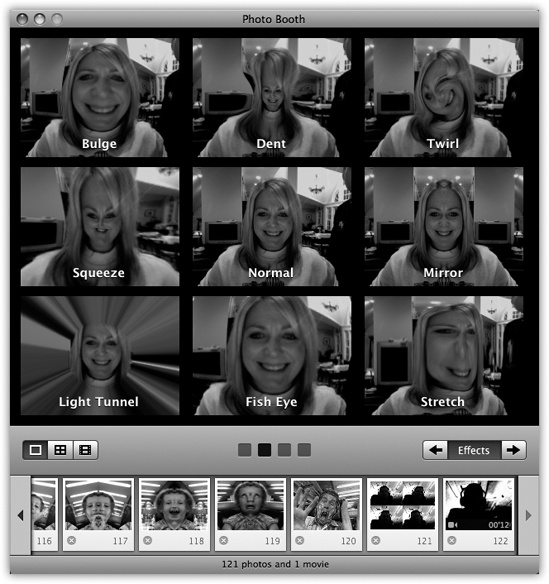
Figure 16-10. The Photo Booth effects must have been dreamed up one night at Apple in the midst of a serious beer party. They’re truly, disturbingly creative. If you decide that you really look best without any help from Apple’s warped imagery, click the Normal icon in the center.
Click an effect
Still
4-Up
Movie
Effects pages
Finished shots (still, 4-up, movie)
Some of the effects have sliders that govern their intensity; you’ll see them appear when you click the preview.
When you find an effect that looks appealing (or unappealing,
depending on your goals here), click the camera button, or press
![]() -T. You see and hear a three-second countdown,
and then snap! —your screen flashes white to
add illumination, and the resulting photo appears on your screen.
Its thumbnail joins the collection at the bottom.
-T. You see and hear a three-second countdown,
and then snap! —your screen flashes white to
add illumination, and the resulting photo appears on your screen.
Its thumbnail joins the collection at the bottom.
Tip
If that countdown is getting on your nerves, Option- click the camera button. You can get rid of the screen flash, too, by Shift- clicking. Needless to say, if you press Option and Shift, you get neither the countdown nor the flash.
If you click the 4-Up button identified in Figure 16-10, then when you
click the Camera icon (or press ![]() -T), the 3-2-1 countdown begins, and then
Photo Booth snaps four consecutive photos in
two seconds. You can exploit the timing just the way you would in a
real photo booth—make four different expressions, horse around,
whatever.
-T), the 3-2-1 countdown begins, and then
Photo Booth snaps four consecutive photos in
two seconds. You can exploit the timing just the way you would in a
real photo booth—make four different expressions, horse around,
whatever.
GEM IN THE ROUGH: Still and Video Backdrops
In Mac OS X 10.5, Photo Booth and iChat are cousins, and they’re closer than ever. One particular feature, in fact, is identical in each: custom backdrops. You can replace the actual, mundane background of your office or den with something far more exciting: a rushing waterfall, for example, or a rider’s-eye view of a roller coaster. In fact, you can use any photo or video you want as the background. It’s just like the bluescreen or greenscreen technology that Hollywood uses to put their actors someplace they’re not—but without the bluescreen or greenscreen.
To replace your background in Photo Booth, click Effects. The third page of effects offers eight canned backgrounds, prepared by Apple for your enjoyment: various spectacular stills (cloudscape, color dots, the moon) and videos (Eiffel Tower plaza, aquarium, roller coaster, tropical beach, Yosemite waterfall).
The final page offers eight empty preview squares. You’re supposed to drag a still or a video from your desktop (or iPhoto) into these empty squares, making them not so empty.
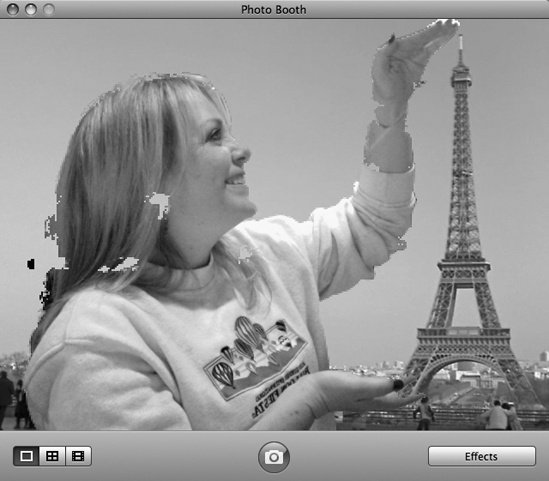
In any case, prepare the backdrop by clicking one of the preview squares. Photo Booth says, “Please step out of the frame.” Do it. Photo Booth is going to memorize what its field of view looks like without you in it, so that when you reappear, it can tell you apart from your boring office background.
Now, when you record the movie or take the photo, you’ll be amazed to discover that Photo Booth has just transplanted you to the far more exotic locale you selected. (Alas, blotches may result if the background includes movement or highly contrasting elements.)
The result is a single graphic with four panes. (In Photo Booth, they appear rakishly assembled at an angle; but when you export the image, they appear straight, like panes of a window.) Its icon plops into the row of thumbnails at the bottom of the window, just like the single still photos.
Here’s another Leopard twist: Photo Booth can now record
videos, complete with those wacky distortion
effects. Click the third icon below the screen, the Movie icon
(Figure 16-10), and
then click the camera button (or press ![]() -T). You get the 3-2-1 countdown—but this
time, Photo Booth records a video, with sound, until you click the
Stop button or the hard drive is full, whichever comes first. (The
little digital counter at left reminds you that you’re still
filming.) When it’s over, the movie’s icon appears in the row of
thumbnails, ready to play or export.
-T). You get the 3-2-1 countdown—but this
time, Photo Booth records a video, with sound, until you click the
Stop button or the hard drive is full, whichever comes first. (The
little digital counter at left reminds you that you’re still
filming.) When it’s over, the movie’s icon appears in the row of
thumbnails, ready to play or export.
To look at a photo or movie you’ve captured, click its thumbnail in the scrolling row at the bottom of the screen. (To return to camera mode, click the camera button.)
Fortunately, these masterpieces of goofiness and distortion aren’t locked in Photo Booth forever. You can share them with your adoring public in any of four ways:
Drag a thumbnail out of the window to your desktop. Or use the File→Reveal in Finder command to see the actual picture or movie files.
Tip
They’re in your Home→Pictures→Photo Booth folder. You’ll find one JPEG apiece for single shots, four JPEG files for a 4-up, and a .MOV movie file for videos.
Click Mail to send the photo or movie as an outgoing attachment in Mail.
Click the iPhoto button to import the shot or movie into iPhoto.
Click Account Picture to make this photo represent you on the Login screen.
Tip
You can choose one frame of a Photo Booth movie to represent you. As the movie plays, click the Pause button, then drag the scroll-bar handle to freeze the action on the frame you want. Then click Account Picture.
Similarly, you can click your favorite one pane of a 4-up image to serve as your account photo—it expands to fill the Photo Booth screen—before clicking Account Picture.
And speaking of interesting headshots: If you export a 4-up image and choose it as your buddy icon in iChat (Chapter 12), you’ll get an animated buddy icon. That is, your tiny icon cycles among the four images, creating a crude sort of animation. It’s sort of annoying, actually, but all the kids are doing it.
As you set off on your Photo Booth adventures, a note of caution: Keep it away from children. They won’t move from Photo Booth for the next 12 years.
Preview is Mac OS X’s built-in graphics viewer, fax viewer, and PDF reader. It’s always been teeming with features that most Mac owners never even knew were there—but in Leopard, it’s a real powerhouse.
Preview’s hallmark is its surprising versatility. It can display and manipulate pictures saved in a wide variety of formats, including common graphics formats like JPEG, TIFF, PICT, and GIF; less commonly used formats like BMP, PNG, SGI, TGA, and MacPaint; and even Photoshop, EPS, and PDF graphics. You can even open animated GIFs by adding a Play button to the toolbar, as described below.
If you highlight a group of image files in the Finder and
open them all at once (for example, by pressing ![]() -O), Preview opens the first one, but lists
the thumbnails of the whole group in the Sidebar. You can walk
through them with the
-O), Preview opens the first one, but lists
the thumbnails of the whole group in the Sidebar. You can walk
through them with the ![]() and
and ![]() keys, or you can choose View→Slideshow
(Shift-
keys, or you can choose View→Slideshow
(Shift-![]() -F) to begin a full-screen slideshow.
-F) to begin a full-screen slideshow.
To crop graphics in Preview, drag across the part of the
graphic that you want to keep. To redraw, drag the round handles
on the dotted rectangle; or, to proceed with the crop, choose
Tools→Crop. (The keyboard shortcut is ![]() -K.)
-K.)
If you don’t think you’ll ever need the original again, save the document. Otherwise, choose File→Save As to spin the cropped image out as a separate file, preserving the original in the process.
Tip
You can also rotate an image—even a PDF document—in 90-degree increments and then flip it vertically or horizontally, using the commands in the Tools menu. In fact, if you select several thumbnails in the Sidebar first, you can rotate or flip them all simultaneously.
Preview is no Photoshop, but it’s getting closer. Let us count the ways:
Choose Tools→Inspector. A floating palette appears. Click the first tab to see the photo’s name, when it was taken, its pixel dimensions, and so on. Click the second one for even more geeky photo details, including camera settings like the lens type, ISO setting, focus mode, whether the flash was on, and so on.
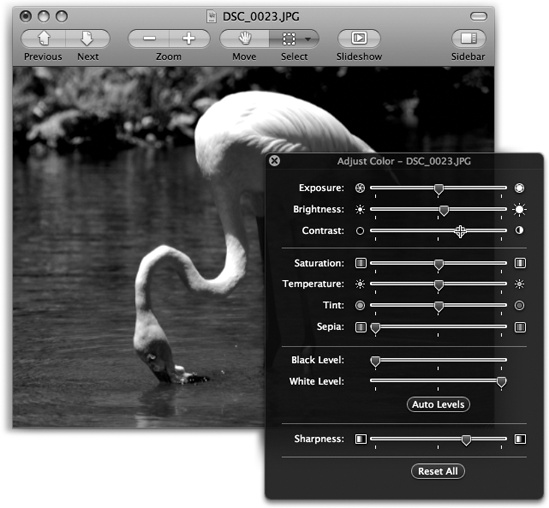
Choose Tools→Adjust Color. A translucent, floating color-adjustment palette appears, teeming with sliders for brightness, contrast, exposure, saturation (color intensity), temperature and tint (color cast), sharpness, and more. See Figure 16-11.
Figure 16-11. Humble little Preview has grown up into a big, strong mini-Photoshop. You can really fix up a photo if you know what you’re doing, using these sliders. Or you can just click the Auto Levels button. It sets all those sliders for you, which generally does an amazing job of making almost any photo look better.
Choose Tools→Adjust Size. This command, new in Leopard, lets you adjust a photo’s resolution, which comes in handy a lot. For example, you can scale an unwieldy 10-megapixel, gazillion-by-gazillion-pixel shot down to a nice 640-by-480 JPEG that’s small enough to send by email. Or you can shrink a photo down so it fits within a desktop window, for use as a window background.
There’s not much to it. Type in the new print dimensions you want for the photo, in inches or whatever units you choose from the pop-up menu. If you like, you can also change the resolution (the number of pixels per inch) by editing the Resolution box.
Preview doesn’t just open all these file formats—it can also convert between most of them. You can pop open some old Mac PICT files and turn them into BMP files for a Windows user, pry open some SGI files created on a Silicon Graphics workstation and turn them into JPEGs for use on your Web site, and so on.
Tip
What’s even cooler is you can open raw PostScript files right into Preview, which converts them into PDF files on the spot. You no longer need a PostScript laser printer to print out high-end diagrams and page layouts that come to you as PostScript files. Thanks to Preview, even an inkjet printer can handle them.
All you have to do is open the file you want to convert and choose File→Save As. In the dialog box that appears, choose the new format for the image using the Format pop-up menu (JPEG, TIFF, PNG, or Photoshop, for example). Finally, click Save to export the file.
The Sidebar slides out from the side of the main Preview window whenever (a) you open a multipage PDF or TIFF file, (b) you highlight a bunch of graphics files in the Finder and open them all at once, or (c) you click the Sidebar button in the Preview toolbar, or choose View→Sidebar. (If your PDF file has been prepared with a table of contents, the Sidebar shows that.)
The idea is that these thumbnails let you navigate pages or graphics without having to open a rat’s nest of individual windows. Figure 16-12 expands on the idea.
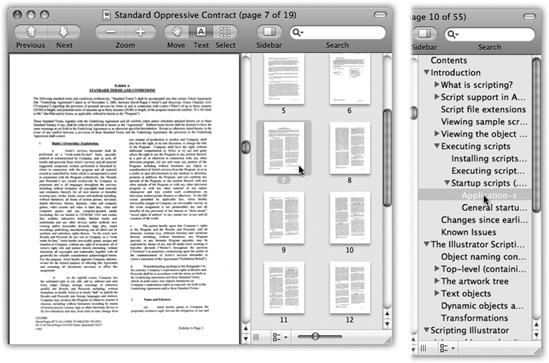
Figure 16-12. Left: To open or close the Sidebar (right), choose
View→Sidebar, press Shift-![]() -D, or click the Sidebar button on the
toolbar. If the toolbar isn’t visible, press
-D, or click the Sidebar button on the
toolbar. If the toolbar isn’t visible, press ![]() -B. Drag the central scroll bar to make the
Sidebar bigger. Right: Some PDF files fill the Sidebar with a
ready-made table of contents instead.
-B. Drag the central scroll bar to make the
Sidebar bigger. Right: Some PDF files fill the Sidebar with a
ready-made table of contents instead.
Preview is a nearly full-blown equivalent of Acrobat Reader, the free program used by millions to read PDF documents. It lets you search PDF documents, copy text out of them, add comments, fill in forms, and click live hyperlinks—features that used to be available only in Adobe’s Acrobat Reader.
Here are the basics:
Use the View→PDF Display submenu to control how the PDF document appears: as two-page spreads; as single scrolling sheets of “paper towel”; with borders that indicate ends of pages; and so on.
Use
-left arrow and -right arrow to page through a document.
(Your Page Up and Page Down keys aren’t quite the same thing;
they shift to the previous or next part of the
same page, if it wasn’t already
visible.)Tip
Some PDF documents include a table of contents, which you’ll see in Preview’s Sidebar, complete with flippy triangles that denote major topics or chapter headings (Figure 16-12, right). You can use the up arrow and down arrow keys alone to walk through these chapter headings, and then expand one that looks good by pressing the right arrow key. Collapse it again with the left arrow key.
In other words, you expand and collapse flippy triangles in Preview just as you do in a Finder list view.
Bookmark your place by choosing Bookmarks→Add Bookmark (
-D); type a clever name. In future, you’ll
be able to return to that spot by choosing its name from the
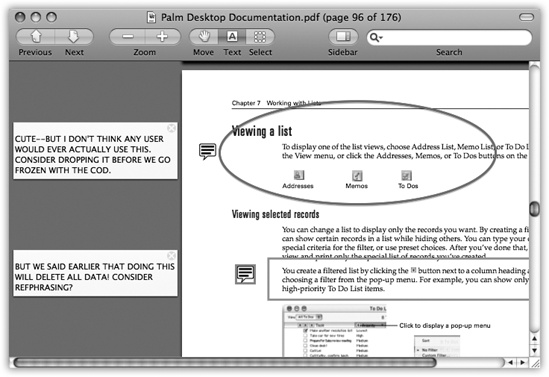
Bookmarks menu.Type in notes, add clickable links (to Web addresses or other spots in the document), or use circles and rectangles to draw your reader’s attention to certain sections, as shown in Figure 16-13. (Those circles and rectangles even work on image files.)
Figure 16-13. Learn the keystrokes for the PDF markings you can make: Oval (Control-
-O), Rectangle
(Control--R), Note (Control--N), or Link (Control--L). That’s a lot faster than using the
Tools→Annotate submenu every time. Hit that keystroke, then
drag diagonally to define a rectangle, oval, or link. Or click
to place a Note icon, and edit that note in the left margin.
You can drag or delete the annotation’s little icon, or adjust
its look using the Tools→Inspector palette.Note
These are full-blown Acrobat annotations; they’ll show up when your PDF document is opened by Acrobat Reader or even on Windows PCs.
Use the Tools→Mark Up submenu to add highlighting, strikethrough, or underlining on whatever text you select.
Turn antialiasing (font smoothing) on or off to improve readability. To find the on/off switch, choose Preview→Preferences, and click the PDF tab. (Though antialiased text generally looks great, it’s sometimes easier to read very small type with antialiasing turned off. It’s a little jagged, but clearer nonetheless.)
Turn on View→PDF Display→Continuous to scroll through multipage PDF documents in one continuous stream, instead of jumping from page to page when you use the scroll bars.
If you want to copy some text out of a PDF document—for pasting into a word processor, for example, where you can edit it—click the Text tool (the letter A on the toolbar) or choose Tools→Text Tool. Now you can drag through some text and then choose Edit→Copy, just as though the PDF document is a Web page. You can even drag across page boundaries.
Tip
Ordinarily, dragging across text selects the text from one edge of the page to the other. But if you want to copy only the first column of several, for example, Option-drag. Preview now lets you drag out any arbitrary selection rectangle, thereby highlighting any block of text you like, ready for copying.
You can save a single page from a PDF as a TIFF file in order to use it in other graphics, word processing, or page layout programs that don’t recognize PDF.
To extract a page, use the usual File→Save As command, making sure to choose the new file format from the pop-up menu. (If you choose a format like Photoshop or JPEG, Preview converts only the currently selected page of your PDF document. That’s because there’s no such thing as a multipage Photoshop or JPEG graphic. But you already knew that.)
To find a word or phrase somewhere in a PDF document, press
-F (or choose Edit→Find→Find) to open the
Find box—or just type into the  box at the top of the Sidebar, if it’s
open. Proceed as shown in Figure 16-14.
box at the top of the Sidebar, if it’s
open. Proceed as shown in Figure 16-14.Add keywords to a graphic or PDF (choose Tools→Inspector, click the
tab, click the + button). Later, you’ll
be able to call up these documents with a quick Spotlight search
for those details.

Dozens of Mac OS X programs can play digital movies in Apple’ s QuickTime format (the rough equivalent of .AVI files in Windows): Word, FileMaker, AppleWorks, PowerPoint, Safari, America Online, and so on.
But the cornerstone of Mac OS X’s movie-, sound-, and photo-playback software is QuickTime Player, which sits in your Applications→QuickTime folder (and comes factory-installed on the Dock). It does exactly what you’d expect: show pictures, play movies, and play sounds. You might think of it as Apple’s take on Windows Media Player.
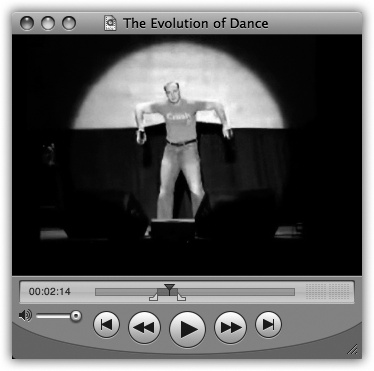
Figure 16-15. Some of the controls shown here are available only in the Pro version of QuickTime Player. They appear as soon as you type in your registration code (which you get when you pay $30).
Counter
Volume
Rewind to start
Selection handle
Play/Stop
Scroll bar
Jump to end
Playhead
Audio level meters
Resize handle
You can open a movie file by double-clicking it, dragging it
onto the QuickTime Player icon, or by launching QuickTime Player and
then choosing File→Open File (![]() -O). The most important controls (Figure 16-15) are:
-O). The most important controls (Figure 16-15) are:
Scroll bar. Drag the playhead to jump to a different spot in the movie.
Play/Stop button. Click once to start, and again to stop. You can also press the Space bar, Return key, or
-right arrow for this purpose. (Or avoid
the buttons altogether and double-click the movie itself to
start or stop playback.)Tip
You can make any movie automatically play when opened, so that you avoid clicking the Play button. To do so, choose QuickTime Player→Preferences→Player Preferences, and turn on “Automatically play movies when opened.”
Selection handles. These tiny black triangles appear only in the $30 Pro version. You use them to highlight stretches of footage.
Volume. If you like, you can make the soundtrack louder or softer by dragging this slider with your mouse or clicking in its “track.” You may find it easier, however, to press the up or down arrow keys.
Tip
Try minimizing a QuickTime Player window while a movie is playing. It shrinks to the Dock—and keeps on playing. Do this enough times, and you’ll know what it’s like to be Steve Jobs on stage.
If you’ve spent the $30 to upgrade your free copy of QuickTime Player to the Pro version—and to shut up the “Upgrade Now!” advertisement that appears the first time you open QuickTime Player each day—you’ve unlocked a number of useful features. For example:
Your Movie menu contains additional playback options, including full-screen playback.
When you find a QuickTime movie on a Web page, you can usually save it to your hard drive. (Click on the movie; hold down the mouse button until a pop-up menu appears; choose Save Movie to Disk, or the equivalent in your browser.)
Using the commands in the Edit menu, you can view, turn on and off, add, or delete the individual tracks in a particular movie. (Most movies have nothing but a video track and a soundtrack. But a few specialized movies may also contain a text track, an animation track, alternate soundtracks, and so on.)
By far the most powerful feature you gain in the Pro version, however, is its ability to edit QuickTime movies. You can rearrange scenes, eliminate others, and save the result as a new movie with its own name. (Even QuickTime Player Pro doesn’t let you create live-action QuickTime movies with your camcorder. For that, you need iMovie or a more complex editing program like Final Cut Express. QuickTime Player Pro simply lets you edit existing movies.)
Apple’s first and only Web browser feels decidedly faster and more modern than Internet Explorer, and there are enough tips and tricks lurking inside to last you a lifetime. Details in Chapter 12.
Stickies (Figure 16-16) lets you create virtual Post-it notes that you can stick anywhere on your screen—a triumphant software answer to the thousands of people who stick notes on the edges of their actual monitors. If you’re a fan of the Windows Notepad, you might find yourself getting heavily into Stickies instead.
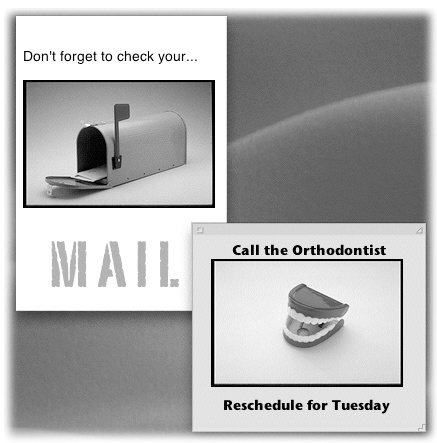
Figure 16-16. In the old days of the Mac, the notes you created with Stickies were text-only, single-font deals. Today, however, you can use a mix of fonts, text colors, and styles within each note. You can even paste in graphics, sounds, and movies (like PICT, GIF, JPEG, QuickTime, AIFF, whole PDF files, and so on), creating the world’s most elaborate reminders and to-do lists.
You can use Stickies to type quick notes and to-do items, paste in Web addresses or phone numbers you need to remember, or store any other little scraps and snippets of text you come across. Your electronic Post-its show up whenever the Stickies program is running.
You can use a mix of fonts, text colors, and styles within each note. You can even copy and paste (or drag) pictures, movies, and sounds into your notes, producing the world’s most elaborate reminders and to-do lists. You can even spell check your notes and search-and-replace text.
The first time you launch Stickies, a few sample notes appear
automatically, describing some of the program’s features. You can
quickly dispose of each sample by clicking the close button in the
upper-left corner of each note or by choosing File→Close
(![]() -W). Each time you close a note, a dialog box
asks if you want to save the note. If you click Don’t Save, the note
disappears permanently.
-W). Each time you close a note, a dialog box
asks if you want to save the note. If you click Don’t Save, the note
disappears permanently.
Note
The Stickies module that’s part of Dashboard (Dashboard) is extremely similar, and it’s arguably quicker to open (just press F12). But it’s also far more limited.
To create a new note, choose File→New Note (![]() -N) and start typing, pasting, or dragging
text (or graphics, movies, or sounds) in from other programs.
-N) and start typing, pasting, or dragging
text (or graphics, movies, or sounds) in from other programs.
Once you start plastering your Mac with notes, it doesn’t take long to find yourself plagued with desktop clutter. Fortunately, Stickies includes a few built-in tricks for managing a deskful of notes:
There’s a small resize handle on the lower-right corner of each note. Drag it to make notes larger or smaller onscreen.
Use the small triangle in the upper-right corner of each note to zoom and shrink note windows with a single click. The first click collapses a note down to a more compact size. Another click pops the note back open to normal size.
The best option: Double-click anywhere along the dark strip at the top of each note to miniaturize it into a compact one-line mini-note, as shown in Figure 16-17. You also can miniaturize a selected note by choosing Window→Miniaturize Window (
-M).If your notes are scattered randomly across the desktop, you can bring them all forward with the Window→Bring All to Front command.
Tip
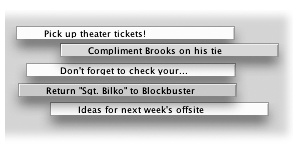
The most efficient way to use Stickies is to keep the notes in their miniaturized state, as shown in Figure 16-17. When a note is miniaturized, the first line of text shows up in tiny type right in the collapsed title bar of the note, so you don’t have to expand the note to remember what’s in it. And since many—if not most—of your notes can probably be summed up in a couple of words (“pick up dry cleaning,” “call mom”), it’s perfectly possible to keep your sticky notes in their miniaturized state permanently.
The Stickies menus offer several word processor-like commands for creating designer sticky notes, with any combination of fonts, colors, and styles. (You can also choose from six different background colors from the Color menu.)
The notes you create in Stickies last only as long as you keep them open. If you close a note to get it out of the way, it vanishes permanently.
If you want to preserve the information you’ve stuffed into your notes in a more permanent form, use File→Export Text to save each note as a standalone text document. When you use the Export Text command, you can save the file as a plain text file, RTF (a special format recognized by most word processors), and RTFD (a strange and powerful variant of RTF that can contain attachments—graphics, files, and even programs you’ve dragged into the note).
This program opens the door to the nerve center of Mac OS X’s various user preferences, settings, and options. Chapter 15 covers every option in detail.
TextEdit is a word processor (Figure 16-18)—a pretty darn powerful one, at that, considering you didn’t have to pay a cent extra for it. You can create real documents with real formatting, using style sheets, colors, automatic numbering and bullets, tables, and customized line spacing, and—get this—even save the result as a Microsoft Word document. If you need to use Word files, but you can’t stand bloated Microsoft interfaces, welcome.
Tip
Not only can TextEdit open and save Microsoft Word documents,
but it even recognizes some of the very same keyboard shortcuts. For
example, you can advance through documents one word at a time by
pressing Option-left arrow or Option-right arrow. Adding the Shift
key to those key combinations lets you select
one whole word at a time. You can also use the ![]() key in conjunction with the right and left
arrow keys to jump to the beginning or end of a line.
key in conjunction with the right and left
arrow keys to jump to the beginning or end of a line.
The one confusing aspect of TextEdit is that it’s both a plain text editor (no formatting; globally compatible) and a true word processor (fonts, sizes, styles; compatible with other word processors). You need to keep your wits about you as you edit, because the minute you add formatting to your document, TextEdit no longer lets you save it as a plain text file.
Here’s the scheme:
You can change a plain text document to a formatted one by choosing Format→Make Rich Text. The ruler appears automatically to remind you that a new world of formatting has just become available.
Conversely, you can change a formatted document (a Word file you’ve opened, for example) to a plain text document by choosing Format→Make Plain Text. An alert message appears to point out that you’re about to lose all formatting.
If you know what kind of document you always want to open, go to the TextEdit→Preferences dialog box; on the New Document tab, select Rich Text or Plain Text. That’s what you’ll get each time you choose File→New.
As you begin typing, all the usual word processing rules apply, with a few twists:
Choose Bold, Italic, and font sizes using the Format→Font submenu, or choose Format→Font→Show Fonts (
-T) to open up the standard Mac OS X Font
panel. You can even create subscript or superscript, change the
color of the text (Format→Font→Show Colors), and so on.Common paragraph-alignment options—Align Left, Align Right, Center, Justify—are all available as ruler buttons and also reside in the Format→Text submenu. Adjust the line spacing (single, double, or any fraction or multiple) using the Spacing pop-up menu in the ruler.
The ruler also offers automatic bulleting and numbering of paragraphs. Just choose the numbering style you prefer from the Lists pop-up menu.
You can select several non-adjacent bits of text simultaneously. To pull this off, highlight your first piece of text by dragging, and then press
as you use the mouse to select more text.
Bingo: You’ve highlighted two separate chunks of text.When you’re done selecting bits of text here and there, you can operate on them en masse. For example, you can make them all bold or italic with one fell swoop. You can even use the Cut, Copy, and Paste commands, as described in the next section. When you cut or copy, the command acts upon all your selections at once.
You can also drag any one of the highlighted portions to a new area, confident that the other chunks will come along for the ride. All of the selected areas wind up consolidated in their new location.
Tip
If you Option-drag one of the highlighted bits, you copy it, leaving the original in place.
Similarly, you can use the Find command to highlight a certain term everywhere it appears in a document. To do that, choose Edit→Find→Find (or just press
-F). Fill in the “Find” and “Replace with”
boxes—and then press the Control key. The Replace All button
changes to say Select All.If you Option-drag vertically, you can freely select an arbitrary column of text (not necessarily the entire page width). This technique is very useful when you want to select only one column in a multicolumn layout, or when you want to select the numbers in a list (“1.,” “2.,” and so on) and format them all at once. (As noted earlier, this trick also works in Preview PDF documents.)
A style is a prepackaged collection of formatting attributes that you can apply and reapply with a click of the mouse (bold, 24-point Optima, double-spaced, centered, for instance). You can create as many styles as you need: chapter headings, sidebar styles, and so on. You end up with a collection of custom-tailored styles for each of the repeating elements of your document.
Once you’ve created your styles, you can apply them as you need them, safe in the knowledge that they’ll be consistent throughout the document. During the editing process, if you notice you accidentally styled a headline using the Subhead style, you can fix the problem by simply reapplying the correct style.
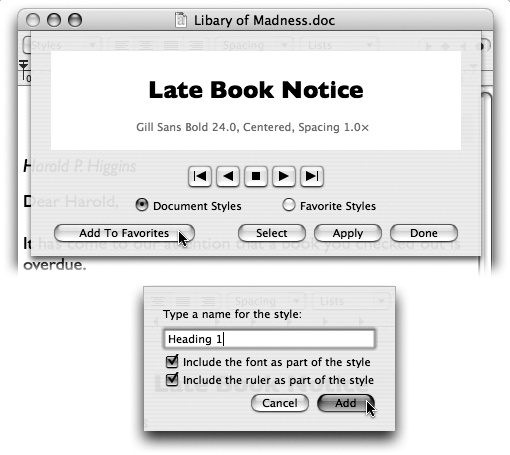
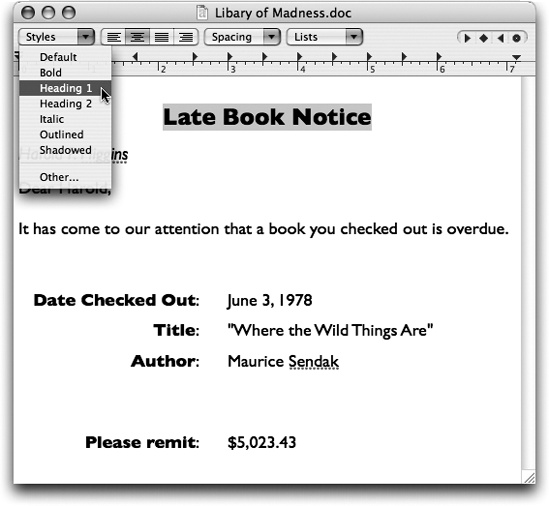
Figure 16-19. Top: Highlight the text you want to format. Then, from the Styles pop-up menu in the ruler, choose Other. With each click of the ▸ button, you summon a snippet of the next chunk of formatting. When you find one you like, you can either click Apply (to zap the highlighted text into submission) or Add To Favorites (to reuse this canned style later). In the latter case, you can give the new style a name (bottom).
Note
Unlike a real word processor, TextEdit doesn’t let you change a style’s formatting and thereby update every occurrence of it. You can’t search and replace by style, either.
Creating a named style. To create a style, format some text so that it looks the way you like it, complete with font, color, line spacing, tab settings, and so on.
Then, from the Styles pop-up menu in the ruler, choose Other (Figure 16-19, top). Click Add to Favorites, type a name for the style, turn on both checkboxes (Figure 16-19, bottom), and click Add.
Applying a style. Later, when you want to reuse the formatting you set up, highlight some text and then choose the appropriate name from the Styles pop-up menu. TextEdit applies the formatting immediately.
Tip
If you simply click inside a paragraph, applying a style affects only paragraph attributes like line spacing, tab stops, and alignment. If you highlight a random chunk of text instead, applying a style affects only character attributes like the font and type size. If you highlight an entire paragraph, however, both text and paragraph formatting appear.
Deleting a style. To delete a superfluous style, choose Other from the Styles pop-up menu on the ruler. Click the Favorite Styles button, choose the unwanted style’s name from the pop-up menu, and then click Remove From Favorites. (Deleting a style doesn’t affect any formatting that’s already in your document; it just removes the name from the Styles menu.)
Copying by example. In Word and most other “serious” word processors, the routines above correctly describe how you use styles. In TextEdit, however, you can use Option-
-C and Option--V (Format→Copy Style and Format→Paste
Style) to grab formatting from one place in your document and
reuse it elsewhere. (Of course, you can’t apply styles in
text-only documents.)
Tables can make life a heck of a lot easier when you want to create a résumé, agenda, program booklet, list, multiple-choice test, Web page, or another document where numbers, words, and phrases must be aligned across the page. In the bad old days, people did it by pressing the Tab key to line up columns—a technique that turned into a nightmare as soon as you tried to add or delete text. But using a word processor’s table feature is light-years easier and more flexible, because each row of a table expands infinitely to contain whatever you put into it. Everything else on its row remains aligned.
Tip
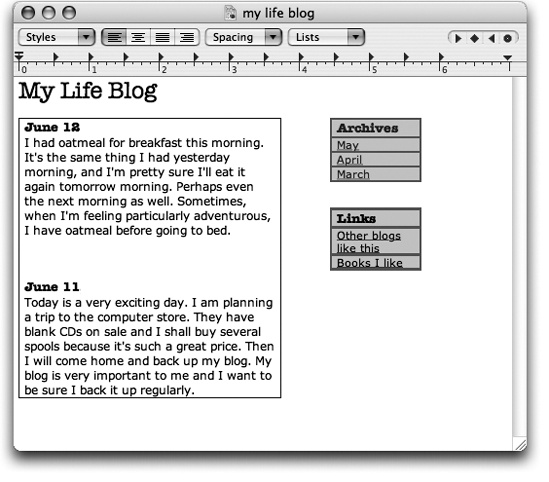
Tables are also critical for designing Web pages, as any Web designer can tell you. Even though you can’t see the table outlines, many a Web page is filled with columns of text that are aligned invisibly by tables. And now that TextEdit can save your work as an HTML document, it’s suddenly a viable candidate for designing basic Web pages.
Create a table by choosing Format→Text→Table. The floating Table palette appears (Figure 16-20). Use it to specify how many rows and columns you want. The placeholder table in your document adjusts itself in real time.
Format the table using the other controls in the Table palette. The Alignment controls let you specify how the text in one of the table cells hugs its border. Cell Border controls the thickness of the line around the selected cells’ borders (or, if you enter 0, makes the table walls invisible). The color swatch next to Cell Border specifies the color of the solid lines. The Cell Background controls let you color in the table cells with colors of your choice. (Choose Color Fill from the pop-up menu, and then click the color swatch.) This is an especially valuable option for Web designers.
Adjust the rows and columns by dragging the cell borders.
Merge two selected cells by clicking Merge Cells in the Table palette. Once you’ve done that, you can use the Split Cell button to split them apart again. (Split Cell doesn’t work except in cells you’ve previously merged.)
Nest one table inside a cell of another by clicking in the cell and then clicking Nest Table. Change the numbers in the Rows and Columns boxes to set up its dimensions (Figure 16-20).
The Table palette isn’t the only clue that Apple intends TextEdit to be a quick-and-dirty Web page design program. Consider these other tools:
You can easily add graphics to the page by dragging or pasting them into a document. The program understands TIFF, PICT, JPG, and GIF formats.
You can add Web-style hyperlinks by highlighting “Click here” (or whatever the link says), choosing Format→Text→Link, and entering the Web address in the resulting dialog box. Or just drag a link in from Safari, Mail, or another program. (To edit the link later, right-click it, and then choose Edit Link.)
To save a document as an HTML (Web page) file, choose File→Save As; from the File Format pop-up menu, choose Web Archive.
Don’t miss the HTML options in TextEdit→Preferences. On the “Open and Save” tab, you can specify what kind of HTML document you want to produce, what cascading style sheets (CSS) setting you want, and whether or not you want TextEdit to include code to preserve blank areas (white space) in your layout.
Tip
When you open a Web page document—that is, an HTML document—TextEdit is faced with a quandary. Should it open up the page as though it’s a Web page, interpreting the HTML code as though it’s a browser? Or should it reveal the underlying HTML code itself?
Actually, that’s up to you. When you choose File→Open, turn on “Ignore rich text commands” to make the document open up as HTML code. (To make this change permanent, turn on the same checkbox on the “Open and Save” pane of the TextEdit→Preferences dialog box.)
This marquee feature of Leopard is described in Chapter 9.
The Utilities folder (inside your Applications folder) is home to another batch of freebies: another couple of dozen tools for monitoring, tuning, tweaking, and troubleshooting your Mac.
The truth is, you’re likely to use only a few of these utilities. The rest are very specialized gizmos primarily of interest to network administrators or Unix geeks who are obsessed with knowing what kind of computer-code gibberish is going on behind the scenes.
Tip
Even so, Apple obviously noticed that as the sophistication of
Mac OS X fans grows, more people open the Utilities folder more
often. That’s why there’s a menu command and a keystroke that can
take you there. In the Finder, choose Go→Utilities
(Shift-![]() -U).
-U).
Activity Monitor is designed to let the technologically savvy Mac fan see how much of the Mac’s available power is being tapped at any given moment.
Even when you’re only running a program or two on your Mac, dozens of computational tasks (processes ) are going on in the background. The top half of the dialog box, which looks like a table, shows you all the different processes—visible and invisible—that your Mac is handling at the moment.
Check out how many items appear in the Process list, even when you’re just staring at the desktop. It’s awesome to see just how busy your Mac is! Some are easily recognizable programs (such as Finder), while others are background system-level operations you don’t normally see. For each item, you can see the percentage of CPU being used, who’s using it (either your account name, someone else’s, or root, meaning the Mac itself), and how much memory it’s using.
Or use the pop-up menu above the list to see:
All Processes. This is the complete list of running processes; you’ll notice that the vast majority are little Unix applications you never even knew you had.
My Processes. This list shows only the programs that pertain to your world—your login. There are still plenty of unfamiliar items, but they’re all running to serve your account.
Windowed Processes. Now this is probably what you were expecting: a list of actual programs with actual English names, like Activity Monitor, Finder, Safari, and Mail. These are the only ones running in actual windows, the only ones that are visible, which is what most people probably think of as programs.
At the bottom of Activity Monitor, you’re offered five tabs that reveal intimate details about your Mac and its behind-the-scenes efforts (Figure 16-21):
CPU. As you go about your usual Mac business, opening a few programs, dragging a playing QuickTime movie across the screen, playing a game, and so on, you can see the CPU graph rise and fall, depending on how busy you’re keeping the CPU. On multiple-processor Macs, you see a different bar for each chip, enabling you to see how efficiently Mac OS X is distributing the work among them.
Tip
You may also want to watch this graph right in your Dock (choose View→Dock Icon→Show CPU History) or in a bar at the edge of your screen (choose Window→Floating CPU Window→Horizontally).
Finally, there’s the weirdly uncapitalized command View→“Show CPU monitors on top of other windows.” It makes the little bar float on top of all your other programs, so you can’t miss it.
System Memory. Here’s a colorful graph that reveals the state of your Mac’s RAM at the moment.
The number below the graph shows how much memory is installed in your Mac. If, when your Mac is running a typical complement of programs, the Wired number plus the Active number nearly equals your total RAM amount, it’s time to consider buying more memory. You’re suffocating your Mac.
Disk Activity. Even when you’re not opening or saving a file, your Mac’s hard drive is frequently hard at work, shuffling chunks of program code into and out of memory, for example. Here’s where the savvy technician can see exactly how frantic the disk is at the moment.
Figure 16-21. The many faces of Activity Monitor. Top: It can be a graph of your processor (CPU) activity, your RAM usage at the moment, your disk capacity, and so on. For most people, only the processes listed here with tiny icons beside their names are actual windowed programs—those with icons in the Finder, the ones you actually interact with. Don’t miss the top-left Quit button. It’s a convenient way to jettison a locked-up program when all else fails. Bottom: If you double-click a process’s name, you get a three-tab dialog box that offers stunningly complete reams of data (mostly of interest only to programmers) about what that program is up to. (The Open Files and Ports tab, for example, shows you how many files that program has opened, often invisibly.)
Disk Usage. This little graph offers one of the quickest ways to check out how full your hard drive is at the moment. (If you have more than one drive—say, a flash drive, tape-backup drive, or whatever—choose another drive’s name from the pop-up menu.)
Network. Keep an eye on how much data is shooting across your office network with this handy EKG-ish graph.
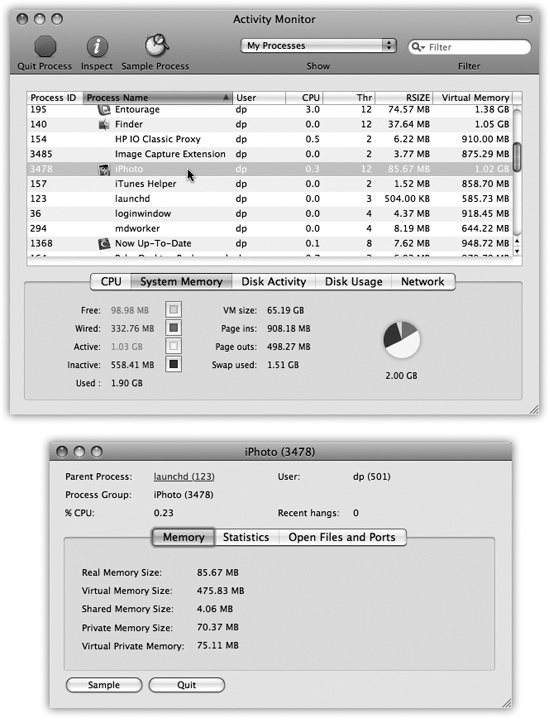
You use the AirPort Utility to set up and manage AirPort base stations (Apple’s line of wireless Wi-Fi networking routers).
If you click Continue, it presents a series of screens, posing one question at a time: what you want to name the network, what password you want for it, and so on. Once you’ve followed the steps and answered the questions, your AirPort hardware will be properly configured and ready to use.
One of the luxuries of using a Mac that has Bluetooth is the ability to shoot files (to colleagues who own similarly clever gadgets) through the air, up to 30 feet away. Bluetooth File Exchange makes it possible, as described in Number of Recent Items.
This important program serves two key functions:
It serves as Mac OS X’s own little Norton Utilities: a powerful hard drive administration tool that lets you repair, erase, format, and partition disks. In everyday life, you’ll probably use Disk Utility most often for its Repair Permissions feature, which solves an uncanny number of weird little Mac OS X glitches. But it’s also worth keeping in mind, in case you ever find yourself facing a serious disk problem.
Disk Utility also creates and manages disk images, electronic versions of disks or folders that you can exchange electronically with other people.
The following discussion tackles the program’s two personalities one at a time.
Here are some of the tasks you can perform with this half of Disk Utility:
Repair folders, files, and program that don’t work because you supposedly don’t have sufficient “access privileges.” This is by far the most common use of Disk Utility, not to mention the most reliable and satisfying. Using the Repair Disk Permissions button fixes an astonishing range of bizarre Mac OS X problems, from programs that won’t open to menulets that freeze up the works.
Get size and type information about any disks attached to your Mac.
Fix disks that won’t appear on your desktop or behave properly.
Completely erase disks—including rewritable CDs and DVDs (such as CD-RW and DVD-RW discs).
Partition a disk into multiple volumes (that is, subdivide a drive so that its segments appear on the desktop with separate disk icons).
Tip
In Leopard, for the first time in Mac history, Disk Utility can create or enlarge disk partitions without requiring you to erase the entire hard drive. Details below.
Set up a RAID array (a cluster of separate disks that acts as a single volume).
Note
Disk Utility can perform some of its magic on the startup disk—the disk that’s running Mac OS X at the moment. For example, it can check the disk for damage, fix the permissions of the disk, or even adjust its partitions.
But any other operation, like reformatting, erasing, or actually repairing the disk, still requires the Mac to start up from a different disk (your Leopard DVD, for example). Otherwise, it’d be like a surgeon performing an appendectomy on himself—not a great idea.
The left Disk Utility panel lists your hard drive and any other disks in or attached to your Mac at the moment. When you click the name of your hard drive’s mechanism, like “74.5 GB Hitachi iC25N0...” (not the “Macintosh HD” partition label below it), you see a panel with five tabs, one for each of the main Disk Utility functions:
First Aid. This is the disk-repair part of Disk Utility, and it does a terrific job at fixing many disk problems. When you’re troubleshooting, Disk Utility should always be your first resort.
To use it, click the icon of a disk and then click either Verify Disk (to get a report on the disk’s health) or Repair Disk (which fixes whatever problems the program finds). In other words, First Aid attempts to perform the same healing effects on a sick hard drive as, say, a program like Norton Utilities.
If Disk First Aid reports that it’s unable to fix the problem, then it’s time to invest in a program like DiskWarrior (www.alsoft.com).
Tip
If Disk Utility finds nothing wrong with a disk, it reports, “The volume appears to be OK.” Don’t be alarmed at the not-so-congratulatory wording of that message—that’s the strongest vote of confidence Disk Utility can give.
You may wind up using the Verify and Repair Disk Permissions buttons even more often. Their function is to straighten out problems with the invisible Unix file permissions that keep you from moving, changing, or deleting files or folders. (The occasional software installer can create problems like this.) You’d be surprised how often running one of these permission checks solves little Mac OS X glitches.
Chapter 14 has a much more detailed discussion of permissions.
Erase. Select a disk, choose a format (always Mac OS Extended [Journaled], unless you’re formatting a disk for use on a Windows machine or an ancient Mac running Mac OS 8.1 or earlier), give it a name, and click Erase to wipe a disk clean.
Partition. With the Partition tools, you can erase a hard drive in such a way that you subdivide its surface. Each chunk is represented on your screen by another hard drive icon (Figure 16-22).
Figure 16-22. Partitioning your drive with Disk Utility no longer involves erasing it completely. Select the drive you want to partition from the list on the left, and click the Partition tab. Click the + button for each new partition you want. Now drag the horizontal dividers in the Volumes map to specify the relative sizes of the partitions you want to create. Assign a name and format for each partition in the Volume Information area, and then click Apply.
There are some very good reasons not to partition a drive these days: A partitioned hard drive is more difficult to resurrect after a serious crash, requires more navigation when you want to open a particular file, and offers no speed or safety benefits.
On the other hand, there’s one very good reason to do it: Partitioning is the only way to use Boot Camp, described as Chapter 8. Your Mac is a Mac when running off of the first partition, and a Windows PC when starting up from the second one.
RAID. RAID stands for Redundant Array of Independent Disks, and refers to a special formatting scheme in which a group of separate disks are configured to work together as one very large, very fast drive. In a RAID array, multiple disks share the job of storing data—a setup that can improve speed and reliability.
Most Mac users don’t use or set up RAID arrays, probably because most Mac users only have one hard drive (and Disk Utility can’t make your startup disk part of a RAID array).
If you’re using multiple external hard disks, though, you can use Apple RAID to merge them into one giant disk. Just drag the icons of the relevant disks (or disk partitions) from the left-side list of disks into the main list (where it says, “Drag disks or volumes here to add to set”). Use the RAID Type pop-up menu to specify the RAID format you want to use (Stripe is a popular choice for maximizing disk speed), name your new mega-disk, and then click Create. The result is a single “disk” icon on your desktop that actually represents the combined capacity of all the RAID disks.
Restore. This tab lets you make a perfect copy of a disk or a disk image, much like the popular shareware programs CarbonCopy Cloner and SuperDuper. You might find this useful when, for example, you want to make an exact copy of your old Mac’s drive on your new one. You can’t do that just by copying your old files and folders manually. If you try, you won’t get the thousands of invisible files that make up Mac OS X. If you use the Restore function, they’ll come along for the ride.

Start by dragging the disk or disk image you want to copy from into the Source box. Then drag the icon of the disk you want to copy to into the Destination box.
Tip
If you want to copy an online disk image onto one of your disks, you don’t have to download it first. Just type its Web address into the Source field. You might find this trick convenient if you keep disk images on your iDisk, for example.
If you turn on Erase Destination, Disk Utility obliterates all the data on your target disk before copying the data. If you leave this checkbox off, however, Disk Utility simply copies everything onto your destination, preserving all your old data in the process. (The Skip Checksum checkbox is available only if you choose to erase your destination disk. If you’re confident that all of the files on the source disk are 100% healthy and whole, turn on this checkbox to save time. Otherwise, leave it off for extra safety.)
Finally, click the Restore button. (You might need to type in an administrator password.) Restoring can take a long time for big disks, so go ahead and make yourself a cup of coffee while you’re waiting.
Tip
Instead of clicking a disk icon and then clicking the appropriate Disk Utility tab, you can just right-click a disk’s name and choose Information, First Aid, Erase, Partition, RAID, or Restore from the shortcut menu.
The world’s largest fan of disk images is Apple itself; the company often releases new software in disk-image form. A lot of Mac OS X add-on software arrives from your Web download in disk-image form, too, as shown below.
Disk images are popular for software distribution for a simple reason: Each image file precisely duplicates the original master disk, complete with all the necessary files in all the right places. When a software company sends you a disk image, it ensures that you’ll install the software from a disk that exactly matches the master disk.
It’s important to understand the difference between a disk-image file and the mounted disk (the one that appears when you double-click the disk image). If you flip back to .sit, .zip, .tar, .gz, and .dmg and consult Figure 4-19, this distinction should be clear.
Tip
After you double-click a disk image, click Skip in the verification box that appears. If something truly got scrambled during the download, you’ll know about it right away—your file won’t decompress correctly, or it’ll display the wrong icon, for example.
In fact, you can make Disk Utility always skip that verification business, which is a relic from the days of floppy disks. To do so, choose Disk Utility→Preferences, and turn off “Check images on locked media.”
You can create disk images, too. Doing so can be very handy in situations like the following:
You want to create a backup of an important CD. By turning it into a disk-image file on your hard drive, you’ll always have a safety copy, ready to burn back onto a new CD. (This is an essential practice for educational CDs that kids will be handling soon after eating peanut butter and jelly.)
You want to replicate your entire hard drive—complete with all of its files, programs, folder setups, and so on—onto a new, bigger hard drive (or a new, better Mac), using the Restore feature described earlier.
You want to back up your entire hard drive, or maybe just a certain chunk of it, onto an iPod or another disk. (Again, you can later use the Restore function to complete the transaction.)
You bought a game that requires its CD to be in the drive at all times. Many programs like these run equally well off of a mounted disk image that you made from the original CD.
You want to send somebody else a copy of a disk via the Internet. You simply create a disk image, and then send that—preferably in compressed form.
Here’s how you make a disk image.
To image-ize a disk or partition. Click the name of the disk in the left-panel list, where you see the disks currently in, or attached to, your Mac. (The topmost item is the name of your drive, like “484.0 MB MATSHITA DVD-R” for a DVD drive or “74.5 GB Hitachi” for a hard drive. Beneath that entry, you generally see the name of the actual partition, like “Macintosh HD,” or the CD’s name as it appears on the screen.)
Then choose File→New→Disk Image from [the disk or partition’s name].
To image-ize a folder. Choose File→New→Disk Image from Folder. In the Open dialog box, click the folder you want and then click Image.
Tip
Disk Utility can’t turn an individual file into a disk image. But you can put a single file into a folder, and then make a disk image of it.
Either way, the next dialog box (Figure 16-23) offers some fascinating options.
Image Format. If you choose “read/write,” your disk image file, when double-clicked, turns into a superb imitation of a hard drive. You can drag files and folders onto it, drag them off of it, change icons’ names on it, and so on.
If you choose “read-only,” however, the result behaves more like a CD. You can copy things off of it, but not make any changes to it.
The “compressed” option is best if you intend to send the resulting file by email, post it for Web download, or preserve the disk image on some backup disk for a rainy day. It takes a little longer to create a simulated disk when you double-click the disk image file, but it takes up a lot less disk space than an uncompressed version.
Finally, choose “DVD/CD master” if you’re copying a CD or a DVD. The resulting file is a perfect mirror of the original disc, ready for copying onto a blank CD or DVD when the time comes.
Encryption. Here’s an easy way to lock private files away into a vault that nobody else can open. If you choose one of these two AES encryption options (choose AES-128, if you value your time), you’re asked to assign a password to your new image file. Nobody can open it without the password—not even you. On the other hand, if you save it into your Keychain (The Keychain), it’s not such a disaster if you forget the password.
Save As. Choose a name and location for your new image file. The name you choose here doesn’t need to match the original disk or folder name.
When you click Save (or press Enter), if you opted to create an encrypted image, you’re asked to make up a password at this point.
Otherwise, Disk Utility now creates the image and then mounts it—that is, turns the image file into a simulated, yet fully functional, disk icon on your desktop.
When you’re finished working with the disk, eject it as you would any disk (right-click it and choose Eject, for example). Hang onto the .dmg disk image file itself, however. This is the file you’ll need to double-click if you ever want to recreate your “simulated disk.”
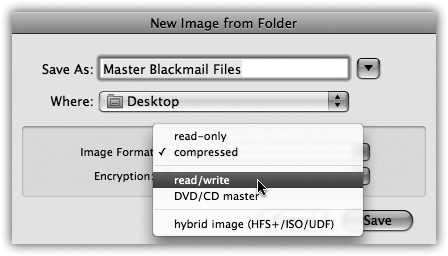
One of the other most common disk-image tasks is turning a disk image back into a CD or DVD—provided you have a CD or DVD burner on your Mac, of course.
All you have to do is drag the .dmg file into the Disk Utility window, select it, and click the Burn icon on the toolbar (or, alternatively, right-click the .dmg icon and choose Burn from the shortcut menu). Insert a blank CD or DVD, and then click Burn.
Grab takes pictures of your Mac’s screen, for use when you’re
writing up instructions, illustrating a computer book, or collecting
proof of some secret screen you found buried in a game. You can take
pictures of the entire screen (press ![]() -Z, which for once in its life does
not mean Undo) or capture only the contents of
a rectangular selection (press Shift-
-Z, which for once in its life does
not mean Undo) or capture only the contents of
a rectangular selection (press Shift-![]() -A). When you’re finished, Grab displays your
snapshot in a new window, which you can print, close without saving,
or save as a TIFF file, ready for emailing or inserting into a
manuscript.
-A). When you’re finished, Grab displays your
snapshot in a new window, which you can print, close without saving,
or save as a TIFF file, ready for emailing or inserting into a
manuscript.
Now, as experienced Mac enthusiasts already know, the Mac OS
has long had its own built-in shortcuts for
capturing screenshots: Press Shift-![]() -3 to take a picture of the whole screen, and
Shift-
-3 to take a picture of the whole screen, and
Shift-![]() -4 to capture a rectangular selection.
-4 to capture a rectangular selection.
(Solitaire has a complete list of the variations.)
So why use Grab instead? In many cases, you shouldn’t. The
Shift-![]() -3 and Shift-
-3 and Shift-![]() -4 shortcuts work like a dream. But there are
some cases in which it might make more sense to opt for Grab. Here
are three:
-4 shortcuts work like a dream. But there are
some cases in which it might make more sense to opt for Grab. Here
are three:
Grab can make a timed screen capture (choose Capture→Timed Screen, or press Shift-
-Z), which lets you enjoy a 10-second
delay before the screenshot is actually taken. After you click
the Start Timer button, you have an opportunity to activate
windows, pull down menus, drag items around, and otherwise set
up the shot before Grab shoots the picture.When you capture a screenshot using Grab’s Selection command, the size of your selection is displayed, in pixels, right under the pointer as you drag. If you need to capture a 256-pixel-wide square, for example, you can do so with pinpoint accuracy. (Choose Edit→Inspector to read the dimensions of a screenshot after you capture it.)
With Grab, you have the option of including the cursor in the picture, which is extremely useful when you’re showing a menu being pulled down or a button being clicked. (Mac OS X’s screenshot keystrokes, by contrast, always eliminate the pointer.) Use the technique described in Figure 16-24 to add the pointer style of your choice to a Grab screenshot.
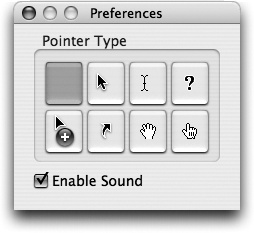
Figure 16-24. Unlike the Shift-![]() -3 or Shift-
-3 or Shift-![]() -4 keystrokes, Grab lets you include the
pointer/cursor in the picture—or hide it. Choose Grab→Preferences
and pick one of the eight different pointer styles, or choose to
keep the pointer hidden by activating the blank button in the
upper-left corner.
-4 keystrokes, Grab lets you include the
pointer/cursor in the picture—or hide it. Choose Grab→Preferences
and pick one of the eight different pointer styles, or choose to
keep the pointer hidden by activating the blank button in the
upper-left corner.
Tip
Actually, if you’re going to write a book or manual about Mac OS X, the program you really need is Snapz Pro X; a trial version is available from this book’s “Missing CD” at www.missingmanuals.com, among other places. It offers far more flexibility than any of Mac OS X’s own screenshot features. For example, you have a choice of file format, you can neatly snip out just one dialog box or window with a single click, and you can even capture movies of screen activity.
This equation grapher is an amazing piece of work.
When you first open Grapher, you’re asked to choose what kind of virtual “graph paper” you want: two-dimensional (standard, polar, logarithmic) or three-dimensional (cubic, spherical, cylindrical). Click a name to see a preview; when you’re happy with the selection, click Open.
Now the main Grapher window appears (Figure 16-25). Do yourself a favor: Spend a few wow-inducing minutes choosing canned equations from the Examples menu, and watching how Grapher whips up gorgeous, colorful, sometimes animated graphs on the fly.
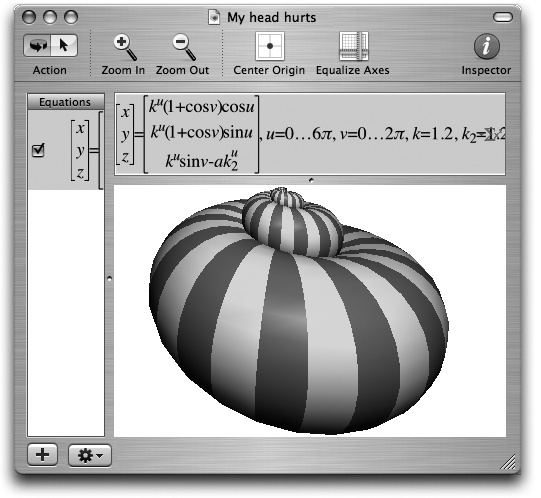
Figure 16-25. In general, you type equations into Grapher just as you would on paper (like z=2xy). If in doubt, check the online help, which offers enough hints on functions, constants, differential equations, series, and periodic equations to keep the A Beautiful Mind guy busy for days.
When you’re ready to plug in an equation of your own, type it into the text box at the top of the window. (If you’re not such a math hotshot, or you’re not sure of the equation format, work from the canned equations and mathematical building blocks that appear when you choose Equation→New Equation from Template or Window→Show Equation Palette.)
Once the graph is up on the screen, you can tailor it like this:
To move a 2-D graph in the window, choose View→Move Tool and then drag; to move a 3-D graph,
-drag it.To rotate a 3-D graph, drag it around.
To change the colors, line thicknesses, 3-D “walls,” and other graphic elements, click the
 button (or choose Window→Show Inspector)
to open the formatting palette. The controls you find here vary
by graph type, but rest assured that Grapher can accommodate
your every visual whim.
button (or choose Window→Show Inspector)
to open the formatting palette. The controls you find here vary
by graph type, but rest assured that Grapher can accommodate
your every visual whim.To change the fonts and sizes, choose Grapher→Preferences. On the Equations panel, the four sliders let you specify the relative sizes of the text elements. If you click the sample equation, the Font panel appears (The Font Panel), so you can fiddle with the type.
Add your own captions, arrows, ovals, or rectangles using the Object menu.
Keychain Access memorizes and stores all your secret information—passwords for network access, file servers, FTP sites, Web pages, and other secure items. For instructions on using Keychain Access, see Chapter 13.
This little cutie automates the transfer of all your stuff from one Mac to another—your Home folder, network settings, programs, and more. This comes in extremely handy when you buy a newer, better Mac—or when you need Time Machine to recover an entire dead Mac’s worth of data. (It can also copy everything over from a secondary hard drive or partition.)
The instructions on the screen guide you through the setup process; then the Assistant automates the transfer.
System Profiler is a great tool for learning exactly what’s installed on your Mac and what’s not—in terms of both hardware and software. The people who answer the phones on Apple’s tech-support line are particularly fond of System Profiler, since the detailed information it reports can be very useful for troubleshooting nasty problems.
There are now three ways to open System Profiler:
Slow. Burrow into your Applications→Utilities folder; double-click System Profiler.
Medium. Choose
 →About This Mac. In the resulting dialog
box, click More Info.
→About This Mac. In the resulting dialog
box, click More Info.Tip
If you click your Mac OS X version number twice in the About box, you get to see your Mac’s serial number!
Fast. Hold down the Option key, which makes the
→About This Mac command
change to say System Profiler. Choose
it.
When you launch System Profiler, it reports information about your Mac in a categorized list down the left side (Figure 16-26).
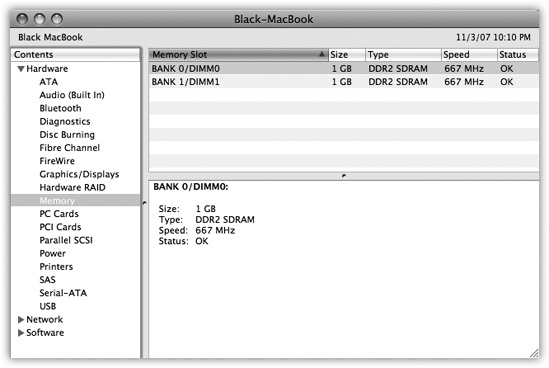
Figure 16-26. Does your MacBook’s chip run at 2 Ghz or 2.6? What percentage of your external hard drive is filled up? Want a comprehensive list of every program installed on your Mac, with version numbers? Can your DVD burner burn dual-layer discs? And (shown here): Does your laptop have any open slots for extra RAM?
Mac OS X’s resemblance to an attractive, mainstream operating system like Windows is just an optical illusion; the engine underneath the pretty skin is Unix, one of the oldest and most respected operating systems in use today. And Terminal is the rabbit hole that leads you—if you’re technically bold—straight down into the Mac’s powerful Unix world.
The first time you see it, you’d swear that Unix has about as much in common with the Mac OS X illustrated in the other chapters of this book as a Jeep does with a watermelon. It’s a command line interface: a place where you can type out instructions to the computer itself. This is a world without icons, menus, or dialog boxes; even the mouse is almost useless.
Surely you can appreciate the irony: The brilliance of the original 1984 Macintosh was that it eliminated the command line interface that was still the ruling party on the computers of the day (like Apple II and DOS machines). Most non-geeks sighed with relief, delighted that they’d never have to memorize commands again. Yet here’s Mac OS X, Apple’s supposedly ultramodern operating system, complete with a command line! What’s going on?
Actually, the command line never went away. At universities and corporations worldwide, professional computer nerds kept right on pounding away at the little C: or % prompts, appreciating the efficiency and power such direct computer control afforded them.
Now, you never have to use Mac OS X’s command line. In fact, Apple has swept it far under the rug, obviously expecting that most people will use the beautiful icons and menus of the regular desktop.
For intermediate or advanced computer fans with a little time and curiosity, however, the command line opens up a world of possibilities. It lets you access corners of Mac OS X that you can’t get to from the regular desktop. It lets you perform certain tasks with much greater speed and efficiency than you’d get by clicking and dragging icons. And it gives you a fascinating glimpse into the minds and moods of people who live and breathe computers.
The first time you open Terminal, you’ll notice that there’s not much in its window except the date and time of your last login, a welcome message, and the “$” (the command line prompt).
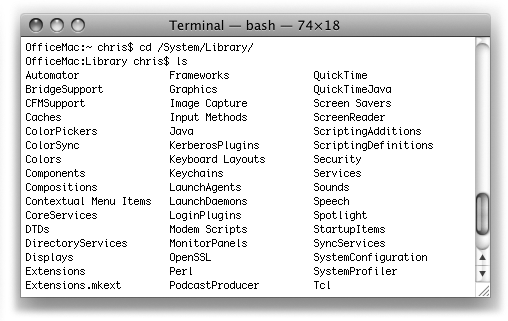
Figure 16-27. On the Web, Mac OS X’s Terminal is one of the most often-discussed elements of Mac OS X. Dozens of step-by-step tutorials for performing certain tasks circulate online, usually without much annotation as to why you’re typing what you’re typing. As you read this chapter, remember that capitalization matters in Terminal, even though it doesn’t in the Finder. As far as most Unix commands are concerned, Hello and hello are two different things.
Working directory (current folder)
What you type
What Unix types back
For user-friendliness fans, Terminal doesn’t get off to a very good start—this prompt looks about as technical as computers get. It breaks down like this (see Figure 16-27):
office-mac: is the name of your Mac (at least, as Unix thinks of it), as recorded in the Sharing panel of System Preferences.
~. The next part of the prompt indicates what folder you’re “in” (Figure 16-27). It denotes the working directory—that is, the current folder. (Remember, there are no icons in Unix.) Essentially, this notation tells you where you are as you navigate your machine.
The very first time you try out Terminal, the working directory is set to the symbol ~, which is shorthand for “your own Home folder.” It’s what you see the first time you start up Terminal, but you’ll soon be seeing the names of other folders here—[office-mac: /Users] or [office-mac: /System/Library], for example. (The slashes show you which folders are inside which other folders.)
Note
Before Apple came up with the user-friendly term folder to represent an electronic holding tank for files, folders were called directories. (Yes, they mean the same thing.) But in any discussion of Unix, “directory” is the correct term.
chris$ begins with your short user name. It reflects whoever’s logged into the shell (the current terminal “session”), which is usually whoever’s logged into the Mac at the moment. As for the $ sign: Think of it as a colon. In fact, think of the whole prompt shown in Figure 16-36 as Unix’s way of asking, “OK, Chris, I’m listening. What’s your pleasure?”
The insertion point looks like a tall rectangle at the end of the command line. It trots along to the right as you type.
Each Unix command generally calls up a single application (or process, as geeks call it) that launches, performs a task, and closes. Many of the best-known such applications come with Mac OS X.
Here’s a fun one: Just type uptime (capitalization counts in Unix) and press Enter. That’s how you run a Unix program: just type its name and press Enter. On the next line, Terminal shows you how long your Mac has been turned on continuously. It shows you something like: “6:00PM up 8 days, 15:04, 1 user, load averages: 1.24, 1.37, 1.45”—meaning your Mac has been running for 8 days, 15 hours nonstop.
You’re finished running the uptime program. The $ prompt returns, suggesting that Terminal is ready for whatever you throw at it next.
Try this one: Type cal at the prompt, and then press Enter. Unix promptly spits out a calendar of the current month.
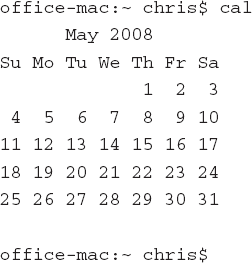
This time, try typing cal 6 2008, cal -y, or cal -yj. These three commands make Unix generate a calendar of June 2008, a calendar of the current year, and a calendar of Julian days of the current year, respectively.
If you can’t see any icons for your files and folders, how are you supposed to work with them?
You use Unix commands like pwd (tells you what folder you’re looking at), ls (lists what’s in the current folder), and cd (changes to a different folder).
Tip
As you can tell by these examples, Unix commands are very short. They’re often just two-letter commands, and an impressive number of those use alternate hands (ls, cp, rm, and so on).
Mac OS X comes with over 1,200 Unix programs. How are you supposed to learn what they all do? Fortunately, almost every Unix program comes with a help file. It may not appear within an elegant, gradient-gray Leopard window—in fact, it’s pretty darned plain—but it offers much more material than the regular Mac Help Center.
These user-manual pages, or manpages, hold descriptions of virtually every command and program available. Mac OS X, in fact, comes with manpages on almost 9,000 topics—over 30,000 printed pages’ worth.
Unfortunately, manpages rarely have the clarity of writing or the learner-focused approach you’ll find in the Mac Help Center. They’re generally terse, just-the-facts descriptions. In fact, you’ll probably find yourself needing to reread certain sections again and again. The information they contain, however, is invaluable to new and experienced users alike, and the effort spent mining them is usually worthwhile.
To access the manpage for a given command, type man followed by the name of the command you’re researching. For example, to view the manpage for the ls command, enter: man ls. Now the manual appears, one screen at a time.
For more information on using man, view its own manpage by entering—what else?—man man.
Tip
The free program ManOpen, available for download from the “Missing CD” page of www.missingmanuals.com is a Cocoa manual-pages reader that provides a nice-looking, easier-to-control window for reading manpages.
Unix is, of course, an entire operating system unto itself. If you get bit by the bug, here are some sources of additional Unix info:
www.ee.surrey.ac.uk/Teaching/Unix. A convenient, free Web-based course in Unix for beginners.
www.megazone.org/Computers/manual.shtml. A fast-paced, more advanced introduction.
Learning Unix for Mac OS X Tiger, by Dave Taylor & Brian Jepson (O’Reilly Media). A compact, relatively user-friendly tour of the Mac’s Unix base.
Tip
Typing unix for beginners into a search page like Google.com nets dozens of superb help, tutorial, and reference Web sites. If possible, stick to those that feature the bash shell. That way, everything you learn online should be perfectly applicable to navigating Mac OS X via Terminal.