10. Apps for Instant Communication
Email is great; it’s fast, easy to use, and you don’t have to pay a small fee every time you send a message. I use it every day. You just can’t beat email when it comes to sending off a fast message. Or can you?
Your iPad comes with two preinstalled apps that are outstanding for what I call instant communication: Messages and FaceTime. Why isn’t the Mail app on that list? Well, Mail is instant when it comes to sending a message, but it’s not so instant when you’re waiting for a reply. You may send a fast message to your friend asking him to meet you for lunch in 15 minutes, but if he isn’t sitting in front of his computer when the message arrives, you may be dining alone. And even those people with smartphones that offer email access might not be able to reply if they’re in a meeting or in the dentist’s chair, for example. Nope, email can be fast, but it’s by no means instant.
For instant communication, what you need is instant messaging or video chat. Both offer you the ability to communicate with other iOS users in real time. Just like a face-to-face conversation, instant messaging allows you to communicate as fast as you can type (and it’s not the same as text messaging on your phone). And video chatting is even faster, but this time you can see the person with whom you’re chatting.
 Note
Note
Text messaging and instant messaging are completely different animals, even though they can often behave the same and even use the same app. If you and a friend are sending text messages back and forth, it can often seem like you’re using instant messaging, but what if your friend has left his phone in the car or is in a meeting? Yep, you’ve got to wait for a response. Instant messaging, on the other hand, implies that both you and the other participant have the instant messaging app open and have no distractions.
In previous chapters, I have mentioned these two apps that allow you to have instant communication across long (or short) distances. Now it’s time to see how the Messages and FaceTime apps work.
The Messages App
Take a look at Figure 10.1, and you’ll see the icon for the Messages app.
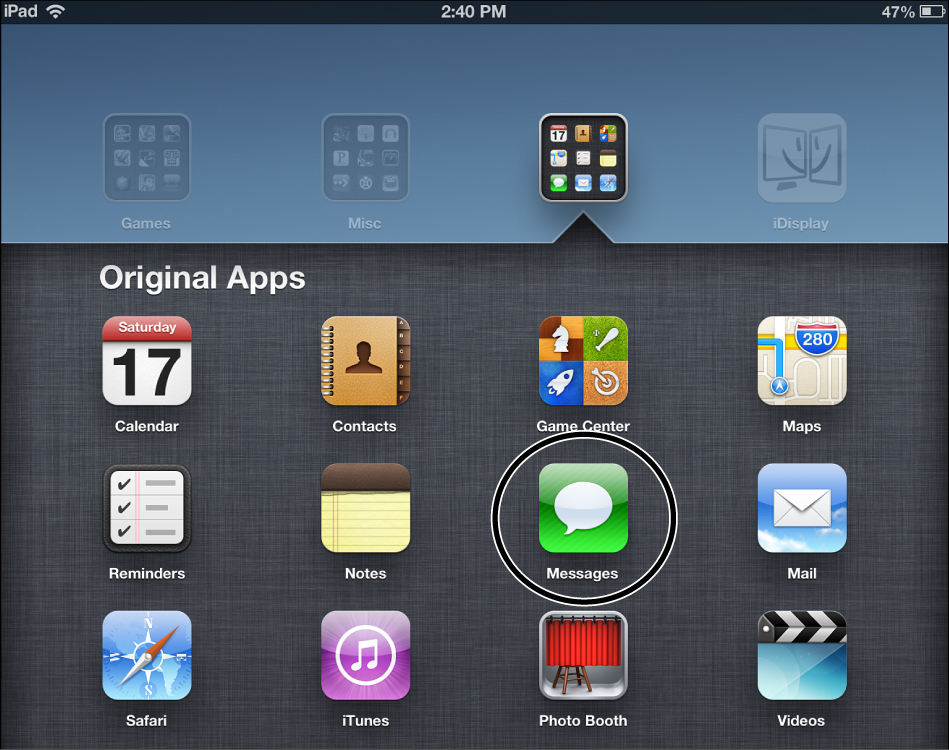
When you first open the Messages app, you’re going to see a mostly blank screen. Assuming that you have not yet used it for any text messaging, you won’t have any previous discussions visible.
Communication between you and another person with the Messages app can take the form of text messaging or instant messaging, but that person’s contact information must be stored in the Contacts app. Type the name or number of the person you wish to chat with (using Messages) in the To: text box with the onscreen keyboard, as shown in Figure 10.2.
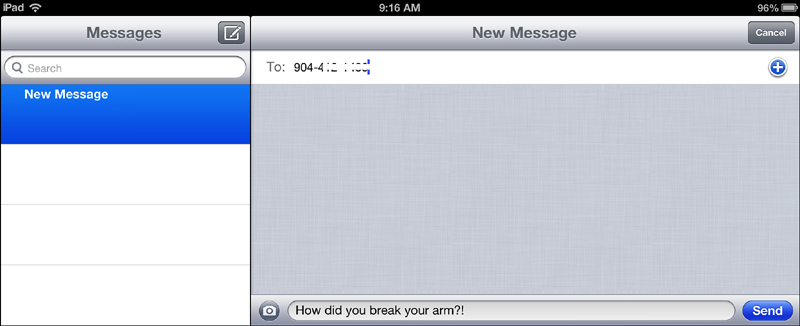
FIGURE 10.2. Typing in a phone number in the Messages app. The recipient’s number has been intentionally obscured.
 Caution
The Messages app on the iPad can be used for text messaging and instant messaging with any person who is using a device that runs iOS 5 or greater; this communication is done using Wi-Fi or a cellular data connection.
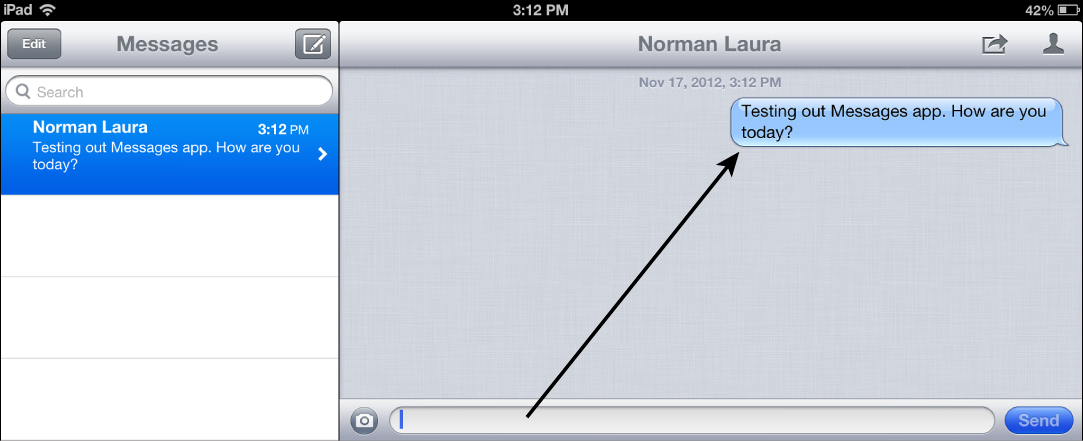
Next, tap in the message text box (to the right of the small camera icon), type your message, as shown in Figure 10.3, and then tap the Send button.
Notice in Figure 10.4 that your message is placed into a text balloon in the conversation window.
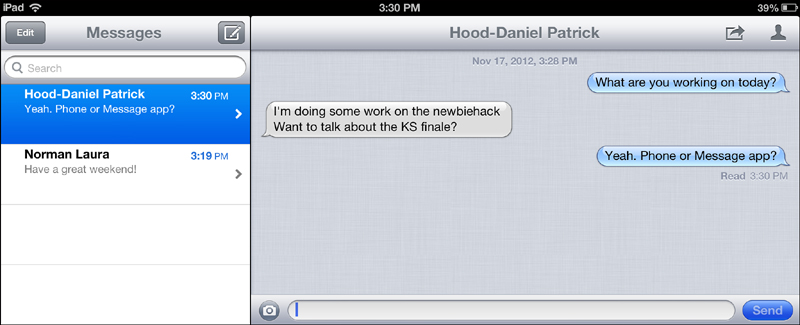
As you and your contact trade messages, they will be stacked in the conversation window, with the oldest message moving toward the top and then eventually off the screen. Your messages will be along the right side of the conversation window and your contact’s replies will be to the left. Each side of the chat will also have a different color, thus making it easy for both of you to follow the conversation. Figure 10.5 shows a back-and-forth I’m having with one of my Pearson editors, Laura.
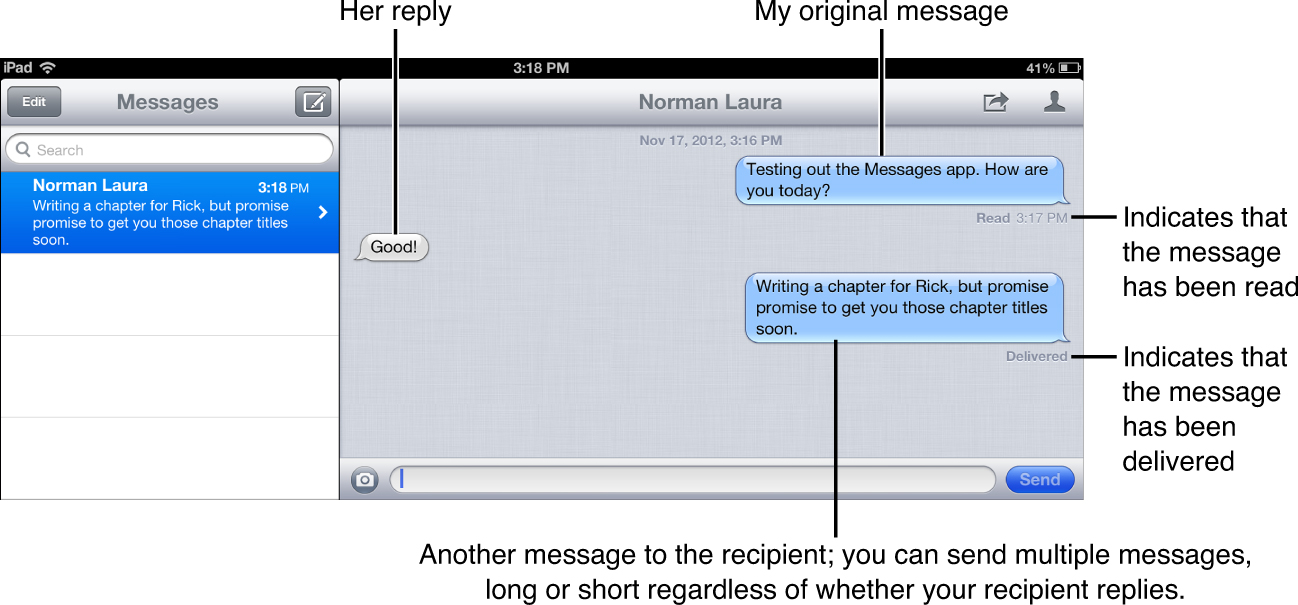
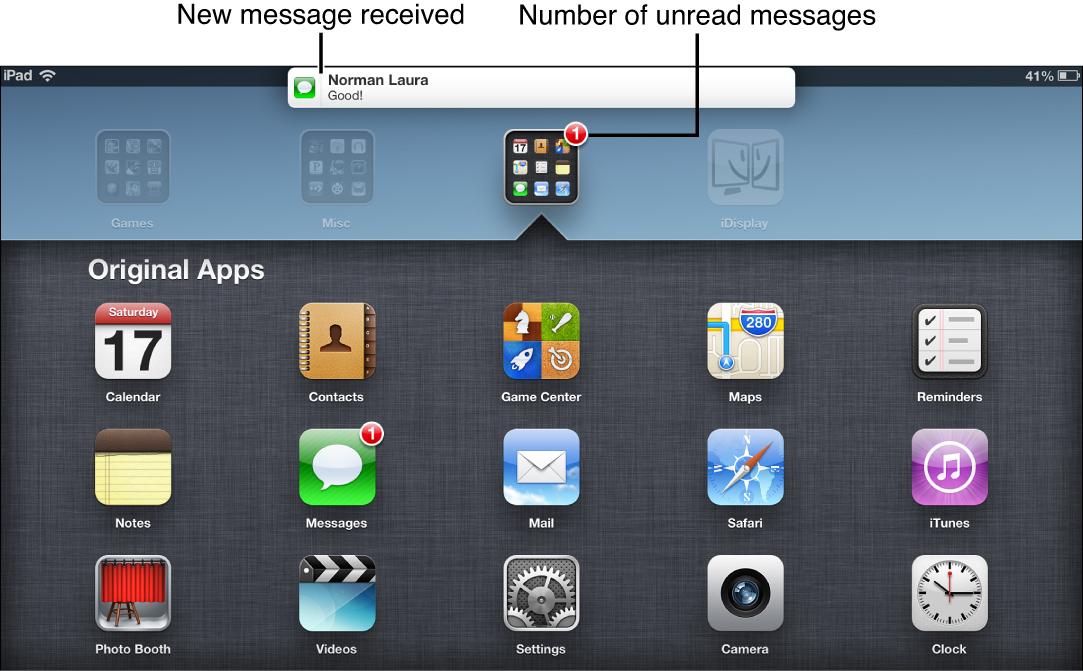
Notice underneath my original message in Figure 10.5 that the word “Read” appears. This lets me know that my message was received and read. In my follow-up, you see the word “Delivered.” This lets me know that the message successfully arrived, but was not read. If I don’t get an immediate response, I at least know the message will be waiting for Laura. Figure 10.6 shows how the Messages app alerts you to a new message. The number (called a badge) lets you know that you have a message waiting to be read.
Note
You can set configure the Messages app to alert you when a message has been read. Open Settings, select Messages, and view the various options available (including the ability to turn on a Subject line).
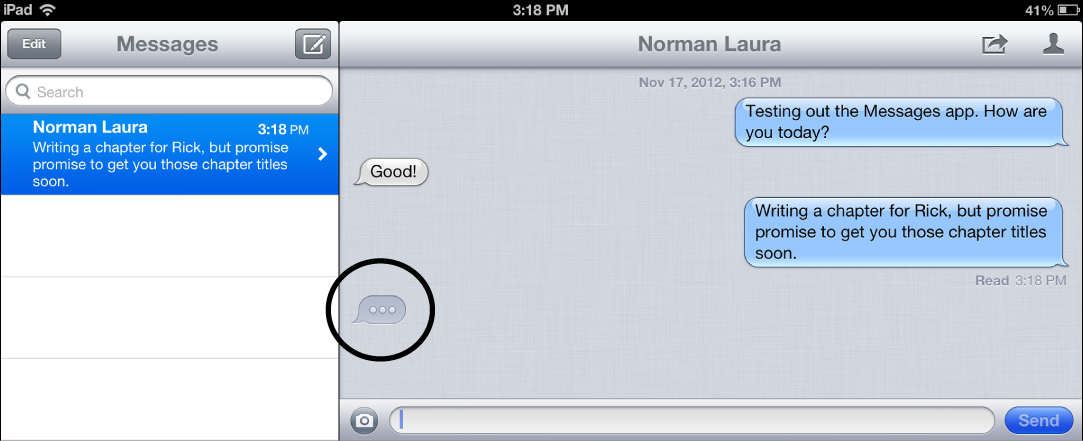
See the little ellipsis icon that appears in Figure 10.7? That icon lets you know that the other person is typing. This is helpful in controlling the pace of a conversation. Just as a face-to-face conversation usually has one person speaking at a time, this icon reminds you to wait for the other person to finish their response.
To the left you can see that the conversation I just had with my editor is being saved as a message. As more text chats occur with other people, each conversation will be saved in this list. At any time, you can tap the right-pointing chevron, and that conversation will be displayed to the right, allowing you to revisit any chat you’ve had in the past.
If you wish to delete a conversation, simply tap on the message in the left column and swipe to the left. A Delete button will appear. Tap the Delete button to permanently remove the conversation, or tap on the left side of the screen on any white area to cancel and return to the Messages window.
At any time, you can open an old conversation and type in a response, and the conversation will start up again. But this is not always desired, especially if the subject of your conversation has changed. In that case, you’ll need to delete the existing message and start a new message by clicking the New Message button. A new, blank message window will appear to the right.
As you can see in Figure 10.8, the new conversation is added to the list on the left and the conversation is visible on the right.
While you’re in a conversation, you can tap the small button in the upper-right corner (looks like a person’s shoulders and head) to view that person’s contact information and even update it by tapping the Edit button, as shown in Figure 10.9. Tap anywhere on the screen to close the Info box.
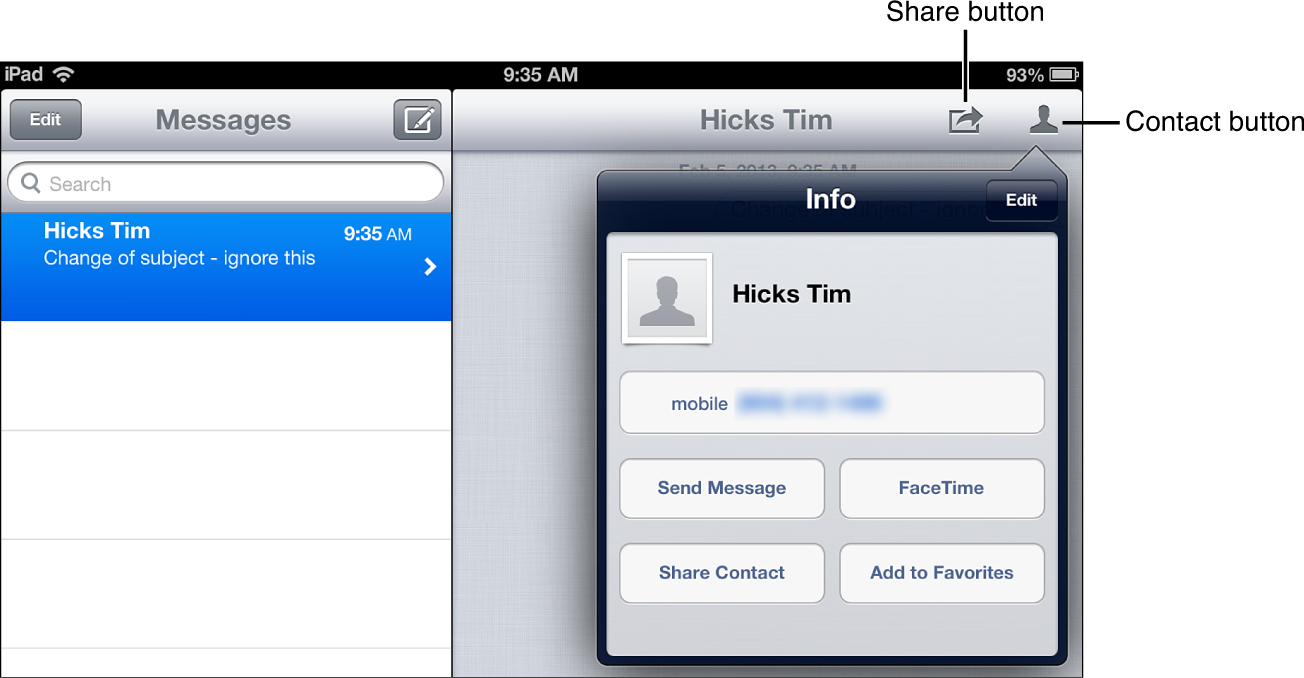
As shown in Figure 10.9, a Share button appears to the left of the Contact button. Tap it, and each of the pieces of a conversation will have a small circle placed to their left, as shown in Figure 10.10. Tap a circle and a check mark will appear inside.
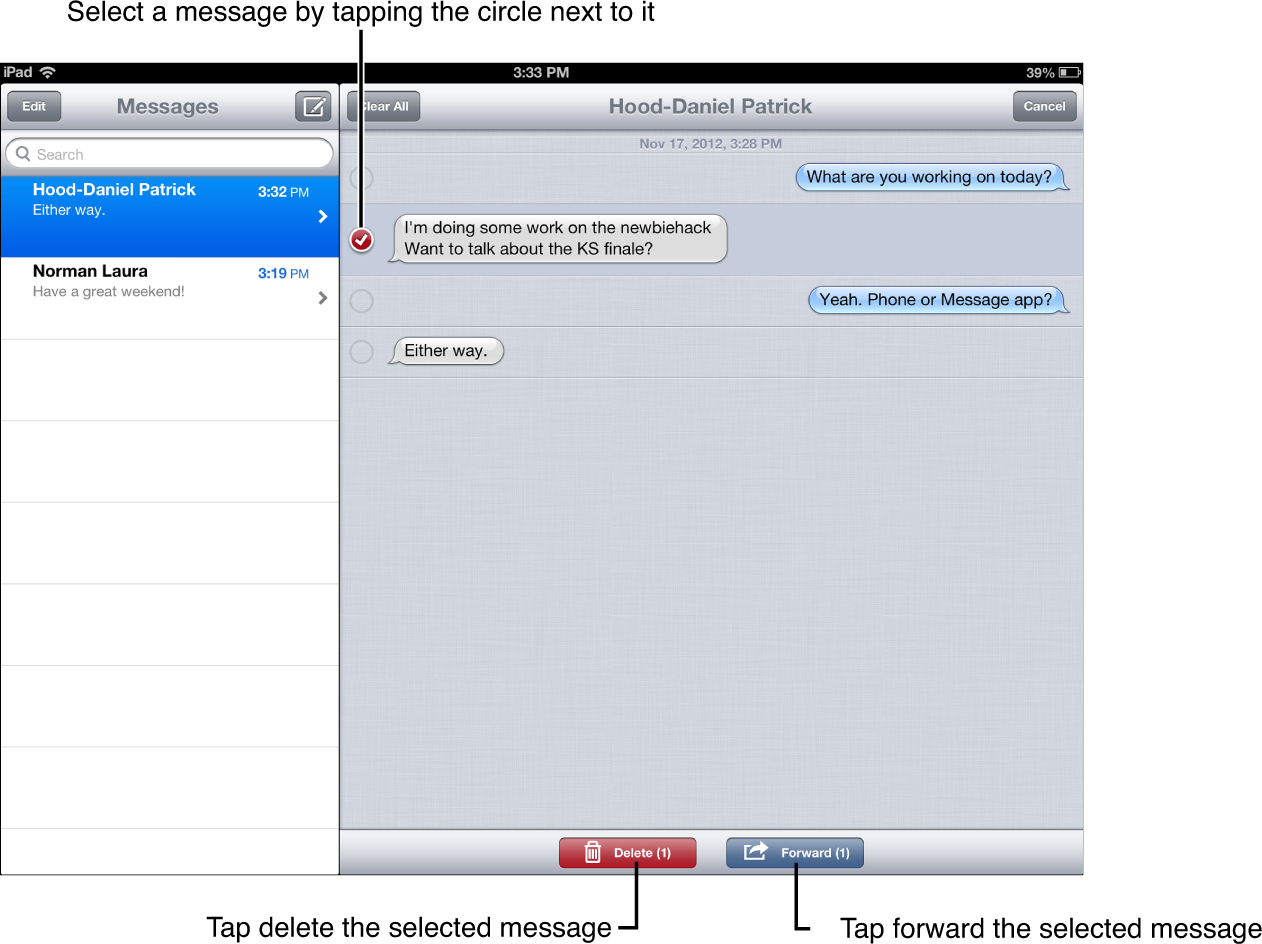
After you select one or more responses, you can tap the Delete button at the bottom to remove them from the conversation. Alternatively, you can tap the Forward button to create a new message containing the selected responses (in their entirety) for forwarding to someone else in a different message. (This is useful if someone provides a phone number or address that might be useful to another one of your contacts.)
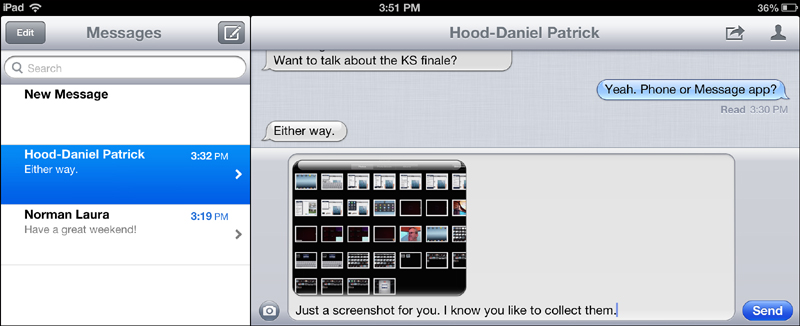
Finally, you might have noticed the small camera icon to the left of the text box. Tap it, and you’ll see these two options (also shown in Figure 10.11):

• Take Photo or Video—If you choose to take a photo or video, the Camera app will open (see Chapter 9, “Apps for Photos and Videos,” for details on using it). After you take a photo or video, it will be sent to your contact using the Messages app—he or she can tap the photo or video to view it.
• Choose Existing—If you tap the Choose Existing button, you can browse the Photos app (also covered in Chapter 9) and pick a photo or video to send to the other person in a message. Figure 10.12 shows that I’ve done the email equivalent of sending an attachment by embedding a photo in the text window—and I can also add a message!
That’s it for the Messages app. As you can see, it’s a great way to have a back-and-forth conversation with a contact. And just like text messaging and email, you can include a photo or video with a message.
Messages is a great app, but I find it does have limitations. For example, I can definitely talk faster than I can type, and I imagine you can, too. Sometimes my replies have spelling errors, and if I insert a little sarcasm into a text message, sometimes my recipient doesn’t read the way I intended and might be offended.
For those moments when the Messages app just doesn’t cut it, you’ll want to open the FaceTime app for face-to-face voice chat.
Using FaceTime
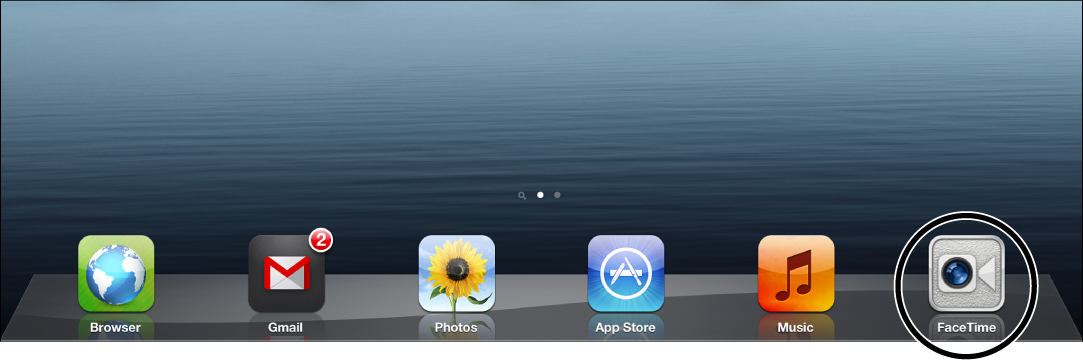
FaceTime is awesome. Any contacts who are running iOS 5 or greater on a device with a front-facing camera can be “dialed up” with the FaceTime app, and you’ll see their shiny, happy face onscreen. The icon for the FaceTime app is shown in Figure 10.13, but don’t tap to open it just yet.
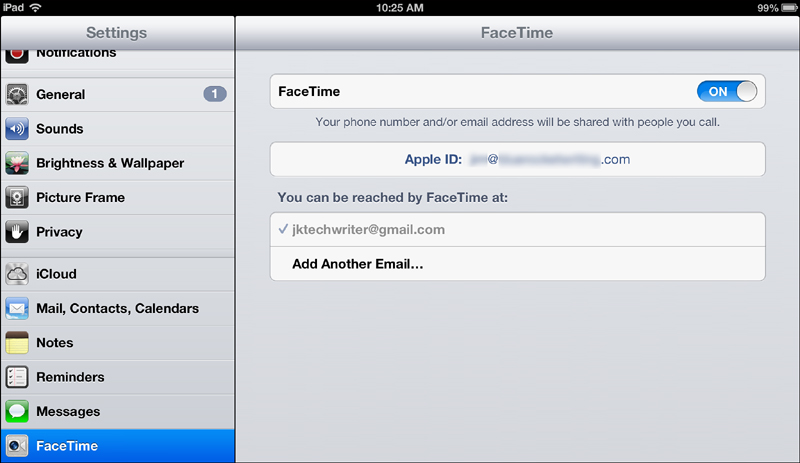
Before opening FaceTime, you need to open the Settings app and add one or more email addresses that will be used to communicate between devices running the FaceTime app. Figure 10.14 shows the Settings app open and the FaceTime option selected. Notice on the right side that FaceTime uses a combination of your Apple ID email address and any additional email addresses you wish to add that other FaceTime users can use to contact you.
Caution
Although you can use the email address associated with your Apple ID to run FaceTime, I highly recommend that you use a separate email address that you can provide to other FaceTime users. This email address must be added to the other user’s FaceTime Contacts (you’ll learn how to do this in a moment); otherwise, FaceTime calls between you and the other person will not work.
You can tap the Add Another Email link and add as many email addresses to be associated with FaceTime as you like. I have multiple email addresses that I use for personal and work-related activities, but for FaceTime I only use one (not my Apple ID email address) and provide that to any of my friends or colleagues running FaceTime so they can call me. The flip side to this requirement is that I must also have my friends and colleagues provide me with their FaceTime email address so I can add it to the FaceTime Contact list.
After you’ve added an email address in the “You Can Be Reached by FaceTime At:” field, close down the Settings app and tap the icon for the FaceTime app to open FaceTime. You’ll see a screen like the one in Figure 10.15. The camera shows your image (or whatever your camera is pointed at when FaceTime opens).
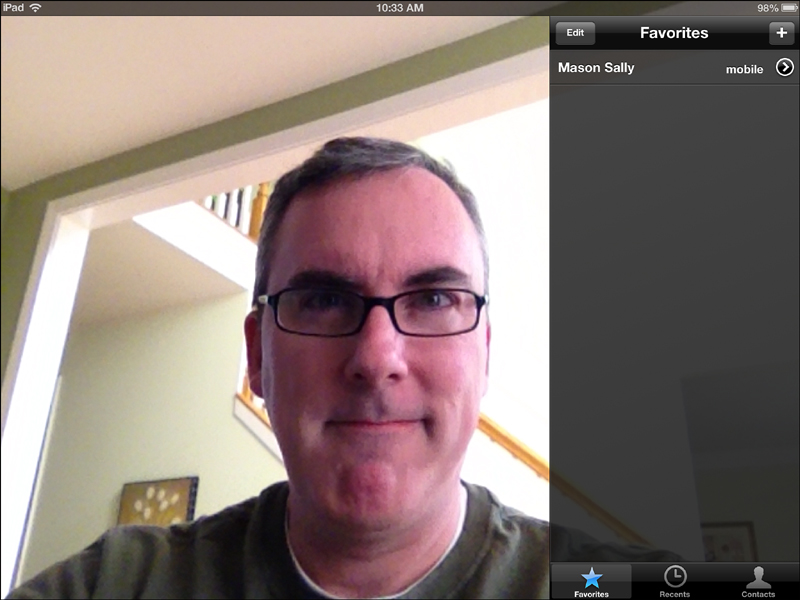
You haven’t made a FaceTime call yet, so you’ll see your face on the screen along with some buttons. In the bottom-right corner, you’ll see these three buttons:
• Favorites—Tap the Favorites button. Any contacts you’ve added to your Contacts app and made a “Favorite” (refer to Chapter 4, “Contacts,” for instructions on how to do this) will be listed here. The Favorite button is simply a faster method for locating people you wish to FaceTime—if someone isn’t in the Favorite listing, you’ll have to hunt them down using the Contacts button.
• Recents—As you will see later in this chapter, a complete list of all FaceTime calls is provided, including the date and which email address was used (home or work, for example).
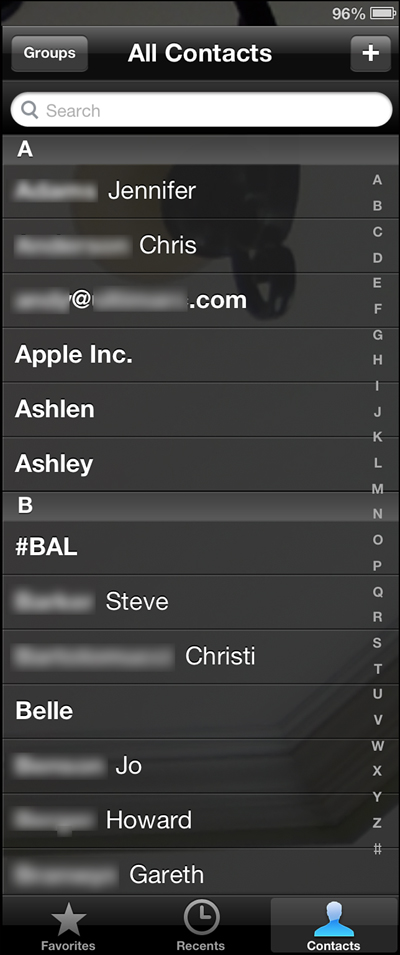
• Contacts—Tap this button, and you’ll see a screen similar to the one in Figure 10.16 (your list of contacts will obviously look different). This is nothing more than a list of all your contacts from the Contacts app. The difference is that anyone listed here who does not have a device that runs FaceTime or does not have an email address associated with their FaceTime app cannot be contacted.
Caution
Remember, to place a video call to someone in your Contacts list, two conditions must be met:
• The person you want to call must have your FaceTime email address saved in his or her Contacts app (meaning you have been added to their Contacts app and have an information page containing your FaceTime email address).
• You must have that person’s FaceTime email address saved in your Contacts app. If both of these conditions are met, you can make a FaceTime call!
 Tip
Tip
As with a standard phone, using FaceTime requires you to simply tap one of your FaceTime contacts to make the call. The problem is that the person you’re calling may not be ready to take that call. It’s always best to send a quick text message or email to set up a FaceTime call. If the person’s device isn’t set to vibrate or the volume isn’t turned down, the FaceTime app will ring a tune that can be disruptive if the recipient of the FaceTime call isn’t ready for it.
To make a FaceTime call, tap a contact’s name and a screen will appear, like the one in Figure 10.17.
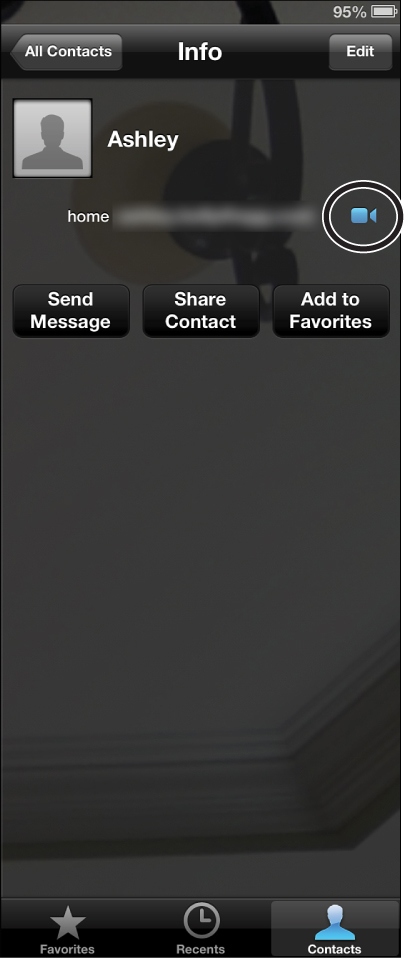
How do I know this person can make and receive FaceTime calls with me? Easy! See that little video icon to the right of the person’s email address? That means Ashley has my FaceTime email address in her Contacts app—and obviously I have her FaceTime email address. All that’s required to make the FaceTime call is to tap the email address (or tap one if multiple email addresses are listed).
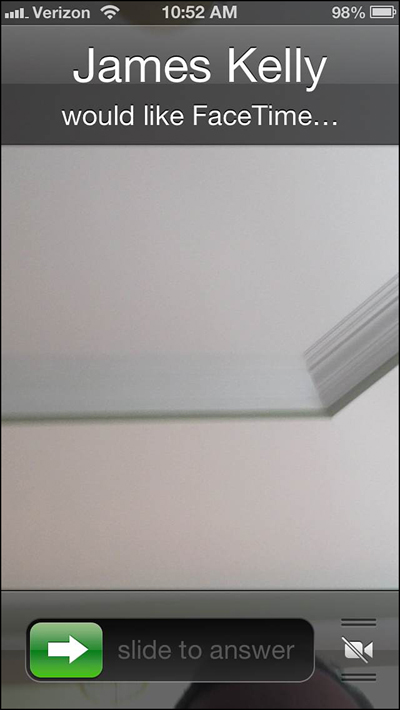
Figure 10.18 shows what the person you’re trying to call sees. If the call recipient chooses to answer, a FaceTime call is started. As you can see in Figure 10.19, you see the person you’re talking to in the larger portion of the screen, while you see yourself in a smaller window. The person you’re talking to sees your video in the main screen and theirs in the smaller window. If the person you try to call doesn’t answer within 30–45 seconds, the call will cancel.
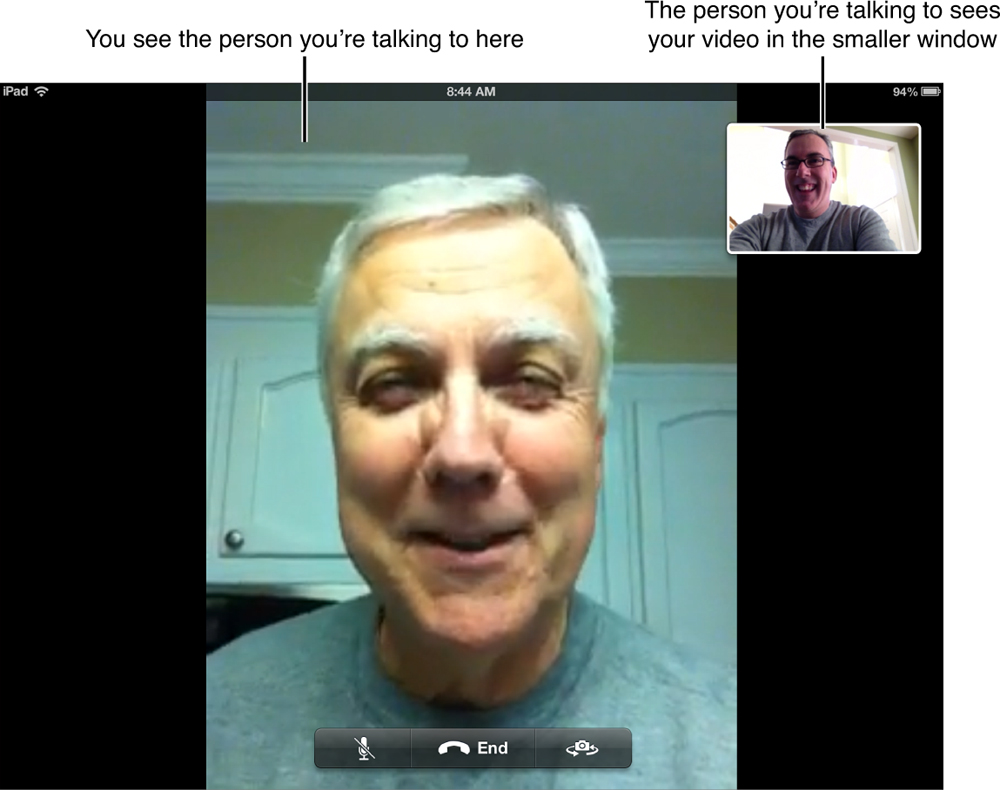
If the person you’re calling answers the phone, you’ll be greeted by that person’s face as shown in Figure 10.19.
A few things are going on here. You can tap and hold the small windows showing your video and move it to any of the four corners of the screen.
At the bottom of the screen, you’ll see three buttons: Mute, End, and Swap Camera.
Mute—If you tap the Mute button, the microphone on the iPad will stop transmitting your voice to the other caller. This can be useful, for example, if you’re in a noisy area and wish to find a quieter spot—tap the Mute button to spare the other person the noise until you’re in a place where you can be heard and then tap it again to turn the Mute option off.
End—The End button is easy—tap it once and the FaceTime call ends. There is no confirmation screen that pops up asking, “Are you sure?” When you tap the End button, the call is over immediately.
Camera Swap—Finally, the Camera Swap button is useful when you’re making a FaceTime call and maybe want to share something you’re looking at with the other person. When my wife travels, we use FaceTime and I’m able to swap to the rear camera so she can see our two boys playing well together (not always). This feature also came in handy when a friend swapped the camera so he could show me a piece of furniture he’d just built in his workshop.
Note
Swapping the camera allows you to keep your eyes on the small box so you can make certain the other FaceTime user is seeing what you want them to see. Without the rear-facing camera, you’d have to turn the iPad around and away from you, and it’d be a bit difficult to tell where you were pointing the camera.
You can use the volume control buttons on the side of the iPad to increase or decrease the sound volume. Turning the volume all the way down is the same as tapping the Mute button.
When you’re done with your call, tap the End button, and FaceTime once again will show your own face onscreen.
As mentioned earlier, you can see a list of your recent calls by tapping the Recents button.
The most recent FaceTime call will be listed at the top, and the list will scroll down if you need to view older calls that are not on the screen. At any time you can tap the small circle with the arrow pointing to the right to view more details about the call. Figure 10.20 shows information on my most recent call—I can see that a few calls were cancelled (not answered) and that the actual FaceTime call lasted 17 seconds.
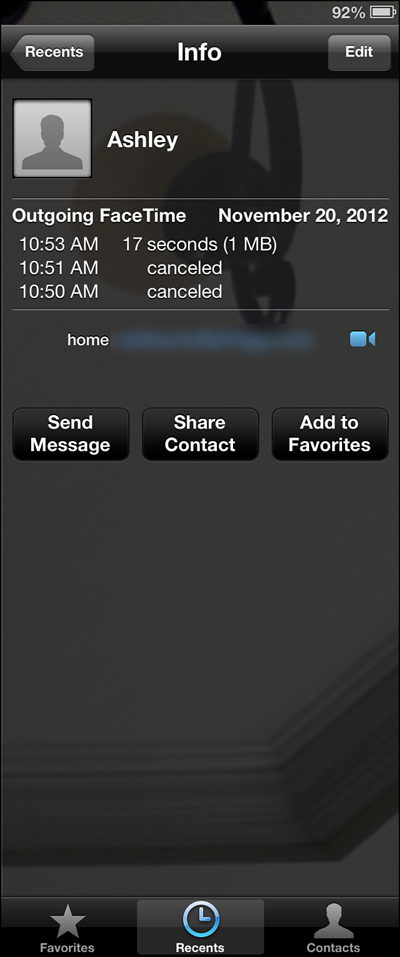
Other options shown in Figure 10.20 include sending a message to the person (using the Messages app), sharing the contact information, and adding this person to the Favorites list. I can also tap the email address again to make another FaceTime call. The Edit button allows you to make similar changes to a contact without actually opening the Contacts app. Refer to Chapter 4 for details on adding new fields, setting ringtones, and more.
And that’s it for FaceTime. Remember, FaceTime requires an email address to be added in the Settings app. You must provide this email address to other people who wish to call you using FaceTime, and you must have their FaceTime email address added in your own Contacts app.
Caution
FaceTime calls can be made using Wi-Fi or your cellular data service, but long calls will definitely eat up your data plan and can cost you some serious money. I always try to do my FaceTime calls when I have a Wi-Fi connection, either at home or away (such as at my favorite coffee shop).