12. Apps for the iPad
When the iPad was released in 2010, it was promoted as a device for downloading and presenting content. But what is content? The general definition for content (in relation to the iPad tablet) is anything that is obtained online, either via a download or a web browser. This includes email, music, video, games, digital books (called eBooks), how-to articles, weather reports, news, and so much more. Content is king, as they say, and the iPad’s original (and still current) mission is to give users access to all the digital content they can handle.
You’ve already seen how easy it is to access email, Facebook, Twitter, websites, and digital photos and videos, and now it’s time to see how your iPad offers up additional content—new apps.
Your iPad came preloaded with 20 apps, but currently over 250,000 apps are available from Apple via its App Store. The App Store offers apps from a variety of software developers, not just Apple. Most of these apps are free or extremely cheap (most apps are less than a dollar), and a smaller subgroup can be had for much less than you typically pay for software for a computer. And access to all of these apps comes via the App Store app, which you’ll learn how to use shortly.
 Note
Note
Before you go and use the App Store app, I need to remind you that downloading content will require an Apple ID, a password, and a saved credit card on file with Apple. Refer to Chapter 3, “iCloud and Settings,” for information on setting up an Apple ID.
Exploring the App Store
Tap the App Store icon to look for new apps.
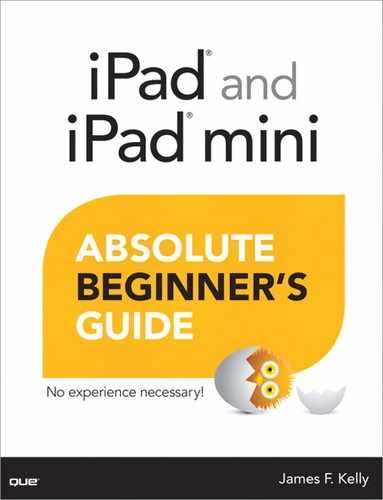
After you open the App Store app, you’ll see a screen similar to the one in Figure 12.1.
When you open the App Store, the Featured screen will look different from the one in Figure 12.1. That’s because the App Store is constantly changing in appearance. Think of the Featured screen like the display window outside a clothing store—it’s always changing to show you the latest arrivals. The App Store works the same way—popular apps are shuffled to the Featured screen in the hopes that you find something you like.
Along the bottom of the screen you’ll see five buttons: Featured, Top Charts, Genius, Purchased, and Updates. Let me explain what each of these are and then I’ll show you how each one works:
• Featured—First, the Featured button will always bring you back to the Featured screen, where you can see the latest recommendations. It will usually consist of a mix of new, popular apps that are selling well along with an occasional category (such as the Halloween category during the month of October, which offers up Halloween-related apps). This screen scrolls down to reveal much more. You’ll see sections such as New to iPad?, Great Games for iPad with Retina Display, and New and Noteworthy (although these may not appear every time you access the App Store). The categories change, but if you scroll all the way to the bottom, you’ll see the Quick Links section, as shown in Figure 12.2.

The Quick Links section sometimes changes, but not often. You’ll find collection buttons (such as Education Collections) that take you to additional screens that show only apps related to the collection topic. You’ll also find a useful button called Apps Starter Kit, which always contains a good mix of free and paid apps that Apple considers beneficial to most iPad users.
You’ll also see your Apple ID listed along with any credit you currently have (from Apple gift cards, for example). To the right of the Apple ID is a Redeem button—if you ever obtain an Apple gift card (such as an iTunes gift card for music), you’ll click the Redeem button and enter the long code found on the back of the card. This will add the gift card amount to your account so you may purchase apps, eBooks, music, and much more.
Note
Your Apple ID isn’t just for the App Store. Other apps such as iBooks, Newsstand, and iTunes (all covered later in this book) have access to any funds credited to your account. Whether you buy an eBook, a movie, a song, or an app, if you have credit available, the purchase price will first be applied to the credit before any additional charge is made to your credit card on file.
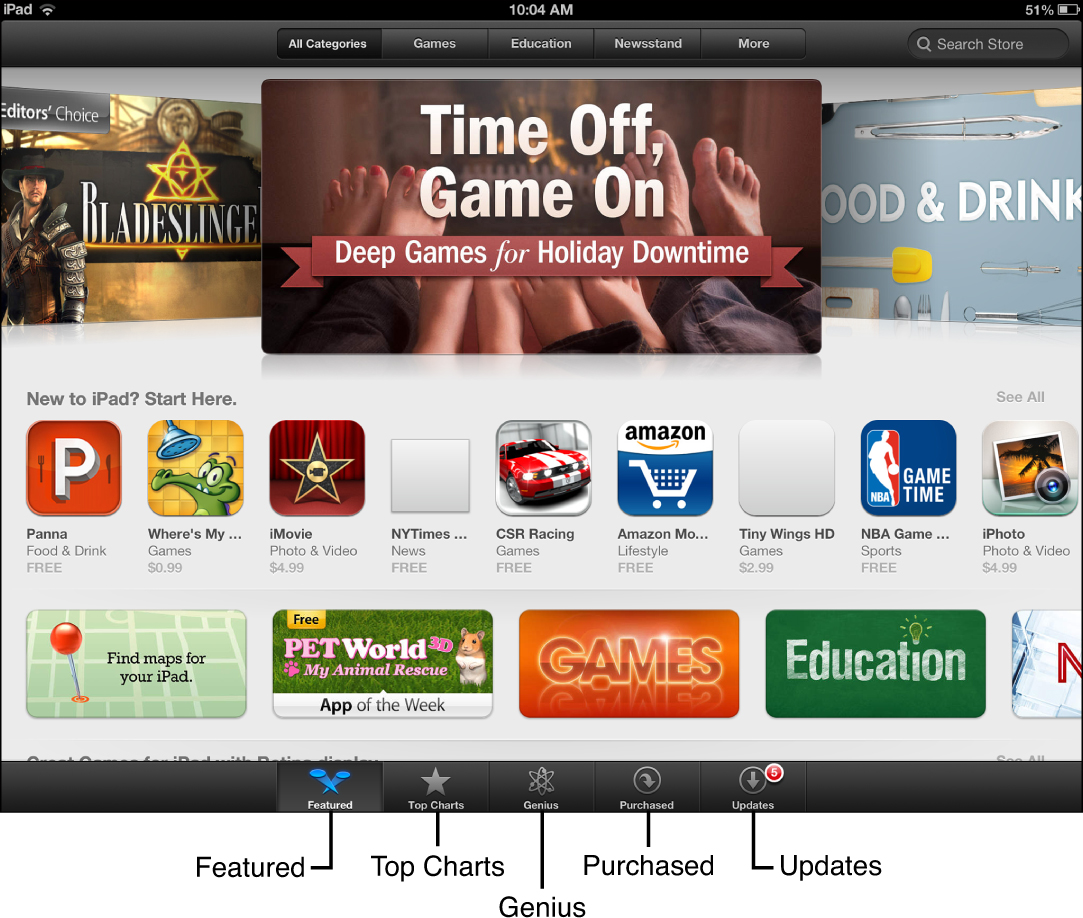
• Top Charts—Tap the Top Charts button and you’ll see three columns of apps listed—Paid, Free, and Top Grossing—as shown in Figure 12.3.
Top Charts is a great place to visit occasionally because you’ll always find one or more interesting apps you might not have found otherwise. Using the App Store is often like looking for a needle in a haystack if you’re just hoping to happen upon something interesting. Top Charts does the job of presenting you with some of the most popular apps that other iPad users are downloading. I show you in the next section how to download an app to your iPad, but for now I want to point out the small button to the right of each app’s image. This button contains one of five things: a price, the word Free, the word Install, the word Update, or the word Open.
If the button has the word Open on it, that means you already have the app installed on your iPad. The Update option simply means the app developer has modified the app with some improvements or bug fixes—tap the Update button to update the app on your iPad. The word Install means you’ve purchased the app already (or downloaded it previously and then deleted it). The word Free means it won’t cost you anything to install the app on your iPad, and the price... well, that’s how much it costs if you want to download the app to your iPad. (Again, I’ll show you how to do this in the next section.)
• Genius—Tap the Genius button next. To use the Genius for Apps service, tap the Turn on Genius button, enter your Apple ID password, and then agree to the terms of service. If you turn on the Genius service, Apple will examine the apps you use the most (or the ones you tend to purchase most often) and then offer up recommendations.
The Genius for Apps service is just another option for finding apps that you might find fun or useful; you’ll still need to pay for any paid apps, but free apps can be downloaded at no charge.
• Purchased—Next, tap the Purchased button. If you’ve not yet purchased any apps, this list will be empty. (Please note that free apps will show up here; think of them as purchased for $0.00.) You’ll click on the small cloud icon to the right of any app to download and install it again on your iPad. (This allows you to delete apps that you’re not using anymore, but they’re always available for reinstallation should you change your mind!)
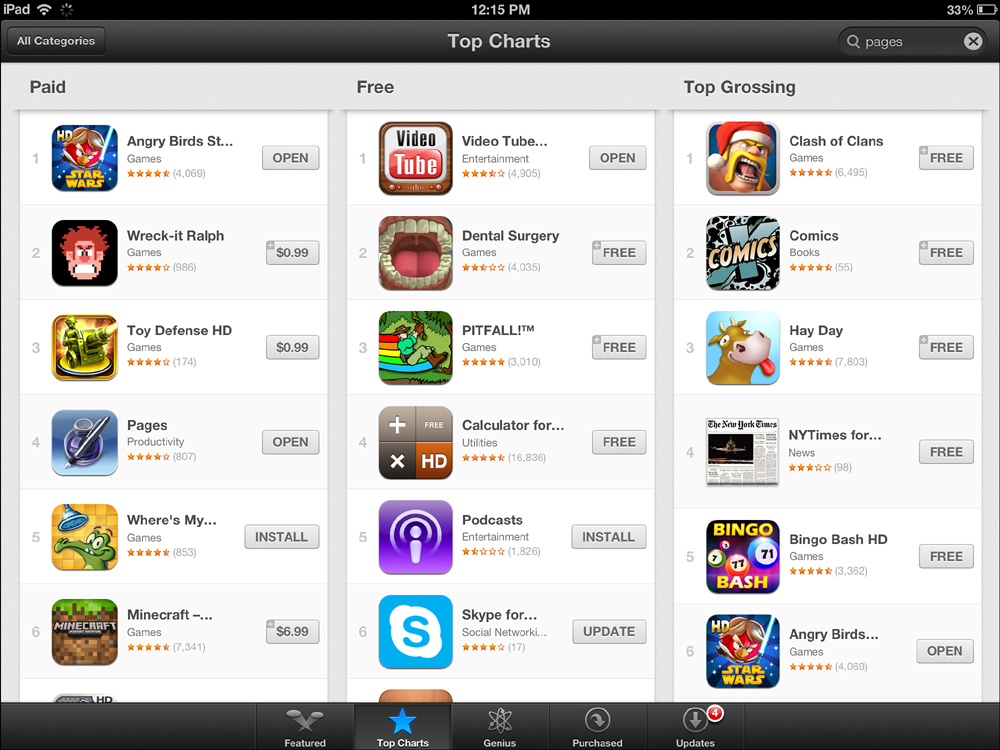
• Updates—The last button along the bottom is the Updates button. App developers are constantly adding new features to their apps...and fixing bugs. Whenever an update to an app you have downloaded is made available, you’ll see a small number appear on this button, as shown in Figure 12.4.

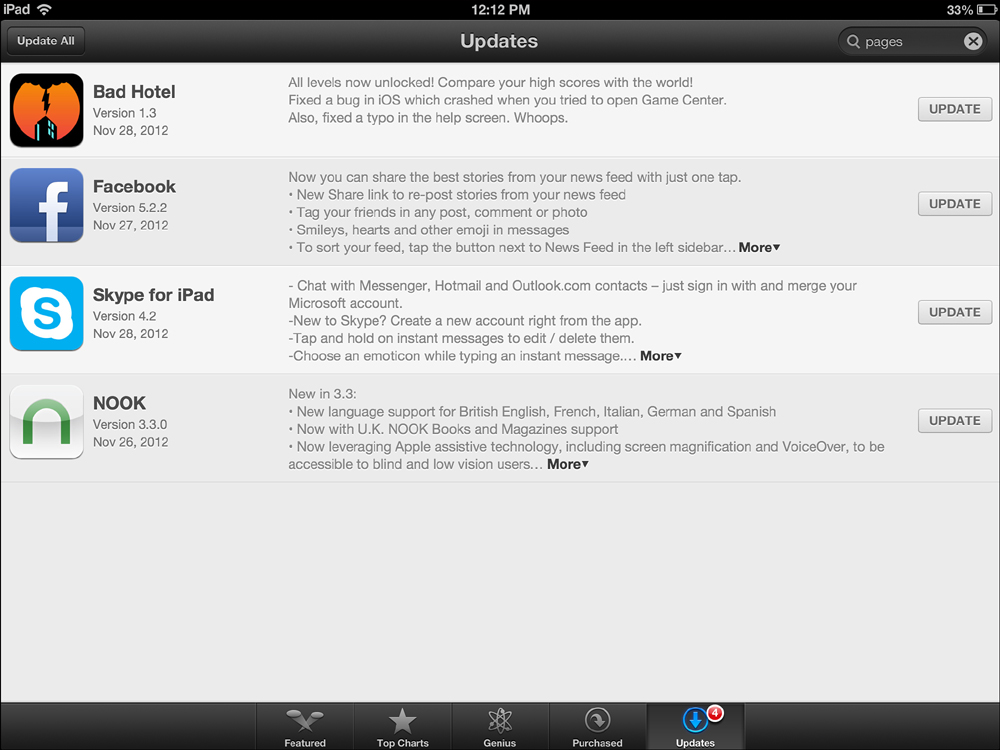
Tap the Updates button, and you’ll see a list of the apps offering updates, as shown in Figure 12.5. To the right of each app is an Update button you can tap to update a specific app, or you can tap the Update All button in the upper-left corner. The latest version of iOS will automatically begin updating the apps for you, and a progress bar on each app’s icon will show you how far along the update has proceeded.
Note
If you tap the Update or Update All button and are asked to provide your Apple ID password, you are running an older version of iOS. When iOS 6 was released, Apple changed the update process so that a password wasn’t required to update the apps.
Searching the App Store
At the top-right corner of the App Store screen you’ll see a Search text box. Type in a keyword or the actual name of an app, and you’ll get a small list of matches, as shown in Figure 12.6.
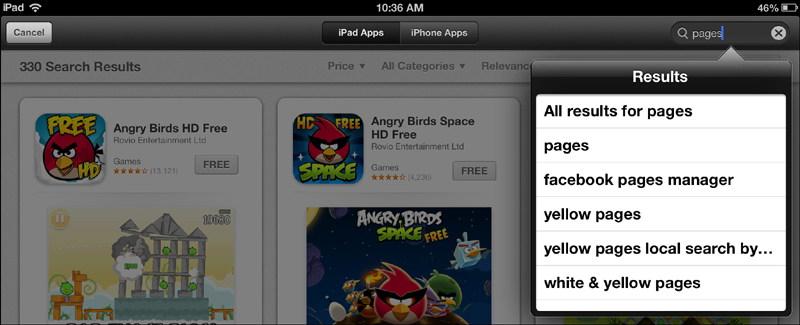
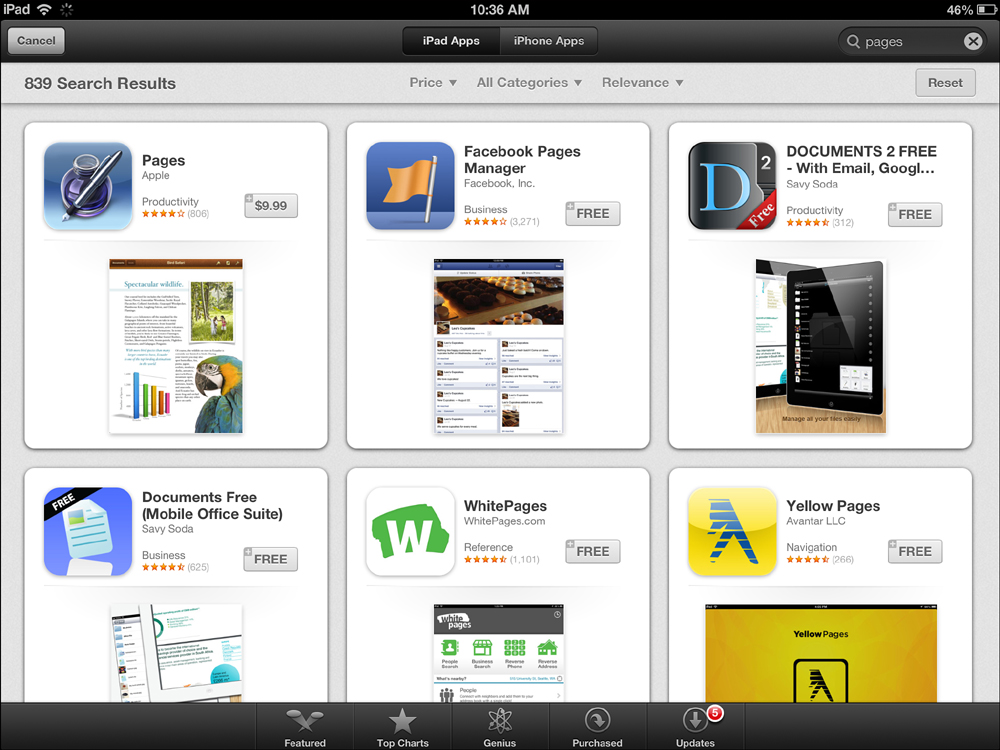
Tap one of the results, and another screen will appear that lists the best matches for your keyword. If you typed in the actual name of an app, that app should be shown first, as shown in Figure 12.7.
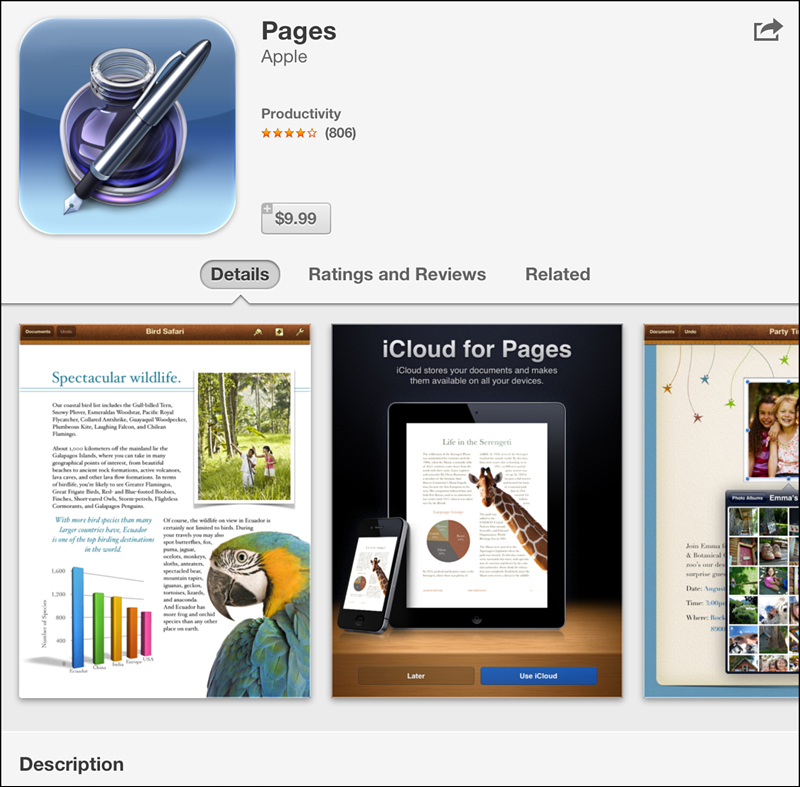
Tap an app’s icon, and that app’s information page will appear, as shown in Figure 12.8. This page contains a lot of information, so you’ll need to swipe down to view it all.

No matter where you tap an app (on the Featured screen or the Genius for Apps screen, for example), you’ll be shown the app’s information page.
Now it’s time to actually install an app from the App Store. Keep reading to see how a purchase is made (for paid apps) and how the installation occurs.
Purchasing an App
When you’re viewing an app’s information page, you’ll see that familiar button listing the app’s price or the word Free, Install, or Open. The Install option only appears if you’ve previously purchased an app, and the Open option appears if the app is already installed on your iPad. For this section, we’re only concerned with free apps or paid apps that you do not already own.
Back in Figure 12.8, you can see information about the Pages app from Apple. Its price is $9.99. If you wish to read more about the app or view some screenshots, you can use the Details button. Swipe your finger right or left to view up to five screenshots from the app. Further down (swipe your finger up) you’ll find a description of the app, along with a listing of any updates that have recently been applied to the app, as shown in Figure 12.9.

Further down the Details page is information on the app’s developer (in this case, Apple Inc.), the size of the app (231 megabytes), an age recommendation (not sure if four-year-olds are really ready for Pages, but okay), and a list of devices on which the app will work.
 Caution
Always check the Requires section of the Information screen to make certain the app is compatible with your version of the iPad as well as the iOS version. Don’t risk spending money or wasting time on an app that your iPad cannot run!
You can tap the Ratings and Reviews button to read what other users are saying about the app.
In addition to reading reviews, you can award the app between one and five stars (if you have purchased the app). You can also write your own review by tapping the Write a Review button.
Tap the Related button to see apps from the same app developer and, in some instances, apps that might have similar features.
Once you have decided on an app to purchase (or simply download if it’s free), you’ll want to tap the price/Free button. It will turn into either a green Buy App button or simply an Install App button (for free apps).
When you tap the Buy App button (or the Install App button), you’ll be asked for your Apple ID password.
 Tip
Tip
Don’t worry about accidentally tapping the Buy App button—all app downloads, whether free or paid, require you to type in your Apple ID password.
After you enter your password, the app will begin to install. You can watch the progress on the app’s information page, as shown in Figure 12.10 or you can tap the Home button to leave the App Store and watch the app install on your iPad’s home screen. You don’t even have to watch it download at all; you can do something else and come back to it. When the app is done installing, simply tap the newly installed icon to open the app.
Again, the process is the same whether the app has a price, is free, or if you’ve purchased it previously (and deleted it) and wish to install it again.
Speaking of deleting an app, if you decide you want to remove an app from your iPad, the process is extremely easy. On the home screen, hold your finger on the app’s icon until you see all the icons dancing, or wiggling side to side.
Any app that can be deleted from your iPad will have a small X in the upper-left corner of its icon. Tap that X, and a box will appear confirming you want to delete the app. Tap Delete, and the app is deleted. Tap the Home button, and the app icons will stop dancing.
Note
A deleted app is simply removed from your iPad; you still own the app (if you paid for it) and can reinstall it at any time. To do so, open the App Store, tap the Purchased button, and find the app in the list. Tap the Install button (no price is listed because you already bought it once before), provide your Apple ID password, and the app will (once again) be installed.
Installing new apps on your iPad isn’t difficult at all. Because it’s so easy, you’ll quickly find that apps are taking over every square inch of your iPad’s home screen. When you find your iPad hosting dozens and dozens (or hundreds) of apps, it’s time for some app management.
Good App Management
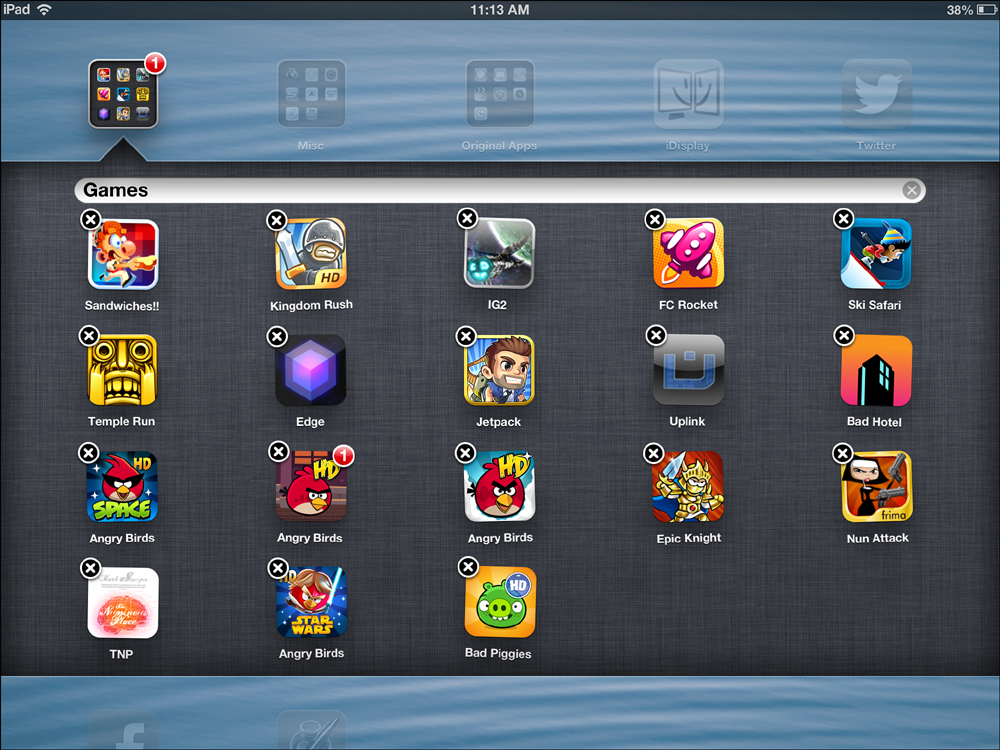
You learned back in Chapter 2, “Overview of iOS,” how to make folders. You tap and hold on an app until you get the dancing app icons. Then all you need to do is drag one app icon on top of another app icon, hold for a second, and the two icons will merge into a new folder you can name. Figure 12.11 shows that I’ve created a new folder called Games where I’m storing all my game apps.
Although you can create folders to hold any mix of apps you like, I highly recommend you try to create folders with themes—games, productivity, personal, and so on. This makes it faster and easier for you to find the app that you need.
In addition to organizing apps using folders, you’ll also find the occasional app purge helpful. Every three or four months I’ll sit down and go through all my apps, looking for those I just haven’t opened or used for some time. When I find an app that’s just taking up space, I go ahead and delete it. I can reinstall that app if I ever find I really need it back. By deleting unused apps, you’ll free up valuable storage space on your iPad.
Tip
Apps are getting larger in size! When the iPad was upgraded to the Retina Display, users suddenly noticed that apps that were under 500MB in size were now well over 1GB in size! That high-resolution display really adds to the size of apps. Therefore, you should delete apps you’re not using so you don’t run out of space.
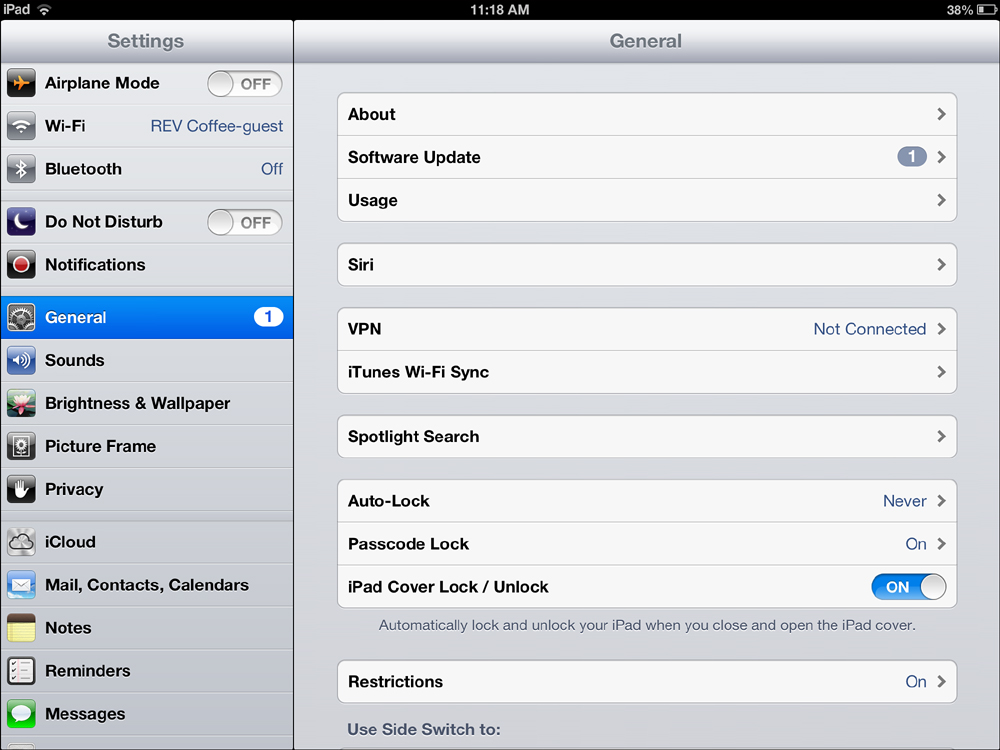
Go into the Settings app and tap the General option on the left, as shown in Figure 12.12.
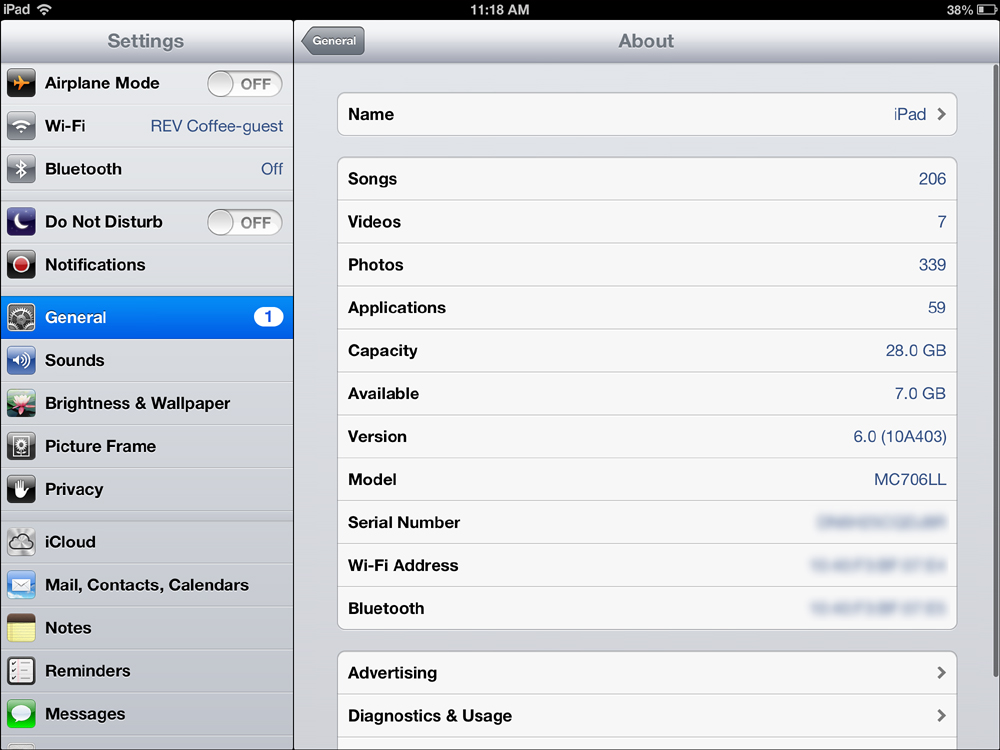
On the right side of the screen, tap the About option and you’ll see an information page like the one in Figure 12.13. Below the Capacity listing, you’ll see the Available listing, which tells you how much free space you have left. Keep an eye on it, because the iPad’s internal memory cannot be upgraded—you’ll need to delete apps to free up more space.
And that’s about it for the App Store. It’s your go-to place for finding new and interesting apps for your iPad. Over time, you’ll build a library of apps that will give your iPad additional functionality and provide you with plenty more ways to use your iPad.