17. The Two iPad Centers
In This Chapter
• The two iPad centers
• Exploring the Notification Center
• Configuring Notification Center
• Configuring Game Center
Your iPad has the ability to notify you of many things—new email messages, reminders, birthdays, app updates, and much more. Although many of the apps can pop up alerts on the screen or use the badge system (small numbers on the icon of the app), one really useful feature is built right in to your iPad that can do even more amazing things. It’s called the Notification Center, and you may find it just as useful as I do for getting a daily (or hourly) update of all the things that matter to you.
The Notification Center is meant to be a single location for you to see what’s going on in your world—weather, email, stock prices, messages, and pretty much anything else that matters to you. It’s a great productivity feature I’m hoping you’ll find beneficial.
But your iPad doesn’t always have to be all about productivity; sometimes you just want to take a break and do something fun—watch a movie, read an eBook, maybe play a game? Yeah, games are great on the iPad, and what’s even more fun is playing games with friends... or against friends. And your iPad has a nice tool for finding opponents (friends you know or complete strangers) as well as tracking scores and putting together rankings. It’s called the Game Center, and I’ll wrap up this chapter by giving you a brief introduction to it.
Exploring the Notification Center
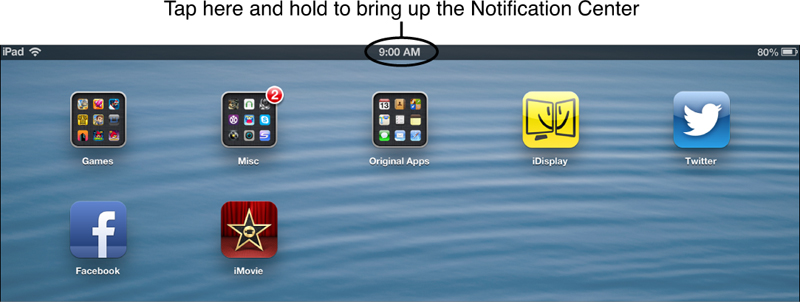
As you’ve been learning to use your iPad, you may very well have stumbled upon the Notification Center with a swipe of your finger in just the right place. Tap and hold your finger at the very top-center of your iPad’s home screen where the time is displayed, as shown in Figure 17.1.
Now drag down. If you perform this gesture correctly, you should see a small window appear like the one in Figure 17.2. Your window will most likely have different items in it or it might say No New Notifications. However, this is how you will access the Notification Center.
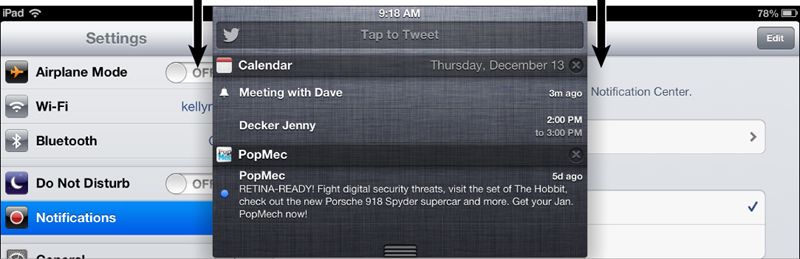
To close the Notification Center, tap on the bottom edge of the Notification Center window (where the small ridges appear) or tap anywhere outside the Notification Center. The Notification Center will disappear.
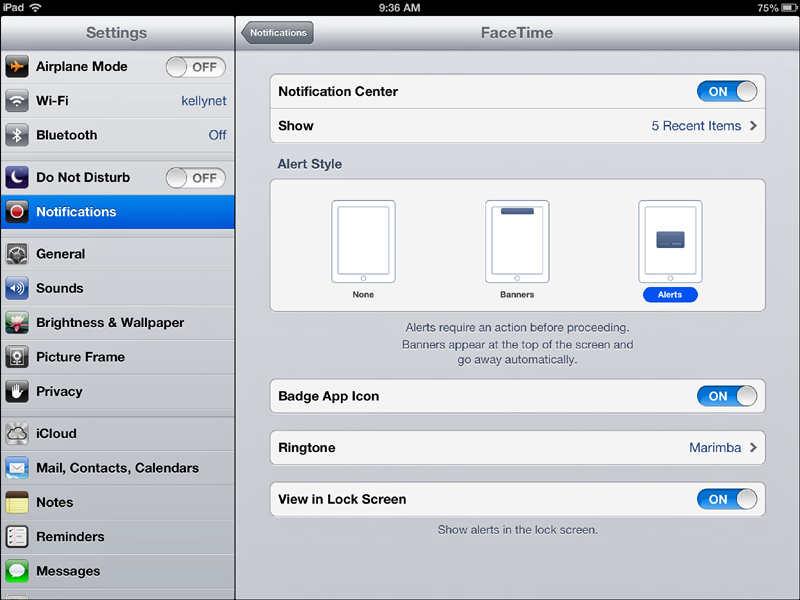
Now that you’ve seen where the Notification Center is located, let’s take a look at what kinds of information it can display. To do that, I want you to open up the Settings app and browse down the left column to the Notifications option, shown in Figure 17.3.
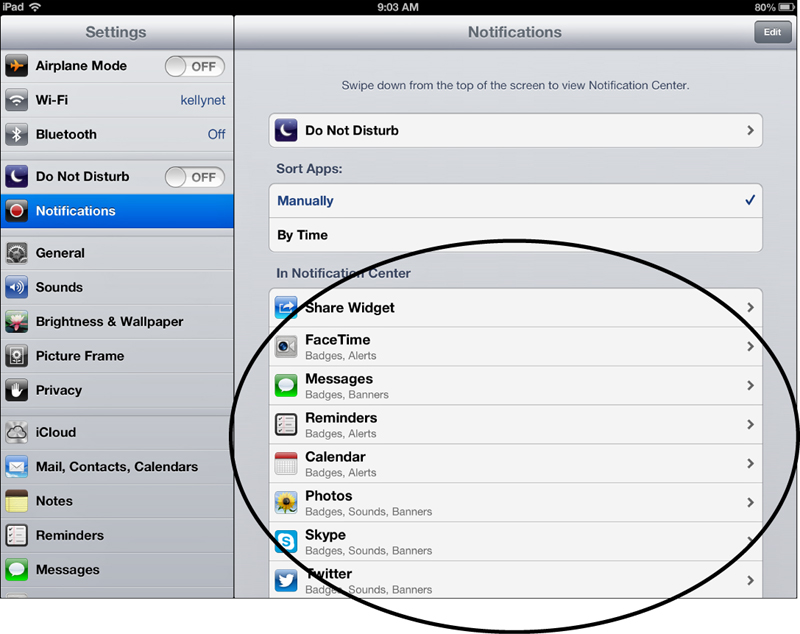
On the right side of Figure 17.3, you’ll notice a long list of apps and options that can be customized for the Notification Center. The first one you’ll see there is the Do Not Disturb option. By configuring the Notification Center’s Do No Disturb option, you can turn off your iPad’s ability to pop up alerts (with a matching sound) on your screen as reminders. If you’ve not seen these before, Figure 17.4 shows a standard pop-up alert that might appear on your iPad to remind you of a scheduled event you put in your Calendar app.

To turn on the Do Not Disturb option, tap that option and you’ll see a new screen appear like the one in Figure 17.5. You have several options:
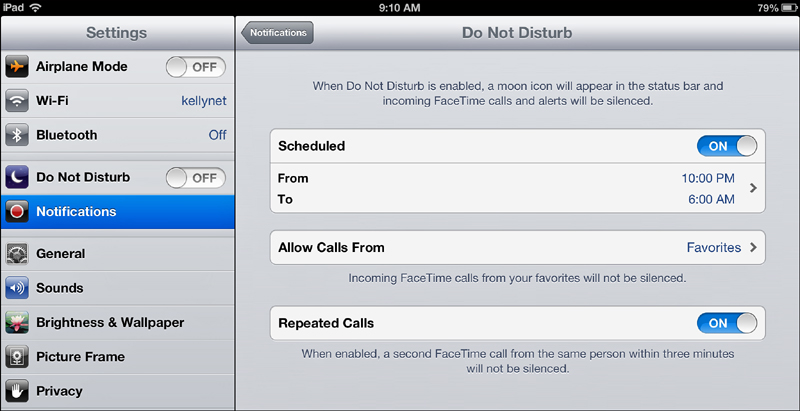
• Scheduled—As you can see, you can define a period of time that the Do Not Disturb feature is turned on—for example, I’ve set it to 10 p.m. through 6 a.m., so my iPad won’t make have any sounds or have alarms going off during that period of time. If I tap the Scheduled option’s toggle button to turn it to Off, alerts can pop up at any time.
• Allow Calls From—You’ll also see that you can override the scheduled Do Not Disturb period so you can receive FaceTime calls from those on your approved list. Tap the Allow Calls From option to specify contacts who can call you using the FaceTime app at any time.
• Repeated Calls—Finally, if the Repeated Calls option is set to On, anyone who calls you a second time with FaceTime within 3 minutes will be allowed through, even if they’re not on the Allowed Calls list. This is meant to allow for emergency calls, where someone might try to call you again and again to reach you.
Tap the Notifications option in the left column again to return to the screen shown in Figure 17.3. The next section below the Do Not Disturb option allows you to specify the order in which apps provide their notifications in the Notification Center. The Sort Apps section shown in Figure 17.6 is set to Manually, but you can tap the By Time option to have notifications ordered most recent at top to oldest near the bottom.
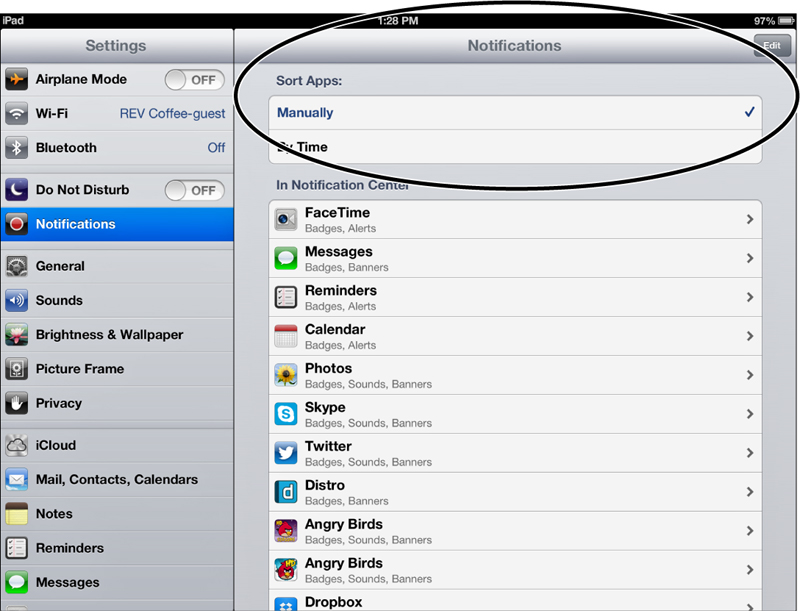
The Manually option won’t make sense to you until you actually configure some apps to use the Notification Center. I’ll come back to this in just a moment.
 Tip
Tip
I prefer the By Time option because it’s my natural tendency to look at the top of a list first to see what’s the most current notification. If you don’t have a lot of apps configured to use the Notification Center, it probably won’t matter whether you use the Manually or By Time option because all notifications will likely fit on the screen without you needing to swipe to scroll down the list.
Below the Sort Apps options, you’ll see a section called In Notification Center, as shown in Figure 17.7.
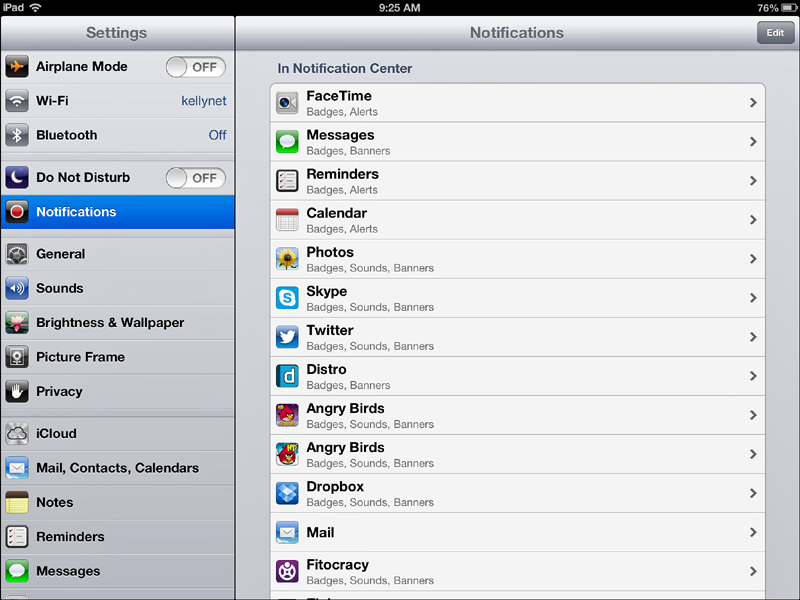
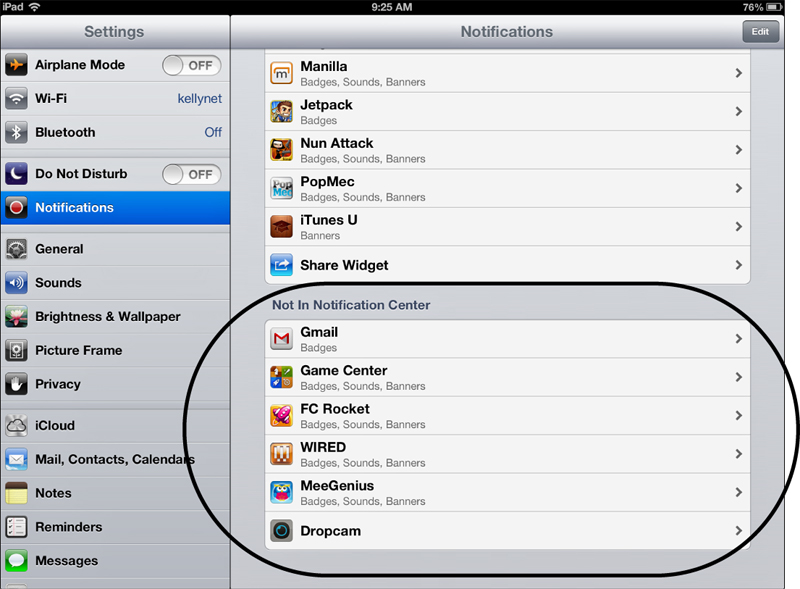
Any apps listed in this section can send notifications to the Notification Center that you drag down from the top of the screen. However, just because an app appears in this list doesn’t mean it will actually have anything to report. I’ll return to this list in a moment to show you how to configure individual apps, but right now I want you to scroll down the right side of the screen a bit until you see the next section titled Not in Notification Center, as shown in Figure 17.8.
 Note
Note
Your iPad might or might not have some apps automatically configured to use the Notification Center. Don’t worry—I’m going to show you how to turn on and off an app’s ability to send alerts to the Notification Center. You’ll be able to customize your list of approved Notification Center apps easily.
Now that you know how to navigate around the Notification Center’s setting options, let’s take a look at how to enable apps to send to the Notification Center (and disable them) as well as some of the additional configuration options available.
Configuring the Notification Center
Tap on any of the items in the In Notification Center section and you will see a screen similar to what you see in Figure 17.9.
Note
Every app has slightly different options to configure for the Notification Center, so you’ll have to investigate each of them to discover all of the options they provide to you.
Here are the options:
• Notification Center—At the very top of the option screen, you’ll see the Notification Center toggle button turned to On. If you turn that to Off (by tapping the toggle button with your finger), the FaceTime app will move to the Not In Notification Center section shown in Figure 17.8. That’s how easy it is to remove an app’s ability to pop up alert windows or even appear in the Notification Center.
• Show—If you tap this option, you can choose for the app to list 1, 5, 10, or 20 alerts in the Notification Center. For example, if I have this option set to 5 and six of my contacts call me using FaceTime while I don’t have my iPad handy, I can pull down the Notification Center and I’ll see the most recent five callers. The first caller won’t be shown in the list because the FaceTime Show option is set to 5 Recent Items—most recent to oldest.
Note
I can always open the FaceTime app to view a list of calls that I’ve made and calls that I’ve missed. My other option is to set the FaceTime Show setting to 20 items and hope that I’ve missed no more than 20 of my contacts calling.
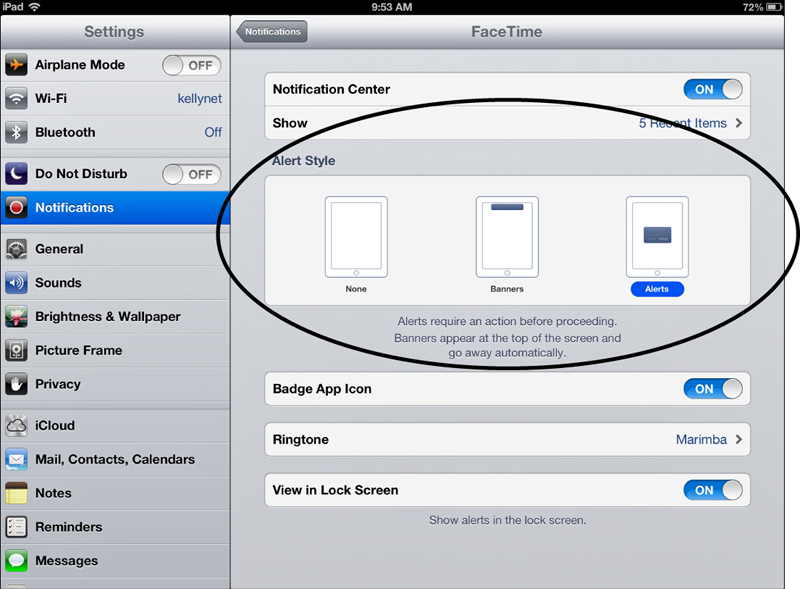
• Alert Style—Below the Show option is the Alert Style setting shown in Figure 17.10:
• None—With the None option, the app will not pop up an alert onscreen, nor will it put any information in the Notification Center when you drag it down from the top of the screen.
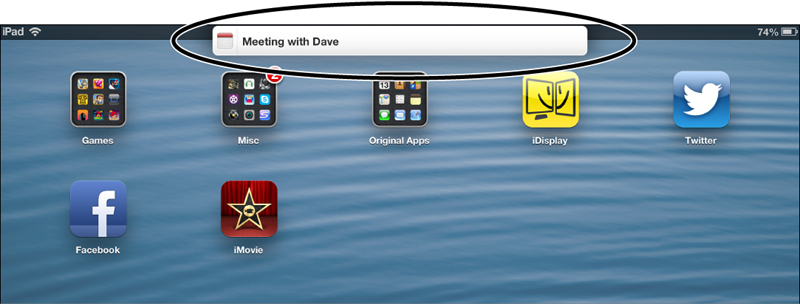
• Banners—If you select the Banners option, the app will put up a quick banner notification near the top of the screen, as shown in Figure 17.11. It disappears fast (about 5 to 7 seconds after appearing).
• Alerts—The Alerts option will create a pop-up alert like the one shown previously in Figure 17.4. Unlike the banners that disappear, alerts require you to acknowledge the message before it will disappear.
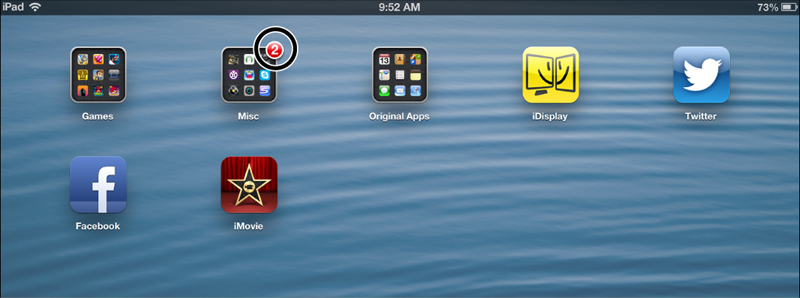
• Badge App Icon—The Badge App Icon setting is either On or Off. Not all apps use the Badge App feature, but those that do will put a small number on the icon of the app to alert you that something needs your attention. For the Mail app, for example, this number represents the number of unread messages. For the App Store, this number represents the number of app updates available to be installed. Figure 17.12 shows a typical Badge App Icon alert in use.
Tip
Why wouldn’t you simply send the app to the Not In Notification Center section if you don’t wish to receive any alerts? Good question! Even though I might choose not to have a banner or pop-up alert triggered, I might still want to see the number of missed calls on the FaceTime icon or the number of missed text messages from the Message app. A lot of apps can be quite annoying with the number of pop-up alerts or banners they create, but by setting an app’s Alert Style to None and leaving the Badge App Icon to On, you’ll still get a visual alert that something’s going on with that app.
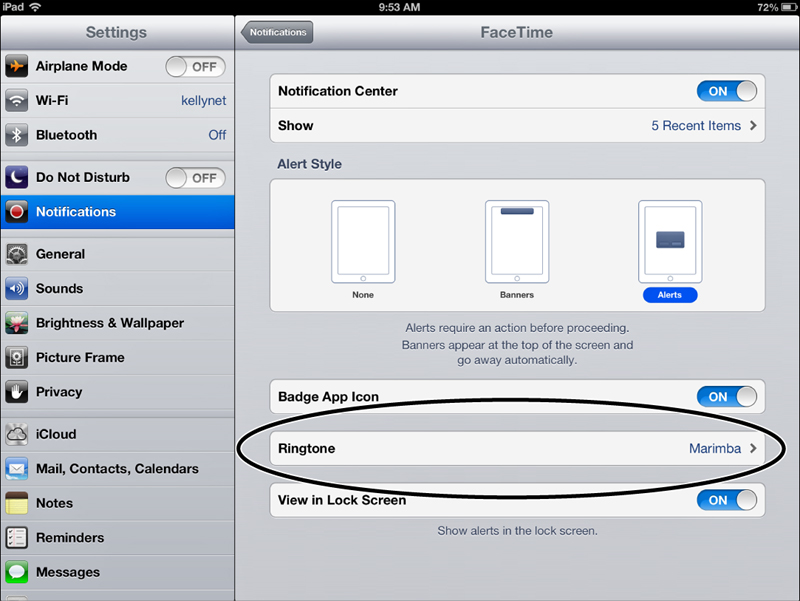
• Various options—Below the Badge App Icon section you’ll most often find options that are specific to the app you’ve selected. For example, Figure 17.13 shows the Ringtone section for the FaceTime app—tapping this option allows you to pick the sound that is played when someone is calling you or when you’re calling a contact.
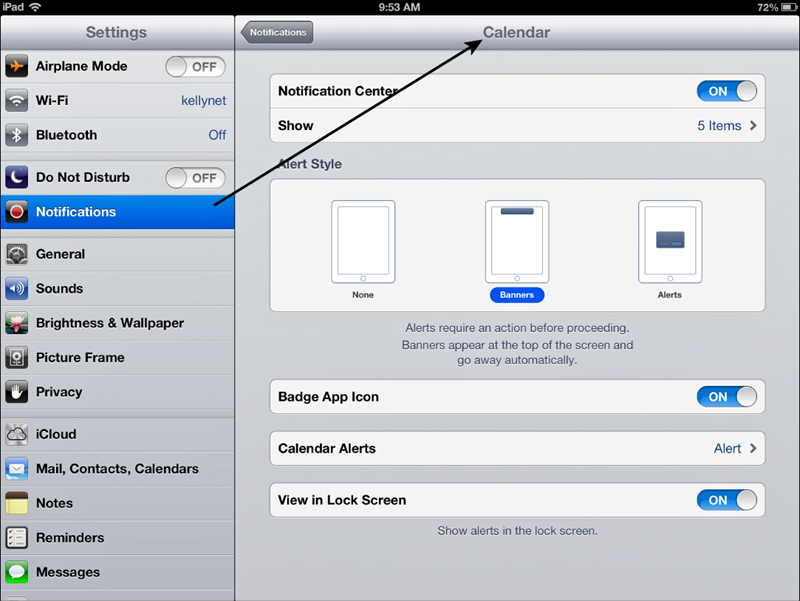
Tap Notifications under Settings to return to the previous screen. Tap Calendar to see the Calendar Alerts section shown in Figure 17.14. This section allows you to pick the sound that is played when a Calendar reminder alert is triggered.
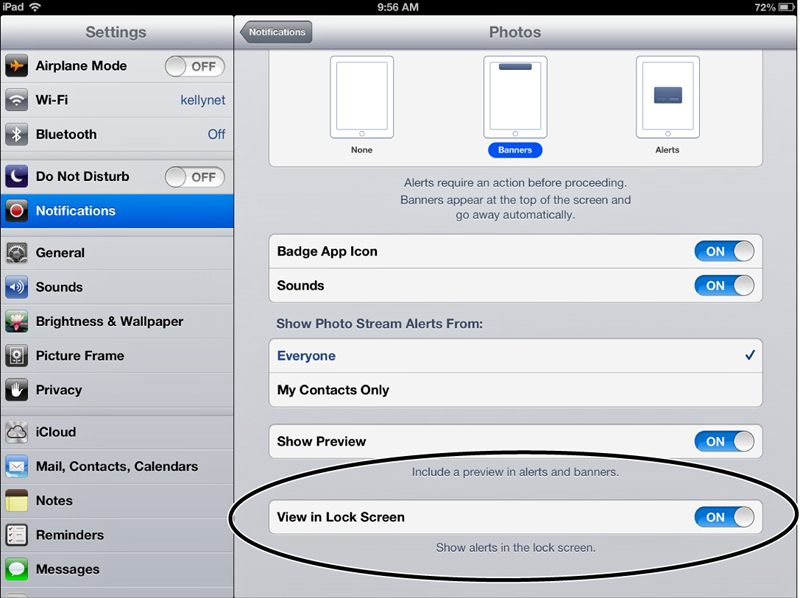
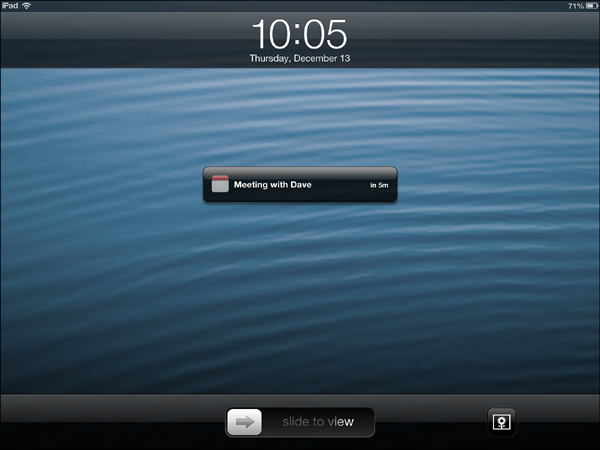
• View in Lock Screen—Most every app has the View in Lock Screen option shown in Figure 17.15. If you leave the View in Lock Screen option set to On, alerts from that app (such as a banner alert) can still appear when your iPad is locked and asleep. For example, I selected the Calendar app and turned the View in Lock Screen option to On. My iPad was sleeping (screen turned off) when the alert in Figure 17.16 triggered, turning the iPad’s screen on and beeping to get my attention. (Remember, however, that if I had set a Do Not Disturb time period, this alert would not have triggered during that time frame.)
One of the best ways to use the Notification Center is to first turn off all the apps so they are all listed in the Not In Notification Center section. Then, one by one, turn on only those that you really wish to have notify you. I’d suggest apps such as Email, Calendar, and Reminders at first. Configure each of these apps’ Alert Style (None, Banner, Pop-Up) and test it out to see if you like the notifications.
Then, slowly start adding additional apps you think you might like to have access to in the Notifications Center. Most of the apps I use rarely send alerts to the screen, but those that do and are particularly annoying about it get sent to the Not In Notification Center section (by tapping the Notification Center button and turning it to Off). Bye, bye annoying alerts!
Exploring the Game Center
Unlike the Notification Center, the Game Center is an actual app that must be opened in order to take advantage of its features.
Note
If you’ve not yet used Game Center, you’ll first be asked to create a nickname and asking if you’d like your profile to be public (available for anyone to see)—set this to On or Off depending on whether you wish other game players to be able to see your game profile and be able to challenge you to games.
Open the Game Center app and you’ll be greeted by the Top Game Center Games page, shown in Figure 17.17.
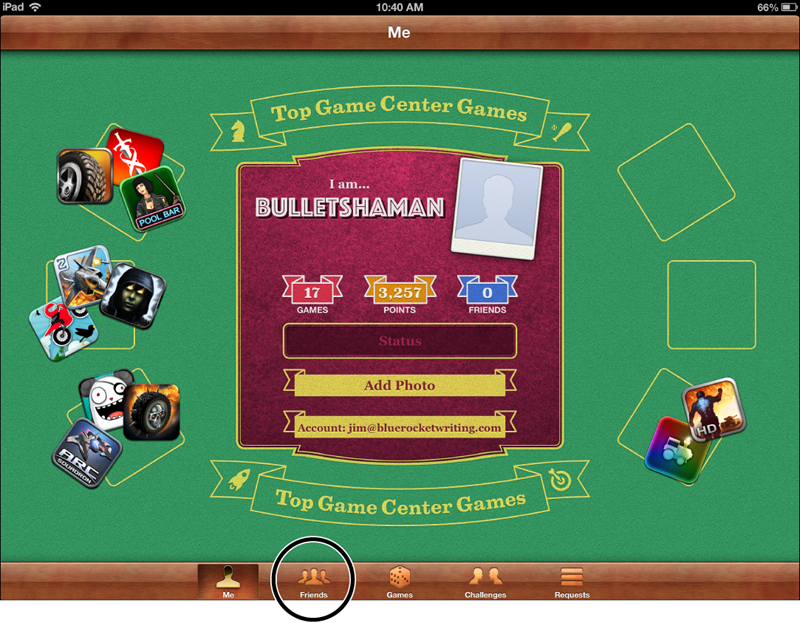
The Game Center allows you to play games on your iPad and share your scores and achievements with anyone you’ve added as a Game Center friend. When you first start the Game Center app, you won’t have any Game Center friends configured, but that’s easy to change. Simply tap the Get Friend Recommendations button that appears. After tapping the Get Friend Recommendations button, you’ll see a screen like the one in Figure 17.18.
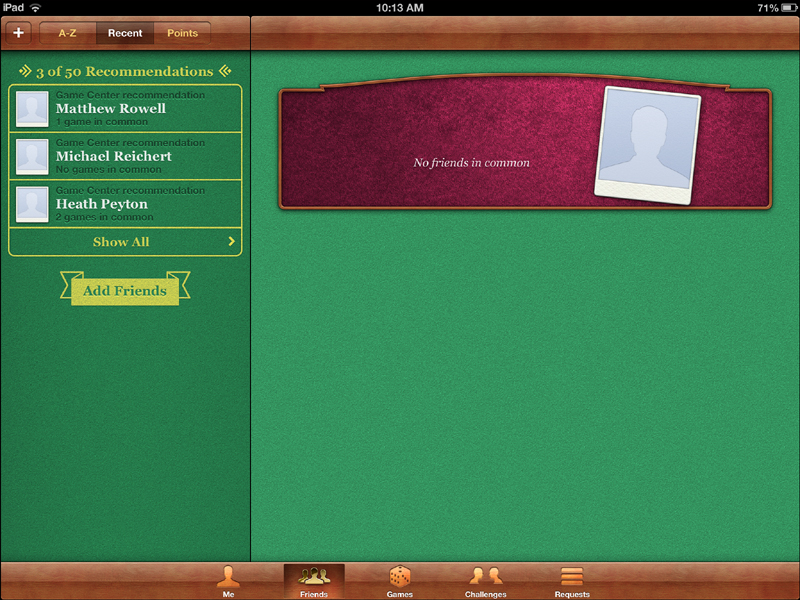
Tap the Add Friends button to the left and follow the instructions to send an email invite to a friend (or a contact already in your Contacts app). Once they’ve received and accepted the invite, their names will appear on the list to the left.
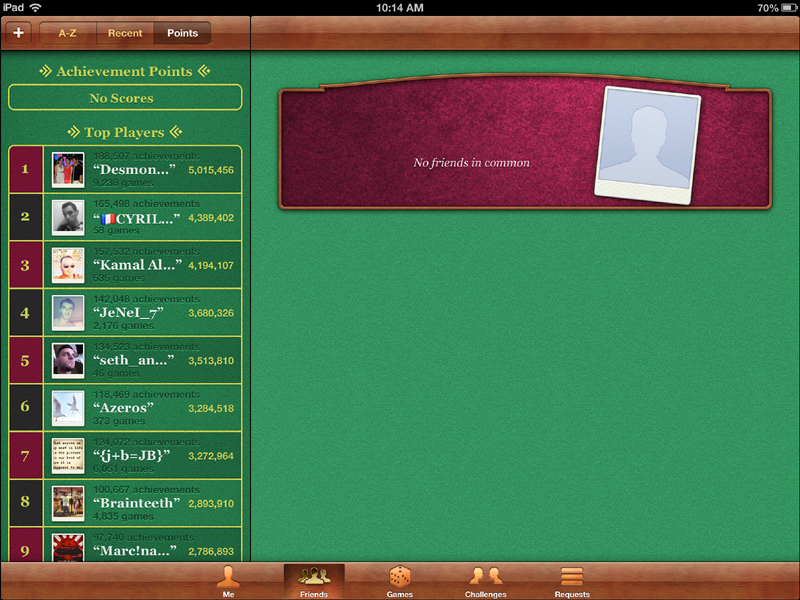
Not all games will work with the Game Center, but those games you’ve installed on your iPad that are compatible will upload your scores to the Game Center. Figure 17.19 shows how players are ranked by the number of achievement points they get from Game Center–approved games.
Note
Don’t even try to catch up with these top-ranked players. Some of them have been playing since 2010 when the iPad was released and many of them have hundreds or thousands of games they’ve played on their iPad. Makes you really wonder just how much time they have on their hands, doesn’t it?
Tap the Games button on the bottom toolbar and you’ll be provided with a list of your installed game apps that will work with Game Center. You will also find some recommendations at the top; tap one of the recommendations and you’ll be taken to a recommended game.
Tip
If you tap the price button, you’ll be taken to the same information page that you would see if you were browsing that game app in the App Store. You can read reviews and a description of the game as well as see some sample screens.
The Game Center allows you to issue challenges to your friends—tap the Challenges button on the toolbar and follow the instructions. You can also tap the Requests button to see any open invites you’ve sent to your friends.
I’m not as big a game player on my iPad as my son, so the appeal of the Game Center is low for me. But if you’re a gamer and have a lot of friends who like to play games on their iPad (or iPhone), this is a great way to have some fun with your tablet.