4. Contacts
Say Hello to the Contacts App
You’ve been learning about gestures and home screens and iCloud, but so far you haven’t actually used any of the productivity apps on your new iPad. That’s about to change. The best way for you to learn to use your iPad is to actually do something, and that means opening apps. I’ll start you out slow by introducing you to the Contacts app, the standard iOS application for storing information such as phone numbers, addresses, birthdays, and much more, for your friends, family, co-workers, and miscellaneous contacts.
 Note
Note
If you own an iPhone, you’re probably already quite familiar with the Contacts app. The iPad and iPhone versions of the Contacts app work in an identical manner, so it’s quite possible you may find your Contacts already synced from your iPhone to your new iPad via the iCloud service discussed in Chapter 3, “iCloud and Settings.” If that’s the case, you may still want to read through this chapter because it will show the Contacts app as displayed on the iPad’s screen, and you might discover a feature or two you didn’t know were available.
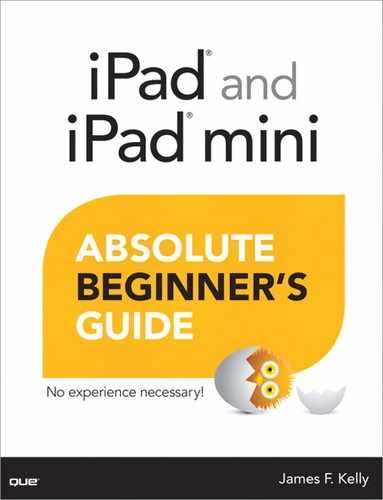
Take a look at Figure 4.1, which shows the icon for the Contacts app. For the remainder of this chapter, we’ll be working in the Contacts app in Landscape view, but the Contacts app also works just fine in Portrait view.
Go ahead and tap the icon to open Contacts app.
Your contacts list running down the left side of the screen will not look like the one in Figure 4.2. Probably the only contact you and I will share at the start is the Apple Inc. listing—Apple has provided its 800 number, web address, and corporate address for you.

If you’ve never used the Contacts app before, you’ll probably have the Apple Inc. listing and nothing else. (iPhone users may see their contacts listed here, especially if iCloud has been enabled—refer to Chapter 3.)
Running down the left side of the screen, you’ll see an index of letters and the # symbol. Unless you have dozens contacts in the list, tapping a letter or the # symbol won’t do anything; however, they are provided for jumping to the letter of either a contact’s last name (if you provided one) or first name. For example, take a look at Figure 4.2 and you’ll see that I have five contacts entered using only their first names. They are each listed under the letter that corresponds to their first name.
I also have a contact entry for John Smith, but because he has a last name, his contact information is filed under the letter S, not J.
But that’s enough about my contacts. I want to walk you through adding a new contact to the Contacts app.
Adding a New Contact
Adding a new contact is super-simple—simply click the + button at the bottom of the left page, as indicated in Figure 4.2.
Tapping the + button opens a blank Info window and the onscreen keyboard, as shown in Figure 4.3.

Name—A blinking cursor will be placed in the First text box, but you can tap in another box (such as Last, Company, or Phone) to enter information elsewhere. I’m going to start by entering a new contact named Sally Mason.
Mobile Number—Next, I’ll enter the contact’s mobile phone number. I don’t have to tap the hyphen (-) key because the hyphen is automatically provided as I type out the number.
iPhone or Custom Number—After you enter a phone number, the Contacts app automatically adds a new phone number field labeled iPhone. Don’t worry—you can change this label by simply tapping it. A list of custom options appears, which allows you to choose Home, Work, Mobile, and other options.
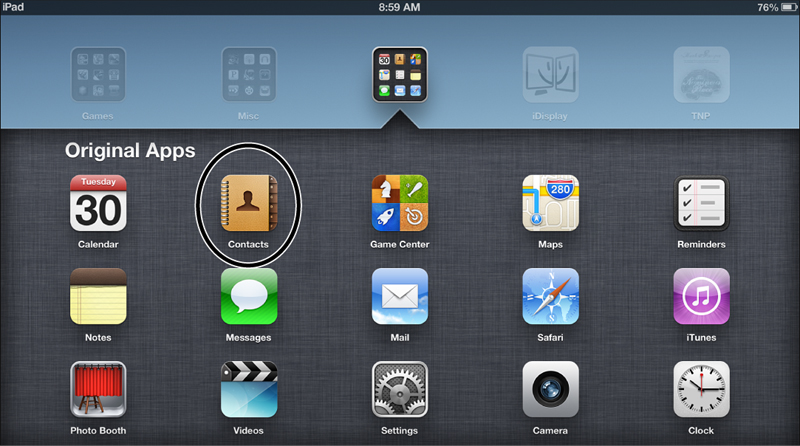
Take a look to the left of each of the new phone numbers you’ve added and you’ll see two red circles with a minus sign inside. Tap one of these, and a red Delete button appears to the right of the number, as shown in Figure 4.4. Only tap the Delete button if you’re absolutely certain you want to remove the entry—you will not be asked to confirm the deletion.
 Tip
Tip
If you tap to place the cursor on an existing bit of text, you’ll also see a small gray circle with an X inside. Tapping this will delete the existing text but will not remove the new label you’ve selected.
Figure 4.4 shows that I’ve continued to add more numbers, including a Twitter name and an extension number for this contact’s work number. This additional information will show up on a contact’s information page when you tap a contact’s name in the Contacts app.
Add Photo—To add a photo, simply tap the Add Photo button to the left of the contact’s name. You’ll be given two options: Choose Photo and Take Photo.
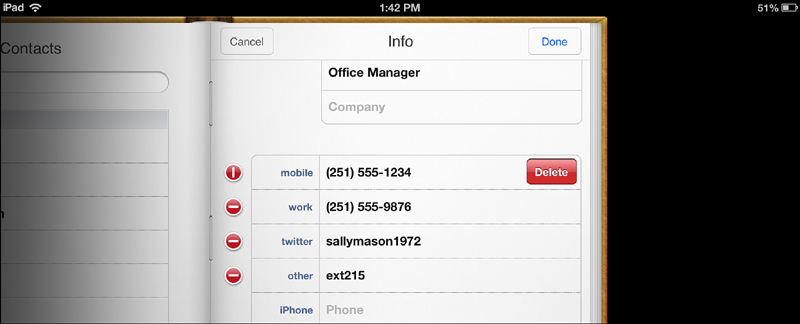
If your new contact is currently with you, simply ask them for permission to take the photo, press the Take Photo button, and hold the iPad up so you can see your contact’s smiling face on the screen. Tap the green button with the camera icon on it, as shown in Figure 4.5.
If you’re happy with the photo, tap the Use Photo button that now appears in place of the green button or tap the Retake button to try again. After tapping the Use Photo button, the new image will be added to the left of the contact’s name.
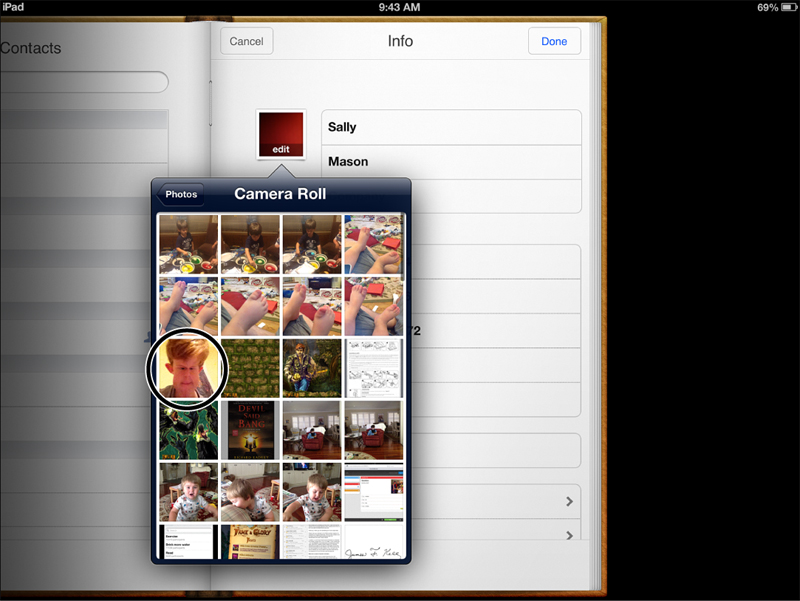
If you already have a photo of your contact stored on your iPad, tap the Choose Photo button and then select the Camera Roll option that appears. A collection of thumbnails will appear, as shown in Figure 4.6.
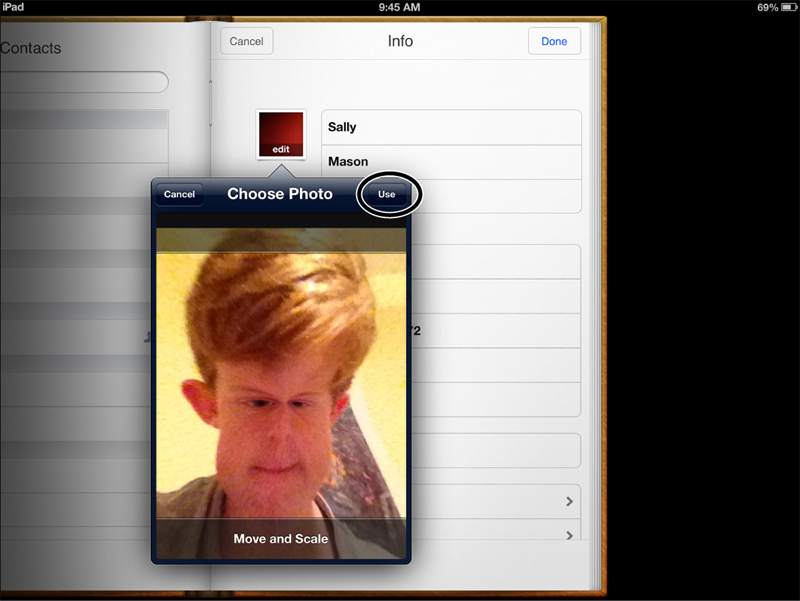
Tap a thumbnail to select that image and then move it around with your finger to center it in the box. Tap the Use button in the upper-right corner, as shown in Figure 4.7, and your selected photo will be added to the contact’s Info page.
Email Address—Adding an email address works just like adding a phone number—when you add one, another blank text box will appear below it. In this manner, you can add email addresses for home, work, and other. You can even create a custom label.
Figure 4.8 shows that I’ve added a home and work email as well as a custom label (tap Add Custom Label to create your own).
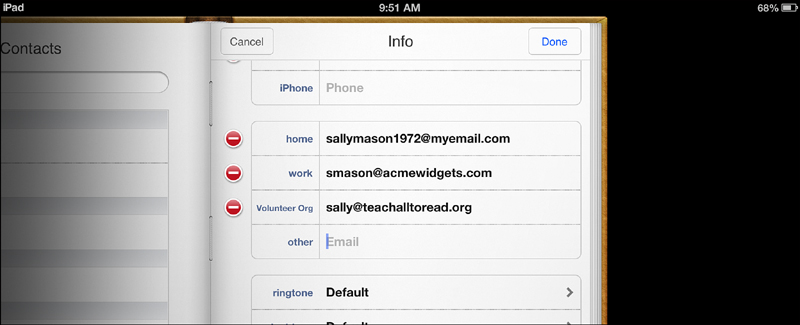
Once again, red dots appear to the left of the email addresses so you can delete any or all if necessary.
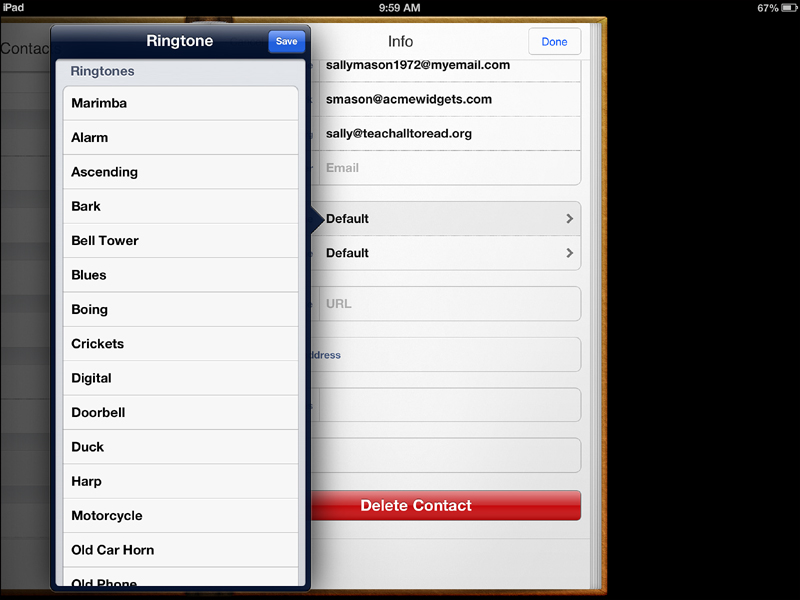
Ringtone and Text Tone—Scroll down a little more, and you’ll see the Ringtone and Text Tone boxes. These allow you to assign specific sounds that are heard when that contact calls you or sends you a message. (I’ll cover the Messages app in Chapter 10, “Apps for Instant Communication.”) To be honest, these aren’t all that useful for the iPad, but they are great if you’re an iPhone user. Feel free to experiment with them by tapping the current selection; a pop-up window will appear like the one shown in Figure 4.9 that you can scroll up and down. Tap a ringtone name to select it and hear it play; Marimba is the default, if you want to switch back to the original sound.
Website—Does your contact have a website? If so, you can enter that information in the Home Page text box.
As with phone numbers and email addresses, you can add more than one website, including changing the label to home, work, or other. You can even create your own custom label.
Mailing Addresses—Scroll down the Info page a little more and you’ll reach the Add New Address text box. Here’s where you can enter your contact’s mailing address (street, city, state, ZIP code, and country). Once you enter the first street address, a second Street text box will appear below it should you need it.
Below the first mailing address you’ll see a green circle with a plus sign inside. Tap it to add another mailing address. You can always tap the existing label to view a pop-up list that offers additional labels, plus the ability to create a custom label.
Add Field—Tap the green circle to the left of the Add Field button, and a scrollable list will appear like the one shown in Figure 4.10.
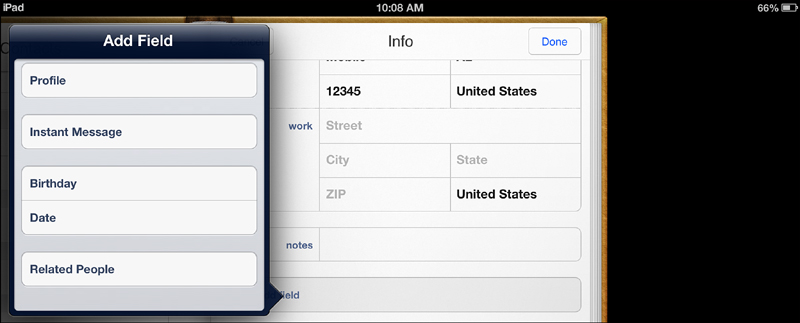
Scroll through this list, and you’ll see many options—birthday, related people, date (this one is used for an anniversary), and more.
When you choose to add a new field, the new field doesn’t always appear at the bottom of the Info page. For example, when I selected Job Title from the Add Field list, a new field was added below this contact’s last name, as shown in Figure 4.11.
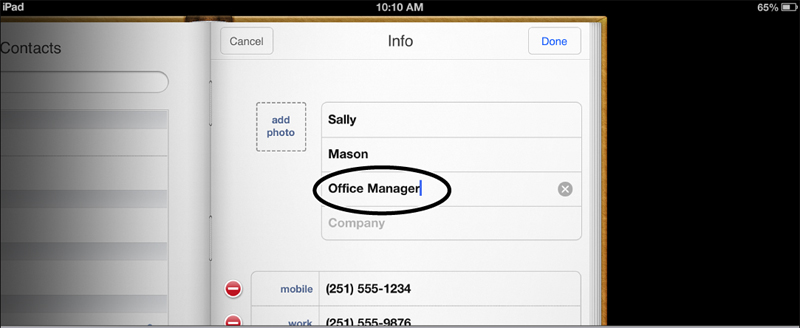
Figure 4.12 shows where I scrolled back down to the bottom of the Info page so that you can see I’ve added this contact’s anniversary date. Below that, I’ve tapped the Add Field button and selected Instant Message from the scrolling list. This adds a new field that can hold a username for any of the popular instant messaging services such as AIM or MSN Messenger. You can tap the service name and get a scrollable pop-up list of other services. I selected Skype as the Instant Messaging service and added a Skype user name. (Additional services include Facebook and Yahoo! Messenger, but you can also create a custom service name.)

Notes—The Notes field is nothing more than a scratch pad of sorts—you can type anything you like inside. Type a bit of text and then tap the Return button to move to the next line. There doesn’t seem to be a limit to how much you can type, but obviously the more concise the information is, the less scrolling you’ll have to do when you’re viewing the contact’s Info page.
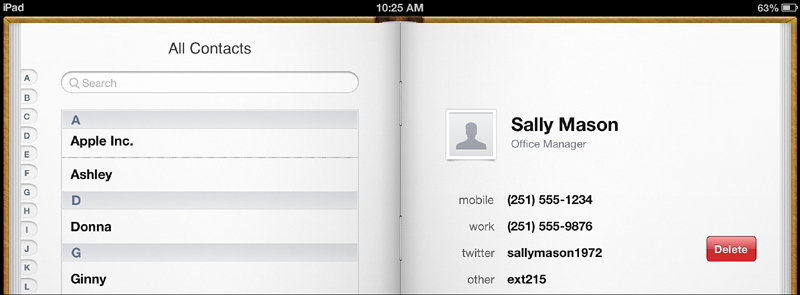
After tapping the Done button, I’m returned to the Contacts app and my new contact is displayed on the right side of the screen, as shown in Figure 4.13. (Alternatively, I can click the big red Delete Contact button to delete the entire listing.)

Depending on how much information you entered, the new contact’s Info page might scroll up and down. I’ve entered quit a bit of info on this contact, so I have to scroll all the way up to see her phone numbers and email addresses and all the way down to see the notes.
Speaking of scrolling all the way down, notice the four new buttons at the very bottom of the contact’s Info page: Send Message, FaceTime, Share Contact, and Add to Favorites, all shown in Figure 4.14. I’ll go over these buttons in just a moment, but I’d also like to point you to the Edit button at the bottom of the same screen.

If you select a contact from the left side of the screen and scroll down the displayed Info page on the right, tap the Edit button to reopen the Info screen and make any changes you like, including deleting entries. Just remember to click the Done button when your edits are finished.
There is a shortcut, however, if all you wish to do is delete a bit of info on a contact’s Info page. All you have to do is place your finger on the line containing the info you wish to delete and then swipe left. When you do this, a Delete button will appear to the right of the line you’ve swiped (see Figure 4.15).
Tap the Delete button, and that bit of information is gone. The only way to add it back is to select the contact again, tap the Edit button, and add the deleted information once more.
Tip
If you change your mind about making a deletion using the swipe shortcut, simply swipe the same line but this time swipe to the right. The Delete button will disappear.
Okay, now let’s return to those four new buttons at the bottom of a contact’s Info page. I’ll go over each of them in their own sections next.
Send Message
Because you haven’t yet reached the chapters that cover the Mail and Messages apps, I’m not going to go into the Send Message option in much detail here. Instead, I’ll remind you in Chapter 7, “The Mail App,” and Chapter 10, where this button will come in handy.
Tapping the Send Message button opens a window that allows you to select a contact’s phone number, email address, or other type of account (such as Twitter) to launch the matching app that will let you contact your, uh, contact. Again, the selection you make from the list will decide what other iOS app opens to let you continue.
FaceTime
Just like the Send Message button, the FaceTime button will launch its respective app and attempt to make a video call to your contact. I cover FaceTime in Chapter 10. There are some caveats about using this service that you’ll need to know before using it, so just know that if you and your contact both have devices that support FaceTime (iPhone, iPad, iPod touch, iPad mini, Mac OS), you can make video calls and see and speak to one another.
Again, I’ll cover FaceTime a bit later in the book, but just remember after you’ve gone through that chapter that you can select the FaceTime option when viewing a contact’s Info page.
Share Contact
I cover the Mail app in Chapter 7. You’re probably familiar with email already, which means you probably know about attachments. If not, an attachment is simply a file that you send along with an email message.
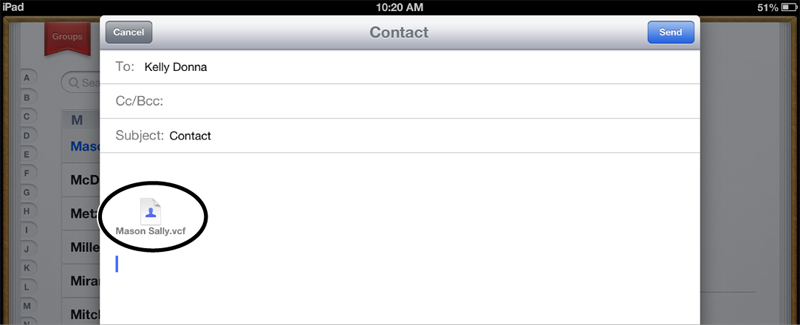
When you tap the Share Contact button, you’ll have two options—Email or Message. I’ll choose Email and the Mail app will open. The information for the contact you are currently viewing will be saved as an attachment that can be emailed to someone else. If you send this to someone else who has the Contacts app, tapping on the attachment will automatically add that information to their list of contacts. Figure 4.16 shows a new email message that will be sent to Donna Kelly. The Sally Mason information is appended to the bottom of the message—all I have to do is click the Send button and the information is on its way to Donna.
Add to Favorites
Finally, tapping the Add to Favorites button really only does one thing—it allows you to add that contact’s email address to the FaceTime app. The FaceTime app has a Favorites tab that saves you time having to hunt down a contact’s email address (FaceTime uses email addresses to make the connection).
Tip
If you’re an iPhone user and have iCloud syncing between your iPhone and iPad, you’ll also be able to use this button to send a contact’s phone number to the Phone app’s Favorite tab.
FaceTime is covered in more detail in Chapter 10, so just remember that when you’re viewing a contact’s Info page, you can send that person’s email address directly to the FaceTime app so it can be added to the Favorites tab.
Settings Tweaks
Back in Chapter 3, I introduced you to the Settings app. The Settings app can be a bit overwhelming if you’ve never used it before, so once again I’ll ask you to just follow along with my instructions if you want to keep the information overload to a minimum. I’ll continue to show you how to use the Settings app where it’s applicable in each chapter. You’ll be happy to know that the Settings app has a very short list of options for the Contacts app.
Go ahead and tap the Home button to close down the Contacts app. Find and tap the Settings app and then look down the left-side list of options until you see the Mail, Contacts, Calendars option, shown in Figure 4.17.
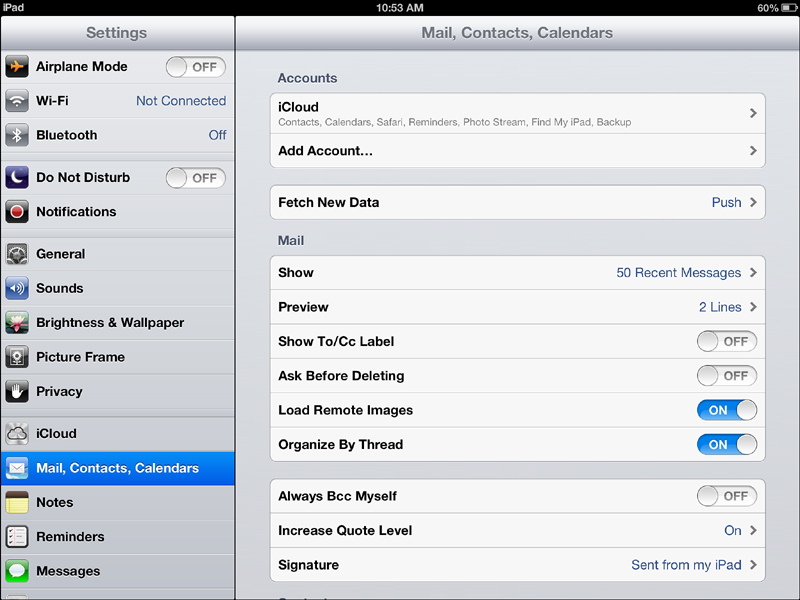
Tap the Mail, Contacts, Calendars option and you’ll see way more information on the right side of the screen than you probably care to view. Don’t worry about all that stuff—just scroll down the right side (by swiping a single finger upward on the screen) until you see the section labeled Contacts.
There are three options here: Sort Order, Display Order, and My Info.
Sort Order—If you tap Sort Order, you can select between sorting your contacts by their first or last names. The default is to sort by last name and then to resort to first name if no last name exists. But if you prefer to view all contacts in your list by their first names, select First, Last as the option.
Display Order—Tap the Mail, Contacts, Calendar option to return to the Contacts section and then tap the Display Order option. Once again, you can choose between First, Last or Last, First for the order in which you want names displayed. If you choose Last, First, contact names running down the left side of the Contacts app will be displayed with the last name followed by the first name.
My Info—Once again, tap the Mail, Contacts, Calendar option to return to the Contacts section. This time, tap the My Info option. Here, you can select your own contact information in the Contacts app. If you haven’t added yourself to the Contacts app, go ahead and do so—having your information in there is useful for other apps that can access this information. I go over this in more detail later in the book where this info will be useful.