2. Overview of iOS
Say Hello to iOS!
Before you start learning how to use your iPad, you’re going to need to turn it on and go through a basic setup routine. Don’t worry—it’s extremely easy to follow and understand. But just in case you’re a bit nervous, I’m going to walk you through some of the steps.
Keep in mind that Apple does update the setup routine occasionally, so by the time you’re reading this, there might be an additional screen added or an existing screen might look a bit different. The main point is that the setup routine deals with one thing at a time. Go slow, read all the instructions on the screen, and you’ll be fine. If you choose to skip something (such as setting up the Wi-Fi connection), you can always reconfigure your iPad later.
 Note
Note
Earlier iPad versions (1 and 2) required you to connect the iPad to your computer to sync with the iTunes application. You even had to install iTunes on your computer prior to setting up your iPad if you didn’t already have it installed! But since the iPad 3’s release, the iPad can now be set up without needing to connect to a computer. All that’s needed is a Wi-Fi signal, so make certain you have Wi-Fi set up in your home or office before turning on the iPad for the first time. If you don’t have Wi-Fi available at your home or office, find a local coffee shop that offers free Wi-Fi and get yourself a cup of coffee or tea while you’re at it. (Likewise, you can skip some of the setup steps if you don’t have access to Wi-Fi and do them later once you have an Internet connection.)
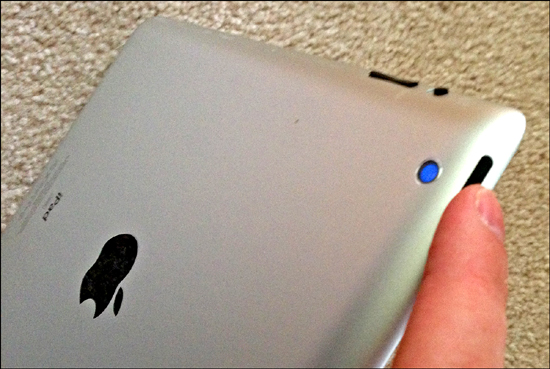
1. Press and hold the Power/Sleep button on the top-right edge of your iPad, as shown in Figure 2.1.
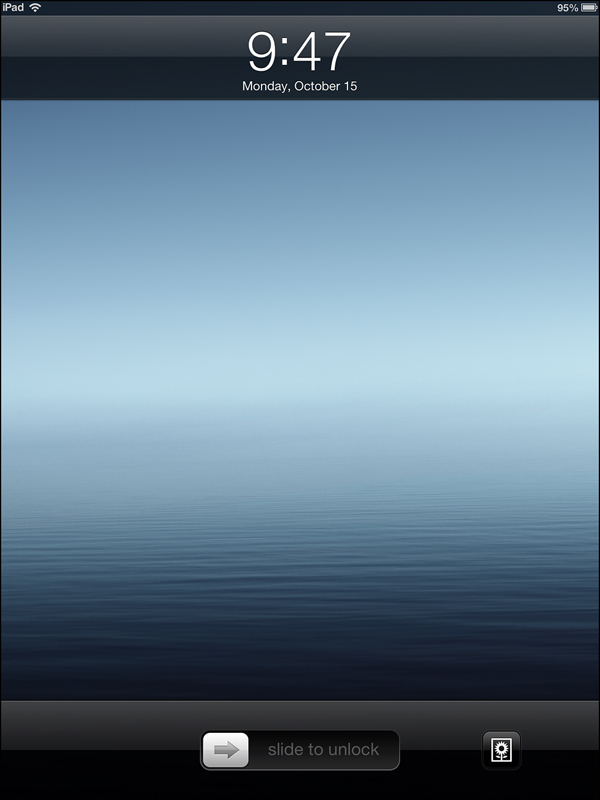
2. Release the Power button when you see the Apple icon in the center of the screen. This may take a few minutes of your time, as the iPad is unpacking and installing some files so that you can begin using the tablet. Be patient, and when you see the screen shown in Figure 2.2, continue to step 3.
3. Next, you’re going to need to select the language you want to use (I’m assuming English, but there are other options), and tap the right-arrow button in the upper-right corner of the screen as shown in Figure 2.3.

4. Next, you’ll select your country and tap the Next button.
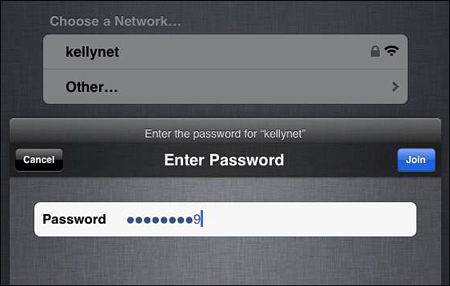
5. You should now see the screen asking for the Wi-Fi network you want to join as shown in Figure 2.4. Tap it with your finger, and then use the onscreen keyboard that appears to type in the password. Press Done to connect to the network.
 Tip
Tip
You can skip the Wi-Fi network selection if you want and configure it later. (Likewise, if you purchased an iPad that supports a data connection via a cellular network, this will automatically work once the iPad finishes the setup routine.)
6. The iPad Activation step will begin, requiring you to wait a few minutes while it does some software configuration. When that’s completed, you’ll be asked whether you want to enable Location Services. I recommend against enabling Location Services until you understand more about how it works. Choose the Disable Location Services button.
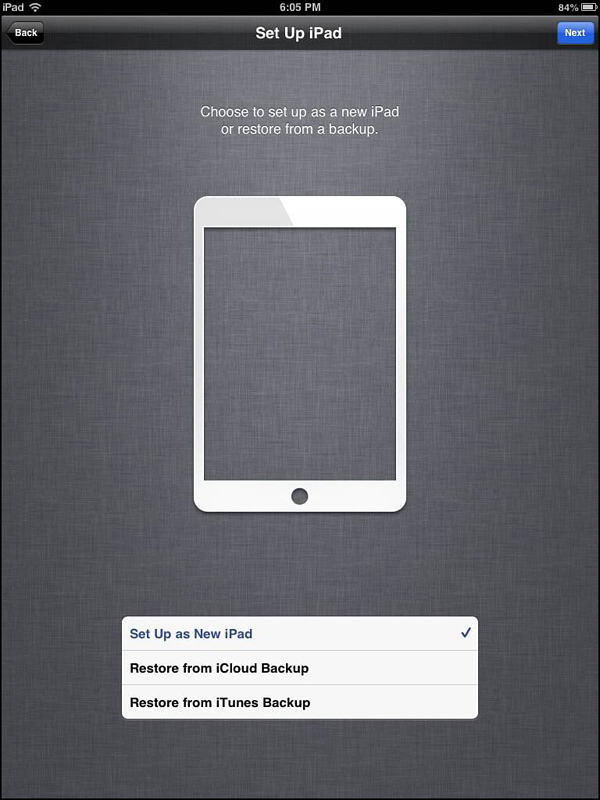
7. Now you will choose whether you are setting up your iPad as a New iPad or if you want to restore settings that are saved by Apple or in the iTunes software. Because you’re just starting with your iPad, select the Setup as New iPad option shown in Figure 2.5, and then tap the Next button.
Note
iPad no longer requires you to connect to a computer running iTunes, but if you are already a user of iTunes, you can connect your iPad after the setup routine is completed and synchronize your iPad’s various settings in case your iPad is lost or stolen; you can connect a replacement iPad to iTunes and get all your settings and data back.
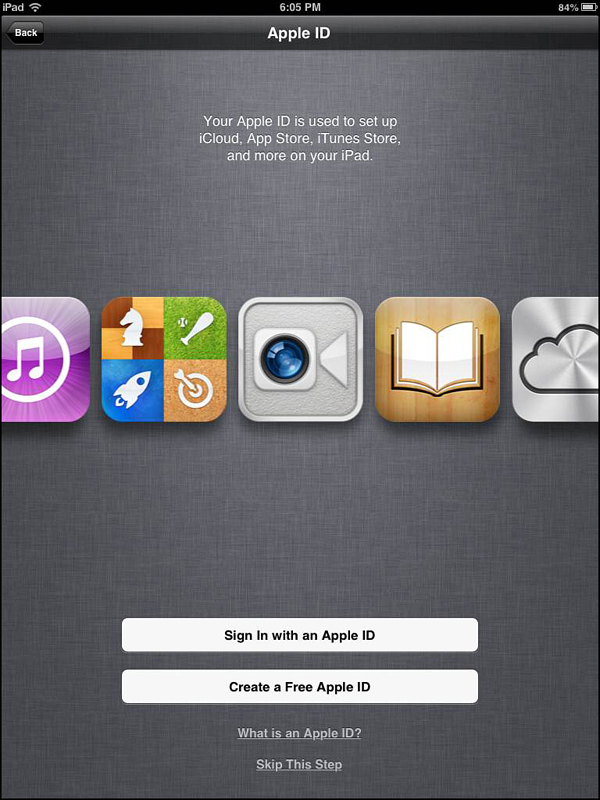
8. Up next, you’ll need to login with an Apple ID or create one as shown in Figure 2.6. Log in or tap the Create a Free Apple ID button and follow the on-screen instructions.
9. The next step requires you to accept Apple’s Terms & Conditions. Read through the text and tap the Agree button to continue. (If you Disagree, you won’t be able to use your iPad, so you really have no choice but to accept the Terms & Conditions if you want to use your new iPad.)
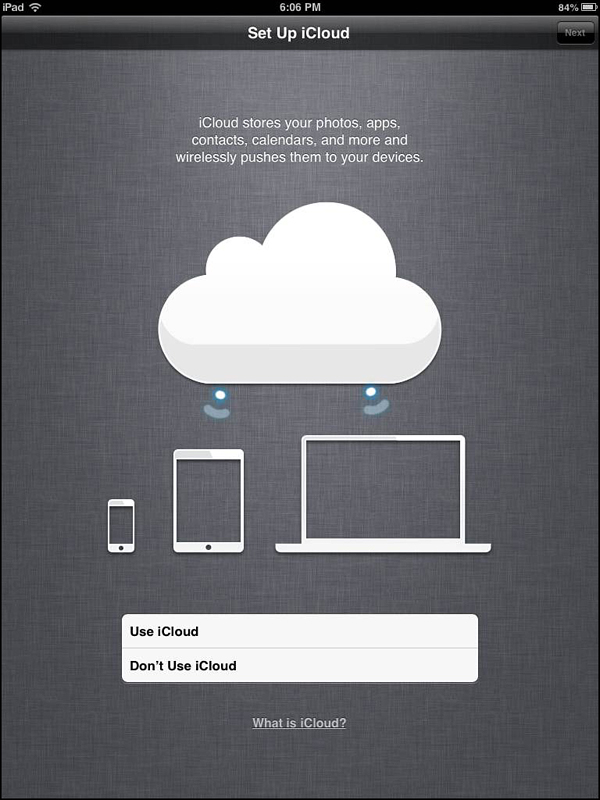
10. You’ll next be asked whether you want to use iCloud. Go ahead and click the Use iCloud button shown in Figure 2.7. You’ll learn about iCloud later in the book, and can disable it if you want, but for now there’s no real harm in enabling it for your iPad.
11. Enter an email address to be used with FaceTime, the iPad’s video chat feature. You’ll learn more about FaceTime in Chapter 10, “Apps for Instant Communication,” but for now go ahead and enter an email address and tap the Next button.
12. Siri is a voice-activated feature that allows you to press and hold the Home button to ask questions (“What is the weather for Atlanta, Georgia, today?”) and get Siri to provide answers. It’s a fun feature, so tap the Enable Siri button unless you don’t think you’ll use it.
13. Next, you’ll be asked to allow or disallow diagnostic information to be sent to Apple. I recommend allowing this option—it requires no additional work on your part, and it does help Apple locate and troubleshoot bugs with the iPad’s software so it can release updates.
14. And the last screen will ask you to register your iPad.
15. When the setup routine is done, you’ll see a screen like the one in Figure 2.8.
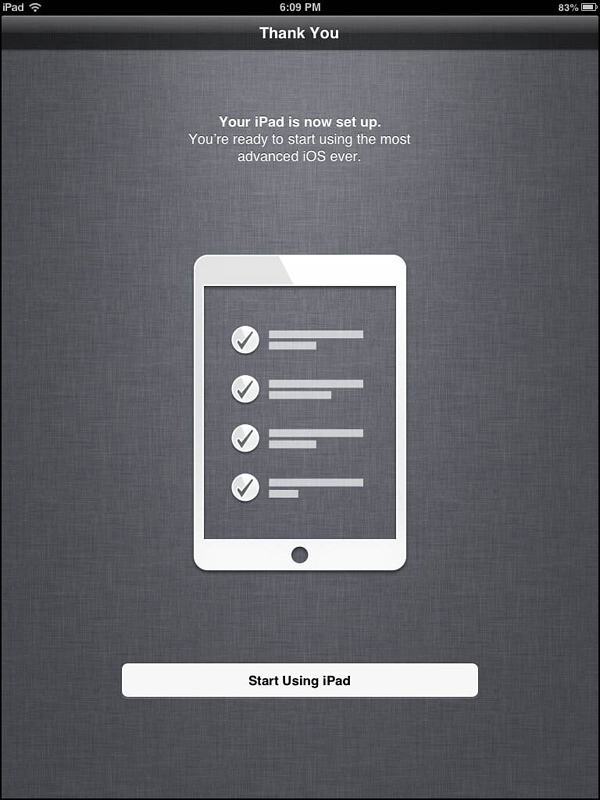
16. Tap the Start Using iPad button and that’s it! You’ve now set up your iPad, and it’s ready to be used.
In the remainder of this chapter, I’ll explain more about what you’re actually seeing on the iPad’s screen and give you additional background on the software that has just been installed on your new iPad. The software you just installed and configured is called iOS. Although the iPad hardware is certainly important, without iOS, that hardware is pretty much useless to you.
What Is iOS?
If you’re familiar with any computer system, then you probably know about Microsoft Windows, Mac OS X, and Linux. Every computer has an operating system (OS), and it’s the OS that makes it easy for us humans to get work done with digital devices. Without an OS, computers would be almost useless to us. We’d have no way to type documents, move files around, email photos to our friends, and a thousand other tasks.
In the early days of computing, an operating system was nothing more than a blinking cursor on the screen and required typing cryptic commands such as del *.* and rm *. Do those look fun to use? Believe it or not, some folks out there prefer this old style of control, but for most of us this method of communicating with a computer just isn’t feasible.
The next step for operating systems came when those confusing, text-based commands were replaced with a graphical “desktop”—a new way to visualize our data as well as the work we did on that data. No longer did we need to type copy jim.txt jim2.txt to copy a file with a new name. Now, we could move the mouse pointer over the file, click it, select Copy from a menu on a toolbar, and type in the name of the new file. There were arguments that this method was slower because you had to click here, drag there, click here, type there. But even if typing copy jim.txt jim2.txt got the job done 2 seconds faster, it wasn’t intuitive or easy to remember for most people. The graphical user interface (GUI) was born, and it continues to be the one used for today’s modern operating systems, including Apple’s Mountain Lion (Mac OS X), Microsoft’s Windows 8, and Linux.
Now we’ve reached a point in time when our mobile devices are doing almost as much work for us as our computers and laptops. Maybe even more! I certainly use my iPad and my iPhone for more of my day-to-day duties than ever before. I read and send emails, I take digital photos, I check news and weather, and I even read my eBooks on these devices. About the only thing I use my MacBook Air laptop for these days is typing up chapters like this one! (Oh, and I do play some fun games on my laptop that are much easier on the eyes with the larger screen.)
Because our mobile devices can do many of the same things as their older cousins (the desktop and laptop computers), it makes sense that they also have an equally useful operating system—some method for you to perform your work (or play games), check your email, send files, and much more. For tablets and phones not made by Apple, the operating system typically is either Microsoft’s Windows 8 or some version of Google’s Android OS. But for the iPad and iPhone, that operating system is called iOS.
iOS is a GUI (pronounced gooey), which is short for graphical user interface. Users of both iPads and iPhones use this operating system instead of Mac OS X because iOS is designed to work with touch screens. From this point forward, I’m going to be talking specifically about the iPad and iOS, but just keep in mind that the iPhone also uses iOS, but with a smaller screen and some specialty apps designed for mobile phones. Other than that, iOS works the same for iPad and iPhone—it even shares the same version number. When iOS is upgraded, this upgrade is pushed out to both iPhone and iPad at the same time. You can see the lock screen of iOS in Figure 2.9, but keep in mind that this is only one possible home screen—iOS can have many, as you’ll learn later in this chapter. To see the home screen on your own iPad, press the On button on the top-right edge for just a second and release it—tap and hold your finger on the little slider near the bottom of the screen (where it says Slide to Unlock) and drag it to the right.

Now let’s talk about iOS and the iPad. As I’m writing this, the current version is iOS 6. Between now and when iOS 7 is (inevitably) released, Apple will provide smaller updates to fix bugs, make improvements in how the operating system works with the hardware, and add new software features. Rest assured, Apple doesn’t sit still between releases of iOS, so as you use your iPad, just keep in mind that at some point an update (maybe even two or three) will come your way.
iOS is also one of the easiest operating systems to use because it requires the use of tools you’re very familiar with—your fingers. Everything you do with your iPad involves using one or more fingers to interact with the touchscreen. You’ll use your fingers to drag files, type email, play games, and much more. I’ll show you later in this chapter all the various ways you use your fingers to control your iPad.
And, finally, iOS is a very stable operating system. I used my iPad 3 for over a year, and it never crashed or locked up on me. Never. Not once. And it’s extremely fast. When you turn on the iPad, it starts immediately. There’s no 30- to 60-second delay as it prepares itself to be used. It’s ready to go when you are. Don’t believe me? Well, it’s time to take your iPad for a spin and see for yourself.
Take a Quick Tour of iOS
If your iPad isn’t already on, go ahead and press the On button on the upper-right edge of the device. You will see a small slider bar that needs to be unlocked near the bottom of the screen, as shown back in Figure 2.1. Press your finger on the slider’s arrow and move it to the right without lifting your finger from the screen (shown in Figure 2.9).
If you did this correctly, you should be presented with the iPad starting home screen, as shown in Figure 2.10. If the home screen isn’t visible, try unlocking the iPad again. Doing so might require that you turn off the iPad (press and release the On button) and then turn it on again.
Congratulations—you just performed your first gesture! I’ll explain gestures in the next section, but in a nutshell they’re a collection of movements performed by one or more fingers. What you just did is called the basic swipe. A swipe uses a single finger and can be done left-to-right or right-to-left. In this instance, you did a left-to-right swipe using the drag bar. Trust me, there are a lot more gestures that do some amazing things. Again, more on that shortly.
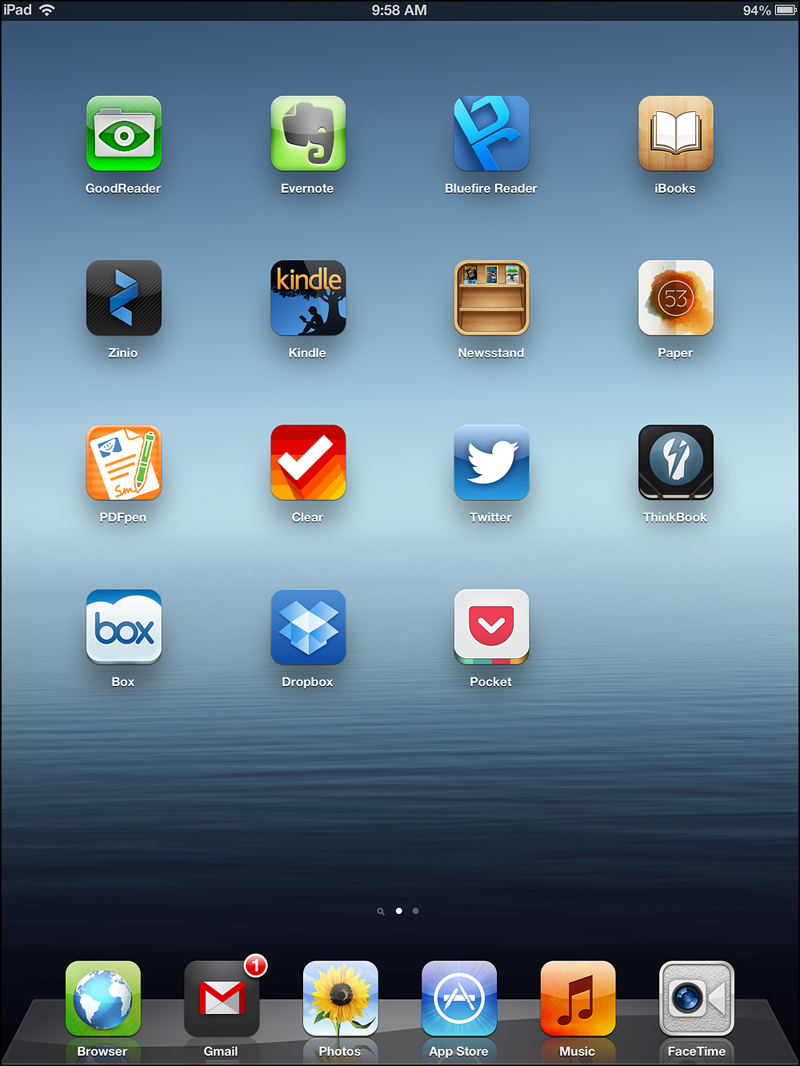
So now that you’re looking at the iPad’s home screen, I want point out a few things to you (see Figure 2.10).
First, along the top of the screen are the Wi-Fi signal strength (or the data connection strength if you’re using your mobile carrier’s service), the current time, and the battery meter. I’ll show you in a later chapter how to set the time if it’s not correct, but the iPad is fairly good at determining your current location using Wi-Fi or a data connection, so it’s a good bet that the time is already correct.
The battery meter offers you two pieces of information: One is a percentage value of remaining battery power. In Figure 2.10, you can see that I have 94% left. To the right of the percentage value is a battery icon. As the battery drains, the outline of the battery change to appear more empty. I’m not certain why iOS offers both items; the percentage meter is more useful in my opinion, but you get both and there doesn’t appear to be a way to turn either one off.
Let’s continue down the screen. See all those small squares filling up most of the screen? Each of those is an app, the iPad version of an application. These are the tools you’ll use to get things done, such as playing games, sending email, taking photos, reading eBooks, and much more. We’ll get into these apps in more detail throughout the rest of the book, but before we continue with the home screen, tap the app labeled Calendar. When you do, you should see a screen similar to the one shown in Figure 2.11. (It’ll be different because you’re reading this on a different day than I took the screenshot.)
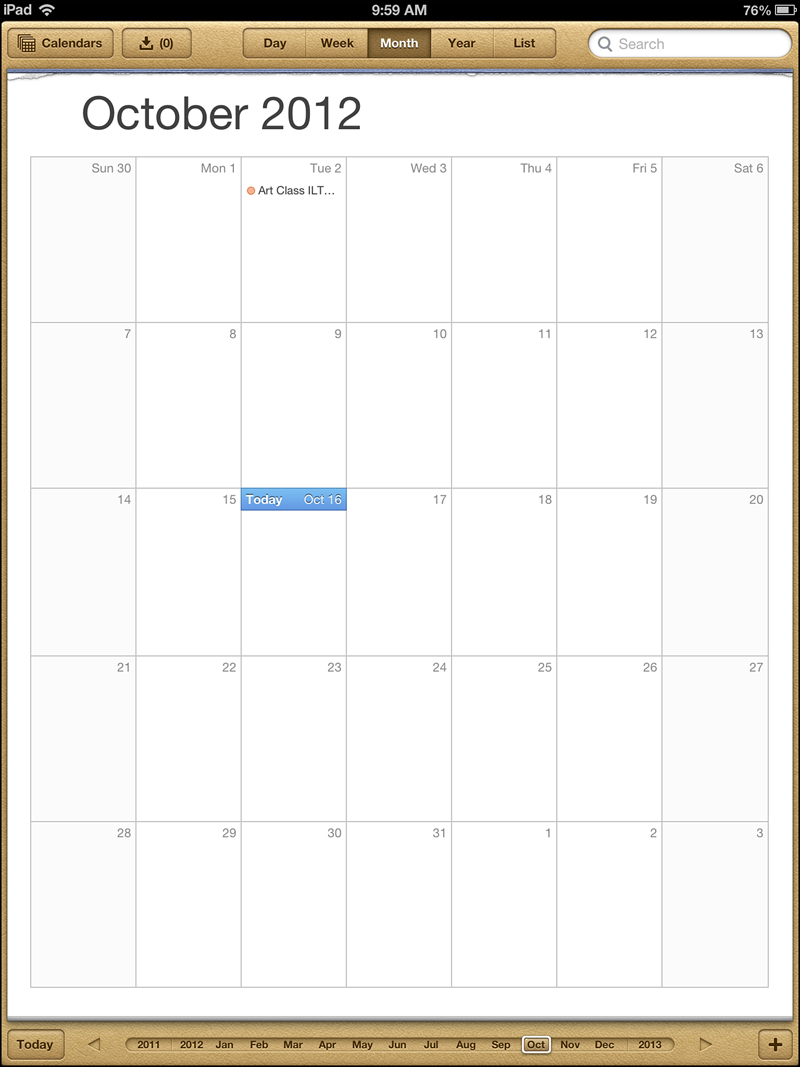
I had you do this for two reasons. One, to teach you a new gesture—the simple Tap-to-Open gesture. And two, to show you how fast an iPad app typically opens. If you’ve never opened an app on an iPad or iPhone before, this probably surprised you. It’s quick!
I’m not going to have you do anything with the Calendar app right now, so go ahead and close it down by pressing the Home button at the bottom of the iPad. Remember, it’s the small black circle just below the touchscreen. Pressing this button once will close Calendar and return you to the home screen.
Continuing down the page, you’ll notice one small dot underneath the collection of apps. If you look closer, you’ll see that the dot on the far left is actually a small magnifying glass. The other dot represents a home screen, and you can have more than one home screen (11, actually). Each white dot indicates which home screen you are currently viewing relative to the other home screens so you can tell here that I’ve got additional home screens on my own iPad. Figure 2.11 shows an empty dot to the right of the white dot—this means there’s a home screen to the “right.” To view it, place a single fingertip on the screen (but not on an app) and flick your finger to the left like you’re turning the page of a book. This swipe gesture will take you to the other home screen, shown in Figure 2.12.
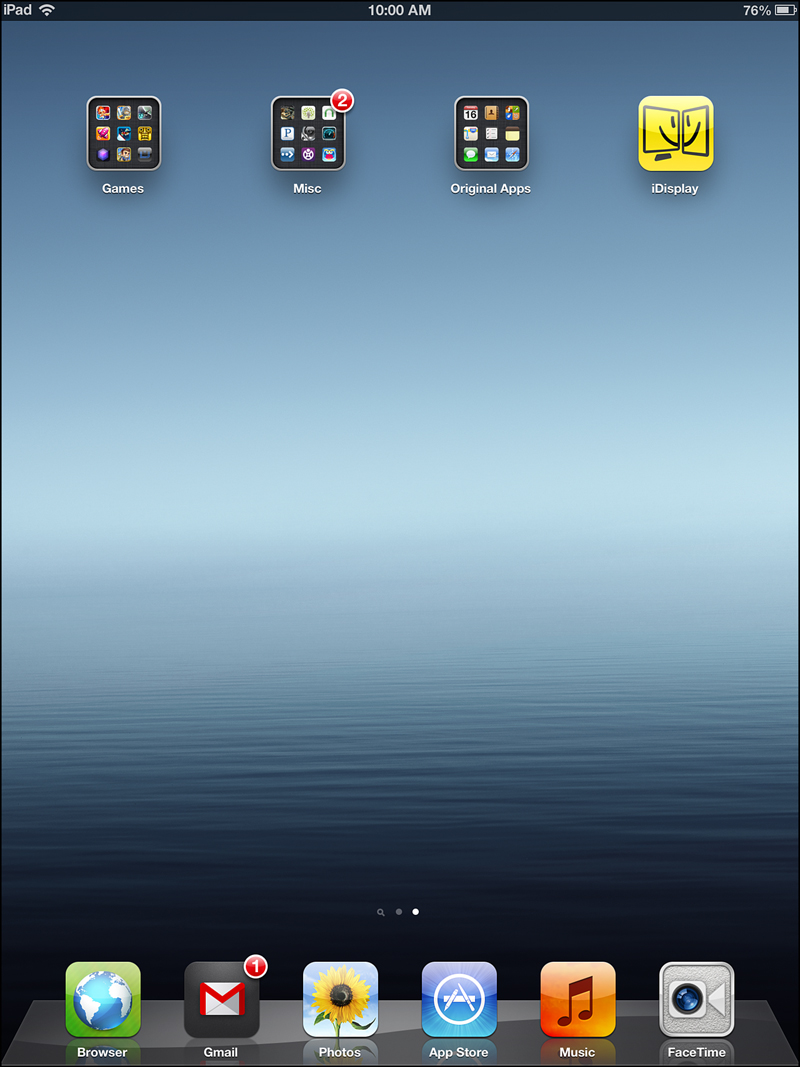
This home screen doesn’t have as many apps on it as the previous one. Go ahead and return to the previous home screen by performing another swipe gesture, but this time swipe to the right. Notice how the current home screen pulls to the right and is then replaced. It’s like turning pages in a book!
Tip
I’ll show you later how to add more home screens; this is a useful method for organizing your iPad as you add more and more apps to it. You can easily create a home page that has all your games, another that holds tools related to work, and another that has apps related to your personal life. Each home screen you add, by the way, adds another dot to the screen.
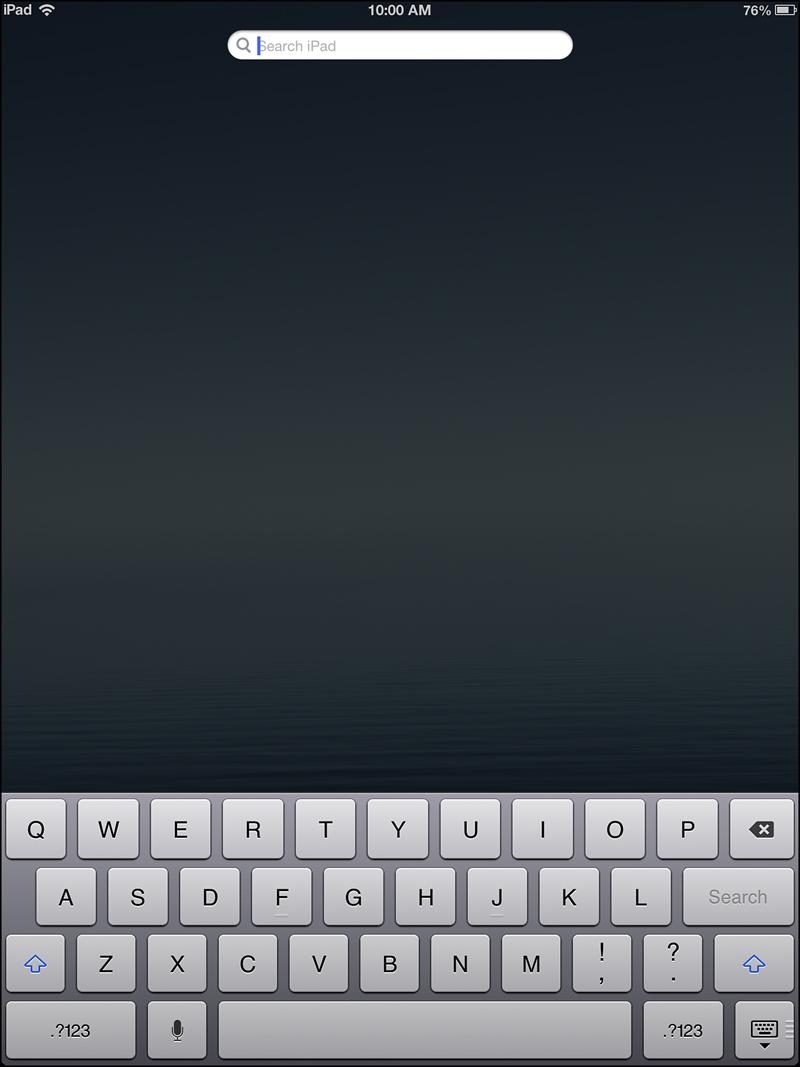
What happens if you swipe again from left to right? Go ahead and try it! You’ll end up on the Search screen, shown in Figure 2.13. I cover this tool in Chapter 16, “Finding Things.”
Return to the iPad’s primary home screen—I call it the primary home screen because any time you press the Home button while on any other home screen or on the Search screen, you’ll be taken back to this home screen. I put all my favorite apps on the primary home screen for just this reason—rather than swiping, I can tap the Home button once to return to it (or twice if I’m in an app that’s located on a home screen other than the primary home screen.)
Okay, we’re almost done with our tour of the home screen. Just below the dots that represent your home screens you’ll find what’s called the Dock. Any apps stored on the Dock are always visible on any other home screen (but not the Search screen). You can always change the apps that are stored in the Dock as well as add two additional apps, for a total of six apps on the Dock. I keep my most used apps here—this includes my email, photo gallery, and web browser, among others. I’ll show you how to move apps around on the screen as well as on and off of the Dock in the next section.
Moving Apps and Creating Folders
Apps can be moved easily around a home screen, but they can also be moved between home screens, allowing you to customize the primary home screen and the Dock to hold those apps that you use most often. You may have noticed that a home screen can only hold 20 apps (not including the Dock), but I’m also going to show you how to create folders that can hold many more apps, allowing you to store more than 20 apps per home screen.
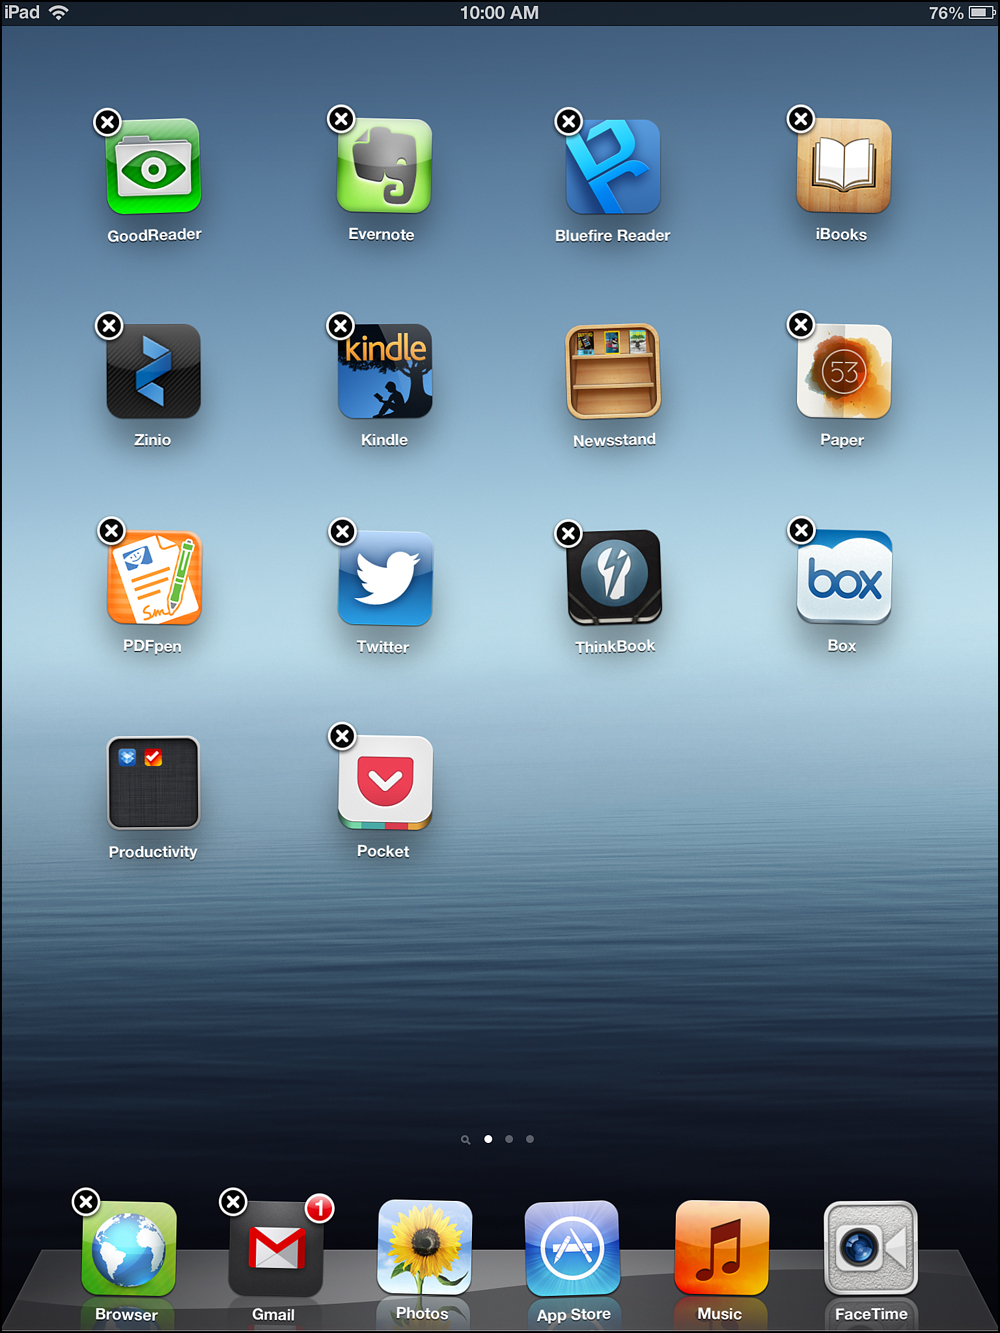
First, return to the primary home screen by either swiping to it (if you’re on a different home screen or the Search screen) or pressing the Home button. Now, tap and hold on the Calendar app until you see it start to dance. Seriously! It will begin to wiggle along with the other apps on the screen, as shown in Figure 2.14.
Note
Apps that don’t have the small X are considered required iOS apps that cannot be deleted. They can be moved but not deleted from the iPad.
To move an app around on the home screen, simply tap anywhere on it and hold until it begins to wiggle (other than on the X) and then drag it with your finger. Go ahead and try it. As you move the app around, the remaining apps will shift location to let you squeeze in the app you are currently dragging.
While still holding down on the app, drag it all the way to the right edge of the screen and hold your finger there for a moment. After a brief pause, the home screen to the right will appear—this is how you can drag an app from one home screen to another. You can drag apps left or right, but they will not move to the Search screen; the primary home screen is as far left as you can place an app.
Drag the app you’re holding back to the left and hold it until the primary home screen appears again. Lift your finger, and the app will drop where you place it. The dancing will continue until you press the Home button to cancel the move operation, but don’t do that just yet.
While the apps are still dancing, tap and hold the Calendar app one more time and drag it directly over the Reminders app. Doing this will create a folder that contains both the Calendar and Reminder apps. You will see the two dancing apps underneath a text bar, as shown in Figure 2.15.
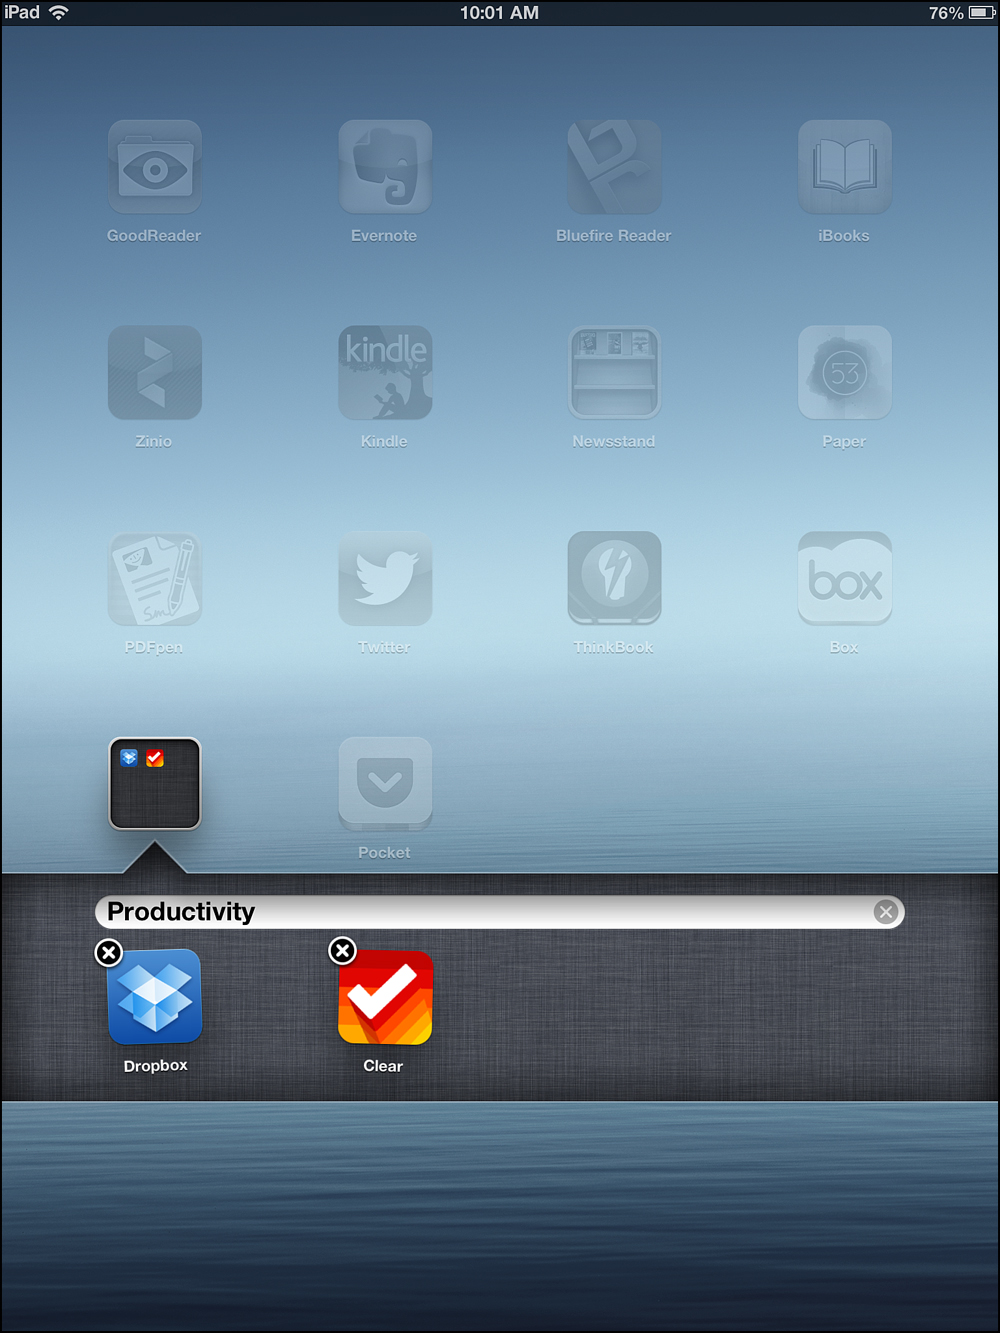
Tap on the text bar and use the onscreen keyboard to give the folder a name that suits the collection. Figure 2.15 shows that the folder is named Productivity. Other apps I’ll probably drop in here include the Notes, Maps, and Contacts apps.
After typing in the folder name, tap on the Done button on the keyboard. Tapping anywhere outside the text bar and area where the wiggling apps appear will return you to the current home screen; you can select additional apps to drop into your new folder or just tap the Home button to stop the dancing apps. Easy!
Using Gestures with iOS
So far, you’ve used three gestures—swipe, tap-and-release, and tap-and-hold. However, you’ll want to learn many more gestures to make using the iPad so much easier and fun. Here they are:
• Reverse pinch—This gesture uses your thumb and pointer finger. Place them together at a point on the screen, and if the app supports this gesture, pulling your fingers apart will cause anything visible on the screen to enlarge and zoom in. This is a useful gesture for working with photos or maps, for example. When you want to see more detail (such as zooming in on a street or a face in a crowded picture), the reverse pinch allows you to zoom in on an image.
• Pinch—With this gesture, you tap your thumb and pointer finger on the screen and pull them together. This allows you to zoom in on an image that has been expanded.
• Five-finger collapse—If you have an app open and want to close it quickly, just spread your fingers and touch the screen with five fingers and pull them together like you’re squeezing a bit of dough.
• Four-finger swipe (left/right)—I haven’t mentioned this yet, but when you open an app and then return to a home screen, the app hasn’t really closed—it’s running in the background, making it faster for the iPad to open it and display the exact spot where you left it (useful for games, for example). Because apps you’ve opened are all running in the background (it’s called multitasking), you can easily move back and forth between these open apps by place four fingers on the screen and swiping left or right.
• Four- or five-finger Multitask Viewer—You can use the four-finger swipe (left/right) to move back and forth between open apps, but if you’d like to see the order in which the apps will open (depending on a left or right swipe), place four or five fingers on the screen and slide them up. This will open the Multitask Viewer near the bottom (where the Dock would normally sit) that shows all open apps. Use a single-finger swipe to move left or right to view all the open apps. The order in which you see them is also the order they will open when you use the four-finger swipe (left/right) gesture.
Tip
After you’ve been using your iPad for a while, you’ll have opened quite a number of apps. These are running in the background and eventually can impact the speed with which the iPad operates. Granted, you have to open a lot of apps for things to get sluggish, but it can and will happen. When this happens, open up the Multitask Viewer and press and hold on a single app. You’ll once again see the dancing apps, but instead of an X to delete an app you’ll see a minus sign (–). Tap the minus sign on an app to close that app completely and remove it from the Multitask Viewer. I do this at least once a week just to close down those apps that I’m not using regularly—I leave running those I like to use frequently.
Gestures can make using the iPad more enjoyable. You’ll find yourself zipping between apps, checking email, sending a fast Tweet (via Twitter—see Chapter 11, “Social Apps”), and much more, all in seconds using a series of gestures. Spend some time practicing them and they’ll quickly become second nature to you.
What About Typing?
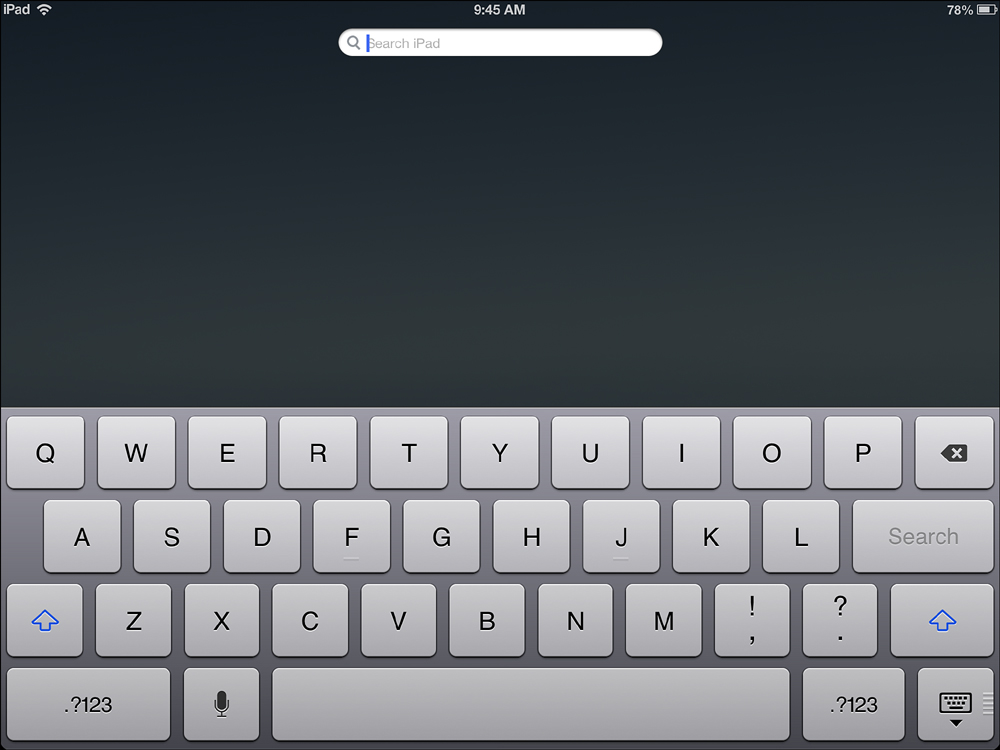
Earlier in the chapter you did a single finger swipe all the way from the left to the right, revealing the Search screen. You probably saw the small onscreen keyboard that appeared, but if not jump back and take a look at Figure 2.13.
The onscreen keyboard will appear when it is needed and stay hidden when it is not. When does it appear? Basically any time some text needs to be entered—typing in an address while ordering something online via the web browser or creating an email message, for example.
Figure 2.13 showed the keyboard in Portrait view—the keys are smaller, but still fairly easy to use. You’ll most likely use a single finger to type in Portrait view, but should you want some larger keys so you can type with your hands together as they would be on a typical keyboard, rotate the iPad to Landscape view when you see the onscreen keyboard appear. The keyboard will increase in size, as shown in Figure 2.16.
Notice in Figure 2.16 that you can hide the keyboard by tapping the Hide Keyboard key in the lower-right corner (small keyboard icon with an arrow pointing down below it). You can tap the button to its left to gain access to numbers and special characters, as shown in Figure 2.17.
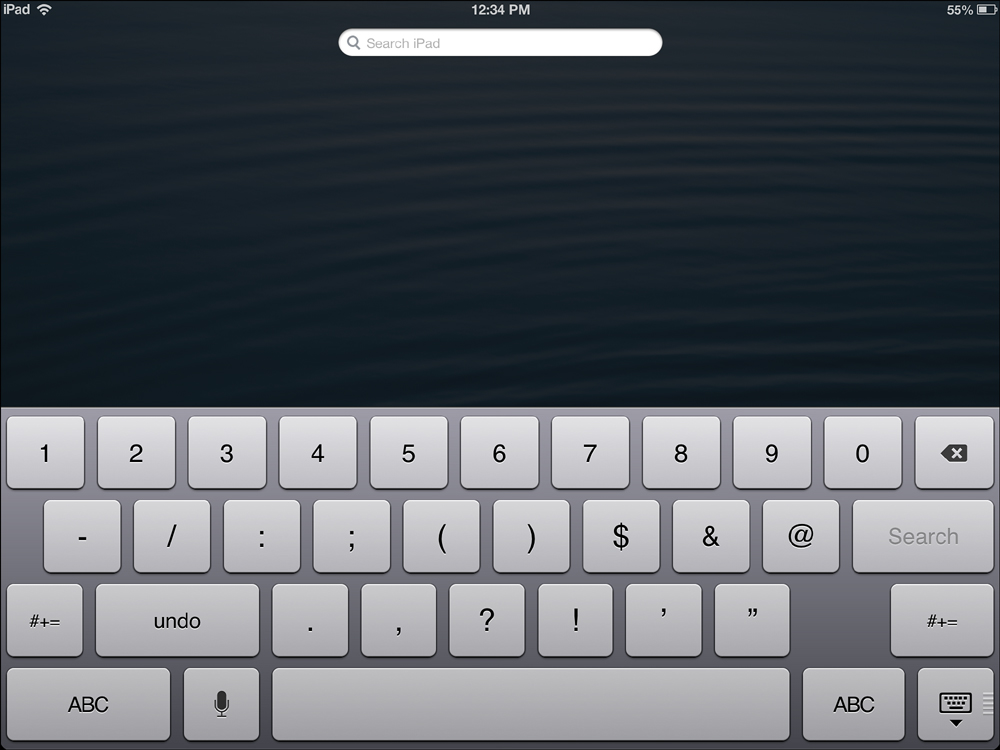
Return to the letters on the keyboard by tapping the ABC button shown in Figure 2.17.
You can also choose to speak what you wish to type by using the Dictation button indicated in Figure 2.16. It’s available on both the letters and numbers key screens (Figure 2.16 and Figure 2.17). Tap it once, and it will listen for you to speak. Tap it again when you’re done. It’s fairly accurate, but you may have to tap the text where you need to make corrections.
Note
The Dictation button is not Siri. Siri is always available by pressing and holding the Home button (see Chapter 16), but the Dictation button is available only when the onscreen keyboard is visible.
You’ll also find the keyboard available whenever you are in an app that requires you to input your name, address, or other bit of information. The best thing about the onscreen keyboard is that it just seems to know when it’s needed, and disappears when it’s not needed. But just in case, you can always tap the Hide Keyboard key to make it go away. If you need it again, just tap anywhere you see a text box or place where text is required, and it will reappear.