13. iBooks and the iBooks Store
In This Chapter
If you like to read books, you’re going to love what your iPad brings to the table. I love books. My home office’s shelves are full of a variety of topics, but the problems I’ve always had with my books are that they take up a lot of space and it’s not easy to tote more than one or two around at a time.
That’s why over the last few years, I’ve slowly been moving over to eBooks. Digital versions of books have no weight (well, other than the device you’re carrying them on), and with your iPad you could easily carry thousands and thousands of books in one place without ever hurting your back.
The typical eBook is a little less in price than its print version. And reading an eBook on your iPad or iPad mini is pretty much the same experience as reading a physical book.
 Caution
The only complaint I have about eBooks is that you can’t give away or donate an eBook when you’re done reading it. That’s why I typically buy my fiction books in print. If it’s a book I expect to keep for a long time and not give away, I buy it in digital format. Yes, you can delete an eBook from your iPad and download it again at any time, but I’d much prefer some sort of option that lets me pass on the eBook at least once, but so far there’s no technical solution for doing so.
Exploring iBooks
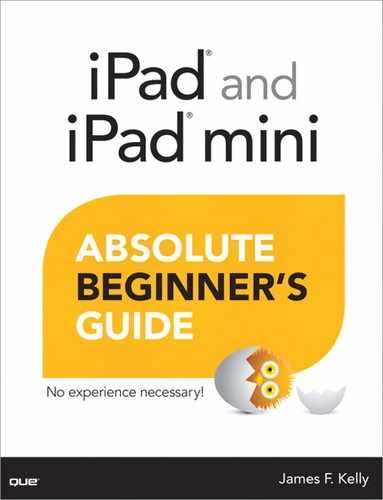
The iBooks app is not automatically installed on your iPad, so you’re going to have to browse the App Store (refer to Chapter 12, “Apps for the iPad”) and install it. The iBooks app is free, so just tap the Free button followed by the Install App button and provide your Apple ID password to finish up the install. Once it’s installed, locate the icon for the iBooks app, shown in Figure 13.1, and tap it to open iBooks.
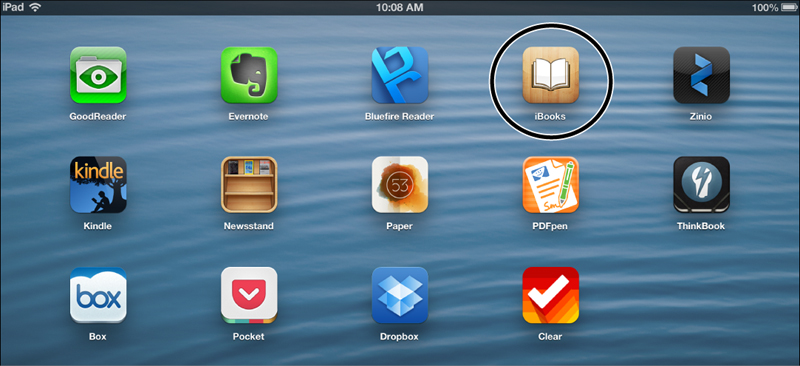
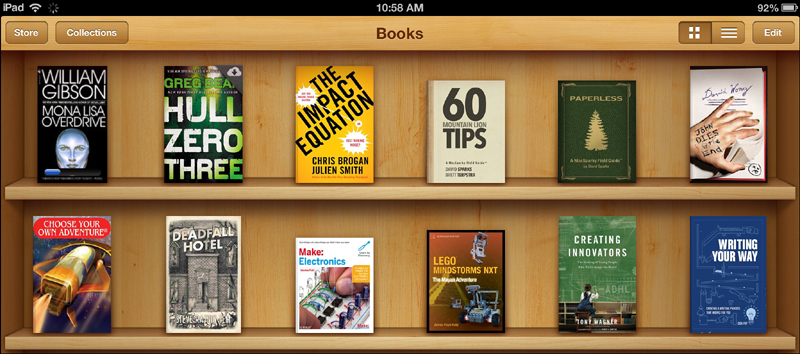
If you’ve never purchased a book from the iBook Store, you’ll see an empty bookshelf. I’ve made some purchases over the last year or two, and you can see that my bookshelf has 13 books on it, as shown in Figure 13.2.

Each eBook appears on the shelf with its full-color cover displayed. A single tap on a newly downloaded book will open that book to the first page, letting you begin reading immediately. (Otherwise, you’re taken to the page you stopped reading—iBooks remembers where you left off.)
 Note
Note
I’ve purchased many more books than you see here, so why is my bookshelf so sparse? Easy—I’ve deleted a lot more books to free up storage space on my iPad. Any book I’ve purchased from the Apple iBook Store can always be added back to the shelf at no additional cost, so keep that in mind as your eBook collection begins to grow.
Take a look around the iBooks app screen for a moment. In the upper-left corner you’ll see two buttons: Store and Collections.
The Store button will immediately open the Apple iBook Store where you can browse for books and make purchases. I’ll show you how this works in the next section.
If you tap the Collections button, you’ll see a menu appear, like the one in Figure 13.3.

As you can see in Figure 13.3, a check mark appears next to the Books option. This means the shelf will show all books you have currently installed on your iPad. The Purchased Books option will display all books you’ve ever purchased from the iBooks Store, including those you’ve deleted from the shelf. This is an easy way to find a deleted book and restore it to your shelf. Figure 13.4 shows a small cloud icon in the upper-right corner of a book that is deleted, but a simple tap on the icon will immediately download the book again.
Tap the PDFs option shown in Figure 13.3, and you’ll see any PDFs that you’ve downloaded to iBooks stored here. How do you get PDFs into the iBooks app? Glad you asked. If you find a PDF file while browsing the Internet, a single tap on it will open it in the Safari web browser. But if you’d like to store that PDF on your iPad, tap the page and you’ll see an option appear in the upper-right corner of the display that says “Open in iBooks.” Tap that button and the PDF opens in iBooks.
 Tip
Tip
If you want to create custom shelves (maybe a shelf for a science fiction genre and another shelf for history books), tap the New button shown in Figure 13.3 and type in the name of a new shelf.
If you go back to the PDF collection, you’ll see three more buttons: Shelf View, Details View, and Edit.
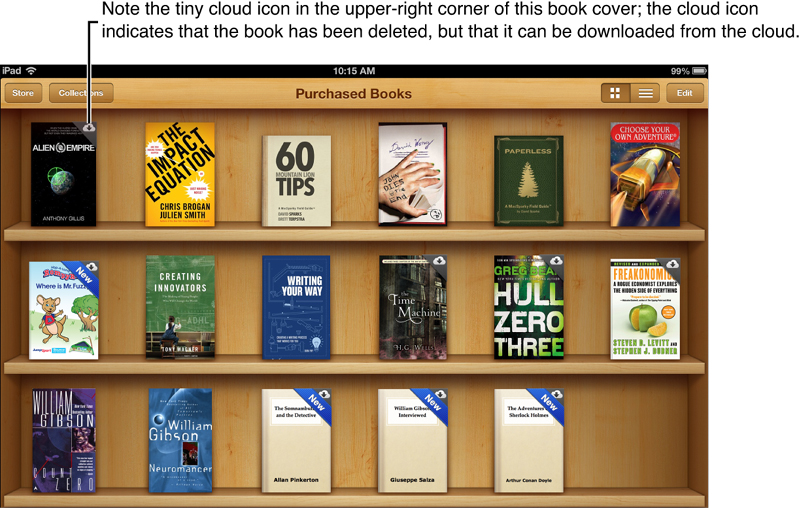
The Shelf View does just that—it displays your eBook or PDF collection on the shelf with a color cover. This is the default view, but the Details View is useful for viewing the actual titles of books and PDFs as well as their categories, as shown in Figure 13.5.
At the bottom of the Details View, you can see four buttons—Bookshelf, Titles, Authors, and Categories—that organize the list based on the button you press. Bookshelf lists items in the order that they have been downloaded, Titles displays them alphabetically, Authors shows all collections grouped by author, and Categories breaks up your collections into genre sections.
Depending on whether you’re in Shelf View or Details View, the Edit button works a little differently. In Shelf View, tapping the Edit button lets you tap one or more books to place a check mark on them, as shown in Figure 13.6.
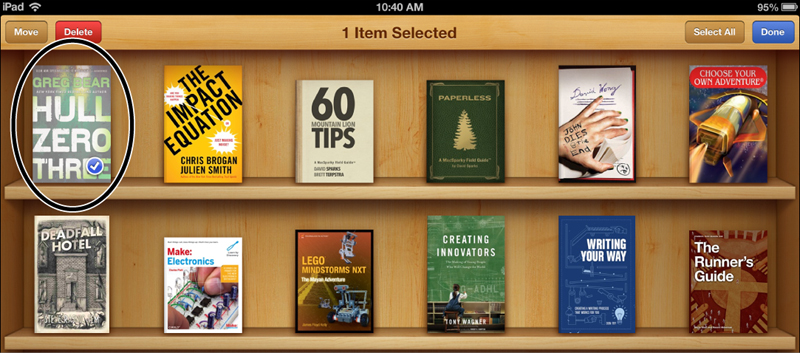
Tap the Delete button, and all books with a check mark will be removed from the shelf. You can also tap the Move button to move selected books to any custom shelves you might have created.
If you are in Details View, the Edit button will put a small circle to the left of each book or PDF. Tap the circle to place a check mark in it.
Once again, you can use the Delete or Move button to delete PDFs or eBooks or move them to other shelves.
Visiting the iBooks Store
To open the iBooks Store, tap the Store button in the upper-left corner of the iBooks app when you’re viewing any shelf.
What you’ll see on the iBooks Store home page changes constantly, just like the App Store. New books and recommended titles are displayed on this scrolling screen. You’ll want to swipe up and down and look at all the categories available—New in Fiction, New in Non-Fiction, Buzz Books, and Popular Pre-Orders are just a few of the sections that the iBooks Store uses to help you narrow down what you’re looking for. And a single tap on any book cover you see will open that book’s information page, as shown in Figure 13.7.

The iBooks Store offers up information pages very similar to the App Store. You’ll see the familiar Details, Ratings and Reviews, and Related buttons that allow you read book summaries, see what other readers think, and find others books from the author, respectively.
Unlike the App Store, however, most eBooks have the option to buy the book for the listed price plus a Sample button that you can click to download the first 30 to 40 pages. If you’d rather just purchase the book, tap the button with the price in it and then click the Buy Book button—the book will begin downloading to iBooks, as shown in Figure 13.8. To delete a Sample, tap the Edit button in the upper-right corner, tap the Sample so a blue check mark is placed on it, and then tap the Delete button in the upper-left corner.
Note
As with the App Store, purchasing books from the iBooks Store requires an Apple ID and password and a credit card on file.
Before moving on to the actual reading of an eBook, I want to point out a few more options with the iBooks Store. First, you’ll always find the Search Store bar in the upper-right corner. Type in an author name or a book title or even a subject matter, and the iBooks Store will return a list of suggested books that fit your search. Click the Books button at the bottom of the screen to return to the iBooks Store.
Along the bottom and top of the iBooks Store you’ll see a number of buttons that help narrow your search. At the top are the category buttons—All Categories, Fiction, Nonfiction, and More. The More button offers up more genres that you can use to filter what is displayed in the Store.
Along the bottom are buttons related to current best sellers, such as those listed on the New York Times Best Sellers list, as well as the Top Charts and Top Authors buttons, which show you which books and authors are currently popular purchases. The Purchased button will, obviously, show you all eBooks you’ve purchased so you can immediately download them again if they’re not still on a shelf.
Reading an eBook in the iBooks App
After you’ve downloaded a new eBook, it appears on the shelf with the New banner on it, as shown in Figure 13.9.

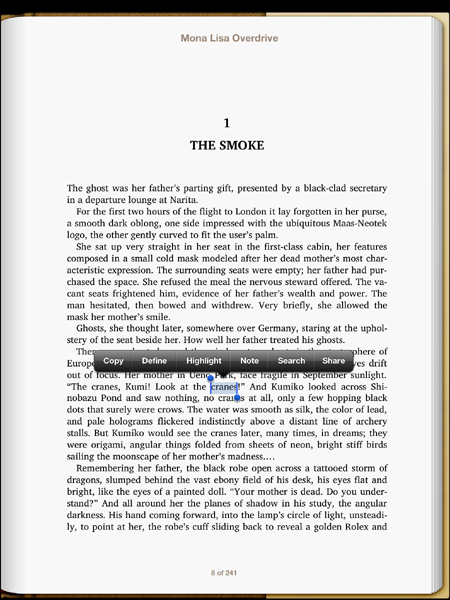
Tap the book’s cover or title (if you’re in Details View) and iBooks will immediately open the book to the first chapter and first page of text, as shown in Figure 13.10.
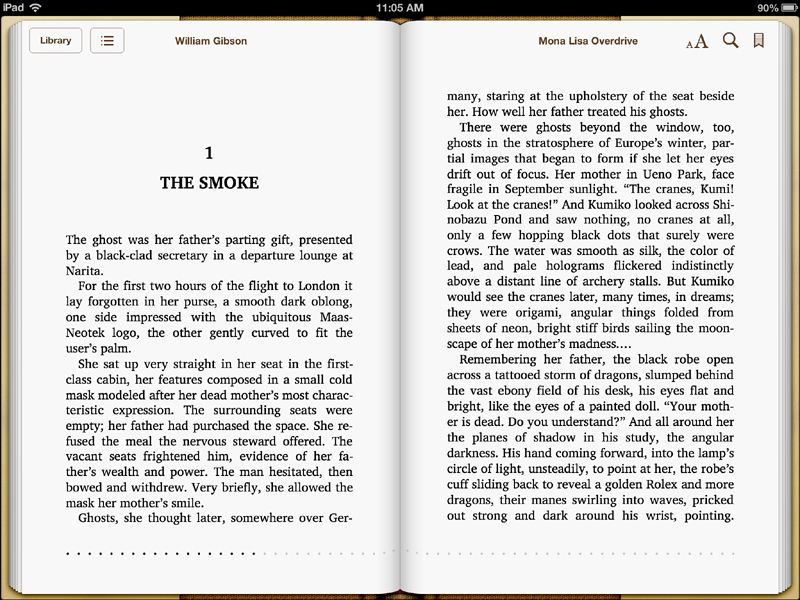
As you can see, I’m holding my iPad in Landscape view so two pages of the book are displayed at once. But I prefer to read my books in Portrait view, so I’ll rotate the iPad and the page changes slightly, as shown in Figure 13.11.
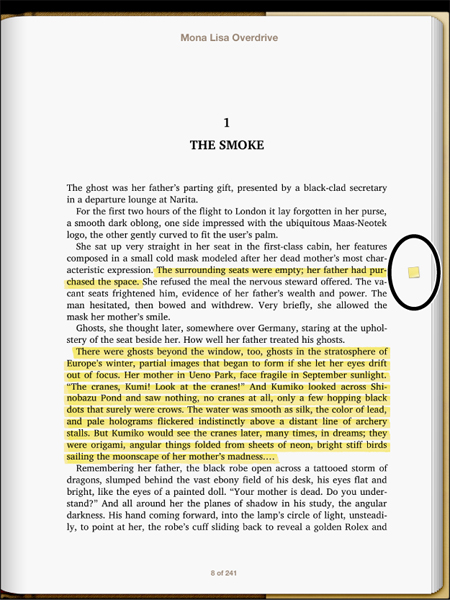
At the bottom of the page is a series of dots and below that is the current page number I’m on and the total number of pages. I’m on page 8 of 241, and I can even see a small bit of text that tells me I’ve got five pages left in this chapter. I can also place my finger on the small brown square and drag left or right to move from one chapter to the next. Feel free to experiment with a book of your own so you’ll see how this works.
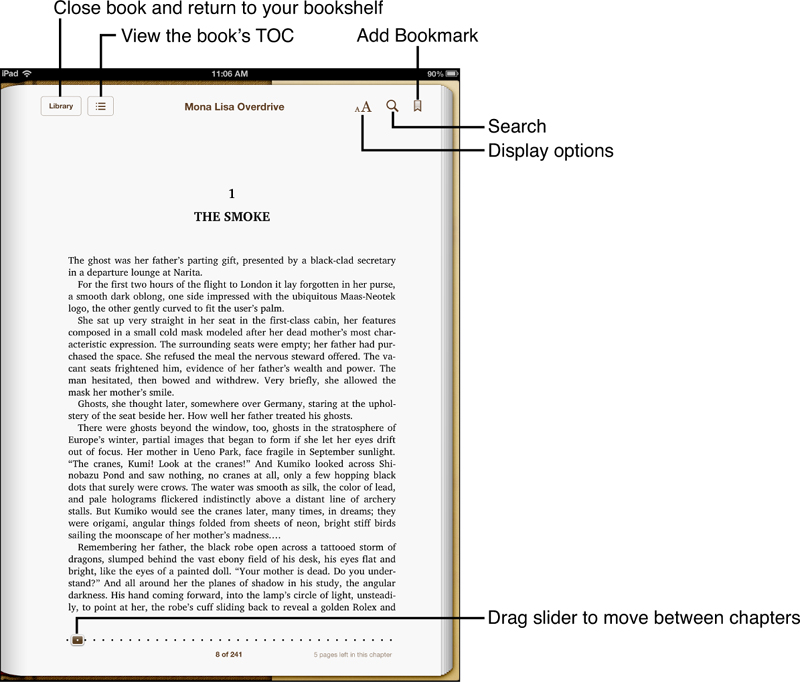
In the top-left corner is the Library button—tapping it will close the book and return you to the shelf. The button to the right of the Library button is the Table of Contents button. If you tap it, you will immediately be taken to the Table of Contents, as shown in Figure 13.12, and a tap on any chapter will immediately jump you to that position in the book.
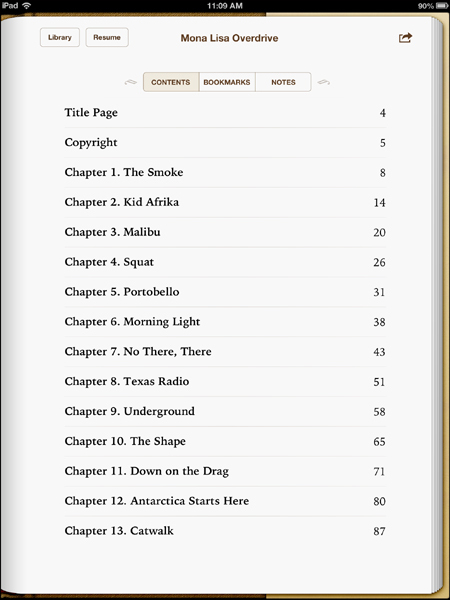
While viewing the Table of Contents, if you tap the Resume button in the upper-left corner, you’ll return to your book, but before you do that, let me explain a few more options shown in Figure 13.12. You should still be on the Contents page, so the Contents button is selected.
As you read your eBook, you can place multiple bookmarks (not just one) on pages by tapping the small bookmark icon found in the upper-right corner of every page—more on that in a minute. The Bookmarks button shown in Figure 13.12 will show you a listing of all bookmarks, and a tap on one will move you to that place in the book.
Also while you’re reading, you can jot notes in the eBook, but it doesn’t require an actual pen or pencil. I’ll show you how to add notes shortly, but tapping on the Notes button in Figure 13.12 will show you all the notes you’ve entered for an eBook and tapping on one moves you to that page in the book.
Finally, in the upper-right corner of the Table of Contents page is the Share button. Tap it, and you can post a little link to the book on Facebook or Twitter, or send it via a message or email to a contact.
As you can see in Figure 13.13, there are three more items—Display options, Search, and the Bookmark icon.

The Display options button (indicated by the AA icon) opens a menu like the one in Figure 13.13.
Tap and drag the slider bar at the top to lower the screen’s brightness or increase it. When you’re reading at night, drag it almost all the way to the left—it’s much easier on your eyes and they’ll adjust quickly to the lower light.
You can tap the larger A button to increase the size of the font or the smaller A button to decrease it. You’ll have to experiment with this to find the font size that works best for you.
Additionally, the Fonts and Themes buttons allow you to change the font style and the background color of the page, as shown in Figure 13.14.

For example, you can change the color of the page from White to Sepia for a less-glaring page color. The Night option turns the page black and the text white, which is supposed to be easier on your eyes. You can also change the display from Book to Full Screen or Scroll if you prefer not to have the text look like an actual page from a physical book.
Turning the page of your eBook requires nothing more than a swipe right to left like you’re turning the page of a real book. Likewise, a single tap of your finger anywhere near the middle-right side of the page will also turn the page. Swipe left to right and you’ll see the previous page come back into view.
Finally, I mentioned earlier that you can type your own notes into an eBook. Well, you can do that plus a few more special things. Tap anywhere on a bit of text in your eBook and you’ll see a small menu appear like the one in Figure 13.15.
You can use your fingers to drag the small dots left and right to expand the selected text from a single word to an entire paragraph or two. Once you’ve selected a word or paragraph, you can tap the Copy button to save the text to the clipboard for pasting into an email or other app that supports the clipboard.
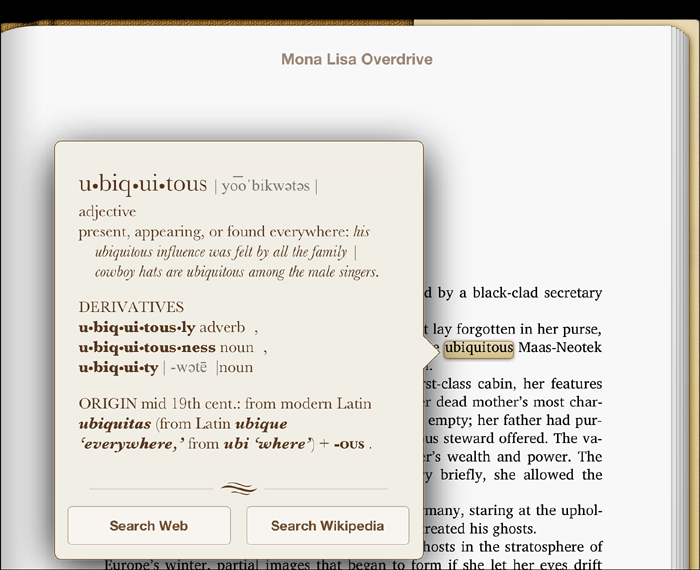
Tap the Define button while a single word is selected, and a definition will appear, as shown in Figure 13.16—you’ll remain on the page while the word is defined but you can tap the Search Web or Search Wikipedia button, which will close the iBooks app and open up Safari.
If you’ve selected a sentence or paragraph that you wish to highlight, tap the Highlight button and the selected text will be highlighted in yellow.
You can change the color of the highlight using the small menu that appears above the highlighted text. Tap the yellow circle at the left end of this small menu to select from five colors or to underline the text.
Other options include the Clear highlight button, the Note button, and the Share button. The arrow button pointing to the right simply allows you to copy, define, or search on a selected word or phrase.
Finally, tap the Note option (shown in Figure 13.15) and you can type in your own note, as shown in Figure 13.17.
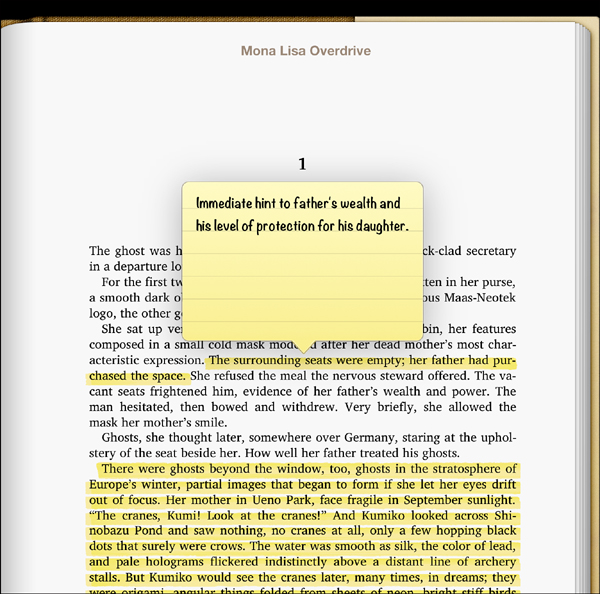
When you are finished typing your note, tap anywhere on the screen to close your note. Notice in Figure 13.18 that a small sticky note appears in the right column; tap a sticky note to view the comments you provided.
Remember, closing down a book or the iBooks app itself won’t make you lose your place in an eBook. iBooks remembers the last page displayed when an eBook is closed, so you’ll always be returned to the page where you left off.
Alternatives to iBooks
Before I close out this chapter, I want to briefly mention other options to the iBooks app. If you’re an Amazon customer (or a Kindle owner) or a Barnes & Noble customer (or a Nook owner) and prefer to purchase your books from either of those sellers, you’ll find two apps in the App Store if you search for them:
• Kindle app—This free app will let you view any eBooks you’ve purchased from Amazon.com for your Kindle. If you don’t own a Kindle, you can still purchase books from Amazon.com and have them sent to your iPad’s Kindle app. For more information, download the free Kindle app from the App Store and read the documentation and instructions it provides.
• Nook app—This app is also free and allows you to download eBooks you’ve purchased from Barnesandnoble.com, either for your Nook or simply as eBooks for reading on your iPad. Again, download the free Nook app from the App Store and read its documentation for assistance.
Many more eBook readers are available from the App Store—way too many to cover in this book. That said, most of them require your eBooks to be downloaded in a specific format (ePub and mobi are two examples). Make certain whichever eBook reader you use is capable of displaying eBooks you purchase online. Because this can be frustrating to manage, I tend to stick with the iBooks, Kindle, and Nook apps for all my reading needs.