20. Eight Great Paid Apps
When I first purchased my iPad, I loaded it up with all the free apps I could find. Although many of these apps were great, the reality was that most of them just didn’t hold my attention for more than a day or so. Free apps can be great, and the old phrase “You get what you pay for” doesn’t always hold true because I’ve found some amazing free apps over the years. But I’ve also found some incredible apps that weren’t free, and to this day a number of them have earned back their initial cost thousands of times over in saved time and aggravation and usefulness.
The nice thing about paid apps for the iPad is that, for the most part, they average between $0.99 and $4.99 in price. This is far better than the cost of computer software, which always seems to cost $19.99 or $39.99 or even into the hundreds of dollars. For a small investment, you can often find an app that exceeds your expectations. I have a small number of apps I fully believe should cost more for what I’ve received. Still, it’s hard to feel too bad when you spend $1.99 on an app and discover after a few weeks of use that it just doesn’t meet your needs. The small investment is often a suitable risk to try out an app that might not have a free “lite” version available for testing purposes.
In Chapter 19, “Eight Great Free Apps,” I provided you with eight free apps that I’ve used and recommend to my friends, family, and colleagues. In this chapter, I’m going to provide you with eight recommendations of paid apps. Hopefully, as with the free apps, you’ll find one or more of these paid apps useful.
All of these apps are currently available in the App Store, and if you don’t like these eight paid apps, you have a couple hundred thousand apps left to investigate!
 Note
Note
Some apps, especially games, will often be listed as “Free.” Only later will you discover that the app is free because it has what are called in-app purchases. With games, for example, in-app purchases often include special features or powers that give you an edge in the game. Other in-app purchases often include extra functionality such as a sketch app that sells different types of textures, background colors, or shapes for the pen or brush. Always read the app’s information page to determine if there are in-app purchases; you’ll almost always see a listing on the information page called “Top In-App Purchases” that shows you what in-app purchases other owners of the app are buying. That’s your clue that although the app is free to download, it’s not always free to use.
GoodReader
For every type of media you wish to view, there’s an app. Want to read PDF files? There are PDF viewers (many free, some paid). Want to watch videos on your iPad that aren’t supported by the Videos app? Just search the App Store for the movie format (such as WMV—Microsoft’s standard video format) and you’ll find plenty of solutions. The same goes for different image types (TIFF, GIF, JPG, and so on) and eBook formats (ePub, Mobi, and so on).
If you have something you want to read, you just need to go find an app that supports it. Or...you can grab GoodReader.
Without a doubt, one of my most used apps on my iPad is GoodReader—I use it to watch videos, read eBooks, view photos, and much more. It’s a solid multipurpose app that continues to surprise me with new features it supports.
I mentioned Dropbox in Chapter 19, and GoodReader allows me to create a permanent connection to my Dropbox account. This means I can view all my Dropbox folders that contain a mix of content and tap my files to open them in GoodReader. I can even choose to download a copy from the Dropbox connection so that if I lose my Internet connection, the file is still available on my iPad.
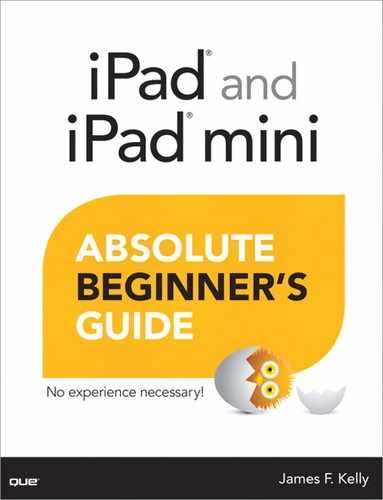
Figure 20.1 shows the basic look of GoodReader.
You’ll notice that the left side of the screen shows folder I’ve created to organize my files. On the right are the various options offered by GoodReader. I can use the Web Downloads section to enter a URL for a file or PDF and download directly to GoodReader. The Connect to Servers section lets me create connections to other services (such as Dropbox) for moving files over to GoodReader.
I store a lot of stuff on my iPad with GoodReader—LEGO instructions for my son’s collection, all the episodes of my favorite science fiction TV series (Firefly), digital copies of Make magazine, and much more.
GoodReader allows you to annotate your documents, write in the margins, highlight, and much more. It’s currently priced at $4.99 and is one of the best investments I’ve made for my iPad.
Pages
I try to avoid using my home office computer as much as possible. Whenever I can, I prefer to use my iPad to write, play, check email, and anything else I can avoid using the desktop computer that’s not at all portable.
One of the tasks that often brought me back to my desktop computer was creating PDFs—brochures, proposals, and other documents that would have a mix of text and images. Although the software I used on my computer did the job, it was bloated with features and quite slow to work with. Thankfully, I rarely have need to use that software anymore now that I’ve installed Pages on my iPad.
Pages is Apple’s version of the word processor. It has all the features I need and, so far, I haven’t yet discovered something I need to do that it can’t handle.
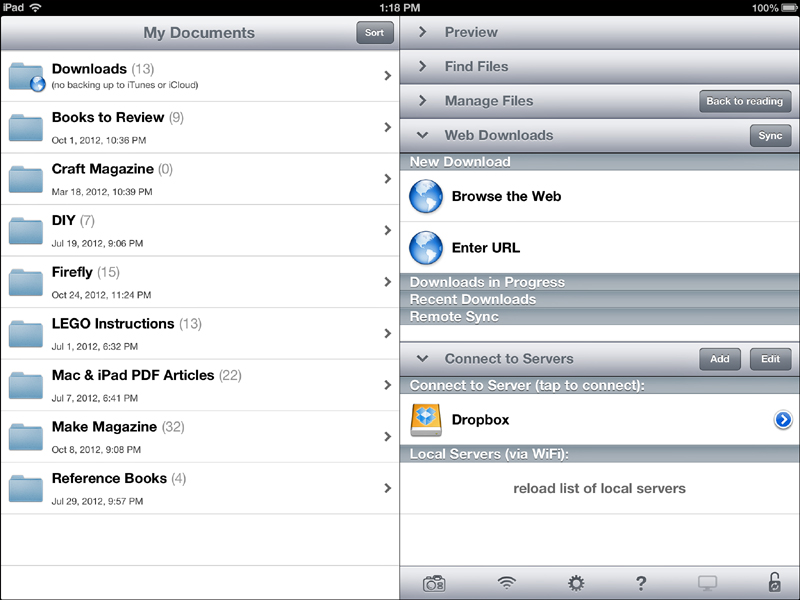
Pages comes with a mix of templates such as a Formal Letter, Resume, Term Paper, Recipe, Thank You Card, and Flyer...plus many more. You can type your text, move images around (and resize them), and have the text shift to accommodate an embedded image. Colors and fonts and other features are hidden on a toolbar that disappears until you need it, giving you a better view of your final document, as shown in Figure 20.2.

The only problem I have with Pages is that it functions best when you’re using an external keyboard instead of the onscreen keyboard. (You can learn more about external keyboard options in Chapter 18, “Charging and iPad Peripherals.”) With a separate keyboard, you can type as fast as you like and save all your work easily on your iPad until you’re ready to print or email it out.
Pages is currently $9.99 from the App Store, and is one of the easiest word processing apps I’ve ever used—it even saves to iCloud so I can access my documents from my iPhone! It doesn’t have all the bells and whistles you’re probably used to in a computer-based word processing application, but ask yourself when was the last time you actually used a macro or a mail merge or any of those hundreds of fonts? If you’re like me and want a simple, easy-to-use word processing app that can create some eye-catching documents, then Pages is the app for you.
PDFpen
Although I use GoodReader to read a lot of PDF files, when I actually need to work with an existing PDF (signing a contract, for example), I turn to PDFpen.
PDFpen lets me create new PDF documents (just as I can do with Pages), but for me the real power is editing with PDFpen. When I get a book chapter and I need to provide some editing commentary, I open the PDF in PDFpen and use the markup tools to highlight, scratch out, add notes, and draw boxes around items of interest.
For contracts, I have a scanned image of my signature stored in the Photos app that I can open and paste (and resize) to fit on any signature line. I cannot tell you how many times this has saved me when a contract needed an immediate signature and I didn’t have time to print, sign, and fax back a document.
Another great thing about PDFpen happens after you install it. Should you find a PDF attachment (in an email) or a PDF file for download on a website, when you tap the item to open it you’ll see PDFpen listed as one of the options to use to open the PDF document. When you open it in PDFpen, a copy is automatically saved in PDFpen so you won’t need an Internet connection later to access it.
Figure 20.3 shows PDFpen and the markup tools available.

PDFpen is currently $14.99 for the iPad. It supports iCloud, but it can also move your documents to other services such as Dropbox and Google Docs. I’m always finding PDFpen saving the day—a few weeks ago my son’s school emailed me some PDF forms at 4:30 p.m. that were due by 5 p.m. and that I’d forgotten to send in with him that day. Rather than head home for the documents, I opened them with PDFpen, filled them out, and emailed them back in less than 15 minutes. I am invincible!
iDisplay
Most desktop computers have the ability to use two or more monitors to provide more screen space to users, but this isn’t all that convenient for laptop users. The idea of carrying a second LCD flat screen to the coffee shop is just silly. Or is it?
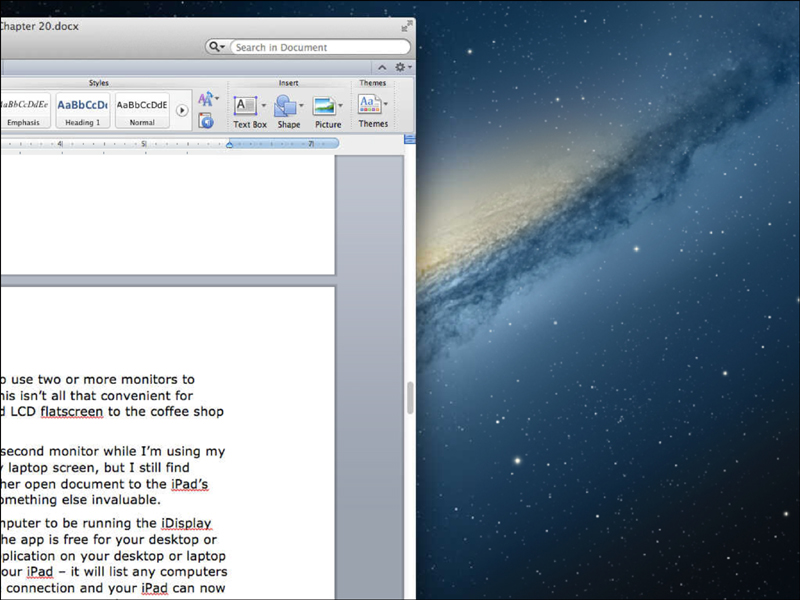
With iDisplay, my iPad quickly becomes a second monitor while I’m using my MacBook Air. The screen isn’t as big as my laptop screen, but I still find having the ability to drag a web page or other open document to the iPad’s screen so I can view it while working on something else invaluable.
Of course, iDisplay will work on a Mac or Windows computer as long as it’s running the iDisplay software. It uses a Wi-Fi connection, and the app is free for your desktop or laptop computer. You open and run the application on your desktop or laptop first. Next, you open the iDisplay app on your iPad—it will list any computers it sees that are running iDisplay. Make the connection, and your iPad can now be placed to the right of your computer to serve as a second screen.
As you can see in Figure 20.4, half of this chapter is displayed on my iPad screen. The other half is on my laptop’s screen—you’ll just have to trust me that it’s there.
iDisplay currently costs $4.99 from the App Store. If you find your laptop or desktop computer screen just doesn’t offer enough viewing space when you need it, consider turning your iPad into a second screen temporarily.
Paper by FiftyThree
I have a lot of friends who love the Moleskine brand notebooks. They’re small, easy to carry, and they’re fairly rugged and hold up over time. I use them occasionally, but for me, I prefer Paper by FiftyThree.
The app called Paper by FiftyThree is one of those apps that’s free to download and install, and you can actually use it as much as you like without ever paying an extra cent. However, it does have some in-app purchases that make this app a real standout for me.
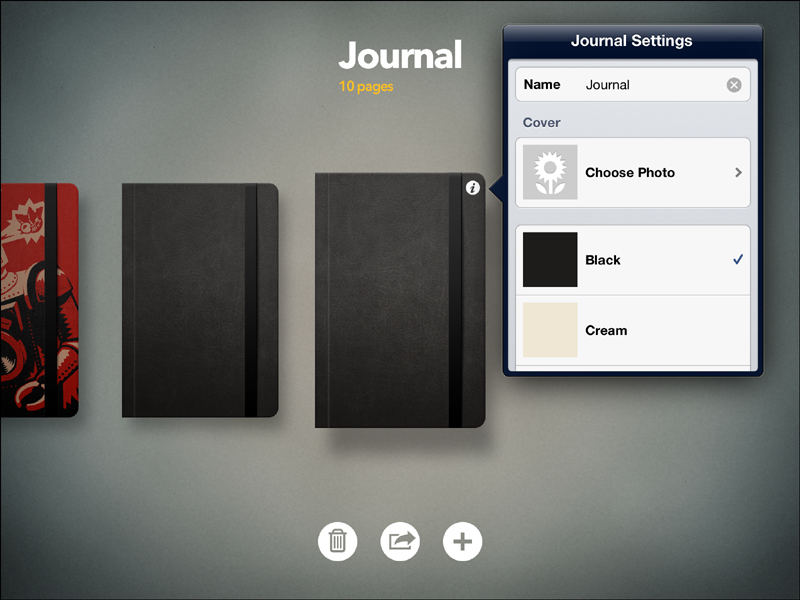
Figure 20.5 shows the scrollable collection of notebooks—create as many as you like (each starts with 10 pages, but you can add and delete pages at the touch of a button) and customize their covers with textures, colors, and even photos or artwork from your iPad’s albums!
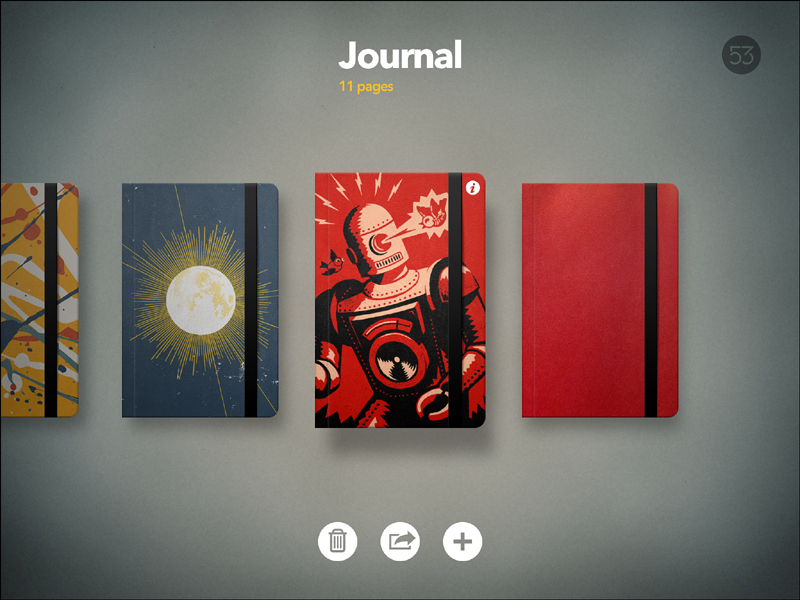
You create a new notebook by tapping the + button shown in Figure 20.5. After the new journal appears, tap the small “i” icon on the journal’s cover and enter the name of the journal and select a cover from the scrolling list shown in Figure 20.6.
After you create and name a notebook, tap its cover to open it. You swipe to move from page to page and then tap a page to open it in full screen. Figure 20.7 shows a single page along with the tools that Paper by FiftyThree offers. The Eraser and Drawing Tool are hidden until you need them—swipe up from the bottom of the screen to see the tool palette, and then swipe down to hide the palette again.
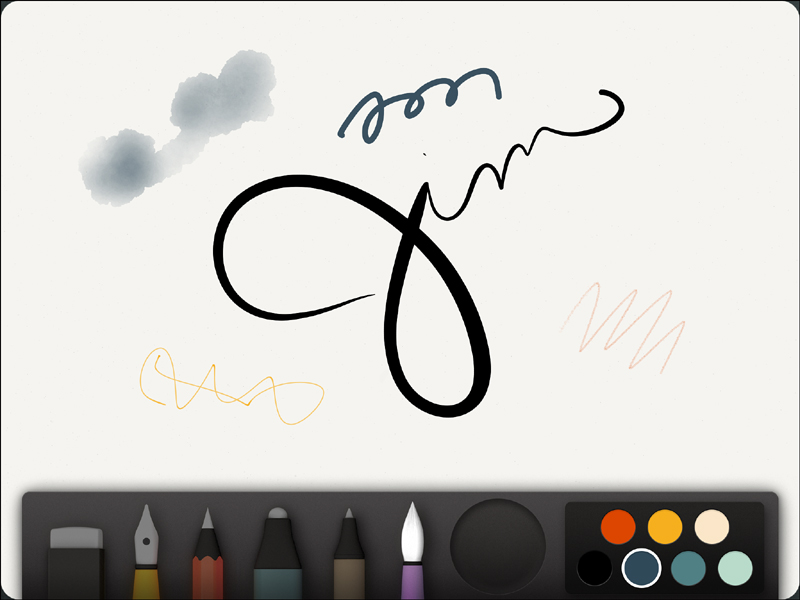
The free version of the app only comes with the Eraser and the Drawing tool (to the right of the Eraser). The other items can be purchased individually ($1.99 each) or as a package deal called The Essentials ($6.99). The small circle on the toolbar is the Mixer ($1.99) and allows you to mix up your own colors.
I find myself using Paper by FiftyThree most often to create custom sketches that I need my publisher’s art department to re-create for me (but in a much more polished and professional manner). I’ve also found the app quite handy at keeping my five-year-old son busy during any kind of wait where game sounds would be unwelcome.
Clear
My wife has always made fun of me because I’m a list person. I would create these lists on paper with everything I needed to do for both home and work, and over time the items would get crossed out. It’s an extremely motivating method that worked for me. The problem is that I often had two or three sheets going at any given time and sometimes I’d lose one.
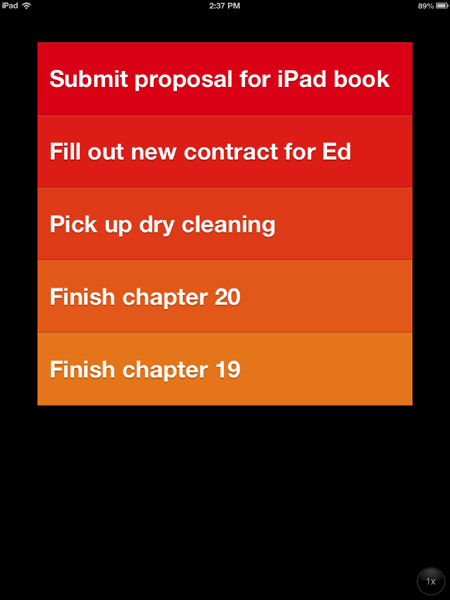
A friend introduced me to the app called Clear, and my list making has never been the same. I’m done with paper lists. Now, with a simple swipe of my finger, I can create a new to-do item. When the item is completed, another swipe deletes it from the list. The eye-pleasing color gradient is supposed to serve the purpose of ordering items by priority (red is highest priority at top, whereas the light orange item near the bottom is low priority).
There’s one caveat about using Clear, however—it’s really an iPhone app. It can also be a little troublesome to find using the Search tool because so many apps have the word “clear” in their title or description. When you search for it in the App Store, search for “Clear Realmac” and tap the iPhone apps as shown in Figure 20.8.
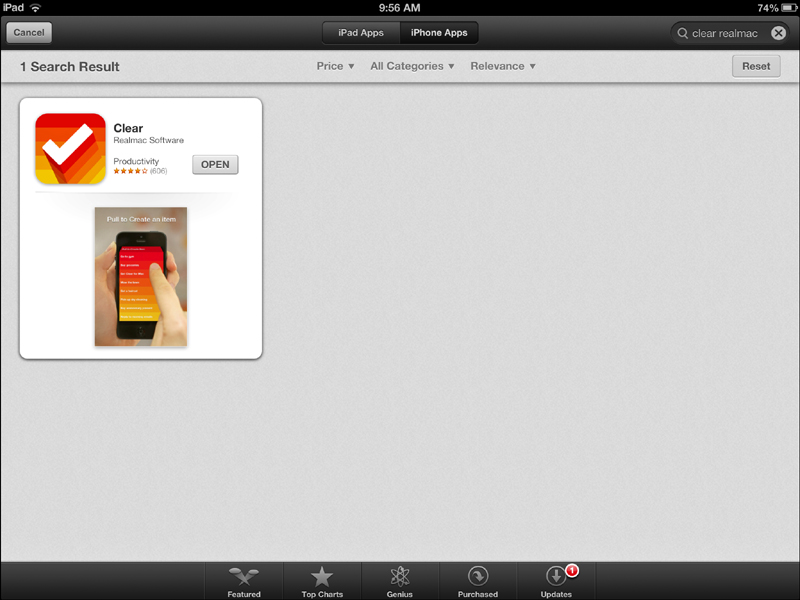
Figure 20.9 shows the Clear app open with some items in it.
What I’ve discovered about Clear is that people love it... or hate it. It doesn’t have a lot of bells and whistles—it doesn’t interrupt you with pop-up alerts and it doesn’t have a lot of configuration options. Instead, it’s a simple list that is extremely easy to add and remove items from, and it has an interesting method for creating, reorganizing, and removing items. It does offer a folders option for creating different types of lists (such as a home to-do list versus a work to-do list), but I don’t use it in that manner. For me, I just keep adding the stuff that needs to be done, and I delete off the list what is completed. It’s a never-ending list, but that’s life—and Clear is my absolutely favorite to-do app.
Clear is $1.99—at that price, you won’t lose a lot of coin for giving it a try. Clear was originally created for the iPhone, and it looks great on that device as well. And with iCloud support, you can synch your items in Clear between iPad and iPhone easily.
iMovie
I shoot a lot of video using my iPhone (and sometimes my iPad), but I am horribly lax when it comes to actually editing my videos into anything worth watching. I have two small boys (ages 5 and 2) who love to watch themselves on my iPad or on the TV (using my Apple TV and the AirPlay feature that puts whatever’s on my iPad’s screen on the TV screen).
For a while, I would just cycle through all the videos stored on my iPad (or in Dropbox) and play them randomly, letting my boys laugh at their antics. But then someone showed me how easy it is to edit these videos down to their best parts, blend them together, and package it all with animated openings and text and special effects using iMovie.
Now I’m an iMovie fanatic, and my boys are able to specify certain videos they’d like to watch because I’ve added titles and special effects that they can remember. “Daddy, play the Falling Down video!” (The single video containing all the snippets I filmed of my boys as they learned to walk.)
iMovie is fantastic. You can create movie trailers for your larger videos. Are you familiar with the Ken Burns effect? It’s in there, allowing you to add photos, move and change scale, and provide a semblance of animation. You can split videos up, blend them together, add sound effects, add music and voiceovers, and much more. It comes with a $4.99 price, but it’s worth every penny in my opinion, and I use it constantly.
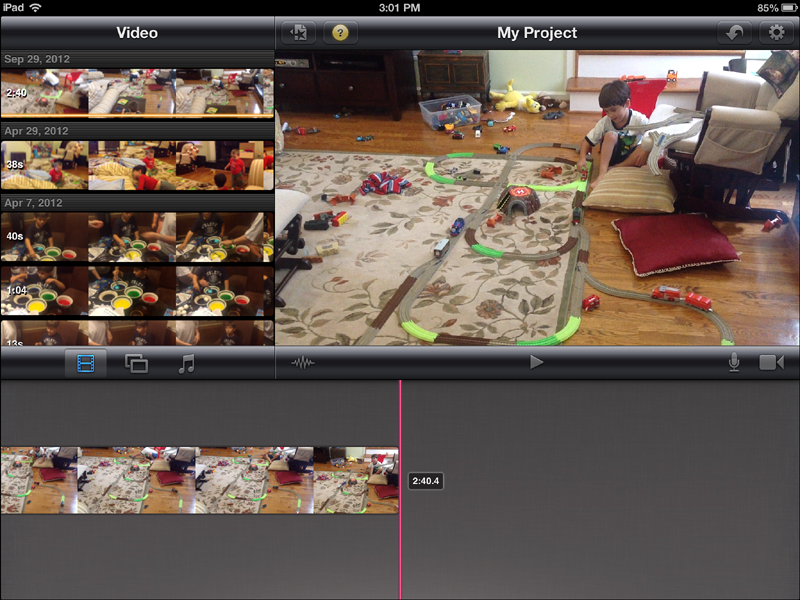
Figure 20.10 shows the basic iMovie interface.
The first few times you use iMovie can be a little confusing until you figure out how to navigate and use the tools available. Use the Help options when you can, but turn to the Internet with a Google search for “iMovie tutorials” and you’ll be in good hands. You can find hundreds of videos and documents out there that will make you an iMovie expert and take your videos to the next level.
Angry Birds (Anything)
I hesitated to include any games in this chapter, but if there is collection of games that has more than earned its spot on the best paid apps, it has to be the Angry Birds group of games.
There’s the original—Angry Birds. The bad pigs have stolen the birds’ eggs and built a series of forts and defenses to keep the birds out. You fling a variety of birds with various powers (one drops an egg that explodes and can destroy walls) to try and defeat all the pigs. Yeah, that’s the game in a nutshell. And it’s sold gazillions of copies and made more money than most countries can print. Why is it so popular? I can’t explain it, other than to tell you to try it out if you dare.
Figure 20.11 shows the original Angry Birds.

But the fun doesn’t stop there. Since the release of the original version, the app’s developers have continued to release game after game—Angry Birds Seasons (with free holiday updates for St. Patrick’s Day, Halloween, and many more), Angry Birds Space (birds fly around planets and use gravity to take out defenses), Angry Birds Rio (a tie-in to the animated Rio movie for kids), and now...Angry Birds Star Wars. Yes, the birds play the roles of Luke Skywalker, C-3PO, and many more good guys—and the pigs wear Darth Vader and Stormtrooper helmets. It’s crazy, and my oldest son is an expert at all of them.
Where will it end? Who knows? A spin-off game was just released called Bad Piggies, which puts you, the player, into the roll of the pig trying to escape safely with an egg.
Should you try out an Angry Birds game, consider yourself warned. The games are addictive, the music will get in your head and stick there, and the constant free updates with new levels makes purchasing the $0.99 full versions (versus the free versions, which have annoying advertisements at the top of the screen) a good investment for long-term play.
Finding More Paid Apps
Paid apps are never hard to find. Most of the apps on the Featured page of the App Store are paid apps; given that Apple gets a nice piece of every sale, it makes sense that most of the apps they display will be paid apps and not free apps.
Still, Apple and the App Store do a great job of promoting the most popular paid apps. And they’re popular for a reason! Word of mouth can quickly kill a paid app that doesn’t deliver on its promises, but it can also create legends in the paid app world when users return to the App Store to give an app praise (using the review feature).
Obviously you can use the App Store’s category option and the various specialty collections displayed on the Featured page, but don’t discount the numerous websites that review apps. Just Google “iPad app reviews” and you’ll find dozens of websites dedicated to reviewing paid apps. Try to find the sites that actually pay for the apps and can provide unbiased opinions rather than those sites that receive the apps for free to review.
Magazines and blogs are also a great place to find reviews of paid apps. And just as with free apps, you’ll often find that a recommendation from someone you know will lead you to a paid app that gets added to your list of favorites.