9. Apps for Photos and Videos
I’ll admit it—I’m not so fond of holding my iPad or iPad mini up in front of me to take a photo or shoot a video. But I must admit, there are times when I don’t have my mobile phone handy or a real camera in hand and an opportunity presents itself that just screams to be documented. Most of the time this need for impromptu photos and videos is related to my kids doing funny or cute things. However, I did have an opportunity recently where I used my iPad after witnessing a fender bender—I shot some photos and a quick video because the driver who was rear-ended lacked the ability.
The iPad comes preinstalled with three apps that are photo/video related: Camera, Photo Booth, and Photos. The Camera app is used to shoot photos and videos. Photo Booth lets you take fun, quirky snapshots just like you’d do in those little novelty photo booths that spit out four small images of anyone in the seat in front of the camera. And the Photos app is where you view your photos and videos and apply some editing techniques.
I cover all three of these apps in this chapter; when you’re done reading, you’ll be ready to take photos, shoot videos, perform some edits, and even share your little works of art with friends and family.
Using Camera
Let me start by having you tap the icon for the Camera app, shown in Figure 9.1.

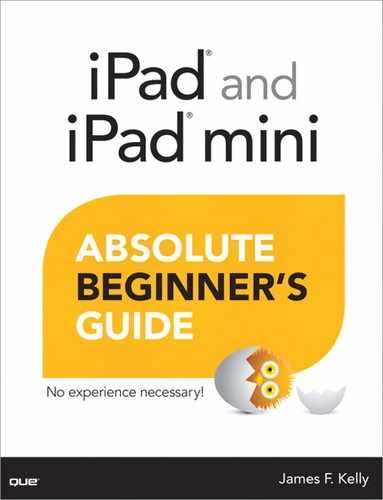
Remember, the primary camera is on the back of the iPad (as opposed to the front-mounted webcam used for FaceTime—see Chapter 10, “Apps for Instant Communication”), so you’ll want to make certain you’re holding the iPad in such a way that the rear camera lens is not obstructed. Figure 9.2 shows that I’m pointing the iPad at my favorite two-year-old.
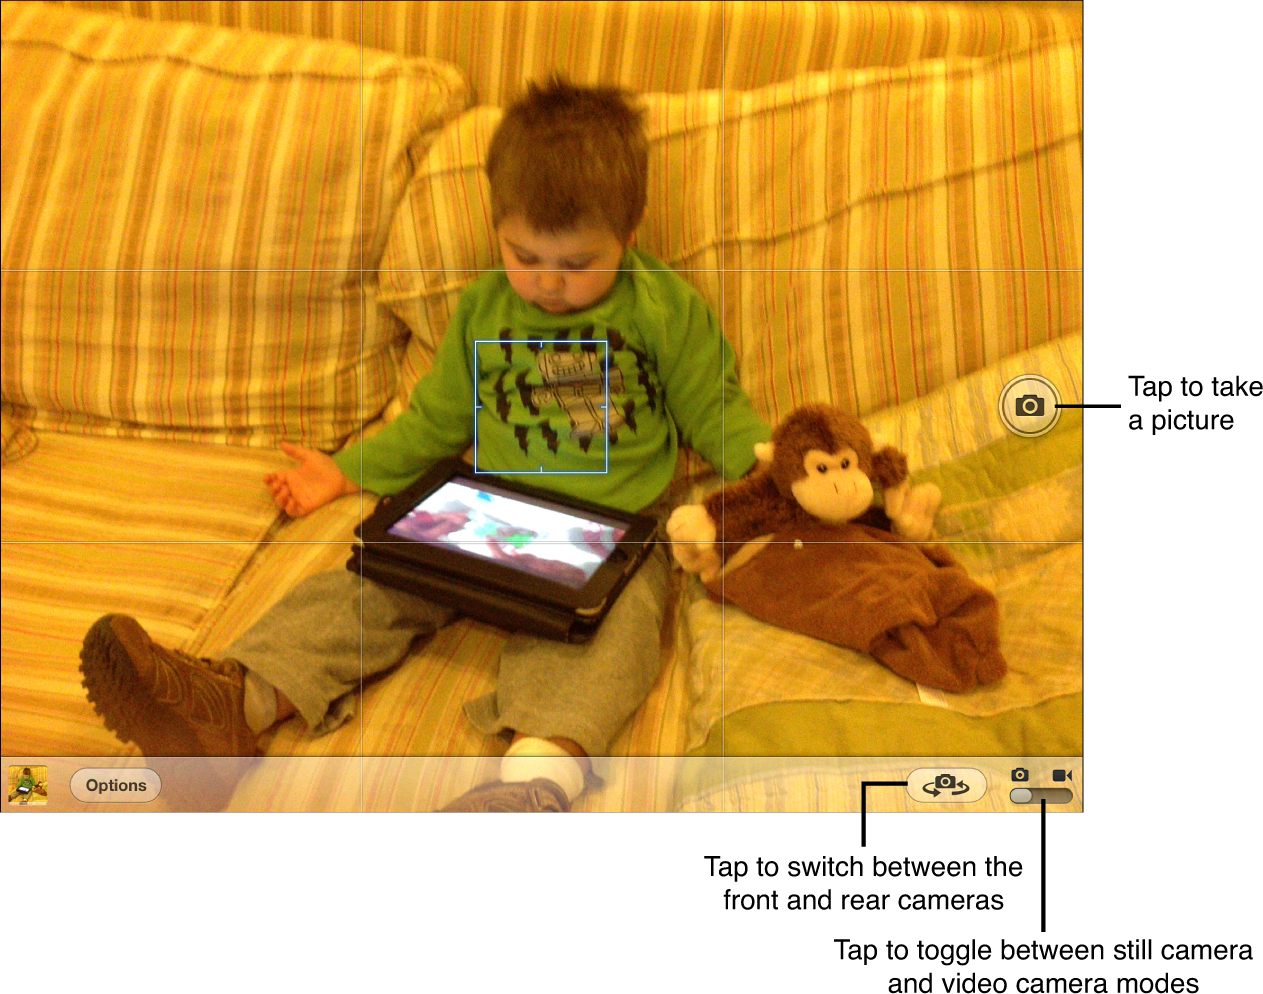
Now for a quick tour. Starting on the right side of the screen about halfway down is the Shutter button. Press that button and you’ll take a picture. Easy! Notice in Figure 9.2 that there’s even a small icon on the button that looks like a camera. There’s a good reason for this, and it has to do with the next item of interest.
Continue down the right edge of the screen, and you’ll run into a toggle button that changes the Camera app from camera mode to video mode. Every time you touch the toggle button, it moves to the other position. Notice in Figure 9.3 that the toggle button is now underneath the small video camera icon.

 Note
Note
Sorry, lefties, but if you rotate the iPad in hopes that the Shutter button will be on the left side and easier for you to press with your left thumb, you’re going to be disappointed. The Shutter button will always be on the right side, no matter if the iPad is in Portrait or Landscape view.
When the Camera app is set to video mode, notice that the Shutter button icon changes from the small camera to a red Record button. Tap the Record button, and your iPad will now begin to record video.
 Tip
Tip
Go ahead and shoot some video (maybe 30 to 45 seconds worth) and take some photos. I want you to have some photos and videos stored on your iPad so you’ll be able to do some hands-on tasks later in this chapter.
Look to the left of the toggle button and you’ll see a small button with an icon of a camera with rotation arrows surrounding it. Tap the Camera Swap button and the iPad will switch from using the rear-mounted camera to the front-mounted webcam. Figure 9.4 shows my iPad ready to take a self-portrait at my favorite coffee shop in Atlanta using the webcam.

Note
Did you notice anything funny about Figure 9.4? This is actually a screen capture I took by pressing the Home button and the Sleep/Power button simultaneously. Notice that when I’m looking at the iPad with the webcam, the image is reversed! Don’t worry—when I take the actual photo by tapping the Shutter button, the actual photo will not be reversed.
One thing you’ll notice right away with the webcam photos and videos is that they are much grainier. The quality of the webcam is much lower than the rear-mounted lens, so always make certain to use the rear-mounted camera when you want to take higher-quality photos and video.
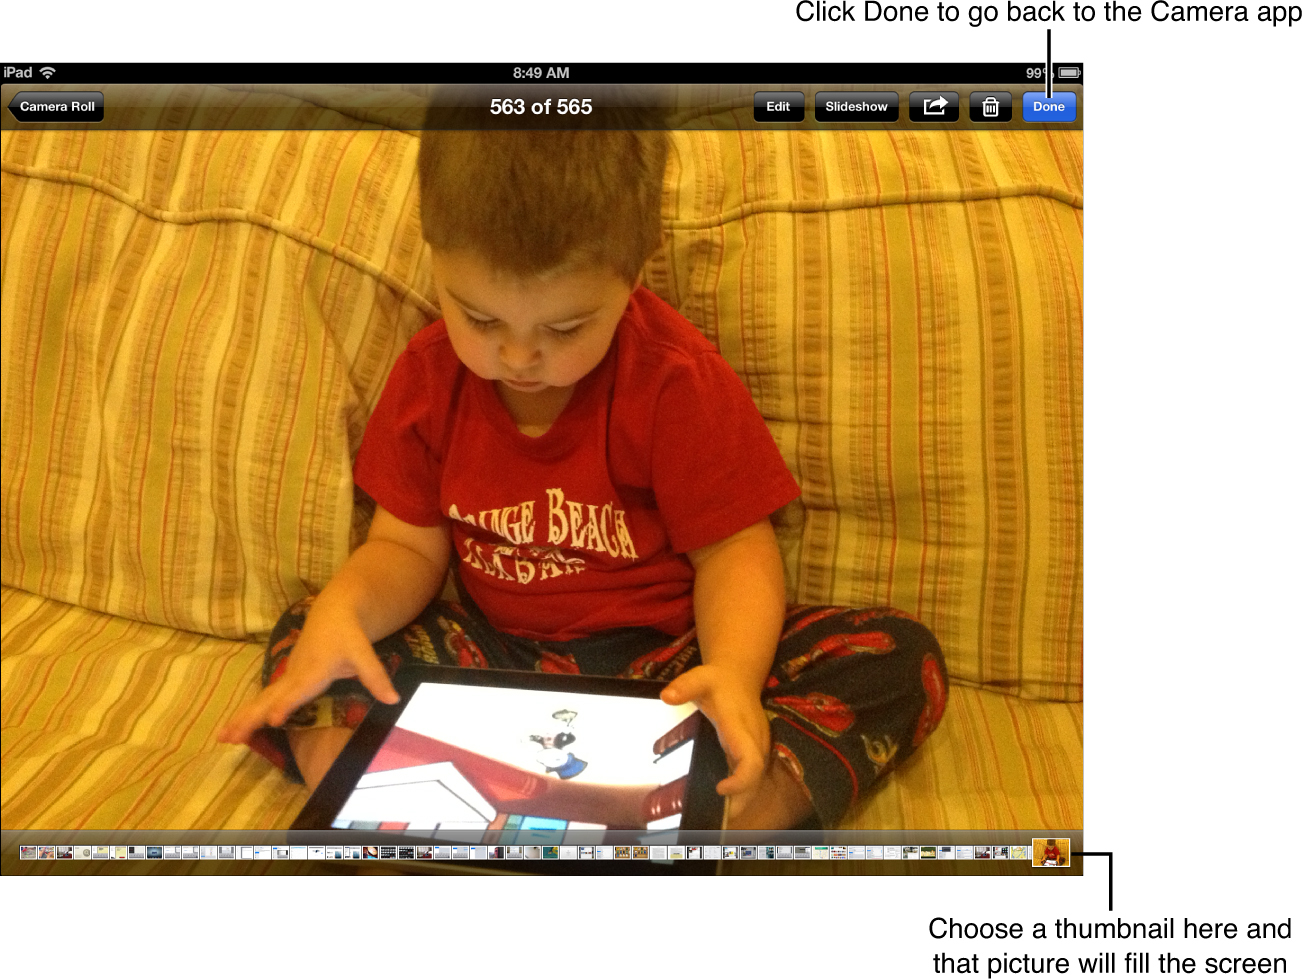
Now look in the lower-left corner of the Camera app and you’ll see two items. The first is a small thumbnail image that, when tapped, will open the most recent photo or video you have taken with the Camera app. If you tap the small square, the Camera Roll is opened; I’ll introduce you to the Camera Roll later in this chapter, but for now just know that it’s part of the Photos app and is where you go to view all the photos and videos you take with the iPad. Figure 9.5 shows the Camera Roll open and displaying a picture of my son—tap anywhere on the screen and you’ll see a blue Done button in the upper-right corner of the screen; tap it to return to the Camera app.
To the right of the thumbnail is the Options button. (If you don’t see the Options button, tap the toggle button to change the Camera app back to photo mode—the Options button isn’t available in video mode.)
It’s a bit funny to me, but the Options button only has one actual option—Grid—as you can see in Figure 9.6. When you tap it, it changes to a Done button. When you click Done, it toggles back to Options.
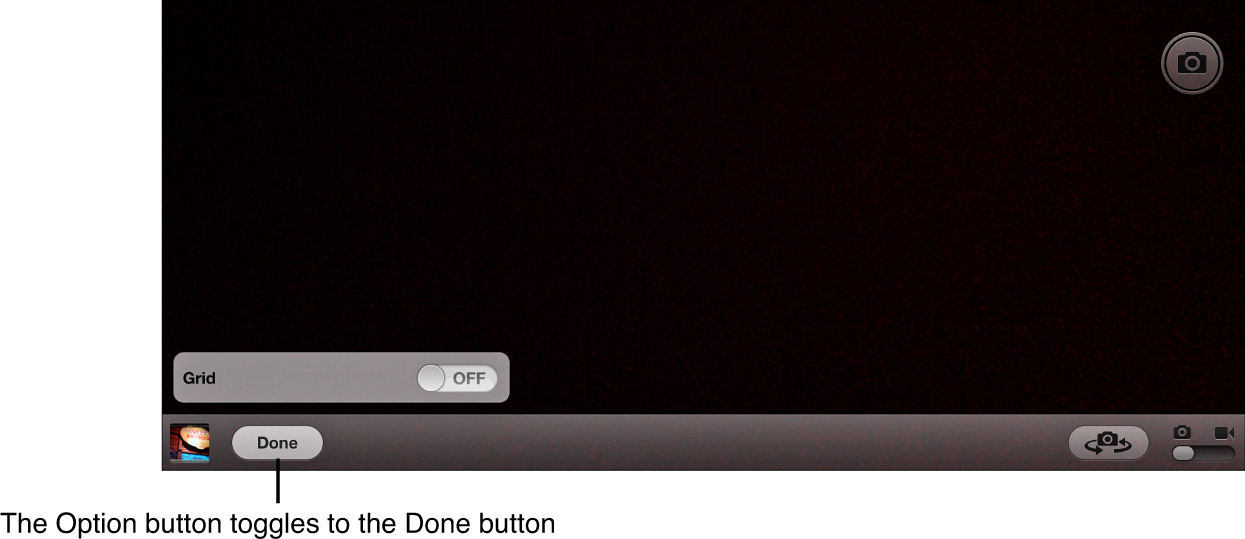
If you turn on the Grid by tapping the toggle button shown in Figure 9.6, you’ll see the screen divided up into nine sections, as shown in Figure 9.7.
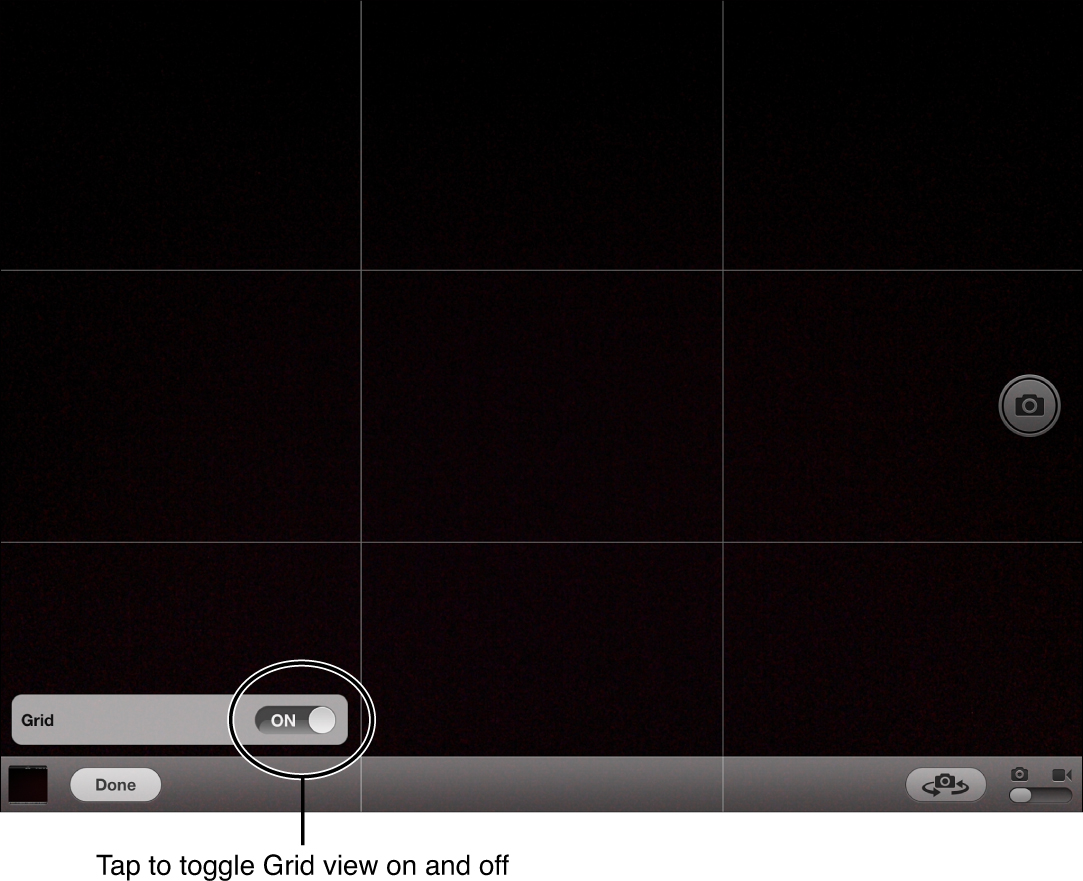
The Grid doesn’t show up in any photos or videos you take while it is displayed on the screen. Instead, the Grid is a useful tool for photographers who like to use the Rule of Thirds when shooting photos.
Tip
If you’ve never heard of the Rule of Thirds in a photography class, visit http://en.wikipedia.org/wiki/Rule_of_thirds to learn more. Believe it or not, I’ve been using the Rule of Thirds for a few years now to take photos and I’ve gotten quite a few compliments on them. It’s worth learning and implementing, especially with the Grid turned on.
Tap the Grid button again to toggle the Grid to the Off position, if you prefer to not have it displayed.
Believe it or not, that’s it for the Camera app! Pretty simple app, isn’t it? One of the reasons I like the Camera app so much is because it’s so simple to use. It doesn’t even have a section in the Settings app for you to tweak.
Note
For those of you who want some more options when it comes to taking photos and videos, you’ll want to investigate the Photo & Video category in the App Store. See Chapter 12, “Apps for the iPad,” for more information on the App Store as well as how to use categories to filter down and find specific types of apps. The App Store has hundreds (yes, hundreds!) of apps that use the built-in camera and webcam on your iPad and iPad mini.
Using Photo Booth
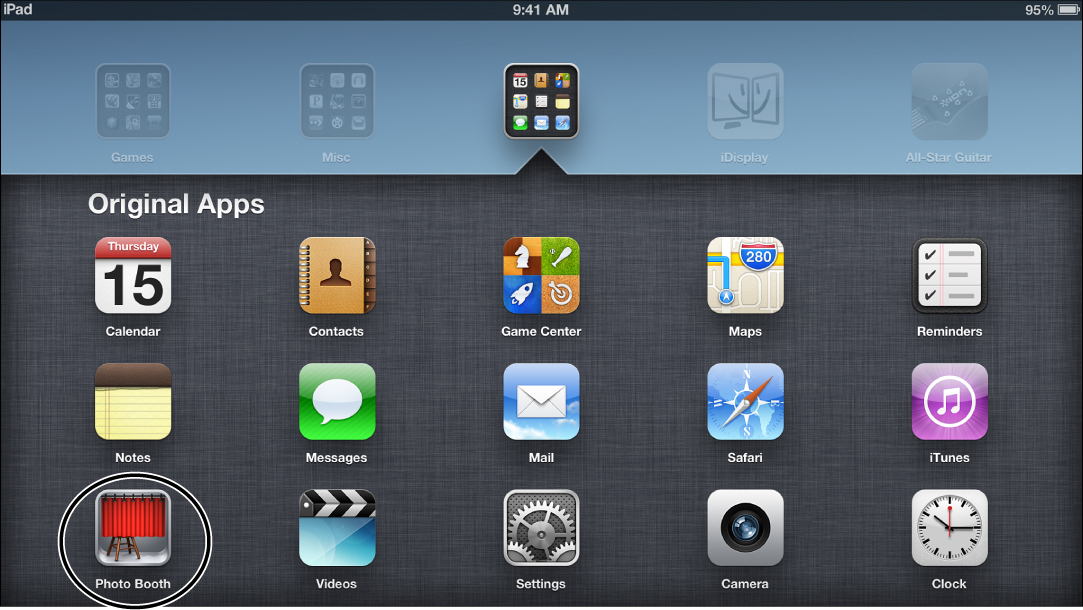
Tap the Photo Booth app icon shown in Figure 9.8.
Unlike the Camera app, the Photo Booth app is only for taking photos—it does not offer a video mode. Figure 9.9 shows the Photo Booth screen before you take any photos.
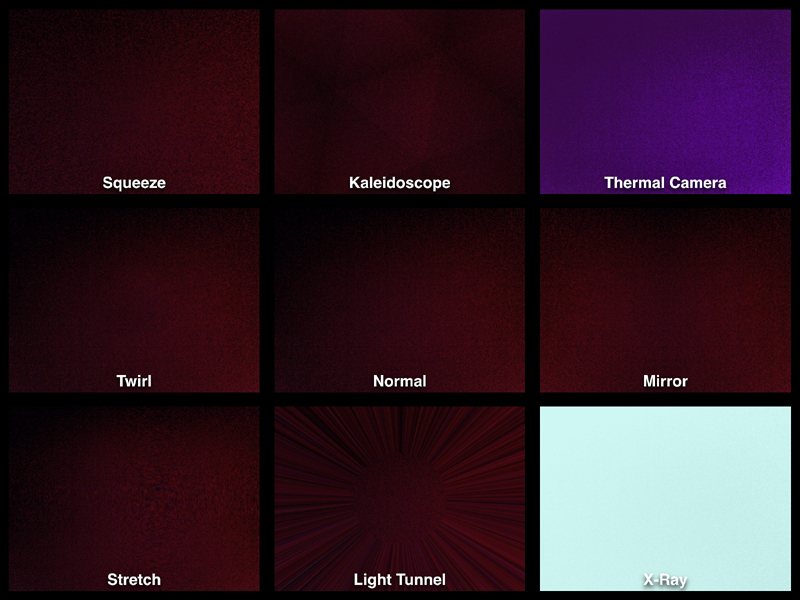
As you can see in Figure 9.9, you’re offered nine image variations of whatever the camera lens is pointed at, with most of them being somewhat comical.
In the center is the Normal option. If you want to take a normal, unaltered image, you can always switch to the actual Camera app. It’s the other eight options that offer some fun with the iPad’s built-in camera and webcam.
Yes, both cameras are supported, but first you’ll need to tap an option to change the camera mode. I’m going to tap the Squeeze option, which takes me to the screen shown in Figure 9.10.
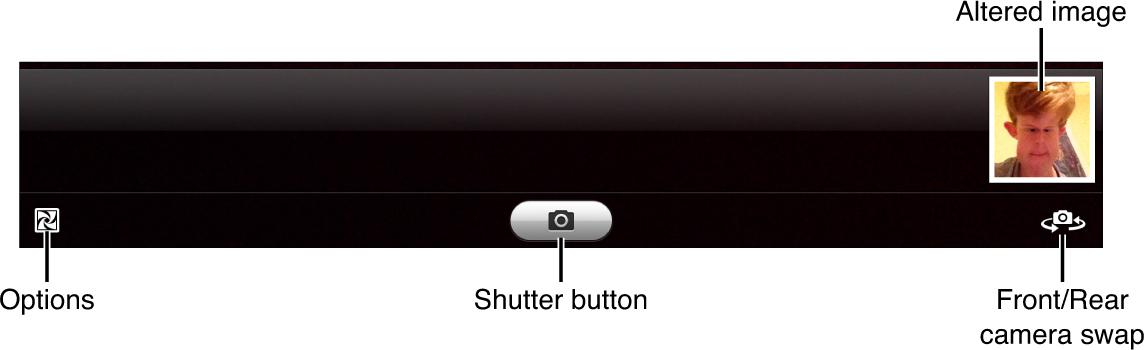
All nine options provide the same toolbar along the bottom of the screen. In the lower-right corner is the Camera Swap button, which changes the view from the rear-mounted camera to the webcam.
The button at the center of the toolbar is the Shutter button. Point the rear-mounted camera at your subject (or tap the Camera Swap button to take a self-portrait, as I’m going to do here) and tap the Shutter button. Your new photo will be displayed on the screen, as shown in Figure 9.11.

Tap the small box in the lower-left corner of the toolbar to return to the nine photo options shown back in Figure 9.9.
My kids love Photo Booth; I do believe they’d sit for hours just taking silly photos of themselves with the webcam. Thankfully, the photos taken with Photo Booth don’t take up a lot of my iPad’s storage space. But once they’re done with the app, I usually find myself having to open up the Photos app to delete a lot of photos while saving a few key ones for use during their teenage years.
And speaking of deleting and saving photos, those two tasks and more are done using the Photos app.
The Photos App
The icon for the Photos app is shown in Figure 9.12—go ahead and tap it to open up the app.

The Photos app offers three views when you first open it: Photos, Photo Stream, and Albums.
The Albums view allows you to organize your photos and videos into folders that you can create by tapping the plus sign button in the upper-left corner of the screen. Figure 9.13 also shows that I’m creating a new album titled “Chapter 9.”
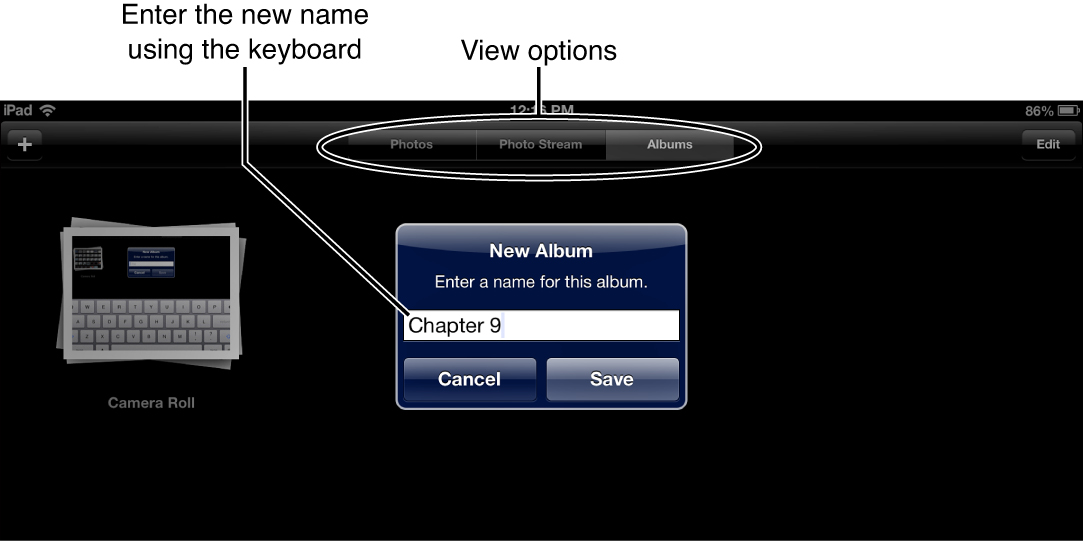
After typing the album title, I tap Save and then a new screen appears like the one in Figure 9.14.
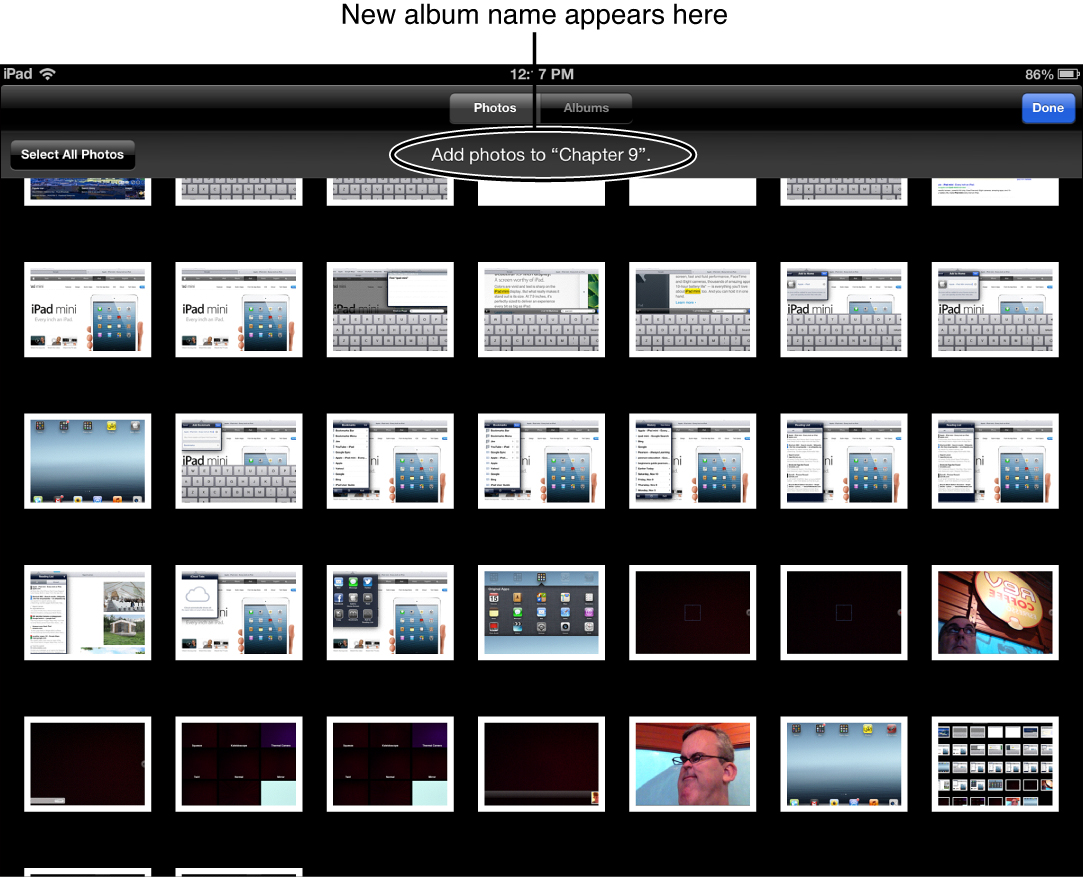
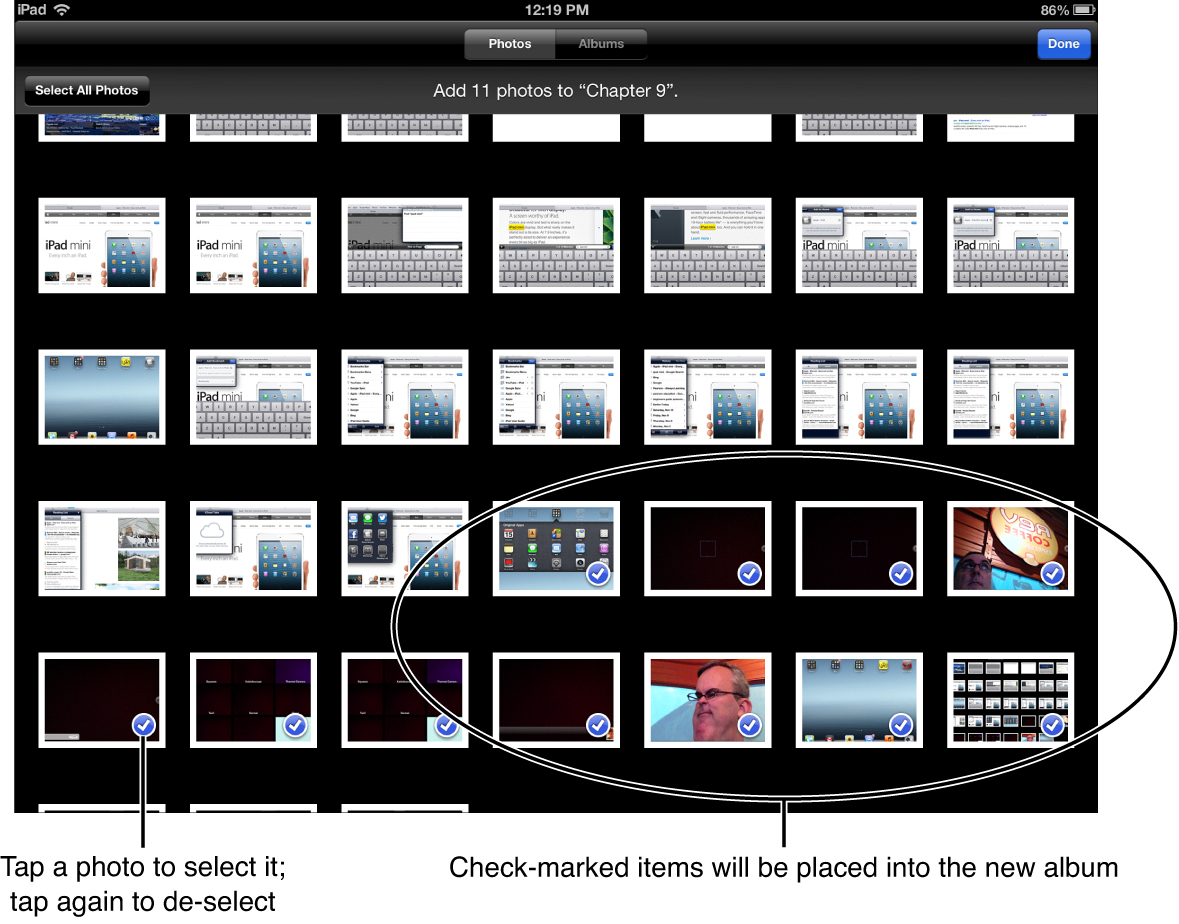
After creating a new album, you simply tap on the photos you wish to have placed inside your new album. You can select multiple photos and videos from the screen by scrolling up and down and then tapping on the selections—a blue circle with a check mark will appear on the thumbnails, as shown in Figure 9.15.
After you’ve selected all the photos and videos you wish to move into your new album, tap the Done button. You’ll be returned to the Album screen and your new album will appear along with the Camera Roll album, as shown in Figure 9.16.
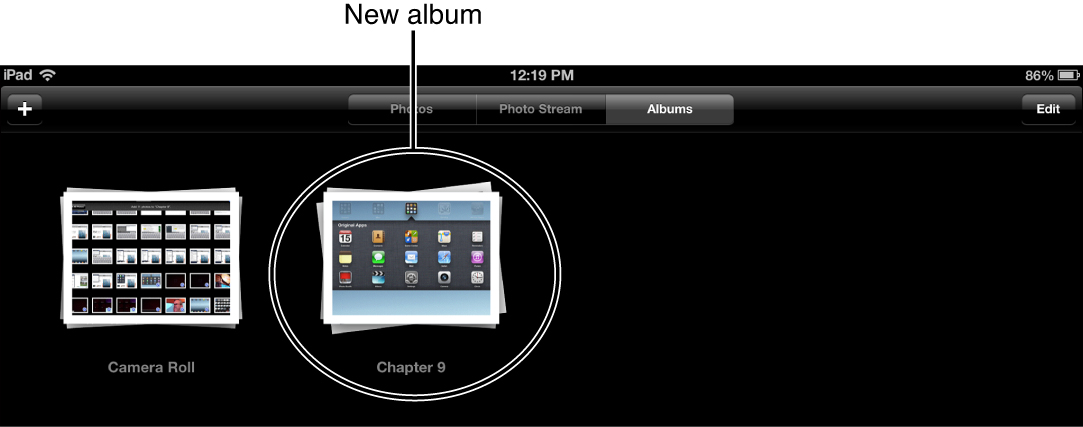
Tap an album to open and view its contents.
When viewing the contents of an album, you can distinguish between photos and videos easily—videos appear with a small video camera icon in the lower-left portion of the thumbnail, along with the length of the video in minutes and seconds, as shown in Figure 9.17.
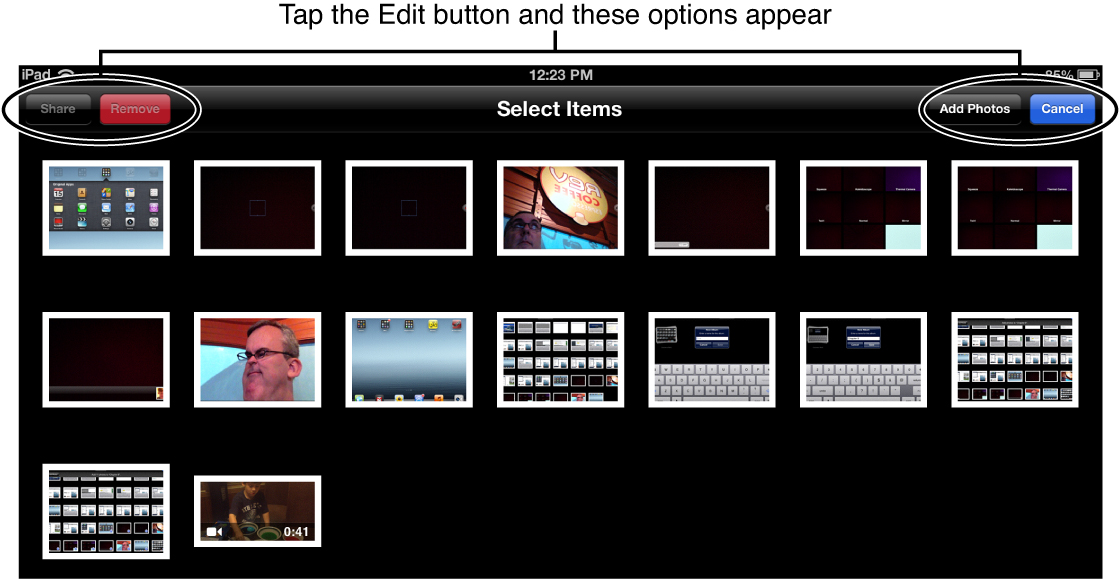
Tap the Albums button in the top-left corner to return to the Album view, or tap the Slideshow button to immediately start displaying all photos and videos inside the album as a slideshow.
Now tap the Edit button. Additional options will appear, as shown in Figure 9.17.
If you tap the Add Photos button, you’ll once again open the Camera Roll album, where you can select additional photos and videos to add to the current album.
While you can delete photos and videos from any album you have created, you can only permanently delete photos and videos from the Camera Roll album. (Think of photos and videos you add to an album you’ve created as copies.) Tap on any photos or videos in one of your custom albums and then tap the Remove button to remove the selected items. A message will appear telling you the photo will be removed from this album, but will remain in the Photo Library. Click Remove from Album to take the picture out of the album.
Also while in Edit mode, you can tap and hold any photo and drag it to a new position. All other photos will shift positions, allowing the photo you are dragging to be dropped in place when you remove your finger.
Note
Consider photos and videos stored in your own custom albums as nothing more than shortcuts to the original photos and videos that are stored in the Camera Roll. This saves on space (so you don’t have two copies of every photo and video, one in Camera Roll and one in your custom albums) and allows for easier sharing of only selected images rather than making your entire Camera Roll album visible.
To the left of the Remove button is the Share button. If you select a video from your album and tap the Share button, three options will appear: Mail, Message, and YouTube. Tapping on any one of these three apps will open that app and let you upload the selected video(s) using it. (Mail is covered in Chapter 7, “The Mail App,” and the Message app is covered in Chapter 10.)
The YouTube button will open a window that allows you to use a YouTube username and password to upload the video along with setting some options such as the quality of the video and whether it is public or private. The YouTube app was removed from iOS 6, so if you wish to use this feature, you’ll need to visit YouTube.com and create a user account.
If you only select photos to share, you’ll get many more options when you tap the Share button, as shown in Figure 9.18.

I covered some of these options in earlier chapters (such as Mail, Print, Assign to Contact, and Copy) and others will make more sense when you read their respective chapters (such as Chapter 11, “Social Apps,” for Facebook and Twitter or Chapter 10 for Messages). A simple option I can show you now is the Use as Wallpaper option. Tap it, and your home screens will use the selected image as the wallpaper.
Notice also in Figure 9.18 that there’s a Photo Stream option, which I’ll explain shortly. It involves adding a photo to an album that you can make visible to your friends and family or the entire world.
By the way, if you choose a mix of photos and videos and tap the Share button, you’ll only have four options available—Twitter, Facebook, Print, and Copy.
Go ahead and tap the Cancel button to exit the Edit screen and return to your custom album. Then tap the Albums button to return to the Albums view. Now I want to talk to you about the Photos button. Tapping the Photos button is the same as opening the Camera Roll album—you will see a scrollable screen (up and down) that displays all of your photos.
Once again, you can tap the Edit button, but this time the options are different, as shown in Figure 9.19.
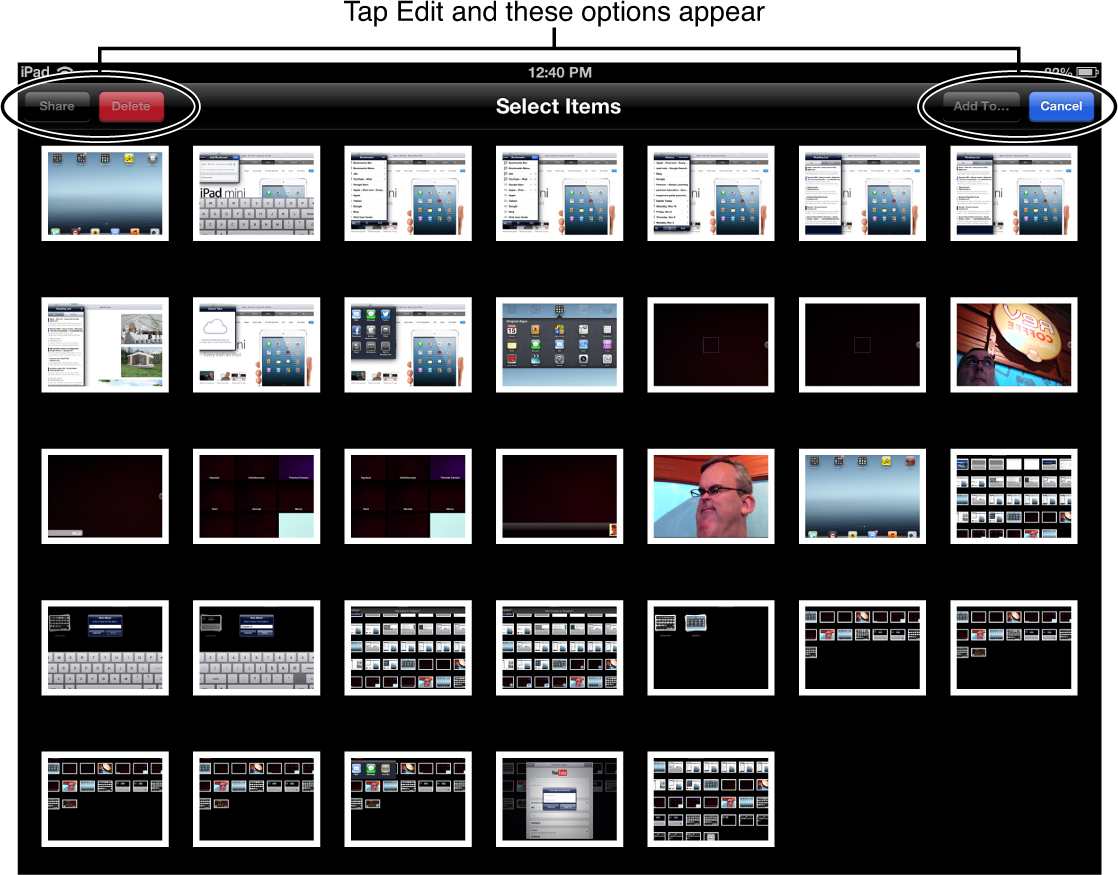
Now, when you select one or more photos or videos, instead of the Remove button you can tap the Delete button to permanently remove those items from your iPad. You cannot undo a deletion, so be certain you want a photo or video deleted before you tap the Delete button—once it’s gone, it’s gone.
You’ll also notice in Figure 9.19 that where the Slideshow button was located for your custom albums, there is now an Add To button. Tapping this button after selecting photos and videos in the list will allow you to move those selections to an existing album or to a new album, as shown in Figure 9.20.
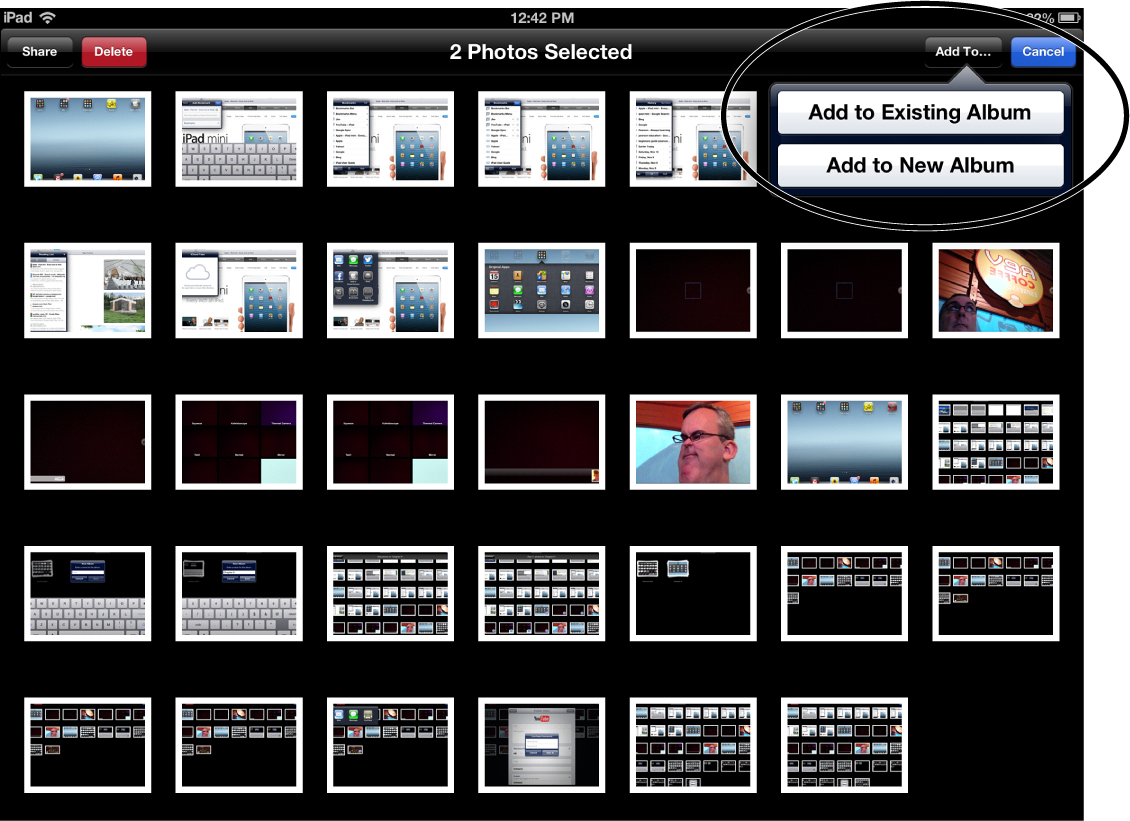
Remember, you’re not really moving a photo or video to a new or existing album. The photos and videos stay in the Camera Roll, and a shortcut thumbnail is placed in the custom album you specify. If you tap the Add to Existing Album option, you will be shown all of your current custom albums (plus the Camera Roll for some reason); tap a custom album and the shortcuts will be created.
Likewise, if you tap the Add to New Album button in Figure 9.20, you’ll see a screen similar to the one shown previously in Figure 9.13 so that you can type the name of your new album. When you’re done, tap the Save button and your selected images and videos will have shortcuts placed in the new album. Easy!
Before exiting the Edit screen for the Photos view, you’ll also notice there’s a Share button in the upper-left corner of the screen. Just as you saw earlier for custom albums, the options for sharing change depending on whether you have selected photos or videos. Tap the Cancel button to return to the Photos view.
Finally, before I show you how to edit photos and videos, let me cover the last view option, Photo Stream.
Note
Photo streams require iOS, so this feature is only available to those with iPads, iPhones, and other devices running iOS.
The first thing you’ll need to do is to create a photo stream. Think of photo streams as albums or folders; you can have more than one, and you can specify who has access to particular photo streams. Start by tapping the plus sign in the upper-left corner and type the email address in the To: text box shown in Figure 9.21. You can also tap the blue circle with the plus sign to select from your Contacts app.
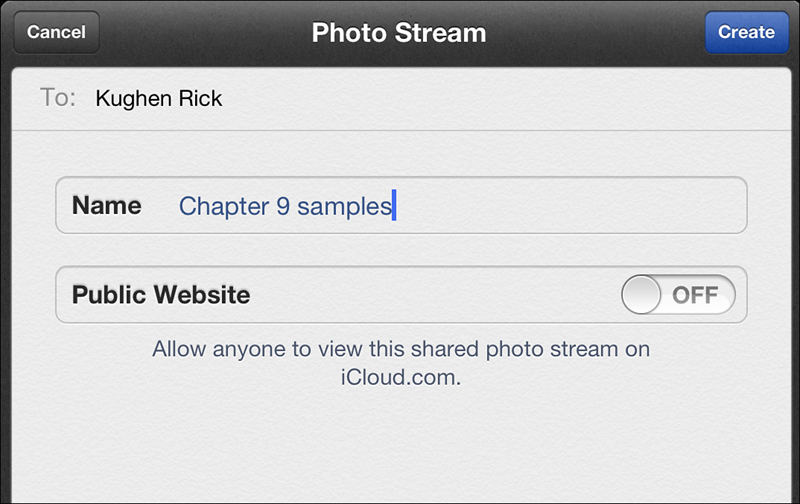
In addition to entering the name or names of any people you wish to give permission to view your new photo stream, you must also give the photo stream a name and select whether you want the photo stream to be public (anyone can view the photos by visiting iCloud.com) or private (which is the default setting—Public Website is turned to Off, as shown in Figure 9.21).
Make your selections and then tap the Create button. Your new photo stream will now be visible, and it works just like a custom album.
When I tap the new photo stream, it opens and is empty at first. I can tap the Add Photos button to add videos and photos.
Once you’ve created a photo stream and set its permissions, you can’t change it. If you wish to make a photo stream visible to anyone, you’ll need to create a new photo stream and turn the Public Website option shown in Figure 9.21 from Off to On.
Editing Photos
Before I end this chapter, I want to give you a very brief overview of editing photos.
 Caution
The editing capabilities built in to your iPad are extremely limited, so if you want more advanced color editing for your photos, you’re going to have to do some research on the various editing apps available from the App Store. You’ll also find there are no editing options for videos, so once again you’ll need to hunt down an app with video-editing features. Refer to Chapter 12, where I cover the App Store. Remember, you’ll want to examine the Photo & Video category.
Open either the Camera Roll album or one of your custom albums and then tap on a single photo to open it as shown in Figure 9.22.
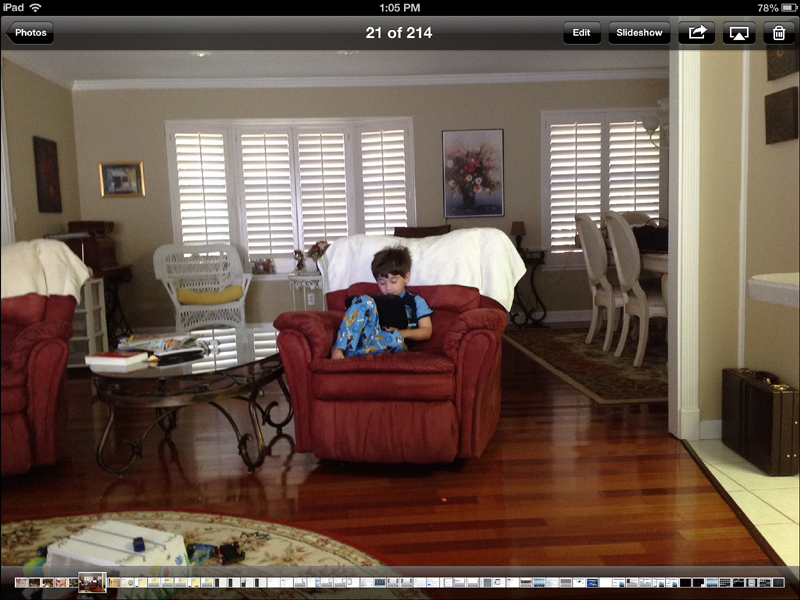
In Figure 9.22, you’ll see a thin band of images running along the lower edge of the screen. You can tap one of those tiny images to jump to that photo, or you can swipe your finger on the screen (left or right) to move forward and back through an album.
You’ll also see in Figure 9.22 the Share button and the Slideshow button; tap either of these to see options appear for the photo you are currently viewing. Tap the trashcan button to delete the current image.
Tip
Also visible in Figure 9.22 is the AirPlay button. If you have an Apple TV hooked up to your television, you can set it to display anything shown on your iPad, including a slideshow, an individual photo, a video, and much more. Visit Apple.com/appletv for more details.
It’s the Edit button shown in Figure 9.22 that you need to tap now. When you tap the Edit button, you’ll see a new toolbar at the bottom of the screen and some options in the upper-left corner of the screen, as shown in Figure 9.23.
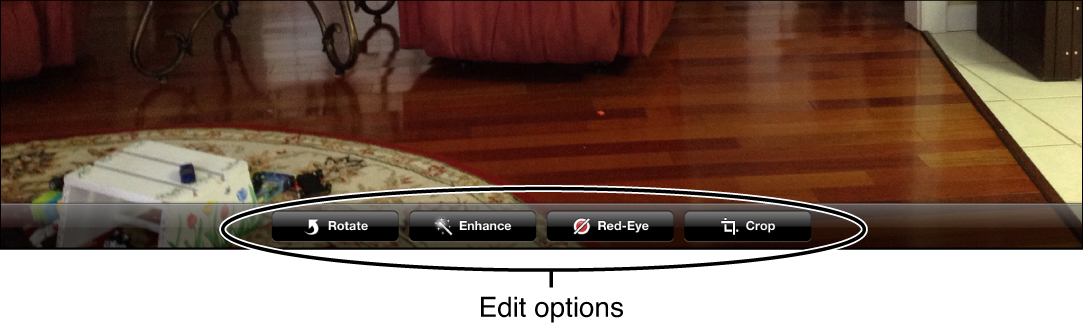
The Rotate button rotates the image 90 degrees counterclockwise for every tap. The Enhance button attempts to brighten or sharpen the image; you have no control over the change it makes, so that’s where the Undo button in the top-left corner comes into play. Tap the Undo button if you don’t like the changes the Enhance button makes to your photo.
The Red-Eye button allows you to tap any fiery eyeballs that appear in a photo. The app attempts to detect the red and remove it. Again, you can tap the Undo button if you’re not happy with the results.
And finally, the Crop button will shrink the image slightly and put a draggable frame around it, as shown in Figure 9.24.
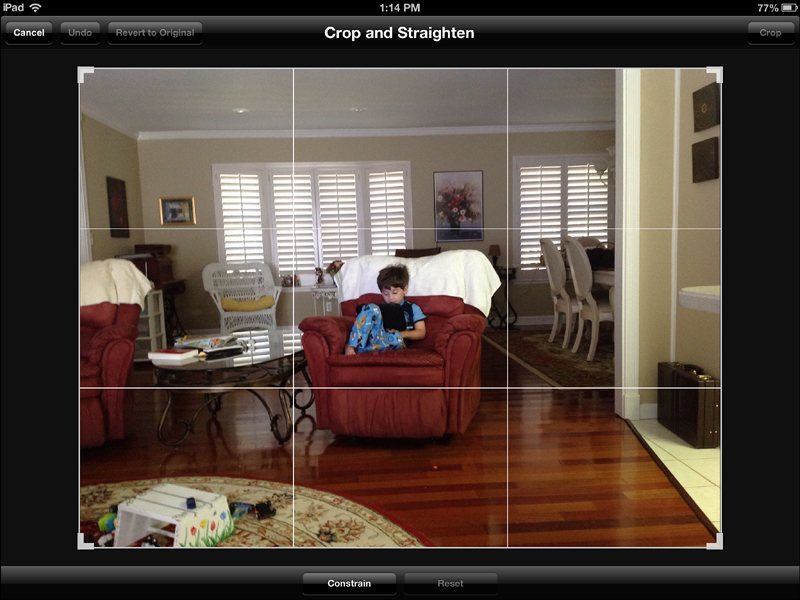
Tap your finger on any of the four corners and move the gridded frame that is over the photo. As you can see in Figure 9.25, by adjusting each of the four corners, you can select the part of a photo you wish to keep; anything outside the gridded area will be removed.
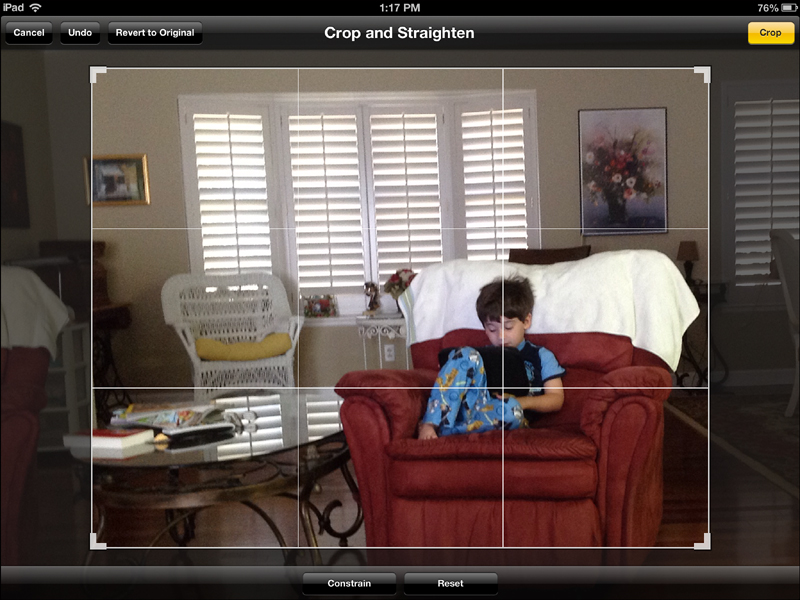
When you’re done, tap the Crop button in the upper-right corner of the screen and your edited photo will be saved as a new photo when you tap the Save button. The original will be kept safe in your Camera Roll.
Tip
If you make a bunch of changes to the photo at once (for example, cropping, followed by red-eye removal, and then maybe using the Enhance button) and are unhappy with the results, tap the Revert to Original button at any time, and the original photo will be reloaded.