
Chapter 14
Working with Contacts
Your iPad gives you immediate access to all your important information. Just like your computer or your smartphone, your iPad can store thousands of contacts for easy retrieval. In this chapter, we'll show you how to add new contacts (including how to do so from an email address), customize your contacts by adding new fields, organize your contacts with groups, quickly search or scroll through contacts, and even display a contact's location with the Maps app on the iPad. We will also show you how to customize your Contacts view, so it is sorted and displayed just the way you like it. Finally, you will learn a few troubleshooting tips that will save you some time when you run into difficulties.
The beauty of the iPad is how it integrates all of your apps, so you can email and map your contacts right from the Contact entry screen.
Loading Your Contacts onto the iPad
In Chapter 3: “Sync Your iPad with iTunes,” we show you how to load your contacts onto the iPad using the iTunes app on your Mac or Windows computer. You can also use the Exchange (Active Sync) or MobileMe services described in the Chapter 4: “Other Sync Methods.”
When Is Your Contact List Most Useful?
The Contacts app is most useful when two things are true:
- You have many names and addresses in it.
- You can easily find what you need.
Two Simple Rules to Improve Your Contact List
We have a couple of basic rules to help make your Contacts list on your iPad more useful.
Rule 1: Add anything and everything in to your Contacts app.
You never know when you might need that obscure restaurant name, that plumber's number, or other business or professional contact's information.
Rule 2: As you add entries, make sure you think about how to find them in the future (First Name, Last Name, Company).
We have many tips and tricks in this chapter to help you enter names, so that they can be instantly located when you need them.
TIP: Here's a good way to find restaurants: Whenever you enter a restaurant into your Contacts list, make sure to put the word “restaurant” into the company name field, even if it's not part of the name. Then, when you type the letters “rest,” you should instantly find all your restaurants!
Adding a New Contact Right on Your iPad
You can always add your contacts right on your iPad. This is handy when you're away from your computer—but have your iPad—and need to add someone to your Contacts list. It's very easy to do; we'll show you how in the next section.
Tap the Plus Sign to Add a Contact
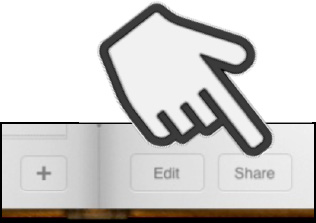
From your Home screen, touch the Contacts icon and you'll see the All Contacts list (see Figure 14–1). Tap the Plus Sign (+) in the lower-right corner of the Contacts list to add a new contact.
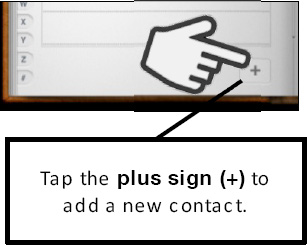
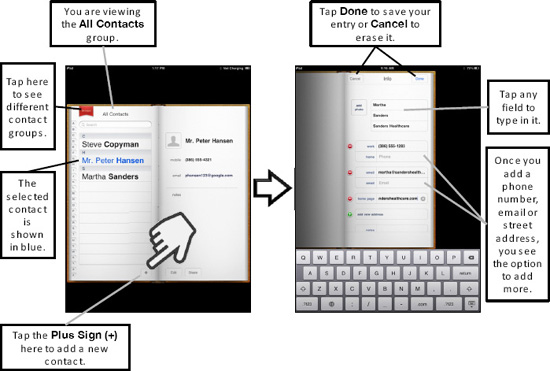
Figure 14–1. Entering a contact into your iPad
Tap any of the fields (First, Last, Company, and so on) to type in information.
TIP: Keep in mind that the search feature of the Contacts list uses the First, Last, and Company fields. When you add or edit contacts, adding a special word to the Company field can help you find a particular contact later. For example, adding the words “Cece friend” to the Company field can help you find all of Cece's friends quickly using the search feature.
Adding New Fields and Changing Labels
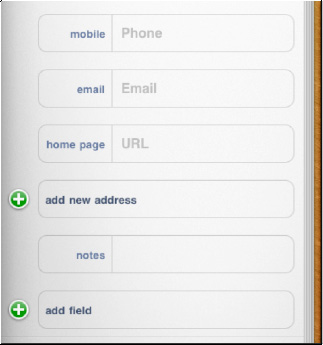
You will notice that the initial screen for adding a contact shows only a few fields for entering information: mobile (phone numbers), email (email addresses), home page (web page address), add new address (street address), notes, and add field.
Apple has purposely done this to make the screen less cluttered. You will notice that, as you start typing a phone number, email address, or street address, a new field appears immediately under the one you are typing. This allows you to add multiple items easily. If you want, you may tap the name of the field (e.g., mobile) and change it to something else like (e.g., home or work).
Adding a Contact Photo
It's easier to identify people with pictures, so you may want to add pictures for your contacts, where available. To add a photo to a contact, tap the add photo button next to the First and Last fields.
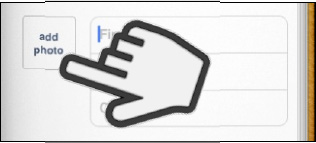
If you are changing a photo, you'll see edit at the bottom of the existing photo when you are in “edit contact” mode.
After you touch the add photo button, you'll see that you can do the following:
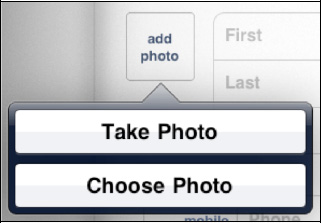
- Take a Photo (for iPad 2 with its camera)
- Choose a Photo
If there's a photo already in place, you will also see these options:
- Edit a Photo
- Delete a Photo
If you select Choose Photo, then you will be able to navigate to one of your photo albums and select a photo by tapping it.
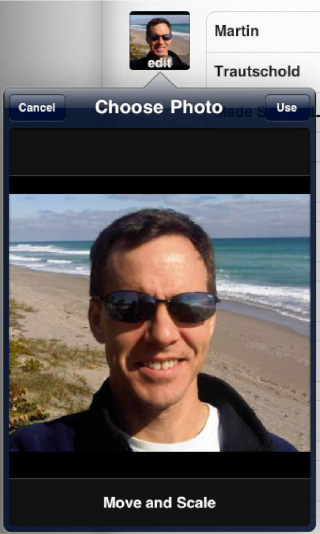
You'll notice that the top and bottom of the photo become grayed out and that you can manipulate the picture by dragging it around with your finger. You can also pinch to zoom in or out.
Once the picture is sitting where you want it, just touch the Use button in the upper-right corner and that picture will be set for the contact.
Adding a New Phone Number
Tap in the Phone field and use the number keys to type the phone number.
TIP: Don't worry about parentheses, dashes, or dots; the iPad will put the number into the correct format. Just type the digits of the area code and number. If you know the country code, it's a good idea to put that in, as well.
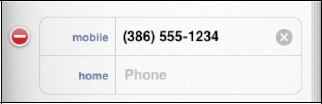
Let's say that this the phone number you just typed is not a mobile phone, but some other type of phone. The good news is that you can change it. Tap the label of the field—mobile, in this case—and change the label to home, work, or some other type (see Figure 14–2).
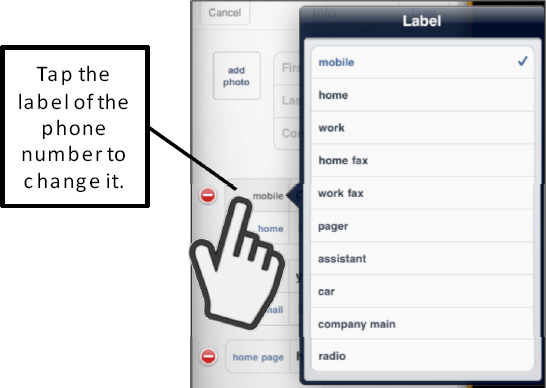
Figure 14–2. Changing the field label of the phone number
TIP: Sometimes you need to add a pause to a phone number. For example, you might need to do so when the phone number is for someone at an organization where you have to dial the main number and then an extension. This is easy to do on the iPad. You just add a comma between the main number and the extension, like this:
386-555-1234, 19323
If you dialed this number (from your iPhone, for example), the phone would dial the main number, pause for two seconds, and then dial the extension. If you need more of a pause, you would simply add more commas.
Adding Email Addresses and a Web Site Address
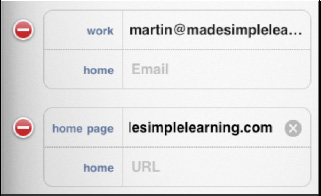
Tap the Email tab and enter the email address for your contact. You may also be able to tap the label to the left of the email address and select whether this is a home, work, or other email address (sometimes you cannot change this label, depending on what type of contact system you are synchronizing with).
Under the Email field, you'll also find a home page field in which you can enter the address of your contact's web site.
Adding New Contact Fields
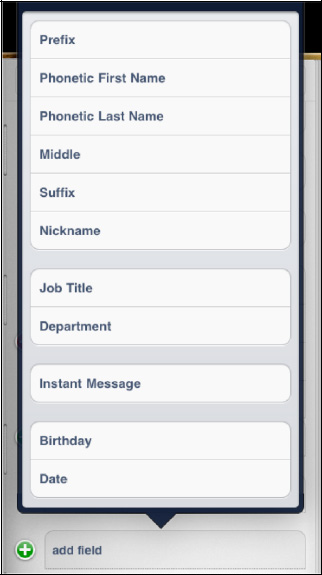
If you need to add more fields to the contact entry, just tap the add field button at the bottom of the Contact entry screen.
Next, select any of the available fields to add to that particular contact.
For example, to add a Birthday field to this contact, just touch Birthday.
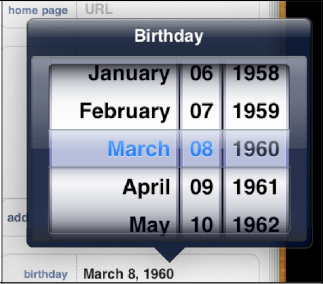
When you touch Birthday, you're presented with a wheel. You can turn the wheel to the corresponding date to add the birthday to the contact information.
TIP: Suppose you've met someone at the bus stop—someone you want to remember. Of course you should enter your new friend's first and last name (if you know it). But you should also enter the words “bus stop” in the Company field. Then, when you type the letters “bus” or “stop,” you should instantly find everyone you've met at the bus stop, even if you can't remember their names!
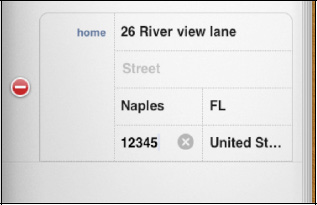
Adding the Street Address
To add a street or physical address, tap the add new address field. You will see all the required fields appear on the screen (Street, City, State, Zip Code, and Country). As you did with the phone number, you can change the label to show whether this is a home, work, or other address.
When you are done, just touch the Done button in the upper-right corner of the New Contact form.
TIP: If you've just moved into a new neighborhood, it can be quite daunting to remember everyone's name. A good practice to follow is to add the word “neighbor” into the Company field for every neighbor you meet. Then, to instantly call up all your neighbors, simply type the letters “neigh” to find everyone you've met!
Linking Contact Cards (Unified Contacts)
NOTE: The Link (Unified Contacts view) feature only appears on your iPad if you have at least two separate contact accounts set up, and you have a duplicate first and last name (but not different prefix, suffix, or middle names) across more than one contact account. For example, if you have a Gmail account and an Exchange or iTunes synced contact account, both with the name “John Smith,” your Contacts app on the iPad will give you the Link option at the bottom of the Edit screen, as shown in this section.
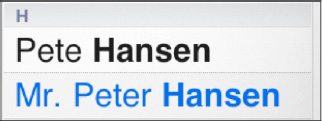
As your Contacts list grows over time, it is common to end up with several duplicate contact entries, each with partial information. For example, you may have added a new contact from someone's email address or mobile phone number, but you already had his contact filed under a slightly different name (e.g., Peter vs. Pete).
On your iPad, you can merge or Link two or more contact cards together to see all the information in what the iPad calls the Unified Contact. Follow these steps to link contact cards together:
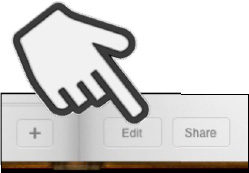
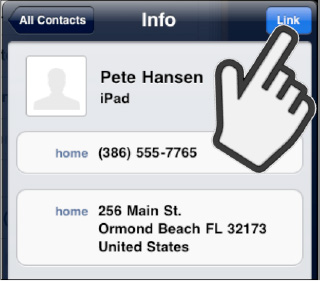
- Select one of the duplicate contact entries and tap the Edit button under the Contact details screen.
- Once you're editing the contact, tap the Link Cards button (a Person icon with a plus sign) at the bottom of the screen.
- Next, locate and tap the correct contact. You can do this by tapping the Groups button at the top to select another Group, using the Search window at the top, or swiping up or down to find contacts.
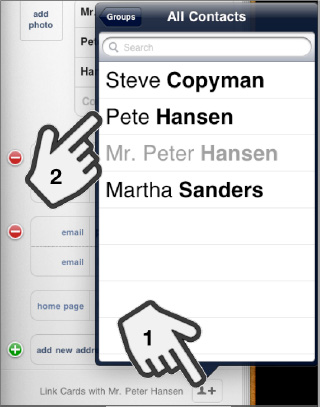
- Now you can see the selected contact details and confirm that you want to connect the contacts by tapping Link in the upper-right corner. If this is not the contact you wish to link, then press the All Contacts button in the upper-right corner and select a different contact.
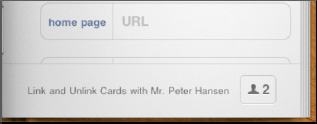
- To link additional contacts or unlink contacts, tap the Link and Unlink Contacts button (a Person icon with number next to it) in the bottom of the Contact screen.
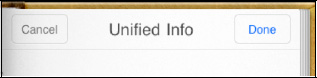
- You know you have linked contacts because, instead of seeing Info at the top, it now says Unified Info. Tap the Done button in the upper-right corner to save the linking of contacts.
When you're done, you will now see only a single contact entry for all the contacts you have linked together. You know these are linked or Unified contacts because there is a Unified Info link at the bottom and a Person icon with a number showing the number of linked contacts (see Figure 14–3).
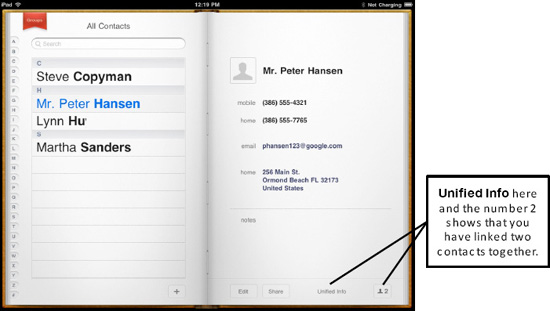
Figure 14–3. Viewing linked contacts on your iPad
TIP: Learning the names of the parents of your school-age children's friends can be fairly challenging. In the First field, however, you can add not just the name of your child's friend, but the names of the child's parents, as well (e.g., First: Samantha (Mom: Susan, Dad: Ron)). Then, in the Company field, add the name of your child and “school friend” (e.g., Cece school friend). Now just typing your child's name in your All Contacts search box instantly finds every person you've ever met at your child's school. Now you can say, “Hello, Susan, great to see you again!” without missing a beat. Try your best to covertly look up the name!
Sharing Contacts
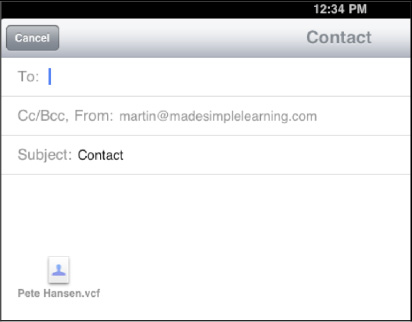
If someone asks you for contact information from your iPad, there is no need to copy and paste it or read it out loud. Instead, you can click the Share button and email it to this person as an email attachment. The attachment is sent in a vCard (.vcf) format, which is a standard format for electronic business cards. Follow these steps to share contact information:
- Open your Contacts list and locate the contact you wish to send.
- Tap the Share button under the contact details.
- Next, address the email message and send it. You have now sent all the contact details in vCard (
.vcf) format. Your recipient should be able to open the email message and tap (or save) the contact information to add it to her own contact list—all without retyping anything!
Start a FaceTime Video Call with a Contact
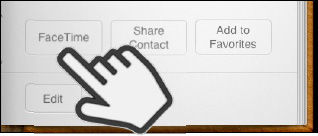
If you like to use FaceTime to make video calls, you can do that right from your Contacts list. Open up your Contacts list and locate the contact. Next, tap the FaceTime button at the bottom of the Contact details screen.
To learn all about FaceTime calls, please see Chapter 18: “FaceTime Video Messaging and Skype.”
Making a Contact a FaceTime Favorite
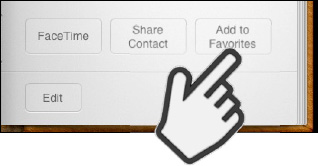
If you use FaceTime video chat a lot with someone, you may want to make her a Favorite. To do this, open up your Contacts list and locate the contact. Next, tap the Add to Favorites button at the bottom of the Contact details screen.
Deleting Contacts
Sometimes, you want to get rid of contacts on your iPad. Follow these steps to do so:
CAUTION: Remember that, if you sync your contacts to your computer or online Contacts list, then deleting a contact from your iPad will also delete that contact from your computer or online contact list (e.g., Google or Hotmail).
- Locate the contact you wish to delete and tap the Edit button under the Contact details screen.
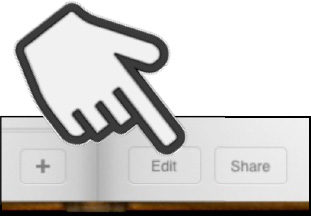
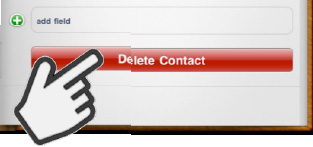
- Scroll all the way to the bottom of the Edit Contact screen to see the Delete Contact button. Tap Delete Contact.
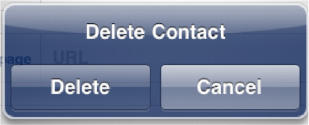
- You may then see a pop-up confirmation. Tap Delete to remove this contact.
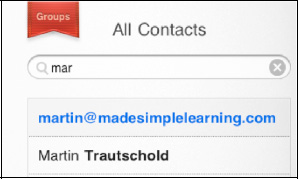
Searching Your Contacts
Let's say you need to find a specific phone number or email address. Just touch your Contacts icon as described previously, and you'll see a Search box at the top of your All Contacts list (see Figure 14–4).
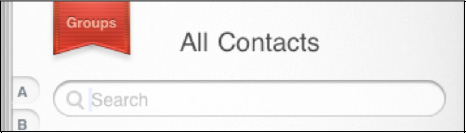
Figure 14–4. The Search box for All Contacts
Enter the first few letters of any of these three searchable fields:
- First Name
- Last Name
- Company Name
The iPad begins to filter immediately and displays only those contacts that match the letters typed.
TIP: To further narrow the search, hit the space key and type a few more letters.
When you see the correct name, just touch it and that individual's contact information will appear.
Quickly Jump to a Letter by Tapping and Sliding on the Alphabet
If you hold your finger on the alphabet on the left edge of the screen and drag it up or down, you can jump to that letter.
Search by Flicking
If you don't want to manually input letters, you can just move your finger and flick from the bottom up to see your contacts move quickly on the screen. Just continue to flick or scroll until you see the name you want. Tapa name and the contact information will appear.
Search Using Groups
If you have your contacts sorted by groups on your PC or Mac and you sync your iPad with the computer, those groups will be synced to your iPad. Just touch the Groups tab at the top left of the All Contacts window and select which group you'd like to search within.

This example shows two groups—one is from a Microsoft Exchange account (i.e., a company email account), and one is from regular contacts.
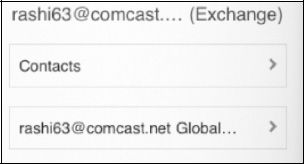
If you have an Exchange ActiveSync account and your company has enabled it, your Exchange Global Address List shows up under the Groups tab, as well. You can search to find anyone in your company there.
NOTE: You can't create groups on the iPad. Instead, they must be created on your computer or on another contact list (e.g., a MobileMe web site or Outlook) and synced to your iPad.
Adding Contacts from Emails
Often you'll receive an email and realize that the contact is not in your address book. Adding a new contact from an email is easy.
Open the email from the contact you'd like to add to your Contacts list. Then, in the email's From field, touch the name of the sender next to the From: tag.
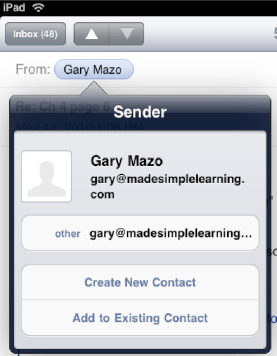
If the sender is not in your address book, you'll be taken to a screen that lets you choose whether to add that email address to an existing contact or to create a new one.
If you select Create a New Contact, you'll be taken to the same New Contact screen we saw earlier (see Figure 14–1).
But suppose this is someone's personal email address, and you already have an entry for that person with the work email. In that case, you would select Add to Existing Contact and choose the correct person. Next, you'd give this email address a tag—personal, in this case.

Sending a Picture to a Contact
If you want to send a picture to a contact, you will need to do that from the Photos app (see Chapter 16: “iPad Photography”).
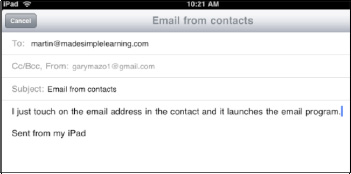
Sending an Email Message from Contacts
Since many of the core apps (Contacts, Mail, and Messages) are fully integrated, one app can easily launch another. So, if you want to send an email to one of your contacts, open the contact and tap the email address. The Mail app will launch, and you can compose and send an email message to this person.
Start your Contacts by touching the Contacts icon. Either search or flick through your contacts until you find the contact you need.

In the contact information, touch the email address of the contact you'd like to use.
You'll see that the Mail program launches automatically with the contact's name in the To: field of the email. Type and send the message.
Showing Your Contacts Addresses on the Map
One of the great things about the iPad is its integration with the Google Maps app. This is very evident in the Contacts app. Let's say you want to map the home or work address of any contact in your address book. In the old days (pre-iPad), you'd have to use Google or MapQuest or some other service and laboriously retype or copy and paste the address information. It was very time-consuming; fortunately, you don't have to do this on the iPad.
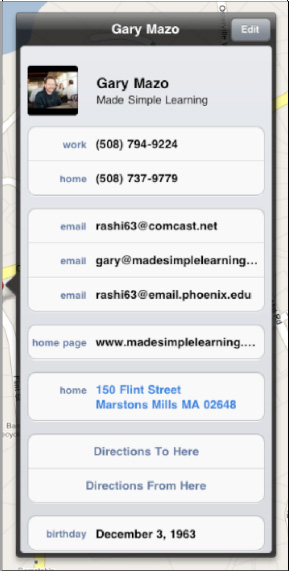
Simply open the contact as you did earlier. This time, touch the address at the bottom of the contact information.
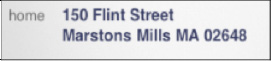
Your Maps app (which is powered by Google Maps) immediately loads and drops a Pushpin icon at the exact location of the contact. The contact name will appear above the Pushpin.

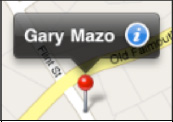
Touch the tab on the top of the Pushpin to get to the Info screen.
Now you can select Directions To Here or Directions From Here.
Next, type the correct start or end address and touch the Route button in the lower-right corner. If you decide you don't want the directions, just tap the Clear button in the top left.
What if you have just typed the address in your Maps app, but have not clicked away from your Contacts list? In that case, you might want to touch Add to Contacts to add this address.
TIP: To return to your contact information, tap the Home button and then tap Contacts.
Changing Your Contact Sort Order and Display Order
Like other settings, the options for the Contacts are accessible via the Settings icon.
Touch the Settings icon, scroll down to Mail, Contacts, Calendars, and touch the tab.
Scroll down and you'll see Contacts with two options underneath. To change the sort order, touch the Sort Order tab and select whether you want your contacts sorted first by first name or last name.
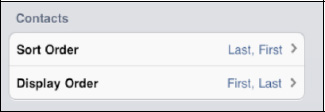
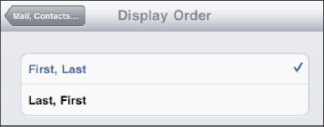
You may want to change how your contacts are displayed. Here's where you get it done; you can choose First, Last or Last, First. Tap the Display Order tab and choose whether you want your contact displayed in first-name or last-name order. Tap the Mail, Contacts… button in the upper-left corner to save your settings changes.
Searching for Global Address List Contacts
Sometimes you will want to search your Global Address List (GAL) contacts. Open your Contacts app as you normally would and touch the Groups button in the top-left corner. Look for the group that has Global next to it in your Group list and touch it. This gives you access to your Global Address List if you are connected to your organization's server.

Contact Troubleshooting
Sometimes, your Contacts app might not work the way you expect. If you don't see all your contacts, review the steps in the Chapter 3: “Sync Your iPad with iTunes” or Chapter 4: “Other Sync Methods” to learn how to sync with your Address Book application. Make sure you have selected All Groups in the settings in iTunes.
TIP: If you are syncing with another contact application, such as Contacts in Gmail, make sure you select the option closest to All Contacts, rather than a subset like a particular group.
When Global Address List Contacts Don't Show Up
This next section is for Microsoft Exchange users. Sometimes you may encounter a problem where your GAL contacts don't show up. If this happens, begin by making sure you are connected to a Wi-Fi or 3G cellular data network.
Next, check your Exchange settings and verify you have the correct server and login information. To do so, tap the Settings button, then scroll to and touch Mail, Contacts, and Calendar. Find your Exchange account on the list and touch it to look at the settings. You may need to contact technical support at your organization to make sure your Exchange settings are correct.