
Chapter 19
Productivity and File Transfer
You already know that your iPad is great for consuming or enjoying content. It is your music player, your video player, and your gaming console; and it brings you news, weather, sports, and more. The iPad isn't just for fun and games, though. In this chapter, we take a look at Apple's three productivity powerhouse apps: Pages (compatible with Microsoft Word), Keynote (compatible with Microsoft PowerPoint), and Numbers (compatible with Microsoft Excel).
If you are a Mac user, you may already be familiar with Pages, Keynote, and Numbers, which are part of the iWork for Mac suite. With these three apps on your iPad, you can create content—not just consume it.
Each has wonderfully creative tools built in, and each can produce professional Microsoft Office–compatible documents that you can then email, upload to an online account, or present on your iPad.
File Transfer Options
As soon as you start working with files on your iPad, you will want to know how to transfer files you create on your iPad or how to move files from your computer or elsewhere to your iPad. In this chapter, we summarize file transfer options (see Table 19–1). Some options are described in detail elsewhere in this book, while other apps will be described in this chapter.
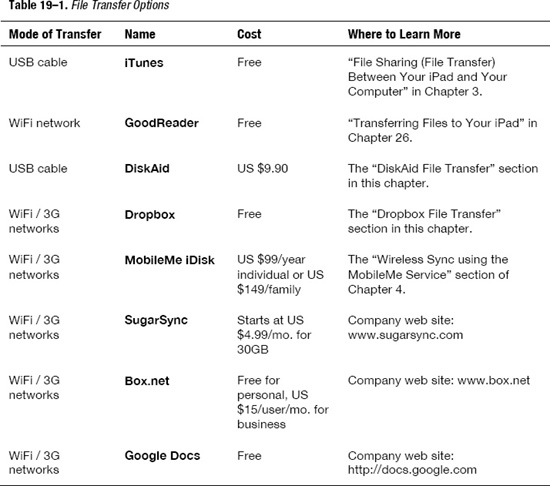
Of course, you can always email files to get them on or off your iPad, but usually this only works well for a limited number of files or small-sized files. Sometimes, files are just too big to send as email attachments. That's when you need a file transfer solution such as DiskAid or Dropbox.
Next, we'll cover two file transfer options: DiskAid, which that works by connecting your iPad to your computer with the USB cable; and Dropbox, which provides wireless file transfer.
DiskAid File Transfer
If you prefer to use a USB cable and really gain access to all the files on your iPad, including spreadsheets, word processing documents, presentation files, pictures, videos, and even things like FaceTime call history, voice memos, and notes—then DiskAid is a good choice.
DiskAid works on both a PC and a Mac. At publishing time, you can download a free 14-day trial. This trial lets you give the software a test run before you pay the US $9.90 purchase price.
You can obtain the software directly from the DiskAid web site at www.digidna.net/products/diskaid/download.
After you run DiskAid on your computer and connect your iPad using the USB cable to your computer, you should see the main screen showing you the apps installed on your iPad (see Figure 19–1).
To copy files, you need to do the following:
- Select an iPad app in the left column of DiskAid. In this example, we chose GoodReader.
- Open a window to browse files from your computer and drag and drop selected files onto the main window on the right side of DiskAid.
- Next, disconnect your iPad and check the app (in this case, GoodReader). You should see the files you just dragged and dropped.
TIP: To copy files from your iPad to your computer, follow the reverse procedure—drag and drop the file from your iPad to your computer folder. You can also delete files from your iPad by highlighting them in DiskAid and pressing the Delete key on your computer keyboard.
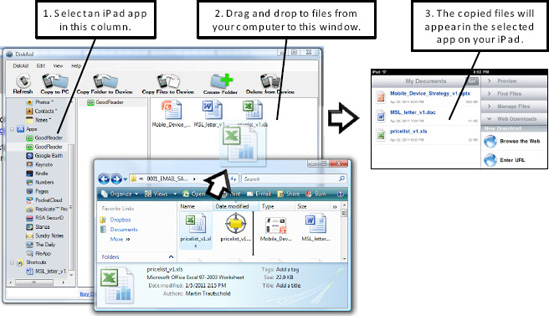
Figure 19–1. Copying files using DiskAid
Dropbox File Transfer
Dropbox is different from DiskAid in a few ways. First, it is wireless; no USB cable connection to your computer is required. Second, Dropbox allows you to sync files between, not just your iPad and computer, but to multiple computers (e.g., Windows, Mac, and Linux) and the Dropbox web site. Third, you need to install an app on your iPad and your computer. The nice thing is that you can store and transfer up to 2 GB (gigabytes) of files for free. If you want to store up to 50 GB, then the price is US $9.99/month or US $99.00/year. Larger plans are available.
TIP: With Dropbox, you can also secure your files with pin codes to further protect them. This means you could securely store and access personal information, tax information, and personal photos on your mobile device.
Follow these steps to use Dropbox on your iPad:
- Sign up for your free account and download the computer (PC or Mac) app from
www.dropbox.com. - Next, go to the App Store on your iPad and locate and download the free Dropbox app.
- Log into Dropbox on your iPad using the same username and password you created when you first set up your account.
- Any files or folders you drag into the Dropbox folder on your computer will be wirelessly synchronized to the Dropbox app on your iPad (see Figure 19–2).
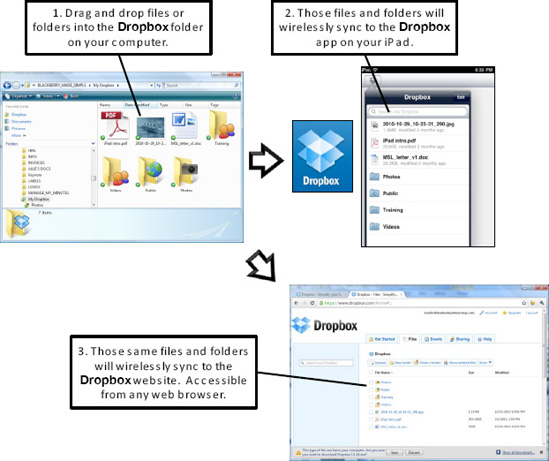
Figure 19–2. Copying files using Dropbox
Files placed in the Dropbox app on your iPad will also appear in the Dropbox folder on your computer, as well as on the www.dropbox.com web site. In other words, important files are backed up automatically at www.dropbox.com.
You can even share specific folders on your Dropbox account with others, such as colleagues, friends, or family members. This is a great way to share files both small and large since you don't have to worry about the size limitations sometimes encountered when sending email attachments.
Now that you know the basics of how to transfer small and large files to and from your iPad, you're ready to dig into some good productivity apps.
Productivity Apps
As we mentioned previously, using Pages as your word processor, Numbers as your spreadsheet, and Keynote for presentations can really boost your mobile productivity with your iPad.
Downloading Pages, Keynote, and Numbers
Pages, Keynote, and Numbers are all available to be purchased and downloaded from the App Store. At publishing time, each app costs US $9.99.
It is probably easiest to search for Pages by typing it into the Search window in the upper-right corner.
Next, from the Pages download page, get to Keynote and Numbers by looking in the More iPad Apps by Apple section in the lower-left corner.
Using Pages
Pages is Apple's word processing program. If you use a Mac, you will be familiar with the layout and functionality of the Pages program. While not meant to be a full substitute for a desktop word processor, Pages is quite capable and can allow you to edit and create very professional-looking documents.
With Pages you can do much more than create documents; you can also then send them via email or upload them to an online account for easy viewing, sharing, and printing.
Using Pages for the First Time
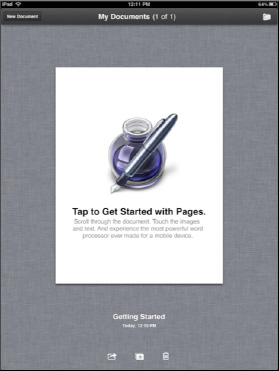
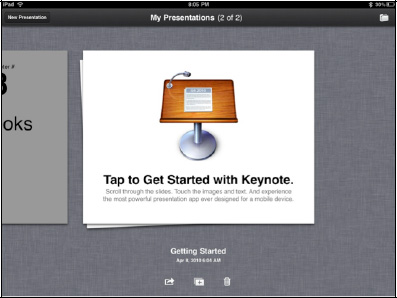
When you first start Pages, you will see that there is one sample document entitled “Getting Started.” This is a great tutorial for many of the features found within Pages. We recommend going through this document and reading about the various styles, objects, and toolbars associated with Pages.
To start a new document, touch the New Document button at the bottom. When you touch the New Document button, you have the option of either starting a new document from scratch or duplicating the document that is showing.
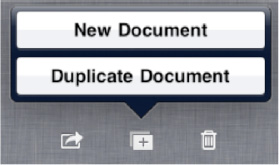
TIP: If you want to use an existing document as a template, it is useful to choose Duplicate Document. Otherwise, choose New Document to create a new document.
Choosing a New Document Template
When you choose New Document, you have 16 available templates from which to choose. The templates are general, like Poster, Proposal, or Term Paper. You can choose to start with a template (which might make the formatting easier) or simply choose Blank (at the top left) to start with a blank page (see Figure 19–3).
Everything within the template can be changed or adjusted, so don't be afraid to experiment.
NOTE: Templates are very helpful for documents that require a certain format and presentation, such as resumes and letters.
Once you make your selection, you are ready to start writing and editing to turn the template into the perfect document.
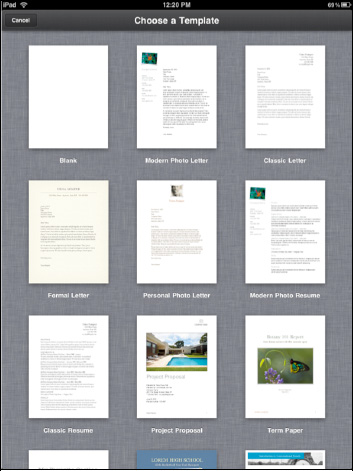
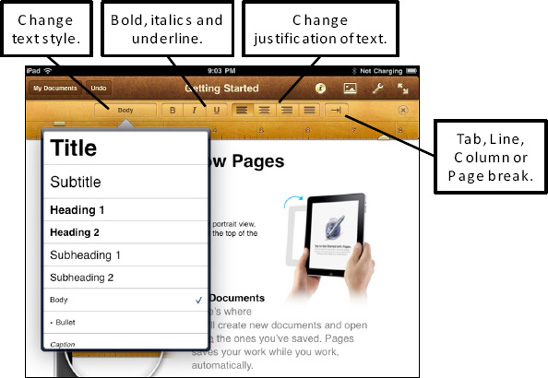
Figure 19–3. The page layout in Pages
Working With Tools and Styles
Like most word processors, Pages gives you many options for adding various styles to the document. The built-in toolbars give you easy access to most of the features for customizing your document.
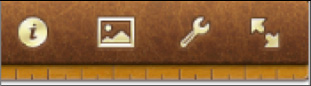
There are four specific buttons on the toolbar in the upper-right corner that will prove to be quite useful in your writing: Information, Picture/Object, Tools, and Full Screen.
Information Button
The Information button only works after you select text or another item, such as a graphic.

This button enables you to accomplish the following:
- Set a particular style, such as Heading, Subheading, or Caption
- Change the font, font size, or color
- Change the settings for lists with bullets and numbers
- Change the alignment/justification and line spacing
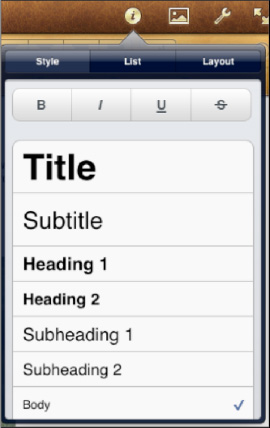
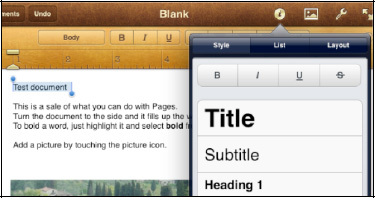
Follow these steps to adjust a style in a document:
- Select text in the document.
- Tap the Information button.
- Tap the Style button.
- Scroll through the list to choose the appropriate style and then touch it. A Checkmark icon will then appear next to the style you have chosen.
You can also add Bold, Italics, Underline, or Strikethrough by touching the appropriate button.
Selecting Text to Apply a Style to or Cut/Copy
The style you select can be applied to the next text you type, or it can be applied to selected text already in the document.
Do this to select text you have typed:
- Double-tap to select a word.
- Triple-tap to select a paragraph.
Do this to select text in a Pages template:
- Press and hold a word to select it.
- Double-tap to select a paragraph.
Once the text is selected, choose the style to apply to the text you have selected by using the tool bar or the Information (i) button, as shown.
Picture/Object Button
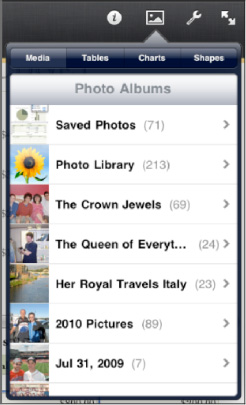
Next to the Information button, you will find the Picture/Object button. Touch this button to insert media, tables, charts, or shapes into the document.
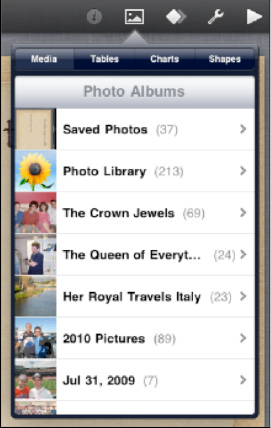
When you first touch this button, you will see the Media tab highlighted, and all your photo albums will be visible.
To choose a photo, navigate through the available albums and select the desired photo to use.
To add a table to the document, touch the Table tab and choose from the various table formats shown.

NOTE: There are six screens of tables; swipe from right to left to advance through the screens.
Follow these steps to insert a chart:
- Touch the Chart tab and swipe through the screens.
- Tap the chart you want to insert.
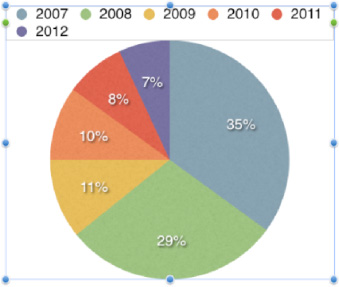
Follow these steps to edit the data behind the chart (see Figure 19–4):
- Double-tap the chart so that it flips around, showing you a data table.
- Type the data needed to create the chart.
- Press Done in the upper-right corner when finished to see the updated chart.
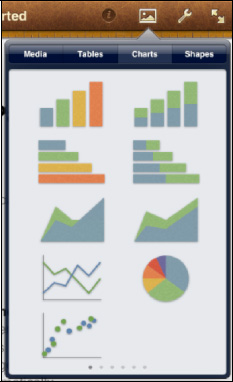

Figure 19–4. How to edit chart data in Pages
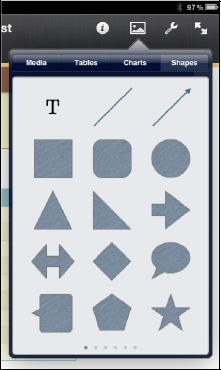
Do this to insert a shape:
- Touch the Shape tab and swipe through the screens.
- Tap the shape you want to insert.
Do this to move or resize the shape:
- Press and hold the shape to drag it around the page.
- Touch the two corners and pinch open or closed to make it smaller or larger.
- Put two fingers inside the shape and spin it around to rotate the shape.
To move or resize the picture, chart, or object, simply tap once to bring up the blue dots. Touch and hold the object and move it anywhere you wish on the page. You will notice that text will move around the object as you move it.
TIP: To change or adjust the text wrapping, simply touch the Information button while the picture or object is highlighted and choose Arrange. Touch the Wrap button and choose a style for the word wrap.
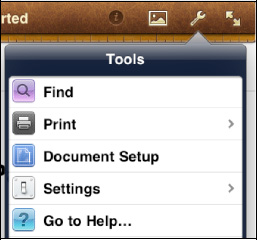
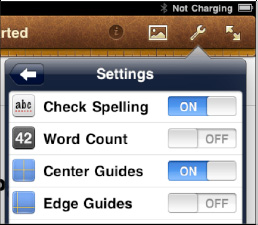
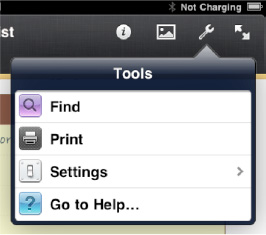
The Tools Button (Print, Find, Settings, and Help)
Next to the Pictures/Objects button is the Tools button. Touch this to access the Find, Print, Document Setup, Settings, and Go to Help tools.
The Settings option allows you to turn ON or OFF the Check Spelling option and choose whether to display various features: Word Count, Center Guides, and Edge Guides.
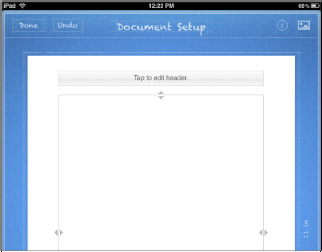
Touch the Document Setup tool and you will see what looks like a blueprint. To add or edit a header or footer, touch the Tap to Edit Header/Footer buttons.
To adjust the margins, just drag the triangles in from the sides or from the top and bottom of the page.
When you are done with your adjustments, simply touch the Done button in the upper-left corner.

To hide all tool bars and just focus on a blank screen for writing, touch the Full Screen icon in the upper-right corner. To enable the tool bar again, just tap the screen.
The Style Buttons and Ruler
The Style buttons and ruler are visible only when you are in a field with editable text. Simply touch the screen anywhere text can be input or edited and you will see the ruler at the top (see Figure 19–5).
NOTE: If you turn your iPad to Landscape orientation, the menus and style bar disappear. To get the menus and style bar back, turn your iPad back to Portrait orientation.
At both edges of the ruler, there are sliding guides for tabs and indentations. Simply slide to adjust the margins and tabs for your document.
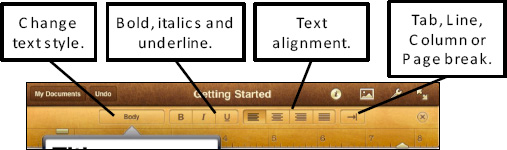
Figure 19–5. The Style buttons
On top of the ruler, you will find many of the same buttons that you saw when you touched the Information button. You can adjust the paragraph and character styles; align or justify text; and set tabs, page breaks, and column breaks by touching the appropriate button.
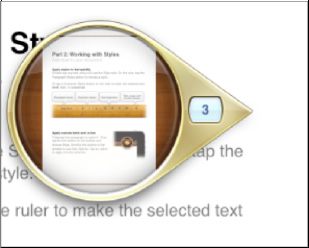
Navigator
Navigator is a very cool tool built into Pages. Follow these steps to use it:
- Hold your finger along the right-hand edge of the page and slowly drag down or up.
- A small Magnifying Glass icon appears with a little “snapshot” of the pages in the document.
- Each little bit you move downwards shows the next page.
- When you find the page you wish to read or edit, remove your finger from the screen and you will jump to that page.
Numbers Spreadsheet
Numbers is a powerful spreadsheet program, much like Numbers for the Mac or Microsoft Excel for Windows.
Numbers allows you to create, edit, and read complex spreadsheets; input and calculate formulas; and set up multiple worksheets within a spreadsheet. These worksheets are displayed across the top of each file as file folder tabs known as sheet tabs.
Using Numbers for the First Time
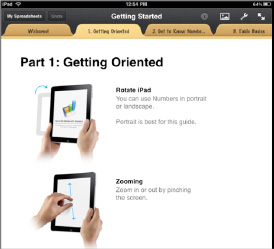
Just like Pages, Numbers comes with a “Getting Started” file to help you with some of the various features of the program. It is a very good idea to thumb through this guide before you start creating your own spreadsheets.
Choosing a Template
As in Pages, the New Document button for Numbers gives you the option of starting a new spreadsheet or using a duplicate spreadsheet.
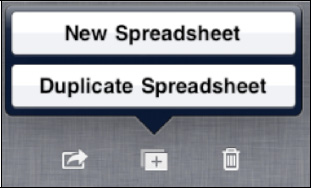
NOTE: To use Duplicate Spreadsheet, you need to have the spreadsheet you wish to duplicate in the main window.
Follow these steps to create a new document in Numbers:
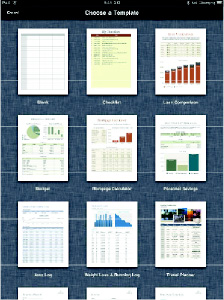
- Touch the New Document button and you will be asked to choose a template.
- Choose Blank to start from scratch or choose one of the templates provided to get started.
In the following example, we chose the Budget template to work with.
Using the Toolbar in Numbers
In the upper-right corner, just like in Pages, you will find the Numbers toolbar. The icons are identical to those in Pages, but the functions are a bit different (see Figure 19–6).

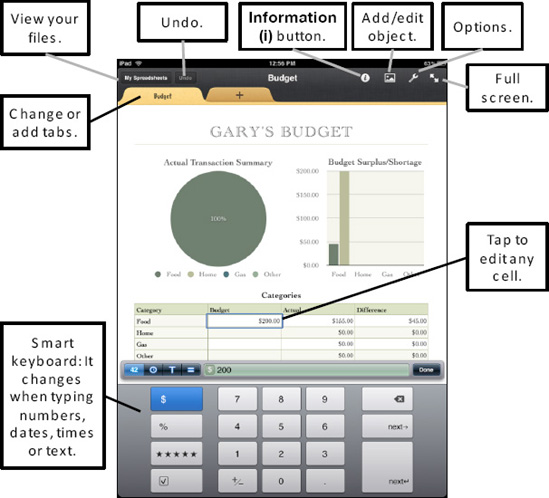
Figure 19–6. The page layout in Numbers
Information Button
The Information button  in Numbers looks identical and sits in the same place that it does in Pages. In order to use the Information button, you need to have text, a chart, graph, or object selected.
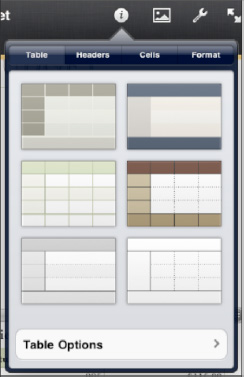
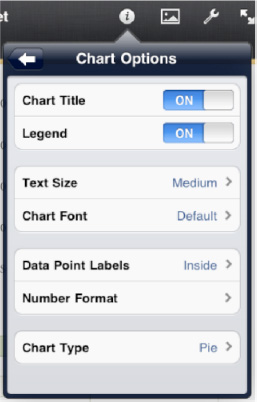
If you have a chart selected, the chart options are displayed. If you have a table selected, the table options are displayed.
In this example, we touched a chart and then touched the Information button. We touched Chart Options and can now choose everything from text size to font to the type of chart. The options are truly staggering.
Take some time to walk through the Numbers “Getting Started” guide to see all the options available.
TIP: We could write a full book on each of these programs. Take some time to just touch icons and options to see for yourself how things change as you make individual selections. Have fun—this is very powerful and creative software to work and play with!
Picture/Object Button
Next to the Information button, you will find the Picture/Object button. Touch this button to insert media, tables, charts, or shapes into the document. In Numbers, this button functions exactly the same as it does in Pages.
Tools Button
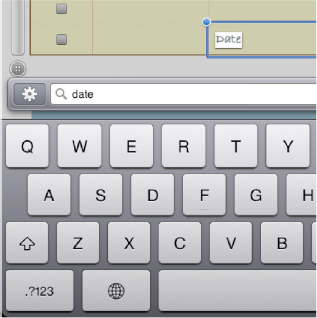
Next to the Pictures/Objects button is the Tools button. Touch this to access the Find, Print, Settings, and Go to Help tools.
Use the Find button to search for any word or phrase in a Numbers document—just like Pages.

When the word is located, the text will be highlighted..
Use Go to Help to jump to the Apple web site for support with Numbers.
Editing Cells, Charts, and Graphs
Numbers is a very powerful spreadsheet program. Just like a traditional spreadsheet program on your computer, it can be used to edit each cell, input formulas, and customize charts and graphs.
Working with Charts and Graphs
The first time you work with Numbers, we suggest you open one of the templates. In this example, we are using the Budget template. Notice the pie chart, which is based on four criteria:
- Double-tap the chart to select it, and the cells used to create the chart are highlighted.
- Double-tap an individual cell, and the formula calculator pops up.
Numbers senses what type of field you are trying to enter. In the Budget template, Numbers knows we need to enter dollar amounts. We can simply type in a new amount and press the Done button; the changes are reflected in the chart shown previously.

Working with Tables
If you have spent any time at all working with spreadsheets, you know that tables are a mainstay of spreadsheet construction.
Tap any table in your spreadsheet to highlight it.
You add columns to the table by holding and dragging the column handle left or right (see Figure 19–7).

Similarly, you add or remove rows by holding and dragging the row handle up or down.
![]()
To move the table entirely, just touch and hold the top bar and reposition the table where you desire.
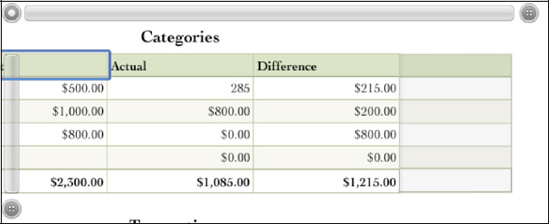
Figure 19–7. Adding and removing rows and columns in tables
TIP: It is easy to make mistakes when using Numbers. If something doesn't look right, just touch the Undo button to undo the last edit or addition. Touch Undo a couple of times to keep undoing things you might not have wanted to do.
There really is so much more to do with Numbers—again, we encourage you to read the “Getting Started” guide to see additional features!
Keynote Presentations
Keynote is the third jewel in the triple crown of iWork. Keynote is comparable to Keynote on your Mac or Microsoft PowerPoint on your PC. Like Pages and Numbers, Keynote is a very powerful and capable piece of presentation software. We won't be able to cover every aspect of this software, but we can get you started and working with presentations using Keynote.
Using Keynote for the First Time
Just like Pages and Numbers, Keynote comes with a “Getting Started” file to help you with some of the various features of the program. It is a very good idea to thumb through this guide before you start creating your own spreadsheets.
NOTE: Unlike Pages and Numbers, Keynote works only in Landscape mode since this is presentation software.
Choosing a Template
As with Pages, the New Presentation button gives you the option of starting a new presentation or using a duplicate presentation.
NOTE: You need to have the presentation you wish to “duplicate” visible in the main window.
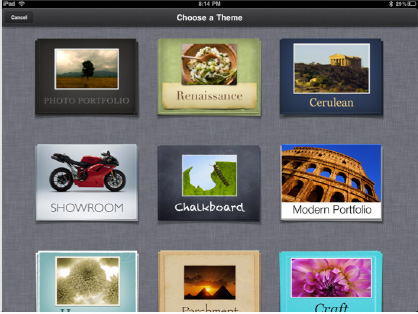
Touch the New Presentation button and you will be asked to choose a template.
You can select from several blank presentations (“White,” “Black,” or “Gradient”) to start from scratch, or you can choose one of the templates or themes provided to get started.
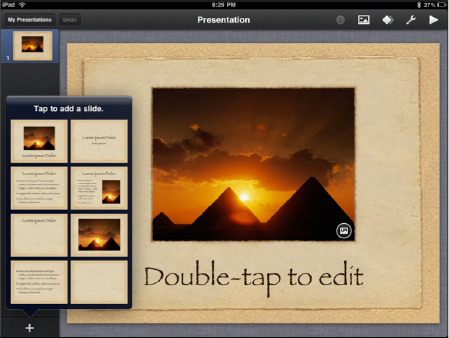
In the following example, we chose the Parchment template to work with.
Using the Toolbar in Keynote
In the upper-right corner, just like in Pages and Numbers, you will find the Keynote toolbar. The icons are similar to those in Pages and Numbers, but the functions are a bit different, as shown in Figure 19–8.
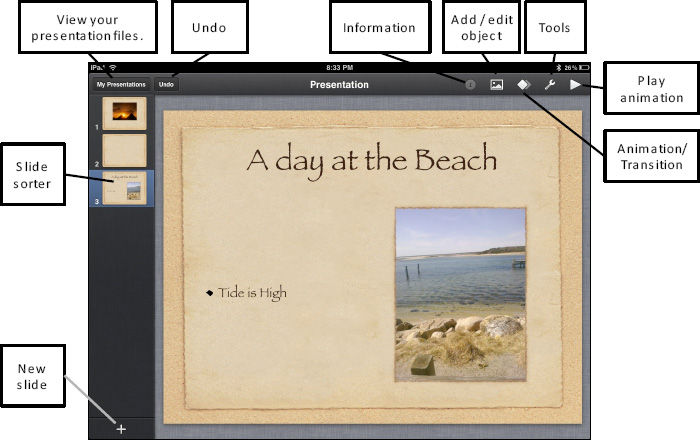
Figure 19–8. The page layout in Keynote
The Information Button
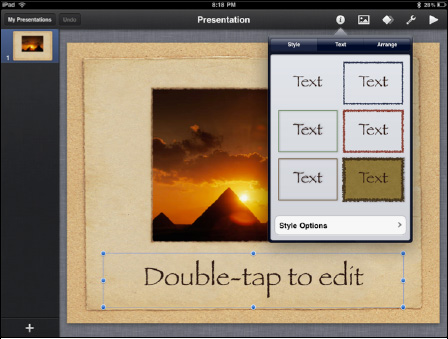
The Information button looks identical and sits in the same place as it does in Pages. In order to use the Information button, you need to have a text box, picture, graph, or object highlighted. Simply touch anywhere to activate the object and then tap the Information button.
Touch a text box and the text options are displayed. Touch a picture and the picture options are displayed.
In this example, we touched a text box and then touched the Information button.
We touched Text Options, and now we can choose everything from the text size to the font to the style of text.
The options are truly staggering. Take some time to walk through the “Getting Started” guide to see all the options available.
TIP: We could write a full book on each of these apps. Take some time to just touch icons and options to see for yourself how things change as you make individual selections. Have fun—this is very powerful and creative software to work and play with!
Picture/Object Button
Next to the Information button in Keynote, you will find the Picture/Object button. Touch this button to insert media, tables, charts, or shapes into the document. This button functions exactly the same as it does in Pages and Numbers.
TIP: In all three programs, pictures can be rotated just by touching and holding two fingers on the picture and rotating your fingers—very cool!
Tools Button
Next to the Pictures/Objects button is the Tools button. Touch this to access the Find, Go to Help, Edge Guides, Slide Numbers, and Check Spelling tools.
Use the Find button to search for any word or phrase in the document—just like Pages and Numbers. When the word is located, the text will be highlighted in yellow. Just touch to edit.
Use Go to Help to jump to the Apple web site for support with this app.
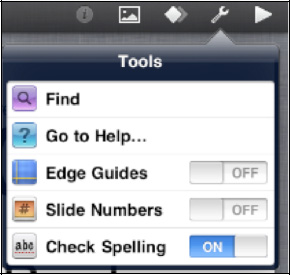
The Edge Guides, Slide Numbers, and Check Spelling toggles are exactly the same as in Pages.
Add a Slide
Follow these steps to add a slide:
1. Touch the Plus button ![]() in the lower-left corner.
in the lower-left corner.
2. Choose the style of slide you wish to add.
3. Double-tap to edit the text and use the tool buttons to add images or objects as you did before.
Animation Button
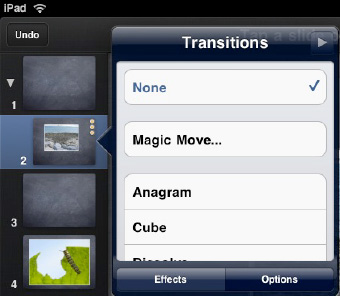
In Keynote, you can customize the transition animation from one slide to the next:
4. Touch the Animation button  to see an Animation tab next to each slide in the presentation.
NOTE: You can also add Magic Moves, which copies the slide and then lets you change aspects and animate those changes.
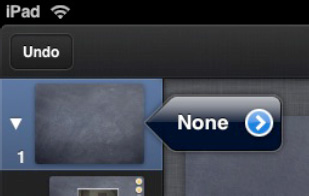
5. Touch the tab to see the Transitions menu.
6. Choose an effect and then tap the Options button at the bottom to adjust the timing of the transition and whether it occurs when tapping the screen or after the previous transition.
7. Tap Done in the upper-right corner when you are finished working with transitions.
The Play Button
To play the slideshow, just touch the Play button in the top-right corner. Based on the transition settings you set, the presentation will begin to play.

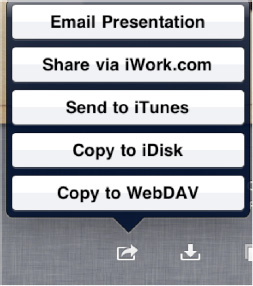
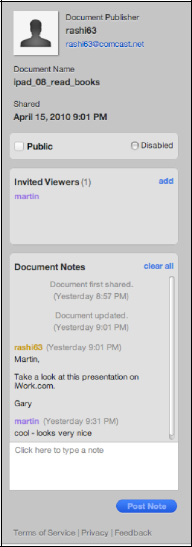
Sharing Your Work
The Share function in iWork is the same in each of the three programs. Touch the Share button and five options are presented to you: Email Presentation, Share via iWork.com, Send to iTunes, Copy to iDisk, and Copy to WebDAV.
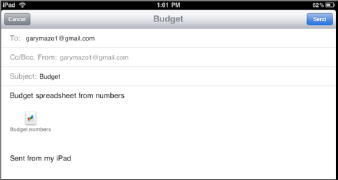
Email Presentation
Sending a document, spreadsheet, or presentation via email is easy. Close the document, spreadsheet, or presentation, and then tap the Share command underneath.
Choose Email Presentation and your Mail app will load with the file shown as an attachment. Add a recipient as we showed you in Chapter 13: “Email on your iPad,” type in your message, and then tap Send.
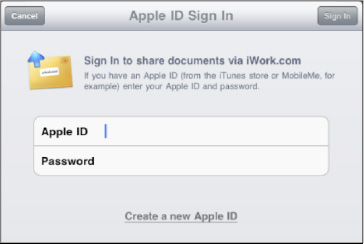
Share via iWork
When you touch Share via iWork.com, a window pops up, asking you to input your Apple ID or your MobileMe ID and password. Input the correct information and your file is now stored online for easy retrieval from any computer. This is a great way to share and collaborate on work.
Once you try to use the iWork.com service for the first time, you will be asked to send a verification email.
Check the verification email and follow the instructions to begin sharing your work online.

Log in to www.iwork.com, sign in with your Apple ID and password, and your “Shared Documents” will now be available.
TIP: This is a great way to collaborate on work and also to send something from your iPad that might be too large to email to someone to view and print.
Printing a File
To print any presentation, tap the Tools icon (the Wrench icon) and select Print. Then you can select any AirPrint-compatible printer and adjust number of copies and specific pages to print.
TIP: We show you details about how to use AirPrint and compatible printers in the “Print Messages” section of Chapter 13: “Email on Your iPad.”
Faxing a File via E-Fax Service
Faxing a file via an e-fax service is a great trick if you are away from your home or office, and you want to get a quick print-out or send a quick fax.
NOTE: In order to do this, you have to first sign up for an electronic fax service such as www.efax.com, so you can send faxes as email attachments.
Once you have your e-fax account, you can send the document to a fax machine as an email attachment by following these steps:
- Choose the Share
 Email Presentation in any of the apps.
 - Choose PDF format.
- Address the email message with the fax number in the format required by your e-fax service. Some of the services have the following format:
(fax number)@faxsend.comor[email protected] - Once the email is sent, it is converted to a fax by your fax service and sent to the appropriate fax machine.
Export a File
Follow these steps to export an iWork file:
- Choose Share Export in any of the iWork apps.
- Choose the file type in which you would like the document to be transferred to the computer.
- Transfers are handled through iTunes the next time you connect your iPad to the computer. The usual formats are the default for the particular application. You also have a PDF option for export.
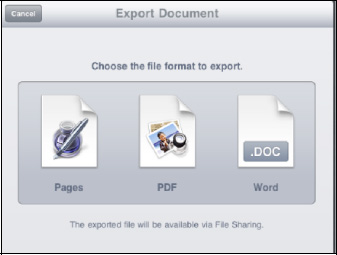
NOTE: Pages can export to Word for Mac or PC, but Keynote and Numbers cannot yet export to their Microsoft PC equivalents (PowerPoint and Excel). You can always choose to export to a PDF file from Pages, Numbers, and Keynote.
In the next section, we will cover how to import these documents into your iPad using file sharing.
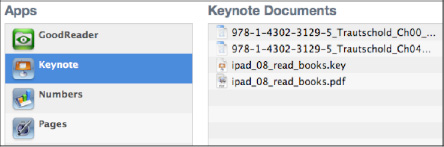
File Sharing
File sharing is the ability to take a document that you create in iWork and share it via iTunes. File sharing takes place in iTunes through the Apps tab at the top of the screen. Click Apps and scroll down to the File Sharing section at the bottom of the screen.
TIP: We also show you how to use file sharing in the “File Sharing” section of Chapter 3: “Sync with iTunes.”
Each program that is installed on your iPad and capable of file sharing is shown at the bottom. Follow these steps to retrieve a shared file to your iPad:
- Click the app from which you have shared the file (in this case, Keynote). All the documents that you have shared on your iPad are shown.
- Highlight the document to save and then touch the Save To button in the lower-right corner.
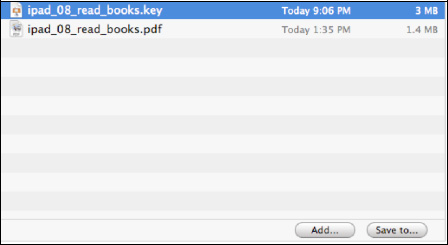
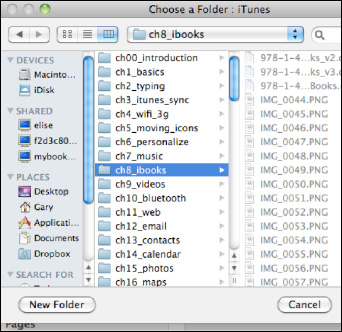
- From there, you simply navigate to the folder in which you want to save the document.
- Now the file is on your computer for easy viewing, editing, and printing.
TIP: Good alternatives to Pages, Keynote, and Numbers are Documents to Go and QuickOffice. Both of these alternatives are combined into a single app, rather than being available as three separate apps.