
Chapter 8
Cutting the Cord: Utilizing Wireless Functionality
In This Chapter
- Printing sans wires
- Sorting out device compatibility
- Taking advantage of Wi-Fi sync
- Understanding when the plug is superior
- Transferring files from device to device
- Using Bluetooth to transfer files
If I didn’t make it clear enough in Chapter 7, the iPhone is at its best when no cables are involved. It just feels less like a tool and more like a… magic wand. I’m sure Harry Potter would agree. In newer builds of iOS, and in iOS 6 in particular, Apple has granted the iPhone wireless abilities that some may argue it should’ve had from the start. Wireless printing and syncing everything from contacts to music over Wi-Fi are now included. This chapter covers the ins and outs of the wireless features that are often overlooked on the iPhone, and even dives into the art of wireless transfers between devices. Bluetooth and Wi-Fi will be the driving forces at work, but as always, it takes a little effort on your part to facilitate the connection. Eager to get more done while cutting even more cables? You’re in the right place.
Cutting the USB Cord
I have to wonder if even Apple knew that its proprietary Dock Connector would end up being the barnburner that it has been. It’s quite remarkable, actually. There’s a USB port on one end and a Dock Connector on the other, but you’d be hard-pressed to know which one was the “universal” of the two.
Indeed, the proliferation of Dock Connector accessories and compatible peripherals is staggering, and these days, it’s the devices that lack support for a Dock Connector that are considered anti-compliant. The iPod and iPhone have become so prevalent that the Dock Connector has become standard fare on lots of audio-related gear, but it’s now clear that Apple may be planning the funeral of its own socket.
With the introduction of AirPlay and the many, many cloud features in iOS 5 and iOS 6, it’s becoming less and less important to have a Dock Connector cable nearby. Of course, until wireless power is implemented (remember the Palm Pre?), we’ll still need one for the wall, but the goal after this chapter is to simply unplug it from charging and leave the cable there. Believe it or not, it’s feasible in a lot of situations.
Taking Advantage of AirPrint
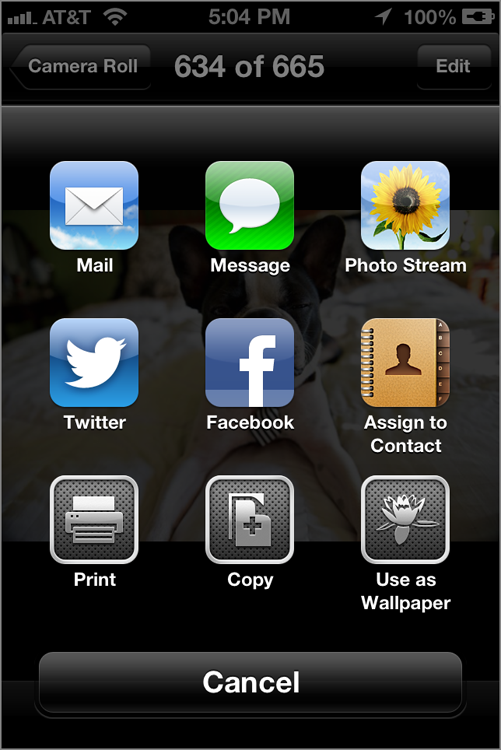
What’s most attractive about AirPrint—the ability to send print jobs to a nearby printer without wires—is just how (relatively) easy it is to use. In typical Apple fashion, all of the functionality is baked right into the operating system, so there are no drivers to tinker with, no additional software to install and—most importantly—no cables to connect. You can see an example of just how integrated it is in Figure 8-1. AirPrint can do its thing in the background, too, so once you send out a Print command, you push the dialog aside and get back to whatever it was that you were doing—sifting through e-mail, flipping through a slideshow, or becoming engrossed in that X-Men trailer.
Figure 8-1: Have a look at the new sharing menu in iOS 6, including the Print option.
Getting started, however, requires a bit of elbow grease. On second thought, it may actually require a bit of hard-earned cash. You see, not every printer is designed to play nice with AirPrint. As nice as it would be for the iPhone to be able to print wirelessly to any printer ever built, part of that “no driver” deal is the inclusion of software on the other end. And that means a new printer, perhaps. To date, only seven major printer manufacturers are producing AirPrint-enabled printers: Lexmark, Brother, Dell, Samsung, Canon, HP, and Epson. The list of compatible printers is certainly growing, though, and there are currently a few dozen options to choose from. The full (expanding) list can be found here: http://support.apple.com/kb/ht4356.
AirPrint Alternatives
If AirPlay was any indication, you may have a sneaking suspicion that there simply has to be some way around the aforementioned stipulation. After all, buying a new printer just to print a few documents per month from your iPhone doesn’t exactly sound ideal. Thankfully for us all, the third-party development community is coming to the rescue once more.
For those diehard Mac users, there’s a phenomenal piece of software called Printopia 2 that enables your iPhone (and any other nearby iOS device with AirPrint support) to send Print commands to practically any printer in the known universe. Assuming it’s in your home and in some way affiliated with your Mac, of course. All you need is a printer of any description plugged into (and configured to work with) your Mac. Or, you can have a network printer plugged into a connected Time Capsule or AirPort. A shot of Printopia 2’s control panel (seen in Figure 8-2) shows how well integrated it is in OS X’s settings.
Figure 8-2: Printopia 2 blends right into OS X’s Settings; no separate app required.
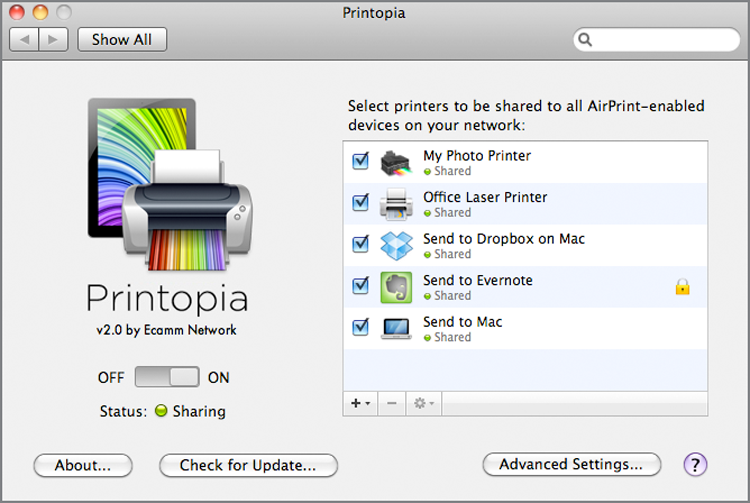
It’ll even recognize printers that are simply connected to the same router as the one your Mac is on, be it via wire or wireless. In case you haven’t caught on, as long as you have a connected printer that’s set up to work with your Mac, the installation of Printopia 2 creates the missing bridge that allows your iPhone to view it as an AirPrint-enabled printer.
The software is available for free on a trial basis from www.ecamm.com/mac/printopia, but the full version costs $19.95. It’s important to note that this is software for your Mac, not for your iPhone. There’s no App Store download required, and no jailbreaking or other tomfoolery necessary. If the program is installed on your Mac, the printers will show up in the exact same spot on your iPhone with no configuration necessary on the device.
It’s also worth mentioning that Printopia 2 works with a shocking amount of legacy Macs. Even Leopard (OS X 10.5) and PowerPC-based Mac users can download the utility and take advantage. Unfortunately, there’s no Windows client to speak of, and the company certainly doesn’t seem eager to change that in the near future. But, as you’d expect, there’s an alternative for those who have Microsoft’s OS running the house.
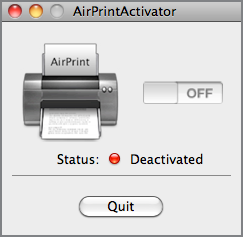
If you’d prefer a workaround with a bit more of a multi-platform vibe, there’s AirPrint Activator (shown in Figure 8-3). It’s a subtle, less sophisticated application that effectively does the same (basic) thing as Printopia 2. It allows non-AirPrint printers to be seen by one’s iPhone. But unlike Printopia 2, it sticks to rudimentary printing functions. On the upside, it’s absolutely free, although donations are obviously encouraged if it ends up suiting your needs. Installing it on a Mac is as easy as downloading the program and tucking it in your Applications directory. That can be downloaded here: http://netputing.com/airprintactivator/airprint-activator-v2-0/.
Figure 8-3: Flip it to On. Do it!
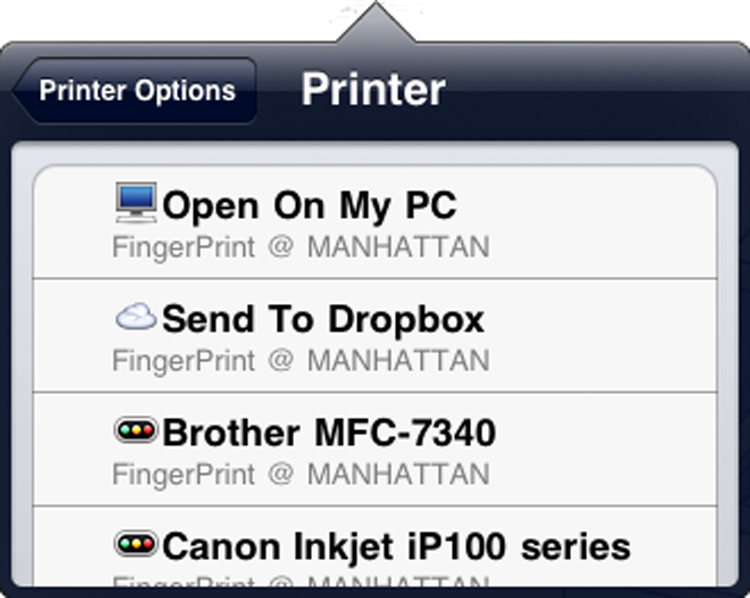
For Windows users, things are (unsurprisingly) a bit more complicated. But if there’s anything I hope you’ve learned thus far, it’s the adage, “If there’s a will, there’s a way.” If you want to enable AirPrint on a Windows XP, Windows Vista, or Windows 7-based machine (32-bit or 64-bit), you need to do a little more manual labor. And by that, I mean manually creating a few file folders, mashing OK through a firewall warning, and feeling extra proud about yourself in the end. The complete how-to guide is here: http://jaxov.com/2010/11/how-to-enable-airprint-service-on-windows/. If you’re concerned about your ability to follow instructions, or you’d simply rather pay someone $9.99 for the convenience of something simpler, there is one other Windows option worth mentioning. Collobos has launched its FingerPrint software—shown in Figure 8-4—for OS X and Windows platforms, and similar to Printopia 2, no jailbreak (or software installation at all, for that matter) is required on your iPhone. That option can be downloaded here: www.collobos.com.
Figure 8-4: So many wireless print options with FingerPrint
Finally, there’s experimental support for printers working in conjunction with Linux. The step-by-step can be found at the following link, but more so than with any other OS, your miles may vary: http://forums.macrumors.com/showthread.php?t=1265049.
Wi-Fi Syncing Your Way to Cordless Freedom
Thinking back on it, it’s a little crazy that we ever had to connect our iPhones to a computer in order to have very basic and essential information synced between the two. But, as with most things, it was probably easier said than done when it came to putting the necessary architecture in place behind the scenes. Starting with iOS 5—according to Apple—you don’t actually need a computer any longer in order to fully operate an iPhone. Of course, what it isn’t telling you is that it’s still highly beneficial to have one tagging along, but at least you don’t actually have to physically connect the two with a cable.
As it stands, Wi-Fi Sync isn’t an app. It’s an innate, built-in feature of iOS 5 and 6, and you see it just as soon as you start your iPhone for the first time.
I’ll make it easy for you: you have two options when it comes time to sync your contacts, Safari browsing data, e-mail, photos, apps, and music. You can go the wired route or you can do the wireless thing. A quick survey has confirmed that the latter of the two is what all the “cool kids” are into. Jesting aside, here’s what you need to do if you’re interested in syncing things up wirelessly.
After your initial sync is complete, you’ll want to change something in your iTunes settings while your iPhone is connected with the standard USB/Dock Connector cable. On the Summary page in iTunes, scroll down to the Options block and look for the Sync With This iPhone Over Wi-Fi box. Check it. Now your iPhone’s set up to… sync over Wi-Fi! From there, you can disconnect the cable, grab your iPhone, and begin part two of this operation. See for yourself in Figure 8-5.
Figure 8-5: Find this option on the first pane within iTunes.

Because it’s obvious that you won’t be initiating iTunes syncs with iTunes, it should be obvious where to initiate it on the iPhone. But, it’s not. Here’s how to initiate a sync from the iPhone itself—head into the Settings app, then to General, then to iTunes Wi-Fi Sync. The icon up top—if your iPhone and your host computer are online on the same Wi-Fi network—should say Sync Now. Give that a tap to begin the process.
A few words of warning with Wi-Fi syncs. First off, be sure you have two or three bars of Wi-Fi signal before starting one. And then, make sure you have plenty of time. Depending on the amount of new data that’s being shuffled around, it could take anywhere from 20 seconds to 20+ minutes for a wireless sync to complete. If only a few files have changed since your last sync, you won’t have to wait too long. If, however, you’re hoping to add a gigabyte or two of new music, it could take a solid 15 minutes for it to complete.
In testing that I’ve done, particularly with larger syncs, Wi-Fi syncing takes between 8 and 15 times longer than USB cable syncs. That’s fairly significant from a percentage standpoint, but when you’re talking about 6 minutes versus 20 seconds—well, as long as you aren’t in a hurry to make an exit, 6 minutes isn’t too awful—particularly if you’re in a different room than your host computer or you don’t have immediate access to a USB/Dock Connector cable.
The good news, however, is that your iPhone is fully functional while Wi-Fi syncs are ongoing. In other words, you don’t have to sit around and wait for a sync to complete before you can browse the web, send an e-mail, or enjoy a round of Angry Birds. That fact alone makes the idea of waiting 10 times longer entirely more palatable.
Mastering Device-to-Device Transfers
As I alluded to in prior chapters, one thing the iPhone is actually a bit weak on is file transfers. You can thank the innate limitations of a mobile operating system (compared to a full-scale desktop operating system, such as Windows or OS X) for that. But of course, just because your options are limited from the factory, that doesn’t mean there aren’t third-party solutions worth knowing about. With Bluetooth, 3G/4G and Wi-Fi onboard, the iPhone technically has the hardware to pass files around sans wires; it all boils down to having the proper software in order to make it happen.
The iTunes ecosystem, in this sense, is really a blessing and a curse. Although the rigidity of iTunes makes it fairly easy to keep your digital life squared away on your host computer and your iPhone, it also makes doing anything outside of those invisible bounds a bit of a challenge. Apple hasn’t even included native support for e-mailing every file type on the iPhone, so you can imagine how difficult the transfer of material using any other method is. (Although, with iOS 6, you can now add pictures and videos from the Compose menu in the Mail app by long-pressing in the body section.) In this section, I offer up a few tried-and-true solutions for getting things to and from the iPhone.
Using Dropbox
Dropbox. To all but the technologically misinformed, this term is probably one that’s known well. It’s a program that actually acts a lot like Apple’s iDisk—a feature the company curiously killed as it phased iCloud into existence. But unlike iDisk, Dropbox is about as universal as it gets. The premise is fairly easy to grok: you sign up for an account, which gives you 2GB for free. This 2GB is available on pretty much any platform you can imagine, and so long as you log in to each account with the same e-mail address, you’ll find mirrored views of your stash everywhere. The Dropbox iPhone app is shown in Figure 8-6.
Figure 8-6: Say hello to Dropbox on the iPhone.
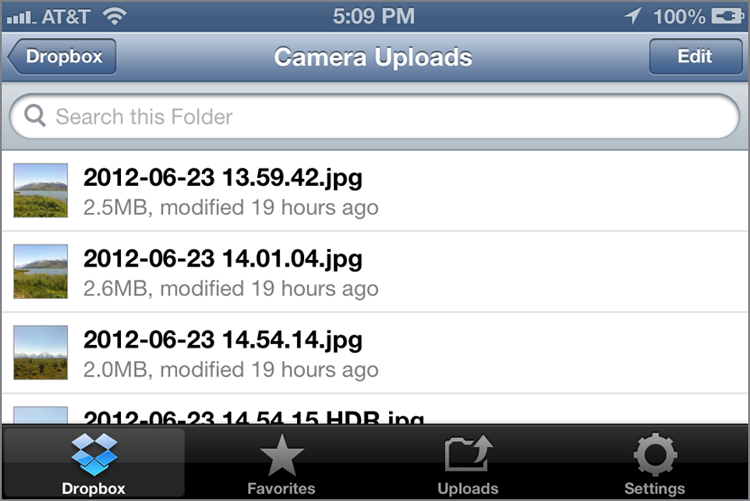
In other words, if you upload a document on your Windows machine to Dropbox, you’ll see it immediately on your Mac, iPad, iPod touch, and Android smartphone within seconds—all without any extra effort on your part. It’s pretty fantastic, and it serves an incredible purpose on the iPhone.
If you’re hoping to send myriad documents, e-mails, and PDFs to your iPhone for offline viewing—this is important when you travel overseas or into areas where you know that finding Wi-Fi will be a challenge—Dropbox is tailor-made to help you out. My suggestion is to convert (or Print to PDF) documents and messages into PDFs, and then host them all in a named folder within your Dropbox account. Once they’re uploaded, your iPhone will be able to open them, and once loaded, they’ll repeatedly open without having to ping back to the Internet.
If you’re not interesting in monkeying around with WebDAV connections, and you only need very basic text-editing capabilities, there are a few app options to consider. Elements ($1.99) and iA Writer ($1), both beautifully seamless, and all are Dropbox-compatible.
Working with Box.net
The similarly-named Box.net does many of the same things that Dropbox does, but it’s geared more toward small businesses and IT professionals. In other words, it’s not as simple, but the advanced feature set may prove useful for those who have money or resources on the line when it comes to file sharing. Aside from enabling all sorts of business collaboration features, it’s also completely free to try.
What’s more, Box.net’s iPhone app even taps into a few of Apple’s most impressive built-in features. Using AirPlay, you can wirelessly stream Box content to an Apple TV for seamless projection of photos, videos, and presentations, and it’ll also support video output via Apple's Dock Connector to VGA Adapter.
Multimedia Streamers
Make no mistake; iTunes facilitates the movement of audiovisual content from your host computer to the iPhone. But more often than not, I’m guessing that you’d like to have content magically appear on your iPhone, rather than have to touch base with iTunes. There aren’t too many easier ways to get that kind of material onto your iPhone, but it’s important to think about alternatives here. Storing content locally isn’t the only way, and in most cases, it’s actually the least desirable way.
The concept’s pretty simple, actually. What if you could use some Wi-Fi device to beam content to the iPhone for easy viewing? A lot of companies have had the same thought, and this section carves out the best of the best for more easily piping music, videos, and photos onto your iPhone. Sorry iTunes—you’re about to get circumvented.
- SugarSync: This highly sophisticated file-sharing app doubles as a backup solution
- SpiderOak: Enables you to e-mail any file from the iPhone’s mail client, and allows access to all of the data you have backed up across your various devices regardless of platform
- Wuala: While effectively accomplishing the same thing as Dropbox, Wuala offers a native Linux client for those using Linux host computers
- Nomadesk for iPhone: Designed specifically for unlimited (yes, unlimited) storage and sharing, but requires a $35 monthly payment per file server
- Google Drive: Now that Google’s own cloud-hosting solution has an iOS app, this is a must for anyone that avidly uses Google’s suite.
Accessing via AirStash
If you shoot videos and stills on a camera that uses SD (Secure Digital) cards, you owe it to yourself to consider yet another $99 accessory. The AirStash looks like a beefed up SD/SDHC card reader, and in fact, it is. There’s a USB plug on one end and a slot for your full-size or micro Secure Digital memory card on the other. If you simply plug it into a PC, it’ll function as a card reader. But that’s hardly what’s magical about it.
The real pizzazz lies within. There’s a multimedia streamer, an internal battery, and a Wi-Fi module all tucked inside, which allows any audiovisual content on your SD card to be transferred to your iPhone over Wi-Fi. The accompanying app, not surprisingly, is completely gratis. After all, you need the $99 hardware in order to actually use the software. The app allows users to wirelessly stream movies, view and import photos, listen to music and podcasts, and view documents stored on your AirStash. AirStash+ (that’s the name of the app) is an enhanced alternative to the built-in web app and includes features only possible with a native app. You can stream materials into the browser by directing your iPhone to connect to the Wi-Fi access point created by the AirStash, but why bother? It’s all about apps at this point.
Hard Drive-Based Streamers
AirStash is a terrific device, if you have SD cards full of content. Although a multi-format card would probably serve a greater slice of the population, there is one more alternative to AirStash. Both Kingston and Seagate have hard drive-based solutions, which allow audiovisual content socked away on an external (and yes, portable) hard drive to be streamed over Wi-Fi to one’s iPhone. Both of them also have batteries within, so a couple hours of wireless streaming is totally feasible. These devices are fantastic for kids on road trips; just load one up with their favorite movies before leaving, and let ‘em stream at will in the back seat without any wires whatsoever.
Kingston’s Wi-Drive starts at $130 for a 16GB model, whereas a 32GB model is $175. Seagate's GoFlex Satellite is far more sizable, but with 500GB of capacity at $200, it’s arguably a far better deal than Kingston's alternative. It also streams to up to three devices at once, and that includes Android devices.
Camera-Tethering Solutions
You have a couple of options when it comes to transferring photos onto your iPhone. For slowpokes, there’s the iTunes sync with your photo galleries on a host computer. For budding hares, there’s Apple’s own Camera Adapter kit. For wireless aficionados, there’s the AirStash method mentioned previously. But there’s an even better solution for all of the sects mentioned in this chapter, and it doesn’t matter what camera you use or what kind of memory card is in your camera.
You’ll need a few things in order to make the magic happen: your iPhone, a camera with an Eye-Fi memory card, a wireless network, and a $15.99 app dubbed Shuttersnitch. Never heard of Eye-Fi? They specialize in producing Secure Digital memory cards with built-in Wi-Fi modules. In other words, having one in a camera allows images to be distributed over Wi-Fi as soon as they’re captured.
That’s how the chain of events begins. You shoot a photo, and the Eye-Fi card is primed to send it. But to do so, you need a wireless network nearby. The easiest way to create one is to use a Mi-Fi device—I recommended that those who longed for a 3G iPhone opt for one earlier, and now you have yet another reason to choose that option over the integrated 3G service. Once a network is in place, you need to connect your Eye-Fi card and your iPhone to it; having them on the same network is essential for the process to work as it should.
Now, you need Shuttersnitch running on the iPhone. That’s a highly specialized app that’ll suck down photos passed over through an Eye-Fi card. Seconds after a shot is taken, you’ll see it right on your iPhone’s display. From there, you can browse, pinch, zoom, and evaluate, and your original shot will remain on your camera’s memory card. It also allows users to arrange shoots in albums, lock private albums, resize or watermark shots before sharing (via e-mail, FTP, Flickr, SmugMug, Zenfolio, Facebook, or Dropbox), geotag incoming photos, add a caption and byline to the photos, and much, much more.
If, however, you don’t need an advanced program to watermark or significantly tweak the incoming photos, and you don’t mind buying a new SD card, there’s one more option you should know about. The Eye-Fi X2 (and only the X2) supports Direct mode. That’s a short way of saying that it’s capable of sending photos directly to the iPhone, without a Mi-Fi or other network in between. So long as your iPhone has Wi-Fi enabled and the free Eye-Fi app is launched, you’re in business. In fact, it’ll work even if the app is running in the background in iOS 5 or 6.
The app accepts full-resolution images, and it automatically sorts by date captured. You can also send over videos, and you can share select clips or shoots via your favorite social networking program (including Facebook, Flickr, Picasa, SmugMug, and YouTube). Eye-Fi also has an Android app that allows Google devices to accomplish the same thing, but you have to pony up $99.99 for an 8GB X2 card. You can learn more about the whole operation here: www.eye.fi/how-it-works/features/direct-mode.
Creating an iPhone File System
One of my biggest gripes with the iPhone—a gripe that is shared by many—is that there’s no file system. That limits its functionality in a number of ways, but not in a way that can’t be at least patched over by third-party development. Air Sharing, an $8.99 app available on the App Store, allows you to wirelessly mount your iPhone as a drive on your host computer. From there, you can create folders and load it up with files—things like Excel documents, PDFs, and so on. Better still, no cable is required; it mounts as a wireless drive, and you can drag-and-drop files as you would on any conventional flash drive.
With OS X, the iPhone is found automatically via Bonjour, while Linux users can connect via SSH. Windows users need only download the free Copy FTP desktop app. Beyond the conventional file sharing capabilities, it’s yet another facilitator of wireless printing, and it will auto-detect Air Sharing on other devices for tablet-to-tablet (or tablet-to-phone, and so on) sharing.
Tapping into Bluetooth
A decade ago, Bluetooth was the go-to protocol when it came to short-range sharing on phones. Everything from ringtones to photos were slung from friend to friend using some of the earliest Bluetooth stacks, but today, Bluetooth has slipped into the background when it comes to file sharing. By and large, most modern-day mobile devices have a Wi-Fi module built-in, and given how much quicker Wi-Fi transfers are… well, there isn’t much incentive to stick with Bluetooth.
Except, of course, that you may be dealing with devices that have only Bluetooth. You have a few options when it comes to transferring files with Bluetooth, and the only ones worth paying attention to are developed by third parties. For whatever reason, Apple includes no functionality whatsoever for Bluetooth file transfers directly from the iPhone. Thankfully, Apple hasn’t ignored developers who figured that some users might be interested in this very functionality.
Without question, the premiere Bluetooth transfer app for iPhone is Bluetooth Photo Share by Nathan Peterson. Best of all, it's free and it doesn't require that your iPhone be jailbroken. It works as advertised for sharing contacts and photos, and better still, it doesn’t compress images that are shared. The receiver not only gets the full-resolution image, but also sees a thumbnail of the shot as it’s being beamed over. Just remember: you need to keep your iPhone and the other iOS device close to one another. Bluetooth’s pretty finicky, truth be told.
Need to transfer something other than a contact or photo? I figured you might. Bluetooth Share HD, available on the App Store for $1.99, allows two iOS devices to share files, photos, and contacts. You can also use your iPhone as a USB disk to store files and transfer them between iPhone and computers.
If you’re looking for completely unrestricted Bluetooth file transfer capabilities, there’s an app for you. But—and it’s a big but—you’ll need to jailbreak your iPhone. If you’re comfortable doing that, you can head to the Cydia app repository and download Celeste for $9.99. This app enables users to send and receive images, contacts, music, iBooks and just about anything else (using iFile, which is also available on Cydia). But unlike the “approved” options, this one allows files to be transferred between iOS devices and between an iOS device and any other Bluetooth device that supports OBEX (OBject EXchange) transfer capability.
Perhaps the best solution is Bump. It’s a free app, and it allows iOS devices to share contacts and photos. Your iPhone can also easily transfer contacts and photos to a Mac or PC by having your computer visit http://bu.mp on a web browser. Be aware, however, that photos you take with your iPhone won’t be transferred across as full-resolution; they’re scaled down a bit to make the transfers quicker. If you need the full-res version, you’ll still need to transfer that via iPhoto.
Summary
The iPhone’s wireless functionality doesn’t stop with AirPlay. Given just how adept it is at creating and viewing content, tweaking it for an optimal wireless printing experience is a great place to jump in. Once you’ve had a taste of just how much is possible without wires holding you back, the possibilities are then only limited by the imagination of the developers pushing apps into the App Store.
Tapping into AirPrint (or just tricking your existing printer into believing that it’s compatible) is a great start, but syncing files without a USB cable is where the real magic begins. Keeping the Wi-Fi Sync to yourself just seems rude. Device-to-device transfers are possible through both Wi-Fi and Bluetooth, although the speed and ubiquity of the former is making the latter less of a go-to solution. There’s an entire stash of cloud-based apps designed to make hosting and viewing files a cinch, but I’ve shown a few tricks that’ll allow you to edit things on your iPhone, too.