
PART IV
Becoming a Digital Genius
- Chapter 13 Utilizing the iPhone’s Camera
- Chapter 14 Utilizing Your Personal Assistant: Siri
- Chapter 15 Social Networking Savvy
- Chapter 16 iCloud, the Cloud, and iTunes Match
- Chapter 17 Ace Accessories
- Chapter 18 Jailbreaking and Troubleshooting
Chapter 13
Utilizing the iPhone’s Camera
In This Chapter
- Understanding camera jargon
- Digging into the settings
- Touching up your photos
- Replacing your point-and-shoot
- Taking advantage of geotagging
- Sharing your photos
Apple’s iPhone range has set the bar for phone cameras. Apple’s phone is oftentimes cited as the most popular camera in global photo sharing sites like Flickr, and for good reason. Not only is the best camera the one you have on you (and in the case of the iPhone, it’s the one you’ll almost always have on you), but Apple has also gone the extra mile to ensure that its sensors are second to none. Particularly with the iPhone 4S and iPhone 5, Apple has created a smartphone camera that produces stunning pictures in terms of sharpness and quality. Natural limitations exist, but there’s a reason many people are leaving their point-and-shoot cameras at home in favor of the iPhone. This chapter dives into the particulars for making the most of your phone’s shooter.
Speaking the Camera’s Language
Not surprisingly, Apple makes using the iPhone’s camera quite simple. Point and tap, or point and click if you’re using the Volume Up button as the shutter depression mechanism. But understanding some of the basics of photography goes a long way to ensuring that your photos look their very best. (And in the event that they don’t, you’ll know how to correct it.)
- Shutter lag—Occasionally, your iPhone will be too busy to capture a photo exactly when you want it to, and you may have to wait up to a full second between the time you push the button and when your phone captures the picture. The 4S and 5 are much quicker, but sometimes you just need patience.
- Lighting—Bright, natural lighting leads to the best shots. If you’re looking to avoid harsh shadows, try to shoot in the day with clouds overhead. At night, expect added blur or grain unless you add a flash.
- Aperture—You can’t tweak the aperture on the iPhone, but in general, the closer your f-stop (aperture) is to zero, the less light a camera needs to take a blur-free image.
- Bokeh—Ever taken a picture where the foreground is sharp and the background is blissfully blurred? That effect is called bokeh. You can encourage this behavior by getting your iPhone dangerously close to the subject (but not too close—it won’t focus at all!).
- ISO—Sadly, Apple won’t let you adjust this either. In general, however, a higher ISO enables you to take more crisp images at night, albeit with increased grain and noise as the ISO figure climbs higher.
- HDR—Apple’s built-in HDR mode grabs a couple of shots at different exposures and overlays them on top of one another for a fairly edgy result. Generally speaking, these images “pop” more than standard images.
- Panorama—It’s a built-in mode within iOS 6 that works on the iPhone 4S and 5, but in general, it’s the art of taking several images as you pan around, and having them stitched together for one massively wide photo.
Understanding the Camera’s Settings
Apple’s built-in Camera application pales in comparison to apps available on Android. It’s a bit strange that Apple equips its phones with such amazing sensors, but so severely limits your control over them. You can’t tweak the ISO, shutter speed, or aperture within the Camera application. All you can do is turn the flash on or off (or set it to Auto), and flip the viewfinder so that it takes a photo with the front-facing camera.
It’s worth noting that there’s a wonderful shortcut to accessing the camera in iOS. After you press your Home button or Power button and pulled up the lock screen, just slide the camera icon in the lower-right corner up (seen in Figure 13-1). It’ll peel back the lock screen and reveal the camera. Note that this works even if you haven’t entered your four-digit access PIN, but you can’t do anything after capture without that code. Apple included this so that users who lock their phones won’t miss crucial shots while fiddling with an unlock PIN.
Figure 13-1: Slide up to reveal the camera.
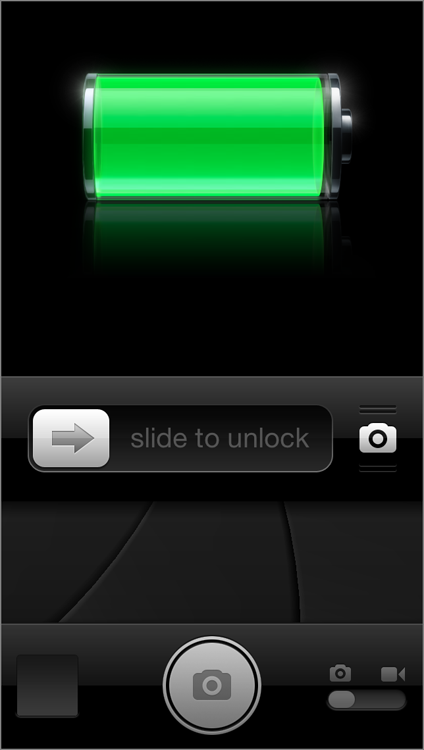
You’ll also notice a slider once you’re in the application; to the left, it acts as a camera. If you flip it to the right, it records video. That small thumbnail icon in the lower left will take you directly to your photo gallery, where you can flick through images that you’ve taken in the past.
Generally, the iPhone does a fairly decent job of determining the focal point of the shot. But every so often, you might want to tell it specifically what to focus on. Thankfully, that’s as simple as framing the shot, and then tapping your screen at the point where you want your camera to focus (and in turn, how you want it exposed). From there, you can tap the onscreen shutter button to capture the image, or press the Volume Up button along the phone’s edge.
The video mode is exceedingly simple to use. Once you flip the lower toggle from still to video, your onscreen shutter icon will switch to a more familiar red record button. Tap that once, and you’ll see a timer begin to count; tap it again, and it’ll stop recording and save the video in the Photos app. Curiously, Apple doesn’t have a way to easily sort through videos and still images in the Photos app. You’ll just notice a small camcorder icon in each video thumbnail.
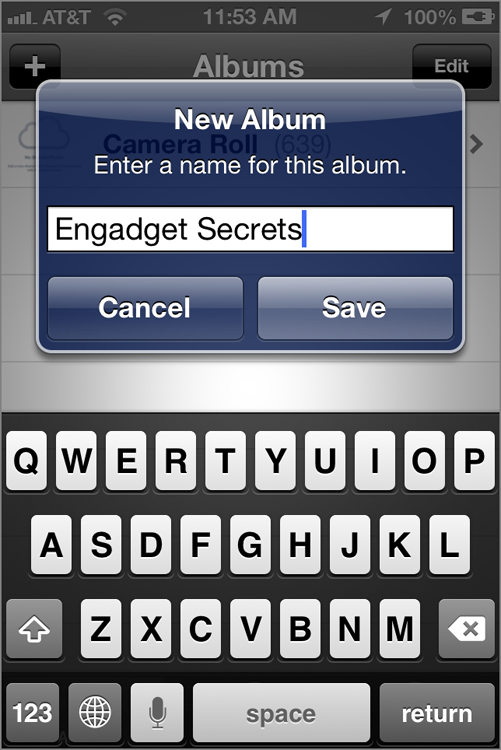
Notice in the Photos app that things are sorted by albums by default. If you’ve synced any albums over using iTunes, they show up here. The images you take on your phone are automatically filed in the Camera Roll album. In order to generate a new album on your iPhone, just tap Edit while in Albums view, then tap Add and give the new album a name (see Figure 13-2). It’s generally more tedious than just organizing photos into albums on iPhoto and then syncing over, but at least you have this option when you’re on the run.
Figure 13-2: Go ahead, add a new album. Or three. Or more!
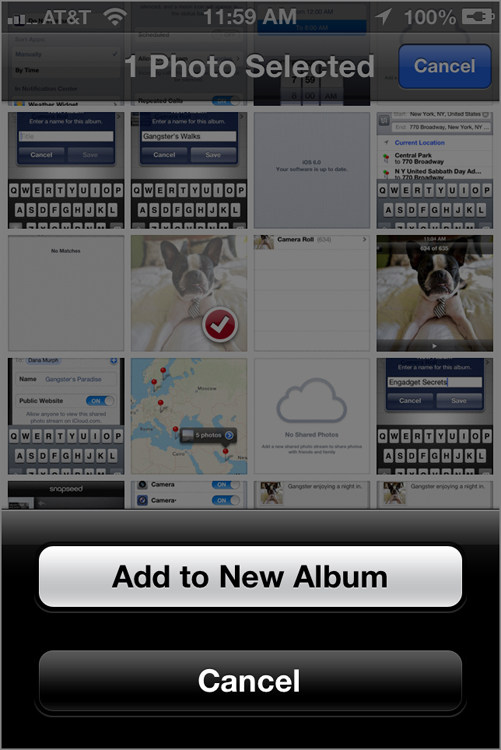
To move photos from the Camera Roll to a new album, just hop into Camera Roll, tap Edit, and select the photo(s) you want moved. Then, tap Add To and select an album that you’ve created (shown in Figure 13-3).
Figure 13-3: Organizing your photos is worth the effort. Trust me.
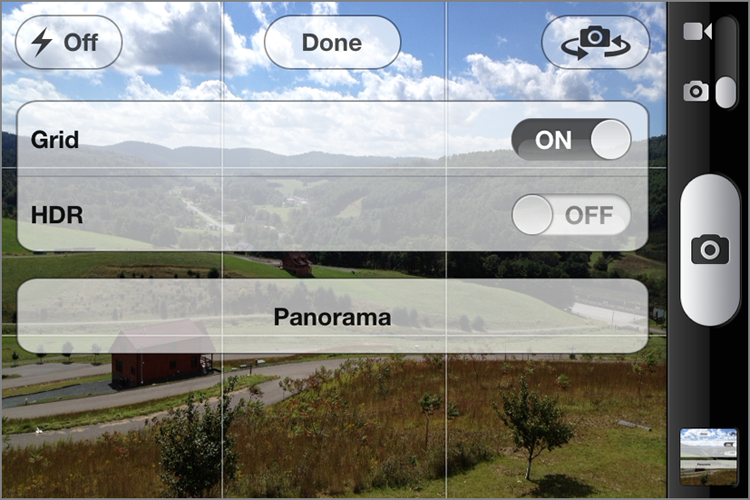
Available exclusively on the iPhone 5 (which ships with iOS 6) and iPhone 4S (which can be updated for free to iOS 6) is Apple’s Panorama mode. To select it, visit the Options bubble while in the Camera app, and tap the Panorama icon (shown in Figure 13-4). Unlike most panorama apps, this one allows you to hold your phone vertically as you pan it; obviously, you’ll want to try to hold it as steady as possible, but the results I’ve seen are really impressive. If you’re using an older iPhone, download the free Photosynth app to take your own panoramic photos. (Don’t tell anyone it’s made by archrival Microsoft, though!)
Figure 13-4: Life just looks better when viewed panoramically.
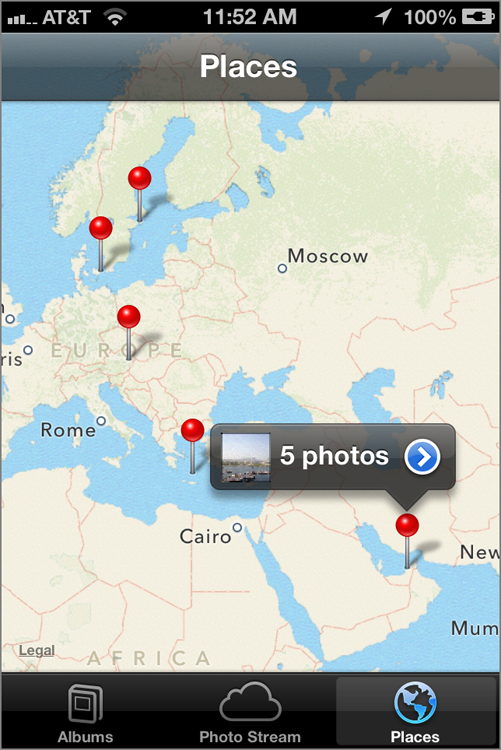
Another nifty way to view your photos is Places, which is a tab found to the right of Albums within the Photos app. If you’ve enabled geotagging on your phone, photos will populate on maps based on the location that they were taken, as seen in Figure 13-5. Instagram has also added a similar photo-map feature in its latest build.
Figure 13-5: Ah, fond memories of travel destinations. And bad ones of bouts with the TSA…
Editing Your Photos
Yes, you can edit photos without having to dump them onto a laptop and fire up Photoshop or Lightroom. I can’t promise that your results will be as stunning, but most iPhone users want to quickly add a bit of tender, loving care to a photo, save it, and upload it to a social network. If you want to take more time, the best way to offload full-resolution images from your iPhone is to connect it to your computer, load iPhoto, and drag photos into an album. If you e-mail a photo, it is a compressed version of the image.
You have a few free options. Facebook’s Camera application has some built-in editing tools (as well as seamless integration with the Facebook app), and Instagram’s well-known filter selection is there as well. Of note, it’s possible to use Instagram just to tweak photos and save the result to your Camera Roll; you don’t necessarily have to upload your works of art to its social sharing network.
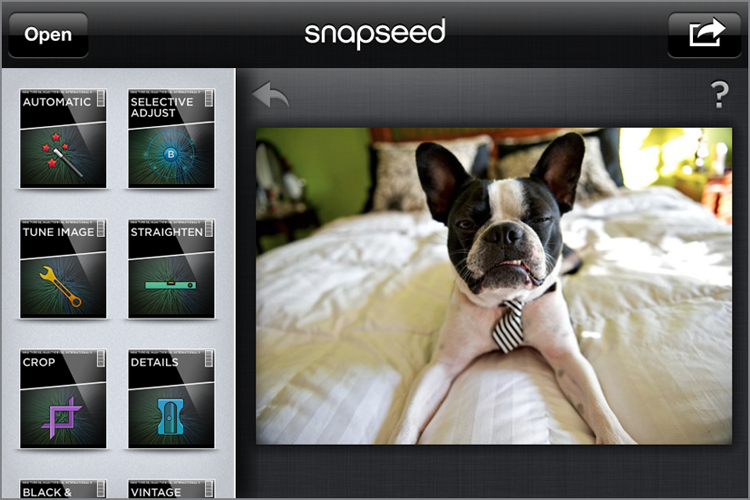
I recommend a $4.99 download of Snapseed, shown in Figure 13-6. It’s a beautifully designed, easy-to-use editing app that does a fantastic job of using gestures to make your photos look genuinely superior. The app’s parent company was recently purchased by Google, so it remains to be seen how much longer iOS development will continue. I have a hunch that most of the Snapseed improvements from here on out will impact Android first and iOS second.
Figure 13-6: Snapseed makes it quick and enjoyable to spruce up your shots.
Ditching Your Point-and-Shoot Camera
There’s a lot of truth to the adage of the best camera being the one that’s accessible. The quality of iPhone images has become so good that many people think there’s really no need to carry a conventional point-and-shoot camera anymore. Yes, a mirror-less alternative or a DSLR still has attractive merits, but the iPhone’s quality and ease-of-use makes it difficult to justify spending $200+ on a typical compact.
The only real drawback to relying solely on your iPhone as your only camera is this—the zoom. Yes, the iPhone has digital zoom, but the results are awful. Without an optical zoom, or a lens that physically moves to zoom, you’re left only with the ability to take very wide shots. This might not impact you, but it’s something to consider. Furthermore, those who shoot routinely on their iPhone may want to invest in a 64GB model. Don’t underestimate just how much space thousands of photos and videos can take up. Because there’s no storage expansion slot on the iPhone, there’s no way to add extra space once it’s filled up.
Geotagging Your Photos
As someone who adores travel (yes, even the frequent headaches that come along with it), I have a particular love for geotagging. In short, geotagging is a process by which a camera looks at your GPS information, and then stamps that data onto the image that you’ve taken. In other words, a shot taken at the Statue of Liberty includes your exact longitude and latitude coordinates stamped on the metadata of the image, so that you can look at the photo years later and remember exactly where you were when you snapped it. Yes, it’s nerdy, but it’s also a fantastic way to journal your trips by location over the years.
So long as you’re outdoors, have a solid 3G or 4G data connection, and have GPS enabled in your Settings, the Camera app will attempt to find a GPS fix fast enough to associate your location with your image automatically. Moreover, those who use Foursquare, Facebook Camera, or Instagram can use the location features in those apps to tag photos with a locale or landmark. Again, this might seem frivolous in the here and now, but over the course of many years, it’s really impressive to look back and see where your life has taken you by way of geotagged images.
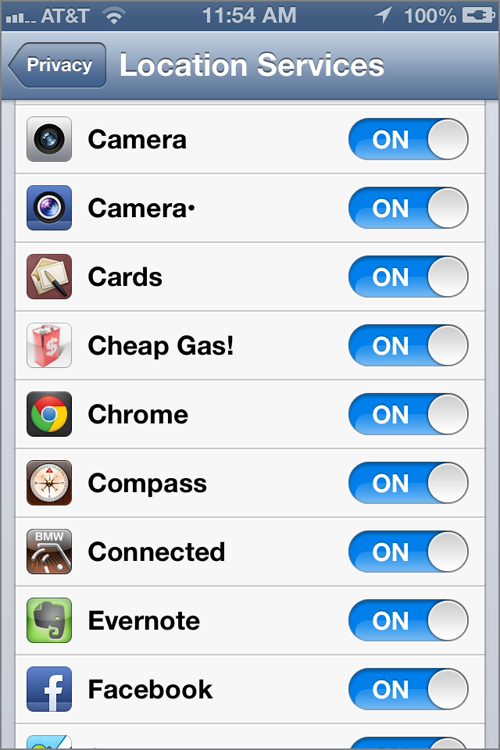
To ensure that you have Location Services enabled for your geotagging apps, go to Settings Location Services and flip the toggle to On (shown in Figure 13-7). Then, make sure that Camera, Facebook, Foursquare, and any other photo-related app you use has its own toggle flipped to On.
Figure 13-7: Keep Location Services on for photo-related apps if you want to geotag your shots.
Sharing Is Caring
As I alluded to earlier, sharing is a huge part of taking a video or photo on the iPhone. Whereas most apps—including Twitter, Facebook, Foursquare, and Instagram—allow you to open the camera from within the app itself, I recommend a different approach. I generally start all of my photo expeditions from within Camera. That way, I know for sure I have a copy of the photo in my Camera Roll album that I can find and tinker with however I see fit. It gives me more control over what happens to my images.
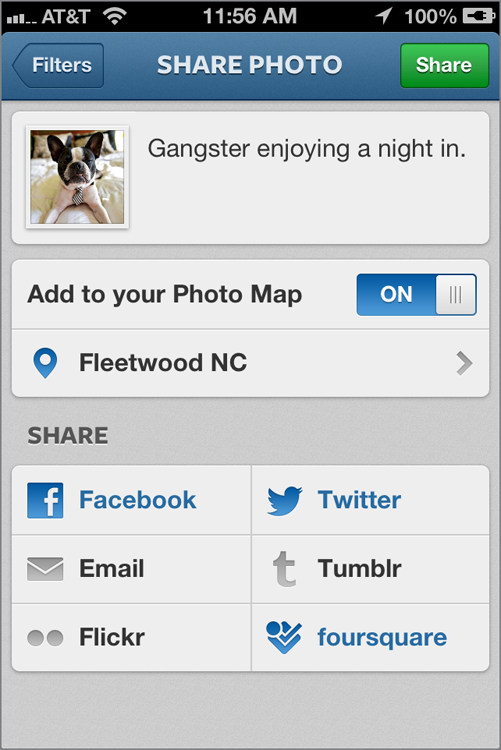
Then, I open my sharing app of choice, and pick the photo from my Camera Roll. It’s possible to start with Instagram, and have that app linked to your Facebook, Foursquare, and Twitter accounts. In other words, you can share a photo on Instagram, and also have that app push your share to three other social networks—pretty handy, no? I’ve found Instagram to be the most platform-agnostic app out there, as it’s the only major sharing app that has no qualms whatsoever playing nice with the others. Have a look at how the multi-platform sharing works in Figure 13-8.
Figure 13-8: Instagram shares with everyone. What a well-mannered app.
Thanks to iCloud, sharing has also taken on a different life with iOS itself. Photo Stream, if you have it enabled, allows any photo you take to automatically be uploaded to your photo galleries on other iCloud-enabled products. So, a shot taken on your iPhone 5 will automatically appear on your iPad and Mac back home, so long as they’re all logged into your personal iCloud account. Unfortunately, Photo Stream works only with your most recent 1,000 photos, so don’t rely on this as a permanent sharing/storage solution.
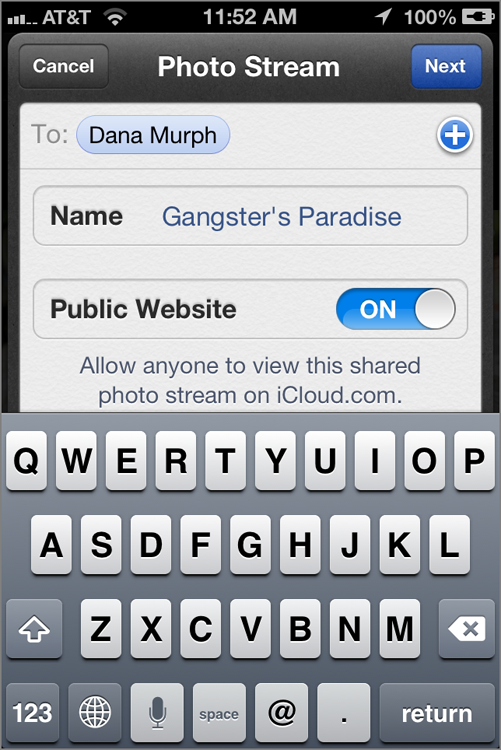
Shared Photo Streams are perhaps even more enjoyable. Here, you simply select the Shared Photo Streams tab within the Photos app (seen in Figure 13-9), select the images you want shared, and then input the people that you want to share them with. They’ll even get a standard URL, enabling them to open the folder in any web browser, regardless of platform.
Figure 13-9: Share your Photo Streams, won’t you?
Summary
There’s no question that the iPhone is a formidable camera, and it’s being used in place of point-and-shoot cameras already. You’ll miss out on the zoom capabilities, but I recommend using the iPhone to complement a mirror-less or DSLR camera. Apple has also limited the amount of tweaking you can do with the Camera app, but thankfully, the App Store has plenty of software to make editing fun and easy.
Programs like iPhoto, iMovie, Lightroom, and Snapseed should be in any photographer’s toolkit, and those who fancy sharing will want to download Instagram, Foursquare, and Facebook, or utilize Shared Photo Streams. Geotagging is also an art that’s coming of age, enabling users to tag pinpoint locations to specific photos. Years down the road, you’ll enjoy looking back at where life took you by way of photos.