
Chapter 18
Jailbreaking and Troubleshooting
In This Chapter
- Jailbreaking and its consequences
- Working in recovery mode
- Tapping into DFU mode
- Weighing your repair options
Ask twenty people, and you’re bound to find one who swears up and down that Apple products simply never have issues. “That’s a Windows thing,” they’ll say. Candidly, Windows has garnered that reputation for a reason, but Apple has most certainly not earned a gold star in Never Failing 101. In my experience, Apple products have failed (and even faltered) less frequently than their Windows-based counterparts, although I suspect much of that is due to the overwhelming amount of malware that targets the operating system with the lion’s share of users. It’s rare for serious problems to arise on the iPhone, but to say problems are nonexistent would be fibbing. In this chapter, I walk through some of the most common issues, as well as how to get around them, through them, or over them. I also discuss recovery and DFU (Device Firmware Upgrade) modes (useful for getting yourself out of binds). But first, I look at the murky, innovative world of jailbreaking—an action not smiled upon by Apple, but one that can be remarkably enlightening if done with precaution and care.
Jailbreaking Your iPhone
The mere mention of the word sends shudders down the spines of those who’ve been burnt by hacks gone wrong before, and to many others, it just sounds illegal. Perhaps it’s the unadulterated use of the word “jail,” or maybe it’s the allusion to something going wrong—“breaking.” Either way, it’s a choice word used to describe an admittedly dangerous technique that gives the end user an unprecedented amount of access to an operating system that ships with extremely rigid rules from the factory.
As it stands, an iPhone can only run programs that are deemed fit and not harmful by Apple. There’s precisely one place to download an app, and that’s Apple’s own App Store. On one hand, it oozes simplicity. On the other, it makes the pondering users wonder what all they are missing. Turns out, there are a smattering of other app stores in existence—none of which are approved (or even publicly recognized) by the folks in Cupertino. You may feel dirty even reading into this as far as you have, but fret not; under the Digital Millennium Copyright Act, jailbreaking Apple devices is legal in the United States, but Apple makes it crystal clear that doing so will void your iPhone’s warranty.
Why Even Bother Jailbreaking?
It’s a question I get often: “What do I gain from jailbreaking? Is it worth it? Why should I risk it? What’s the first thing I should do if I end up going through with it?” The amount of mystery and intrigue surrounding the art of jailbreaking is actually quite impressive. Almost everyone who owns an iOS device has at least heard casual mention of it, but only the brave dare open up the browser and Google for more information on it.
The reality is quite different from the common line that you’ll hear. Much like the term “hacking” gets a sour reputation, there are a great number of positive, helpful things that iPhone owners can do by jailbreaking. Beyond the whole “additional access to apps” thing—which I dive into shortly—one of the primary reasons for jailbreaking is to unlock iPhone handsets for use on any carrier worldwide. In fact, that tidbit alone was monumental in keeping jailbreaking legal. U.S. carriers in particular have a knack for selling iPhone handsets that are locked to their network; in other words, if you insert a SIM for any other carrier, it simply won’t work. Amazingly, Verizon’s iPhone 5 is being sold unlocked, even with new on-contract customers, so those who purchase that model can pop a different SIM in (if you’re traveling overseas, for example) and cruise along on the local network.
Beyond all the wireless network talk, there’s a very real (and growing) desire to access more applications than the ones Apple lets through its doors. Programmers are capable of producing applications that do more complex tasks than Apple allows. But if an app submitted to the App Store violates any of the company’s polices—however questionable those policies may be— that app is rejected by the company. The bubbling desire to truly unlock the potential of Apple’s iOS devices (the iPhone included) has helped spur a litany of applications that aren’t welcome in the App Store. But they’re more than welcome in a place called Cydia.
Cydia acts as a tool to search for and install applications that are stored in a great many repositories. All of these, of course, require a jailbroken device to access. Apps within jailbreaking stores can be free or costly; it’s just another market entirely outside of Apple’s purview. To give you an idea of what you’ll find in Cydia that you won’t find in the actual App Store, consider the MyWi application. It enables jailbroken devices with a 3G/4G radio to share their data signal over Wi-Fi, with no monthly fees raining down from associated carriers. That’s usually all I have to mention before people become emphatically interested in the jailbreaking scene.
To recap, the two primary reasons people take interest in jailbreaking are to free their iPhones from carrier locks—so that they can pop in any SIM card from any carrier and have their phone work—and to have access to a nearly limitless amount of apps without having to wait for Apple’s golden gates to open and allow them onto the official App Store.
What’s the Downside to Jailbreaking?
With every successive release of iOS, Apple seems to make it more and more difficult for jailbreakers to gain access. It’s a cold war, of sorts. Apple knows it can’t stop jailbreaking from a legal standpoint, but it certainly does everything it can to wrap its code in a shatterproof layer. The jailbreaking scene is one that changes and evolves rapidly, with compatibilities changing by the hour some weeks.
The other important tidbit here is the recognition of two major kinds of jailbreaks. There’s tethered, and then there’s untethered. Both give hints at what they are, but neither just come right out and say it. History has shown that the former nearly always comes before the latter, and I’ve also found that patience is not only a virtue at the DMV, but in the world of jailbreaking, too. Tethered jailbreaks are easiest for hackers to accomplish, but you’re forced to have your iPhone plugged into your computer’s USB port for the jailbreak to complete. The first time around, it’s not so bad; the problem arises when your iPhone decides to lock up, freeze, or otherwise go on the fritz while you’re away from your machine.
A tethered jailbreak requires the assistance of a computer to boot up every single time; in other words, if you power down your iPhone and attempt to turn it back on, you’ll be greeted with an unusable product until you can re-tether it to your host computer and try again. If you’re constantly carrying around a notebook computer that you can use to revitalize your jailbroken iPhone should it require a reboot, tethered jailbreaks are worth installing. Otherwise, you are well advised to hold off until the untethered counterpart arises.
That variant, predictably, doesn’t require the assistance of a connected computer in order to start up or reboot. You can simply use your iPhone as you normally do, without fear of rebooting into a “bricked” state.
Okay, So How Do You Do It?
One of the reasons that jailbreaking remains a relatively underground activity is the natural fear that a voided warranty could lead to an unwanted repair bill. But perhaps even more significant is just how difficult it is to understand the process, implement the changes, and track the updates. Although the jailbreaking community is as fervent as ever, the lack of standards has led to a fragmented release schedule, non-uniform labeling, and a situation where there are a couple of leaders instead of one common company overseeing things. The “do as you will” mentality that makes the jailbreaking scene so vibrant and innovative is also a pitfall when it comes to actually understanding it.
There’s an unhealthy amount of jargon surrounding the entire scene, so I do my best to break it down for you.
- Jailbreaking—The art of running a software package to unlock your iPhone for use with unauthorized applications.
- Tethered jailbreak—A jailbreak that requires a host computer to facilitate the iPhone boot process.
- Untethered jailbreak—A jailbreak that doesn’t require a host computer to facilitate the iPhone boot process.
- Cydia (http://cydia.saurik.com)—An app that runs on jailbroken devices; used to find and install unauthorized software packages, including apps, system extensions, and interface tweaks.
- Dev-Team (http://blog.iphone-dev.org)—A few dedicated hackers who you should follow for the latest in jailbreaking news.
- Ultrasn0w—An unlocking program designed by the Dev-Team to break carrier-locked iPhones from their shackles, and enable them to function with international SIM cards.
- Redsn0w—This unlocking program enables jailbreaking in the greater sense, enabling you to install unauthorized apps on your iPhone, iPad, or iPod touch.
When Apple releases a new iOS build, it’s an approved copy that’s been internally tested for quality. However, jailbreak tools are typically released in beta (or alpha) form, and then new builds are released in quick succession after early adopters report back with bugs and issues.
These days, jailbreaks are mostly software-based. That’s to say, users simply download the most recent Redsn0w software package (naming conventions can, and usually do, change over time), plug in their iPhone, and let the software run. Instructions on usage typically arrive either within the software package or on the forum post announcing the new version. You’ll be quickly overwhelmed if you rely on Google to find jailbreaks. There are a few legitimate alternative sites out there that offer jailbreaks for a fee, but I recommend steering clear. Authentic jailbreaks from the Dev-Team are always made available for free and can be found at http://blog.iphone-dev.org. A screenshot of its site can be seen in Figure 18-1.
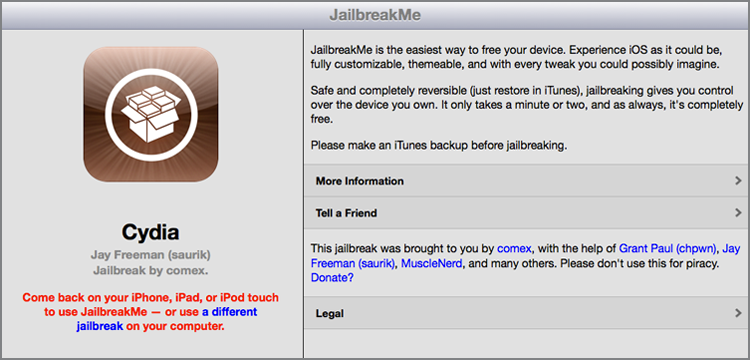
The exception to this rule is JailbreakMe (www.jailbreakme.com), which is shown in Figure 18-2. Designed by @comex, this is a simplistic website that enables iOS devices to surf to it, press a button, and have their product jailbroken. It’s far and away the easiest method, but it also tends to lag behind software jailbreaks in terms of release. If you’re looking for simplicity, though, it’s probably worth waiting for JailbreakMe to be compatible with your product and iOS build.
It should be obvious, but I can’t stress this enough: back up your iPhone to iTunes before applying a jailbreak. If anything goes awry, you can plug your iPhone back into your computer, select the Restore option, allow iTunes to reformat your tablet, reinstall the latest legitimate iOS build, and then restore your backed-up music, apps, documents, and photos. If you forget to back things up (or just opt out), you’ll be stuck starting over if your jailbreak renders your iPhone useless.
Figure 18-1: The Dev-Team’s site isn’t flashy, but it’s chock-full of information.

Figure 18-2: If you have a compatible device, surfing to this site will initiate the jailbreak process.
Furthermore, there may end up being a need for you to lose your jailbreak. It’s not unfathomable to run into sluggish performance (or worse) when heedlessly installing uncertified apps, and while the aforementioned method will “unjailbreak” your iPhone and restore it as it came from the factory, you’ll need that backup if you’re looking to avoid duplicate transfers.
Rather than being a store in and of itself, Cydia is simply a universally accepted tool that provides access to apps and extensions that are hosted elsewhere. You can install new “sources” in Cydia that will search repositories of existing apps, but I confess that most of those are designed to encourage and facilitate piracy. In my mind, jailbreaking should be approached by those who simply want access to creatively and passionately designed apps that—for whatever reason—can’t find a home in the App Store. Given that Apple’s own App Store still functions on jailbroken devices, users should still head there in order to purchase apps that made it in.
The Best Apps for Jailbroken iPhones
If you go through the trouble of jailbreaking your iPhone, be it tethered or untethered, you’ll be selling yourself short if you don’t dive into a bucket of apps that is unavailable to those who are living on the tame side. The options here are even more unlimited than the conventional App Store, but I break down a few of my suggestions here:
- Activator (free)—If you’ve grown frustrated by the limited multitouch gesture support on the iPhone, here’s your extension. It’s a beautifully designed, highly practical tool that enables users to customize what gestures do what, and considering that many jailbreak apps require this to be installed, it’s a good foundation to have around.
- OpenSSH (free)—Tired of moving things around the Apple-approved way? This app enables users to SSH into their iPhone from a computer in order to edit, move, or change files.
- SBSettings (free)—Similar to the settings drop-down menu found on many Android devices, this provides quick-and-easy access to toggling many settings and services. Furthermore, an Activator gesture can be programmed to pull this up, tossing one shortcut on top of another.
- CyDelete (free)—On a non-jailbroken iPhone, if you long-press on an app you’ll see a small X appear over it (Apple’s built-in core apps notwithstanding). Cydia apps lack this feature, but by downloading this app, they’ll gain the easy delete feature.
- Action Menu (free)—It took Apple the better part of eternity to add basic copy and paste functionality to iOS, but the jailbreak community still thinks they can do the company one better. This adds more customizations to handling and moving text, and the (worthwhile) $2.99 Action Menu Plus Pack adds six more actions, including History, Lookup, and the option to instantly tweet text you’ve selected.
- QuickGoogle (free)—If you have Activator installed, just assign a single gesture to bring up a box, which allows you to type in any search term and have it immediately sent to Google.
- Infiniapps ($0.99 each)—This suite of apps allows mega multitaskers to shove as many apps as they want into a folder, as many apps as they want into the Dock, and for icons to be placed vertically as well as horizontally.
To say that this is just the tip of the iceberg would be understating things tremendously. The amount of customizations available in the Cydia app store is staggering, and the only way to truly stay on top of what’s out there is to follow the beat in related forums and message boards. I recommend heading to iMore.com, ModMyi.com, iPhoneForums.net, MacRumors.com, iPhoneHelp.com, and iFans.com. These sites provide active, informative user forums, and most of them also provide frequently updated tips, tricks, and hacks related to the iPhone and iOS as a whole.
A Look at Recovery Mode
Recovery mode is a completely natural mode of operation for the iPhone. Although the title could lead you to believe that it’s reserved for situations where your iPhone is in a real pickle, it’s actually the state the iPhone slips into whenever a user initiates a standard iOS upgrade or restore.
Every so often, however, Recovery mode decides to take on a life of its own. While uncommon, I’ve seen iPhones continually restart but never display the Home screen. In the case of an update or restoration being cut short by a yanked cable, a power outage, or a computer freeze, your iPhone may sink into a deep sleep that it simply can’t exit. If you’re looking to force your seemingly bricked iPhone into a workable Recovery mode, you can follow these steps:
Remember, when using recovery mode, you can only restore the iPhone. All user content will be erased, but if you had previously synced with iTunes on your computer, you can restore from a previous backup—that’ll bring your multimedia, contacts, documents, and so on, back to where they belong. If you still need assistance, give this article a peek: http://support.apple.com/kb/TS1538.
A Look at DFU (Device Firmware Update) Mode
To put it bluntly, DFU is Recovery mode on steroids. It’s the next level of recovery, with the primary difference being the ability to interface with iTunes without loading the iPhone operating system or boot loader. Technobabble got you down? Look at it this way—entering DFU mode enables you to override Apple’s mandate that the latest official iOS build be the one applied within iTunes. Recovery mode will allow an iPhone to have the same iOS build reinstalled, or it will allow a newer official build to be applied (such as going from iOS 5.0 to iOS 5.0.1). With DFU mode, users can change the firmware in either direction, enabling an iPhone running iOS 5.0.1 to be downgraded to iOS 5.0.
Rather than just using the most recent build at iTunes, you can manually choose an .ipsw file saved to your computer by pressing the Alt/Option key while clicking the Restore button in iTunes. There are myriad reasons why you might want to manually choose an iOS version to install on your iPhone. In some cases, new iOS builds kill compatibility with iOS-friendly car audio interfaces. Perhaps you want to manually install an iOS beta before you’re actually supposed to. On occasion, new iOS builds will break compatibility with select apps. And of course, if you accidentally let your jailbroken iPhone update to the newest official iOS build, your jailbreak—and all its associated apps—will be obliterated.
If you place your iPhone into DFU mode, you can install any firmware you want, provided that you have two things. First, you need the desired .ipsw file, which can be downloaded at www.felixbruns.de/iPod/firmware. Second, you need the version of iTunes that was released when the matching iOS build was released. A fantastic archive of old iTunes versions can be found here: www.oldapps.com/itunes.php.
But here’s the thing—you can’t easily put two iTunes versions on a single machine. The libraries will conflict, your playlists could be overwritten, and in general, I just don’t recommend trying it. Whenever I need to downgrade with an older version of iTunes, I use an older PC that I keep around for hacking tasks such as these. If you have a spare machine, I highly recommend using it.
Furthermore, you need saved SHSH blobs from an old iOS version in order to install that old version on an iPhone. With that, you also need to bypass Apple’s firmware signing security model, which is the final hurdle to getting an iOS build to function with iTunes. An entire how-to guide that explains the ins and outs of SHSH blobs can be found here: www.ijailbreak.com/how-to-save-shsh-blobs.
If you’re looking to install a very specific firmware/iOS build on your iPhone, or otherwise gain access to portions of the iPhone that are generally locked down, DFU mode is your access point. Be warned, however, that modifying files on your iPhone could indeed result in a bricked device. And if it’s bricked, no Apple warranty will apply.
Taking Your iPhone in for Service
If you steer clear of jailbreaking, iPhones are generally reliable. Of course, as with any monolithic consumer electronics company, problems can and do arise. Dealing with Apple’s phone support (www.apple.com/contact) is like dealing with anyone’s phone support; it’s not exactly something anyone wakes up looking forward to. But unlike most rival companies, Apple has a massive advantage when it comes to customer support: Apple Stores and Apple Specialist resellers.
If you’re within driving distance of an Apple Store, your best bet is to set up a Genius Bar appointment. Each Apple Store has a Genius Bar stocked with trained employees who do nothing but service Macs, iPhones, and other Apple products. They aren’t there to sell you product protection plans you’ll never need or a set of orange headphones that your son “would just love”—they’re there to fix your gear, period.
Best of all, it’s absolutely free to make a Genius Bar appointment. Yes, free. Even if your product is out of warranty. Most people find this arrangement truly unfathomable, but by placing trained professionals in front of Apple customers at no charge, the company has created a significant competitive advantage that I’ve yet to see a rival match.
There’s no need to pick up the phone to make an appointment. Just point your web browser to www.apple.com/retail/geniusbar, select the locale nearest you, and choose an available date and time for your appointment. A few clicks later, you’ll have an e-mail confirmation and the ability to change or modify it at any time prior. I advise arriving around 10 minutes early on your appointment day, but be prepared to wait another half hour beyond your scheduled time. They aren’t late often, but I’ve seen it happen.
You should also make every effort to bring everything remotely related to your issue. Bring your iPhone, your charger, a USB cable, any accessories that were giving you issues, and even your computer that you use to sync it with (assuming it’s portable enough to make the trip). The more devices you bring, the more likely the experts will be to solve what’s ailing your poor iPhone. If the problem isn’t abuse, and your iPhone’s under warranty, you can have it fixed either on the spot or in-store, depending on how serious the issue is. Even when it costs, the Genius will walk you through everything before providing you with an estimate—all for free.
Summary
Apple deliberately kept a lot of doors closed in iOS and iTunes, perhaps trying to improve the overall experience for the masses and prevent too much tinkering. That tinkering, however, can lead to all sorts of beautifully innovative apps and extensions, all of which can be found and utilized on a jailbroken iPhone. Tapping into Cydia will allow new potential to be unlocked on your device, but it also opens it for malware and unoptimized applications to mar the experience.
Dipping your toes into the jailbreaking world while being prudent of what you consume is something that I highly recommend, but only for users who are well-versed in backups and not averse to having to restore their iPhone in case things go awry. There’s a certain level of risk associated with deviating from Apple’s predefined iOS path, but as with most risk, it brings great reward.
In case something goes south, you have options for getting back on track. Understanding Apple’s Recovery and DFU modes is vital to keeping your nerves calm and your iPhone in service. For times when you just need to see the expert, Apple’s envious Genius Bar and network of authorized Apple Specialists are there to investigate and solve your issues.