
4 Camcorder: track selection and magnetic recording
Track selection
Once the audio feed/s have been plugged into the recorder, you must select the correct type for each track. Unfortunately, each model seems to have a layout and labelling system peculiar to itself, hence the need to refer to the appropriate manufacturer's handbook!
The camcorder record section may have a two-, three- or four-position switch, to select between on-camera mic, external/rear inputs, and possibly an onboard radio mic receiver or other facility specific to that model. You can, however, only switch the external input from channel one to track one of your recorder, and similarly the input from channel two to track two. In other words, via the camcorder switching you cannot select an input from one of the channels to both sound tracks on the recorder. The only facility that you can select to either (or both) tracks is the on-camera mic (see below) via the camcorder switching.
Mic and line level
There are usually two positions associated with ‘rear’, mic level and line level (Figure 4.1) for each track. The difference between mic and line level is normally in the region of 60 dB, that is mic level needs to be raised (amplified) 60 dB to bring it up to line level. This level of amplification is two to the power of ten, in other words the signal is amplified by a factor of (just over) a thousand.
If you're feeding a mic input, when you select ‘mic’ you may also need to select phantom power. Select line if you've plugged a separate source such as the feed from a PA desk, or a mixer. (A mic feed is relatively unamplified, whereas mixers and PA are amplified. If you incorrectly switch your rear inputs, you'll either be unable to hear anything – mic input selected at line level, or severe overload/distortion – 210 – line level selected to mic level.)
On camera mic
This may be labelled ‘front’ or ‘cam’ on the selector switch (Figure 4.2). On broadcast models, it will almost certainly be automatically phantom powered when this position is selected. It may also be plugged via a short cable to an XLR socket on the camera body (Figure 4.3). This allows a degree of flexibility, for instance easy replacement of a faulty microphone (as it's a somewhat vulnerable position in which to site one), or the use of an alternative microphone in this position, or cabling another microphone directly to this socket (so long as you maintain the camera mic selected). But if you do plug another microphone to this socket (Figure 4.4) it will then automatically have phantom power along the cable.
Therefore, if you wish to use a dynamic mic in this configuration, check its output very carefully, as it might generate an unwanted hum on the track (the faulty cable/wiring syndrome mentioned above). It does not require phantom power, and it's unlikely that you can easily remove the phantom powering from the channel.
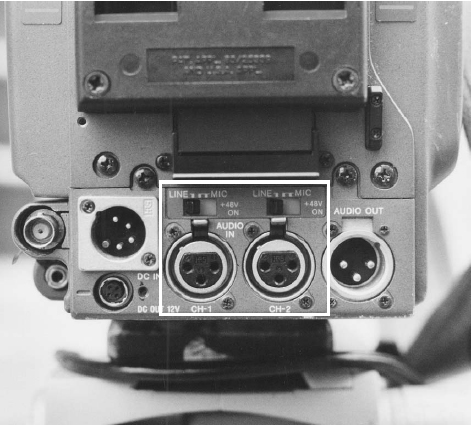
Figure 4.1 Mic/line level selection on camcorder rear panel (combined with phantom power option)
If, however, the microphone is part of the viewfinder housing, or a cable runs from the microphone into the camera body without an obvious plug/socket, then the options listed above are not open to you.
Magnetic recording
To date, the majority of camcorders use tape cassettes for recording. Disc based recording is still in its infancy, but is configured along the same lines as disc recording in computers. Moreover, in modern camcorders, the audio and video signals are digitized, so the recording no longer comprises pictures and sound but digital data, irrespective of the medium. In addition, there are also mixers incorporating hard disc recorders for use on location (see Section 22, Sound recordist operation: mixer).
Cassette
The most common system for recording is still the video tape cassette. The tape from the cassette is wrapped around the head drum, and whilst it traverses the drum, the drum spins, such that the recording heads lay down ‘stripes’ of data on the tape. In analogue systems, the main audio is recorded on separate linear tracks, whilst in digital systems it is more often recorded in the ‘stripes’ laid down by the head drum.
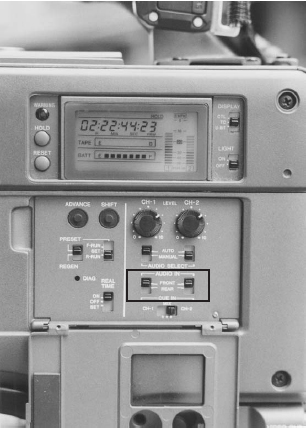
Figure 4.2 Front (on camera) or rear (XLR input) selection for each channel on camcorder side panel
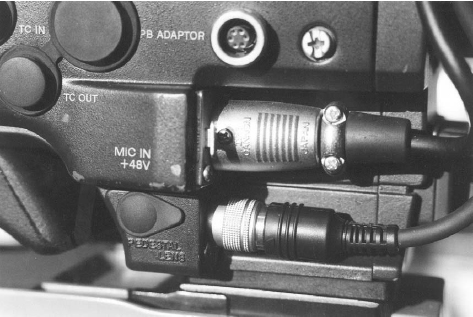
Figure 4.3 XLR connector (with phantom power) for on camera mic
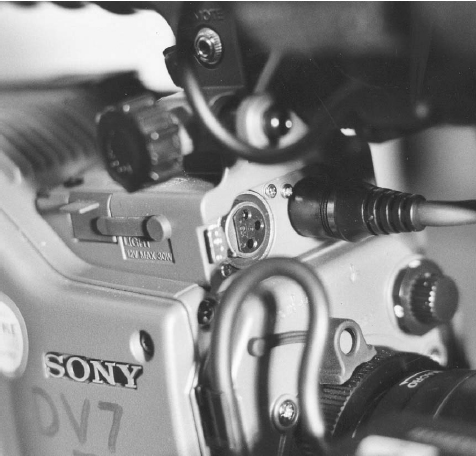
Figure 4.4 XLR socket on camcorder body for mic (usually the camera mic, but you can use it for any mic level input, although phantom power will remain routed via this input)
Do not use the first section of a tape cassette (10–15 seconds) for programme material as tensioning instability may be present. If you do so, you may find that this part of the tape does not produce usable results. Always record a minimum of 30 seconds of line up signal, or, if pushed for time, spool into the cassette before beginning to record your (valuable!) programme material. See also Section 21, Single person operation: shooting; Cassette handling.
Head cleaning
Whatever your recording medium, to maintain sound (and picture!) quality, plus ensuring timecode stability, all recording heads should be cleaned in accordance with manufacturers’ directions. On location with today's camcorders, this means you should be using the approved head cleaning cassette.