
7 Camcorder: external facilities
Sound monitoring
Most camcorders have a small loudspeaker, usually sited on the side panel to be adjacent to the operator's ear when the camcorder is being used hand-held (i.e. on the shoulder). Close to the loudspeaker is an associated volume control (normally labelled monitor), and there may also be another volume control beside this labelled alarm (Figure 7.1). When headphones are plugged into the jack socket (Figure 7.2), the sound feed to the loudspeaker is cut. The volume control/s now affects the level fed to the headphones via the jack socket. There may also be a switch to select either one of two sound feeds (PB or EE) for the loudspeaker/headphone monitoring.
These monitoring controls do not affect the record level, but you must set them at the beginning of the day so that, via your headphones, you may accurately judge the subsequent recorded levels and ensure the consistency of your work (see Headphone monitoring volume control below, and also Sections 12 and 13, Mics: practical listening exercises). Before adjusting your sound levels, you may have to check the position of the front camera operational panel, to ensure the camera's St/by (or VTR) mode is selected.
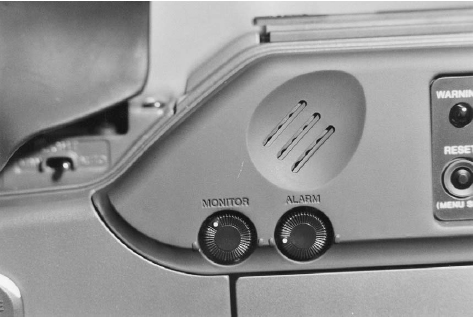
Figure 7.1 Monitor and alarm volume controls sited below the camcorder's onboard loudspeaker. When headphones are plugged into the camcorder the feed to the loudspeaker is cut and these rotary faders then adjust the headphone volume. Unplugging the headphones restores the feed to the loudspeaker
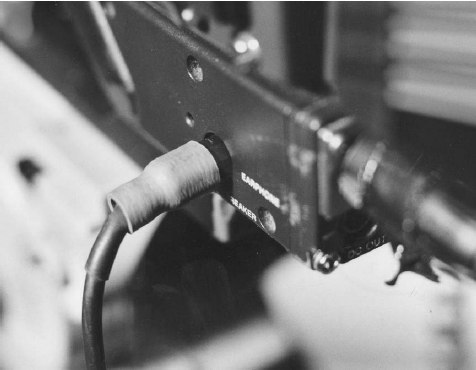
Figure 7.2 Headphones plugged into mini-jack socket on camcorder body
Noise on monitoring circuit
Since your only guide to the quality of the our only guide to the quality of the sound you record is via the monitor circuit, you will naturally take great care whilst listening to it to ensure that there is no appreciable interference or other undue noise discernable. However, it is possible for this circuitry to develop a fault, for example an intermittent earth connection, which can generate a hum or buzz which is easily heard on your headphones. Worse still, if you record and replay the tape in the camcorder, the noise is still present, although it is only in the monitoring circuit, and not actually on the tape.
On location, the only way to check that this fault has occurred is to carry a test tape (see also Section 34, Pre-location equipment check; Test tape) which you know has a perfect signal. Put it in the camcorder and see if the noise is now present on replay. If it is, you can be reasonably confident that it is only the monitoring circuit which has the fault, and that the recording is clean. But make a note on the cassette labels that the results should be carefully checked for unwarranted noise. Ensure the camcorder is thoroughly checked before its next operational assignment.
Playback or E to E
Some broadcast camcorders give you a choice of monitoring sound off tape (playback, PB) or E to E (prior to recording on tape) (Figure 7.3). Monitoring PB ensures a certain amount of confidence in the recorded sound, but it's delayed by roughly a quarter of a second, thus rendering it almost unintelligible, especially as you can probably hear the direct speech as well in most working environments. Worse still, if it has been Dolby encoded, and you're hearing an undecoded replay, the quality will seem overly ‘brilliant’ – bright and compressed. (This is the case for in-camera review/replay from Beta SP camcorders – also note – with the recorder correctly lined up, the PB level is higher than the recorded level, when monitoring locally, and can thus give you a false impression of your sound levels.) Most recordists opt to use EE monitoring, the sound that is about to be recorded, but it is advisable to check the off-tape recording at every break.
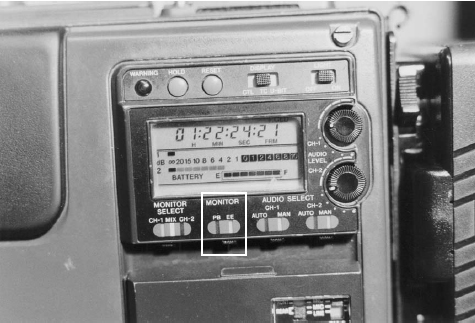
Figure 7.3 Playback/EE selection switch for monitoring
Headphone monitoring volume control
I haven't yet seen one that is adequately protected from accidental knocks or tweaks (Figure 7.1), and you must check its position regularly. Set it at the beginning of the day (before you go on location) so that you're monitoring your sound at a comfortable/practical level, and make a note of its position (not the same for all headphones, as their impedance varies from one model to another). Since you're reliant on your headphones to consistently monitor sound levels, you must be vigilant that this control is not altered, unless the ambient noise level intensifies significantly on location.
However, you must also ensure that the level at which you are monitoring does not become audible to anyone else on location, in other words, you don't want any ‘sound leakage’ emanating from your headphones. Quite apart from the danger inherent in the risk of damage to your hearing if you listen at too high a level for a protracted period, you also run the risk of unnerving the contributors if they can hear any external ‘noises off’.
Alarm
Most broadcast cameras have an alarm function which flashes the red cue (tally) light, and sends an intermittent tone in sync with the flashes, to the monitoring chain. Thus, if the associated volume control is turned up, you will hear this in your headphones/on the recorder's loudspeaker. In either case you'll almost certainly find it extremely distracting and, if it becomes activated during recording, it could all too easily cause consternation amongst the contributors (similar to your listening level being too high), bringing the proceedings to a grinding halt. Most operators, therefore, have its level turned down to zero.
Tape/alarm warnings
Possible problems in several functions produce alarm signals, and you must refer to your camcorder handbook for precise information. Common warnings are:
![]() Battery voltage low
Battery voltage low
![]() Tape end imminent
Tape end imminent
![]() Tape slack – wind/spool the cassette to correct tension
Tape slack – wind/spool the cassette to correct tension
![]() Humidity – damp, or moisture on the head drum
Humidity – damp, or moisture on the head drum
![]() RF – signal not being properly recorded, head to tape contact problem, possibly a head clog
RF – signal not being properly recorded, head to tape contact problem, possibly a head clog
![]() Servo – tape not lacing or transporting correctly
Servo – tape not lacing or transporting correctly
LCD display
The most prominent feature of the camcorder's LCD display (Figure 7.4) is usually Timecode (see Section 33). It may also display an indication of the tape/alarm warnings listed above. Most digital camcorders also have bar graph (see Section 6) sound metering and a battery level indication. The latter has proved notoriously unreliable in the past on several models of camcorder, and should not be relied upon unless you have tried and tested the individual camcorder/battery combination for yourself.
Other information displayed depends on the software available with each camcorder. Among the options that could be included are items such as menu driven function switching for the record section, editing and/or data flag insertion, and storage of several seconds’ worth of sound and pictures which may be made available to the recording medium when you press record (for a comprehensive list of what's available, or how to install and operate it, refer to the camcorder handbook).
Camcorder recording operation
On broadcast camcorders starting and stopping the recorder can be achieved by pressing the record button on the lens servo package (Figure 7.5), the usual method for most operations, or pressing the button on the front of the camera body (Figure 7.6). The last five seconds (approximately) of recorded material can be reviewed (and the tape accurately reset to start recording at the end of that material) by pressing the Ret (return) button (Figure 7.7) on the lens servo package.
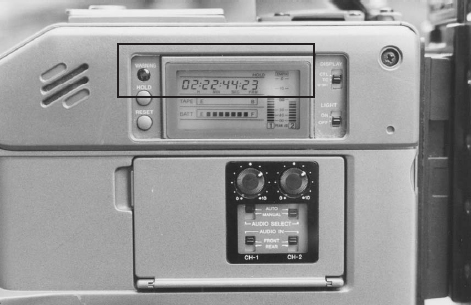
Figure 7.4 The timecode display is at the top of the LCD screen, and usually larger than the other information displayed
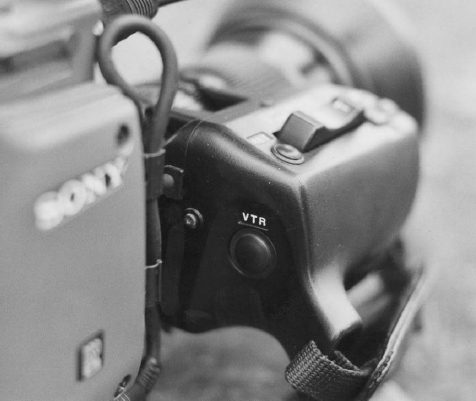
Figure 7.5 Record run (VTR) button on lens
Further recorder controls can be found on the top rear of the camcorder (Figure 7.8(a),Figure 7.8(b)). They will not operate whilst recording, but otherwise perform the obvious replay and spooling functions, and the material can be viewed in the viewfinder, or via a monitor (except Beta SP, see playback adapter below). On some digital camcorders editing functions are also associated with these controls.
Eject
The tape eject facility is usually situated on this control panel on broadcast models.
Playback adapter
Beta SP camcorders will only replay material via the viewfinder and onboard sound monitoring. To display colour pictures and sound via a monitor/loudspeaker, a playback adapter is required.
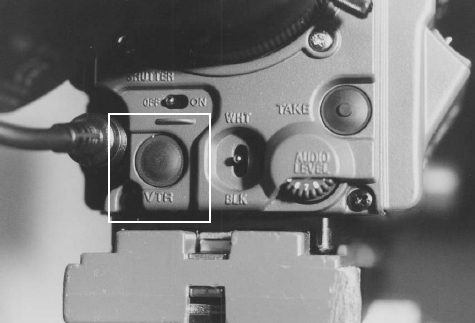
Figure 7.6 Record run (VTR) button on the front of the camcorder body
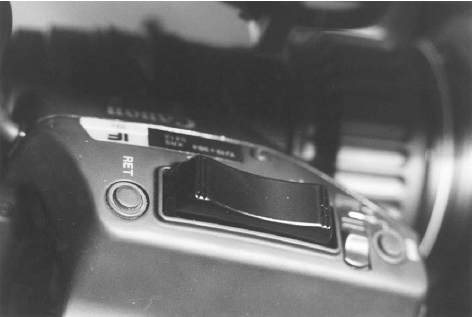
Figure 7.7 Ret (return) button on the lens servo housing
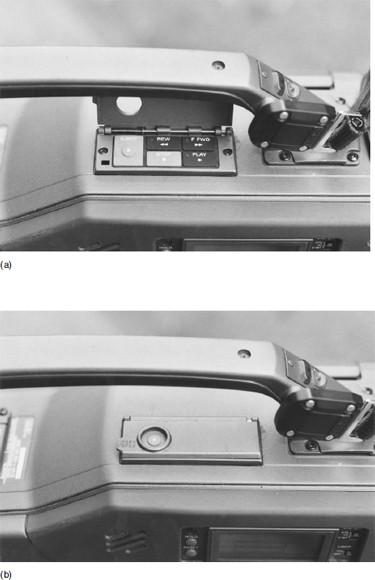
Figure 7.8 (a) Recorder operational controls on the camcorder top panel; (b) recorder controls protected, leaving the eject button accessible