
12 Mics: practical listening exercise (a): mic quality
Listening to mics
So far, we haven't considered the ‘listening’ aspect of the job. On location, the most practical method is to use headphones (the ubiquitous ‘cans’ – you'll find more information on them in Section 19, Single person operation: use of headphones). This is the part of the job which, for the best results, you can only gain through experience – listening constantly to your mics. That is the only way you can actually tell that you're obtaining the correct sound.
Practical exercises
But how can you gain this experience? Well, first and foremost, as suggested in the introduction, you will have already been listening to radio and television programmes, as well as countless CDs – in other words, all forms of recorded sound. So hopefully, you'll have at your disposal a radio, a television and a hi-fi/tape/CD player, each with its own loudspeakers, for the purposes of this exercise.
You'll also need the mics you intend to assess, a pole for mounting, and ideally a means of recording the results, preferably a camcorder, or at minimum, a high quality disc or tape recorder. Most importantly you must be able to listen to the mic outputs on headphones (ideally via the camcorder monitoring socket). First, you must establish a ‘comfortable’ listening level, which is not overly loud. Apart from damaging your hearing by listening at too high a level, on location, if you tend to monitor at a high level, the sound from your headphones will ‘leak’ out and may disturb your contributors. You must also ensure that your listening level (headphone volume) stays constant once set, as the perceived tonal quality of sound changes with volume. The ear does not have a flat response, and sounds appear to have more bass (and to a lesser extent, more treble) when the volume is increased.
The two exercises, (a) and (b) (Section 13) should be paired and undertaken one after the other. Exercise (a) helps you appreciate the quality of each mic and (b) underlines the importance of mic placement (Figure 12.1).
(a) Mic quality. For this, you'll need one source of high quality sound that can be repeated indefinitely, so I suspect you'll almost certainly pick one of your favourite CD tracks! Ideally, in your listening environment, you want to ensure that the background noise level is low, and that there aren't likely to be any other extraneous noises off that might distract you! At this stage, since we're only interested in the sound from a single source, you need to disconnect/remove the second loudspeaker to obtain the ideal listening conditions. Since you want to listen to the mic output, and not the CD direct, you either need to use closed headphones (if you have a pair) or, especially if you are also familiarizing yourself with a more open pair for professional use, work as far from the loudspeaker as possible whilst listening. Direct someone else to place the mic for you.
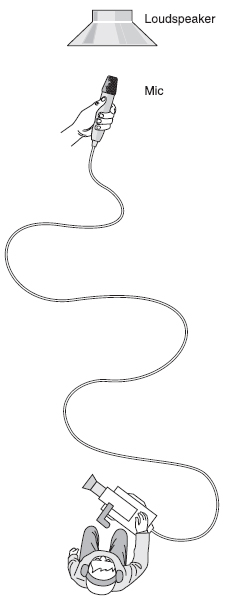
Figure 12.1 Sit as far as is practical from the loudspeaker
Failing outside help, you could place the mic on a stand and reposition this yourself, or you could mount it on the end of a long pole, and manipulate it from a distance. Neither solution is ideal, however, since either option tends to distract you from the vital task of listening, the latter especially so until you become familiar with handling a pole. Thus, you could all too easily miss the finer points the exercise hopes to demonstrate with respect to mic movement.
I'll consider omni mics first. In theory, no matter at what angle you place them relative to the sound source, they will pick up the same quality of sound. Try it and see. Keeping the mic capsule in the same place, I'd recommend you start about a foot, 30 cm, from the loudspeaker, does it make any difference to the sound if you angle the body of the mic? You may find there is a very slight difference with some clip mics, although I suspect that's more likely due to it being almost impossible to rotate the mic and keep the capsule in exactly the same spot.
Also move the mic slowly backwards and forwards to and from the loudspeaker, and notice any change in quality as you increase and decrease the gain to maintain constant input to your recorder. Then, keeping the mic gain constant, listen to the drop off in level as you double the distance from the loudspeaker, then double that again, and remember this as best you can for later comparison with the gun mic.
Directional
For this, remove the gun mic from any cradle, mounting or windshield, so that you (or preferably your ‘assistant’) are holding the barrel close to the base where the cable is plugged. Take care not to cover the slots along the length of the barrel. The first thing you should notice is that compared to the omni stick, it's extremely sensitive to being handled. You can almost certainly detect any slight movement of fingers on the barrel. This underlines the importance of correctly mounting the mic whilst recording.
Start by working the mic about a foot (30 cm) away from the loudspeaker, and, without adjusting the incoming level via the fader, turn the mic in different directions, keeping the capsule in roughly the same position. Obviously, the best pick-up will be when the mic is pointed directly at the speaker, and as it's turned away, you'll find that once it gets beyond about 208 off axis, the level begins to decrease. Depending on the particular mic you're using, you may find its response has an ‘edge’ which is easy to detect.
Experiment to see (hear!) whether the mic's characteristics are consistent in all three dimensions. In other words angle the mic away from the loudspeaker both in a vertical and then in a horizontal direction (plus any angle you care to try in between) and determine whether the drop off in level is consistent in all three dimensions. This should be the case with any reputable broadcast quality mic, but I have known peculiarities with cheaper versions.
You'll find that mics from different manufacturers have slightly differing directional characteristics. You should also notice that no mic entirely loses or eliminates sound, no matter how you alter its angle relative to the source. Some are better than others at ‘rejecting’ off axis sound, and many experience an increase in pick-up from the rear, compared to the side. So, if you're unfamiliar with a particular make or model it's always best to evaluate it carefully before taking it on location.
Once you're satisfied with its directional capabilities, keep it pointed towards the loudspeaker and double its distance, then double it again. If you've managed to perform this experiment in a quiet environment you'll be surprised to hear that the level of incoming sound drops off in much the same way as the omni mic at the same distance.
Therefore, do be aware that the gun mic simply discriminates in its acceptance of sound along its axis. The better the design (and usually the more expensive the mic!) the better the directional discrimination of the mic; and to a certain extent, the longer the barrel of the mic, the better the directional discrimination.
The recording
If you have recorded the results, feed both your recording and the original sound via a switch to the same loudspeaker, and alternate between each source. At this stage, listening to the loudspeaker is most important, as this is how the majority of your potential audience will be hearing your efforts. Ask yourself – how ‘transparent’ does the mic sound – has it introduced any colouration or distortion to the recorded sound – and how has its position affected the recording?