Lesson 8
Manage User Home Folders
Goals
![]() Describe user home folders
Describe user home folders
![]() Delete users’ accounts and preserve their home folder contents
Delete users’ accounts and preserve their home folder contents
![]() Migrate and restore home folders
Migrate and restore home folders
When you log in to your Mac, you can securely store documents in your home folder. You can store and access documents in other locations, but this lesson focuses on your home folder.
Reference 8.1 User Home Folders
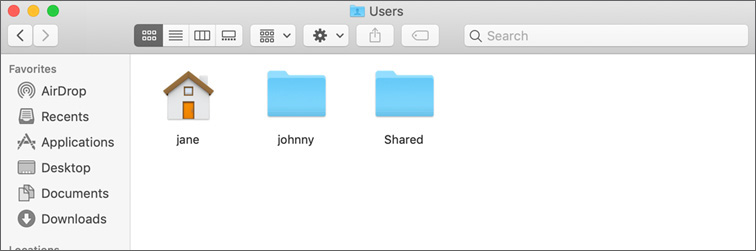
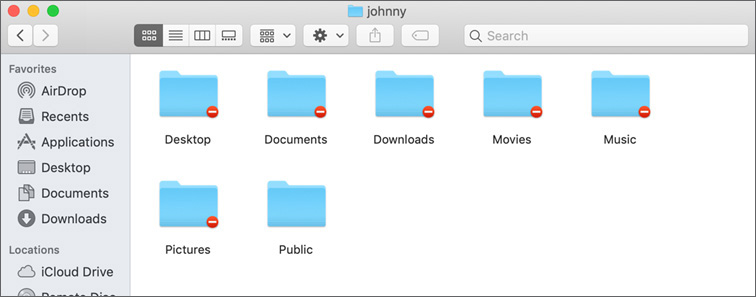
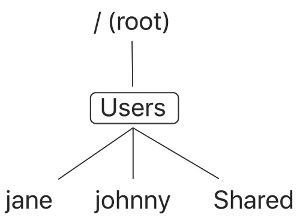
The default location for a locally stored home folder is /Users/name, where name is the user account name. In the following example, johnny and jane are user account names.
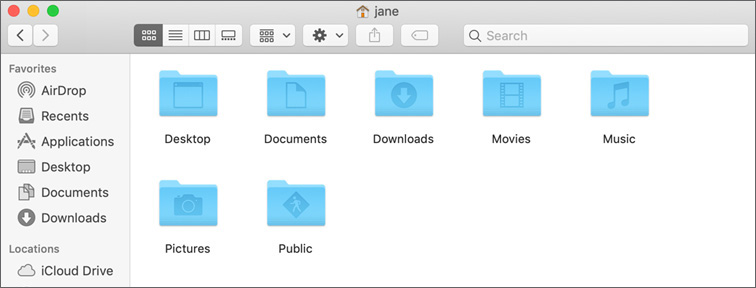
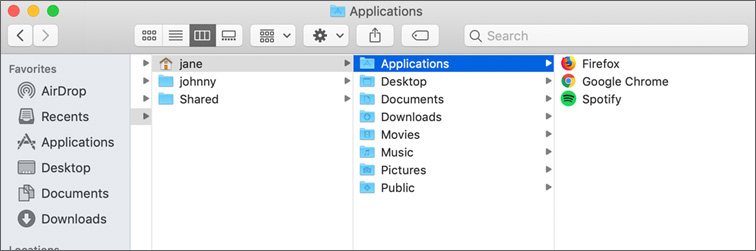
When you create a new user account, macOS generates a home folder for that account. The home folder contains these default home folders: Desktop, Documents, Downloads, Movies, Music, Pictures, and Public.
Files you save to your desktop appear on your desktop and in the Desktop folder.
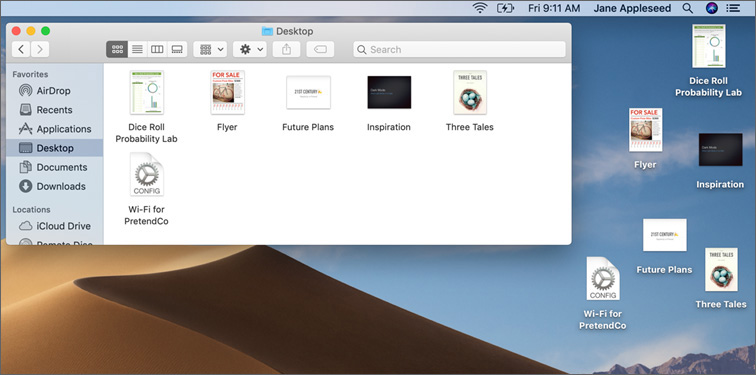
New in macOS Mojave is Stacks. You can use stacks on the desktop to keep files neatly organized in groups. Whenever you save a file to the desktop, it’s automatically added to the appropriate stack. This helps you keep your desktop tidy.
To turn on Stacks, click the desktop to make the Finder the active app; then from the View menu, choose Use Stacks. Or at any point you can Control-click the desktop and choose Use Stacks.
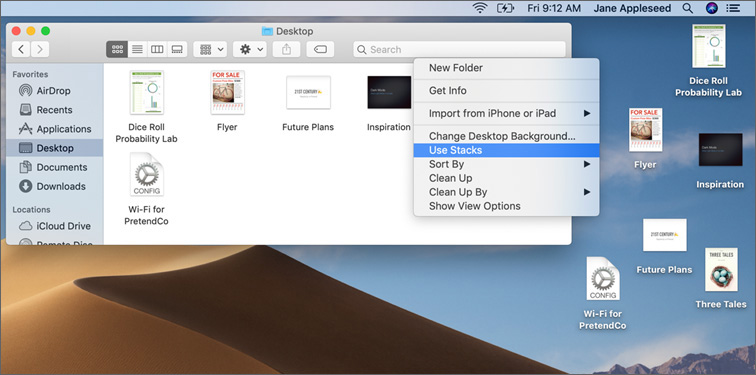
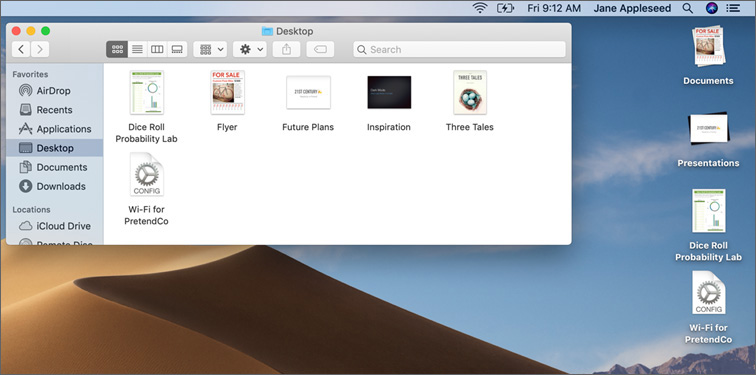
In the following figure, the Stacks feature is enabled. Only four items are displayed on the desktop: Documents (a stack of similar files), Presentations (another stack of similar files), and two other unique kinds of documents. At the same time, you can see that there are six files in the Desktop folder.
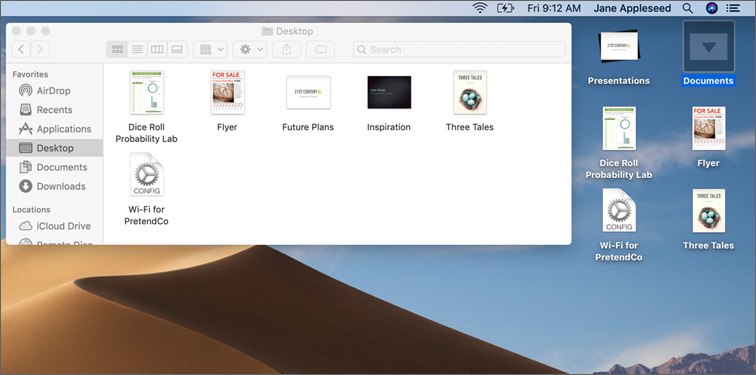
Click a stack to view the files in that stack. For more information about stacks, read Apple Support article HT209101, “How to use Stacks on your Mac.”
When you download content from the Internet, it goes into the Downloads folder by default.
The Library folder includes user-specific preference files, fonts, contacts, keychains, mailboxes, favorites, screen savers, and other app resources. The Library folder is hidden in the default Finder view.
The Documents, Movies, Music, and Pictures folders are the default locations for document, movie, music, and picture files.
If you open other users’ home folders, you can’t see inside their default folders, except for their Public folders.
You can put items to share with other users in your Public folder.
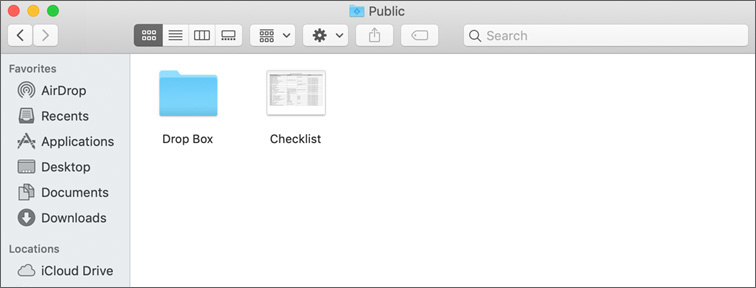
Other users can view the contents of your Public folder, and you can view the contents of any other user’s Public folder.
If you want to give a copy of a file to another user, you can use the other user’s Drop Box folder. The Drop Box folder is a special folder. Every user has a folder named Drop Box that’s inside that user’s Public folder. You can put files into another user’s Drop Box folder, but you can’t remove the files once you put them there. And you can’t see what’s inside another user’s Drop Box folder.
Except for putting items in the Drop Box, other users can’t add items or make changes to files in your Public folder.
In the file system, the root folder (/) is the top folder. It contains folders—such as the Users folder that includes your home folder—and files. Other users can see what’s in your root folder.
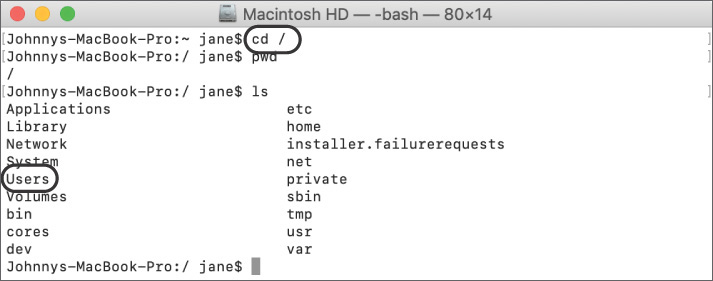
This figure illustrates that the Users folder is located in the root (/) folder, and it contains three folders.
You can change folder permissions as described in Lesson 13, “Manage Permissions and Sharing.”
You might see an Applications folder in your home folder. When you install some apps, they automatically create an Applications folder in your home folder. For other apps, you can choose to place them there. Only you have access to the contents of your Applications folder (though someone with access to the System Administrator account can access your Applications folder). See Reference 18.3, “Install Apps Using Software Packages and Drag-and-Drop,” for more information.
Reference 8.2 Delete User Accounts and Preserve Their Home Folder Contents
You might need to delete a user account. If you do, you must decide what to do with the user’s home folder contents.
To delete a user:
Select the user from the list of users in Users & Groups preferences.
Click the Remove (–) button at the bottom of the list.
Select an option for the user’s home folder contents.
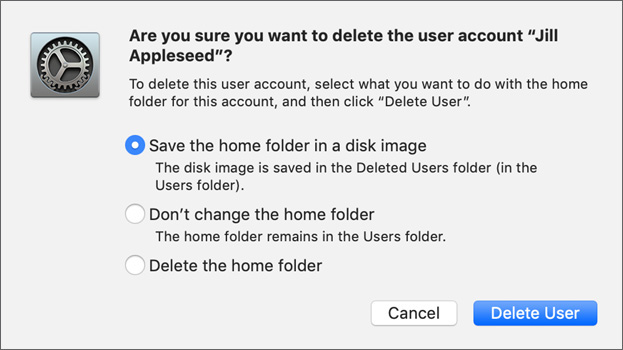
 Select “Save the home folder in a disk image” to save a user’s home folder as a disk image file. macOS saves the disk image file in the /Users/Deleted Users folder and gives it the user account name. You can copy it to other Mac computers or into another user’s home folder. You must have enough local disk space to duplicate the home folder. The process might take several hours. As this guide went to press, this option wasn’t available. Select “Don’t change the home folder” to leave a user home folder unchanged. macOS appends “(Deleted)” to the home folder name to signify that the user no longer exists. The deleted user home folder keeps the same access restrictions as a normal user home folder. If you want to access the deleted home folder contents, you must change folder and file ownership and permissions. Read Lesson 13 to find out more. Select “Delete the home folder” to delete home folder contents. The content won’t be stored in the Trash, so you can’t easily restore it.
Reference 8.3 Migrate and Restore Home Folders
Migration Assistant enables you to transfer settings, user accounts, and content from a Mac or Windows computer to your new Mac.
You can move content over Wi-Fi or Ethernet. If you have a lot of content, the move could take several hours. Be sure to plug both computers into a power source before you start.
You can use a Time Machine backup to move your content. If you don’t have a Time Machine backup of the original Mac content, create one. Connect the external storage device that contains the Time Machine backup to your new Mac.
When you migrate content from another Mac, a Time Machine backup, or a startup disk, Migration Assistant scans the local network for Mac computers that are running Migration Assistant and are ready to transfer content. If you don’t have a local network, connect two Mac computers through Ethernet, FireWire, Thunderbolt, or USB-C, and create one. Migration Assistant also scans locally mounted disks and the local network looking for Time Machine backups. It scans locally mounted disks for a previous system as well. Previous systems include external disks, or Mac computers in target disk mode, that are connected with FireWire, Thunderbolt, or USB-C. Using target disk mode is detailed in Lesson 11, “Manage File Systems and Storage.” Read Apple Support article HT204350, “How to move your content to a new Mac,” for detailed instructions.
When you migrate content from a Windows computer, Migration Assistant scans the local network for Windows computers that are running Windows Migration Assistant and are ready to transfer content. This enables you to migrate content from Windows 7 or later if the Windows computers are running Windows Migration Assistant. You can download Windows Migration Assistant from the Apple Support website. Read Apple Support article HT204087, “Move your data from a Windows PC to a Mac,” for detailed instructions.
Migration Assistant runs as part of macOS Setup Assistant on new or newly reinstalled Mac computers. You can use Migration Assistant anytime. It’s in /Applications/Utilities. Look for it with Spotlight or Launchpad.
Before you use Migration Assistant, check for Apple software updates on the source and destination computers.
This ensures that you’re using the latest copy of Migration Assistant.
Open Migration Assistant.
Click Continue to start Migration Assistant.
Authenticate as an administrator user.
Migration Assistant quits running apps and logs out users.
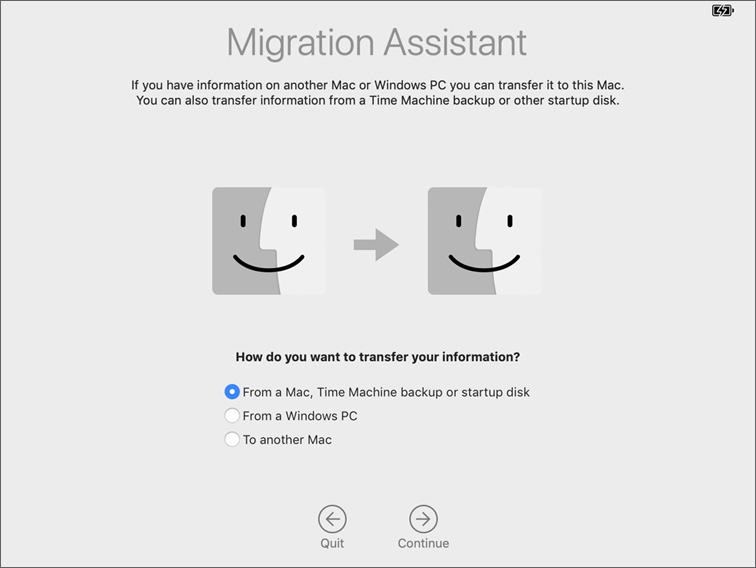
Select how you want to transfer information:
From a Mac, Time Machine backup, or startup disk From a Windows PC To another MacIf you select “From a Mac, Time Machine backup, or startup disk” or “From a Windows PC,” Migration Assistant scans attached disks and the local network for migration sources. If you select “To another Mac,” open Migration Assistant on the destination Mac too.
After you select a source, Migration Assistant scans the contents and presents you with a list of items you can migrate. If multiple disks are available, you can choose to migrate those contents too. Migration doesn’t create new volumes or partitions on the destination Mac. It creates folders that include the contents of the migrated disks.
Select the information to transfer. This includes user accounts.

After you make selections, record the random password that Migration Assistant assigns to all standard users that you will migrate.

Create a secure password for each administrator user account you want to migrate.
Click Set Password for an administrator user account.
Enter and verify a password for the administrator account that you’re migrating, then click Set Password.
Repeat steps 8 through 10 for any additional administrator accounts.
If you want to promote a standard user to an administrator user, click “Promote to Admin” next to the user, and then set and verify a new password for that user.
Click Continue.
If a user account already exists on your Mac, Migration Assistant displays a prompt. You can replace the account, optionally keeping its home folder, or keep both user accounts by entering a new name and account name.
To add new users to your Mac, Migration Assistant must collect a password from an existing administrator user who is authorized to create new users. Next to an administrator user, click Authorize.
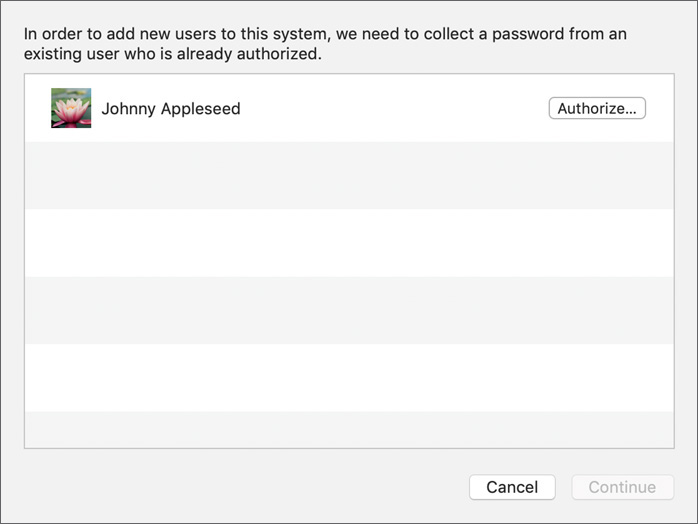
Enter the password for the user you selected, then click OK.
Click Continue to begin the transfer. The more content you transfer, the longer it takes.
Manually Restore a User Home Folder
See Exercise 8.1, “Restore a Deleted User Account,” for information about how to restore a user’s home folder after you delete that user.
Exercise 8.1 Restore a Deleted User Account
![]() Prerequisite
Prerequisite
![]() You must have created the Local Administrator account (Exercise 3.1, “Configure a Mac for Exercises”).
You must have created the Local Administrator account (Exercise 3.1, “Configure a Mac for Exercises”).
In this exercise, you create a user account and populate the home folder for the user. Then, you delete the account, preserving the contents of the home folder. You also create a new account, ensuring that the new user gets the old user’s home folder contents. Besides showing you how to restore a deleted user account, you can use what you learn in this exercise to change a user account name. What you learn in this exercise provides an alternative to Migration Assistant for moving user accounts between Mac computers.
The scenario for this exercise is that Emily Parker recently married and now has the last name of Davidson. The company she works for uses the account naming convention first initial, last name. So, you must change her account name from eparker to edavidson.
Create Emily Parker’s Home Folder
Log in as Local Administrator (password: Apple321!).
Open Users & Groups preferences.
Click the Lock icon, and authenticate as Local Administrator.
Click the Add (+) button under the user list.
Enter the account information for Emily Parker:
New Account: Standard
Full Name: Emily Parker
Account Name: eparker
Password: Apple321!
Verify: Apple321!
Don’t provide a password hint.
You can optionally change the account picture.
Click Create User.
Control-click Emily Parker’s account, and choose Advanced Options from the shortcut menu.
Take a screenshot of the System Preferences window to record Emily Parker’s account attributes for later reference.
Press Shift-Command-4, followed by the Space bar.
Your pointer changes to a camera icon, and the region of the screen it is over is highlighted in blue. If you see a crosshair, press the Space bar again.
Move the camera pointer over the System Preferences window, and click to record its contents.
This is one of several ways of taking screenshots in macOS. Shift-Command-3 records the entire screen, Shift-Command-4 (without the Space bar) enables you to select a rectangular region to record, and Shift-Command-4 with the Space bar enables you to select a single window.
The image is saved to your desktop and named “Screen Shot,” followed by the date and time you took it.
In the Advanced Options dialog, click Cancel, or press Command-Period, which is a way to select Cancel in most macOS dialogs.
Log out as Local Administrator.
Log in as Emily Parker (password: Apple321!).
At the Data & Privacy screen, read Apple’s privacy policy and click Continue.
At the “Sign In with Your Apple ID” screen, select Set Up Later, and click Skip in the confirmation dialog.
At the Siri screen, deselect Enable Ask Siri, and click Continue.
If you are prompted to set up Touch ID, click Continue, click Set Up Touch ID Later, and then click Continue in the confirmation dialog.
At the Choose Your Look screen, choose your preferred appearance, and click Continue.
If you see True Tone Display, click Continue
In the Dock, click the Launchpad icon.
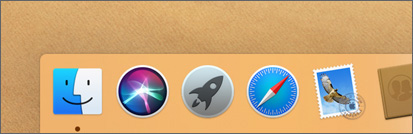
Launchpad gives you an easy way to open apps that aren’t in your Dock. You don’t have to navigate to the Applications folder in the Finder.
In Launchpad, begin typing Text.
TextEdit should become available.
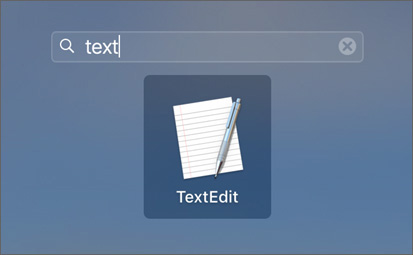
Click the TextEdit icon to open TextEdit.
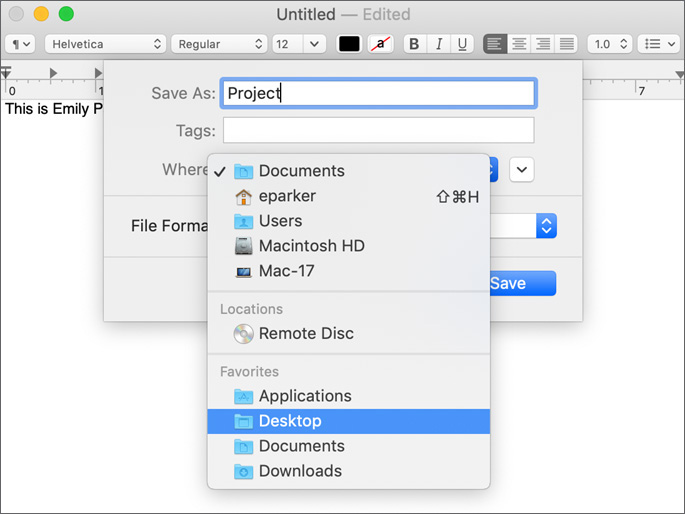
In the Untitled document, enter the text This is Emily Parker’s project document.
From the menu bar, choose File > Save (or press Command-S) to save the file.
Name the file Project, and save it to Emily Parker’s desktop. You can use the shortcut Command-D to select the desktop.
Quit TextEdit, and log out of the Emily Parker account.
Delete Emily Parker’s Account
Now, you delete Emily Parker’s account without removing the files in her home folder.
Log in as Local Administrator.
Open Users & Groups preferences and unlock the pane.
Select Emily Parker’s account name and click the Remove (–) button to remove her account.
In the dialog that appears, make sure “Don’t change the home folder” is selected.
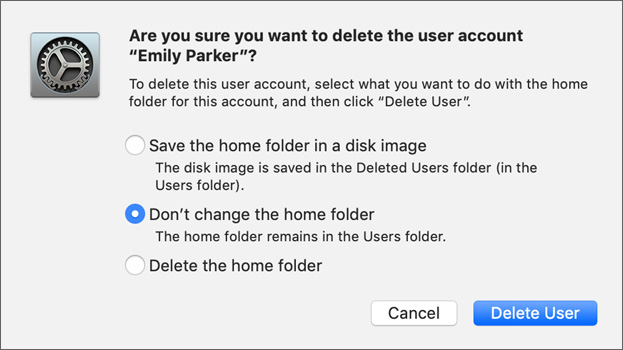
Click Delete User.
Emily Parker’s account is no longer visible in the list.
Quit System Preferences.
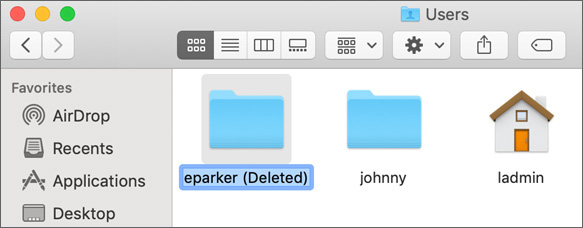
Navigate to /Users. Open Macintosh HD from your desktop and open the Users folder.
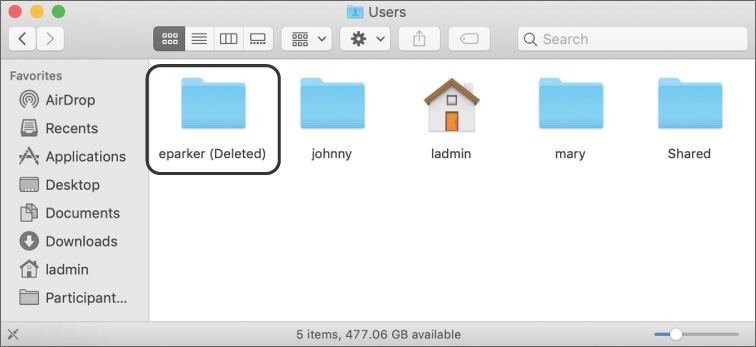
Emily Parker’s home folder still exists, and (Deleted) is appended to the end of the name.
Restore Emily Parker’s Account for Emily Davidson
Emily Parker’s files (soon to be Emily Davidson’s files) still exist in the Users folder. Now you rename the home folder so that when you create the new account, she gets her old (Emily Parker account) files.
Navigate to the folder /Users.
Control-click the eparker (Deleted) folder, choose Rename, and change the folder name to edavidson.
Press Return.
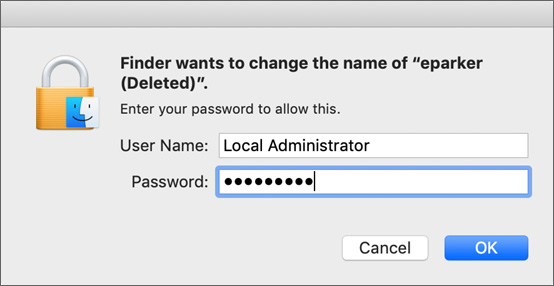
The file permissions in the /Users folder don’t enable you to modify items within it. The Finder asks you to authenticate as an administrator to override the permissions.
Enter the Administrator password and click OK.
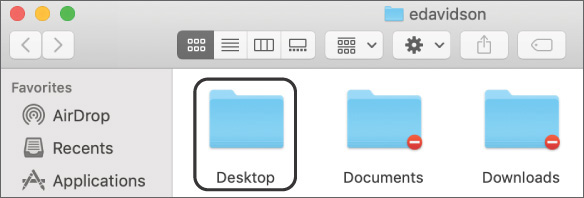
Open the edavidson folder, and then attempt to open the Desktop folder.
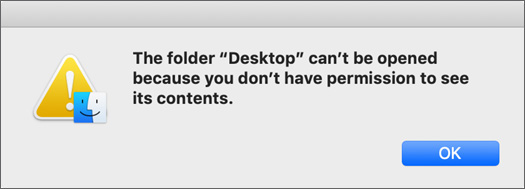
You are prohibited from viewing the contents because the owner of the folder is still the old eparker account.
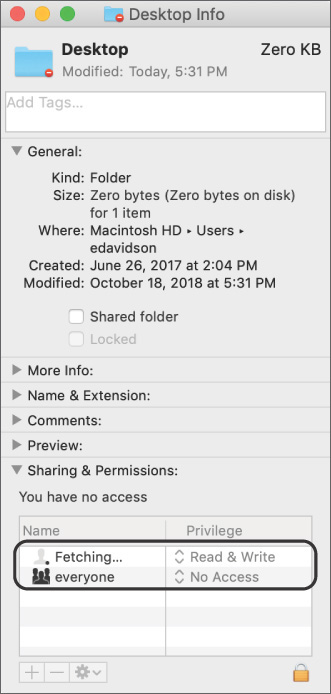
Control-click the Desktop folder and choose Get Info.
Notice that macOS attempts to find eparker (the process is shown as Fetching), who no longer exists. Also notice that no one but the old owner (who was eparker) has permissions to view anything inside the Desktop folder.
Click the lock and authenticate as Local Administrator.
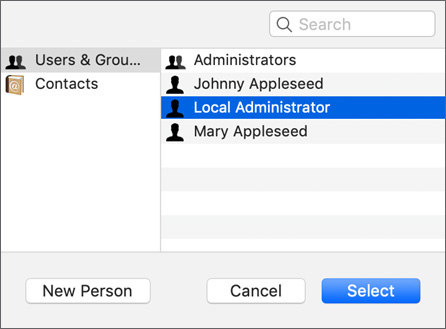
Click Add (+).

Choose Local Administrator, and click Select.
Notice that you are granted Read Only permissions by default. You could change this to Read & Write, or become the owner of the folder, but for the purposes of this exercise, Read Only is sufficient.
Also notice that the prohibitory badge is no longer displayed on the Desktop folder.
Open the Desktop folder.
You see Emily Parker’s Project document. After you create Emily Davidson’s account, she retains this document, along with all the other settings pertaining to her account.
Now you will remove Local Administrator’s permissions to see the Desktop folder.
If necessary, right-click the Desktop folder and select Get Info.
Authenticate as Local Administrator, and remove ladmin (Me).
It’s no longer necessary for the Local Administrator user to have permissions to view the Desktop folder and its contents. If you leave Local Administrator’s permissions to see Emily’s Desktop folder, the Local Administrator will be able to see files that are not intended for the Local Administrator to view.
Create and Verify Emily Davidson’s Account
Now you create the Emily Davidson user account using the renamed home folder as her new account home folder.
Open Users & Groups preferences.
Click the Lock button, and authenticate as Local Administrator.
Click the Add (+) button to create another account:
New Account: Standard
Full Name: Emily Davidson
Account Name: edavidson
Password: Apple321!
Don’t provide a password hint.
You may optionally change the account picture.
Click Create User.
A dialog appears and asks whether you want to use the edavidson folder for this account.
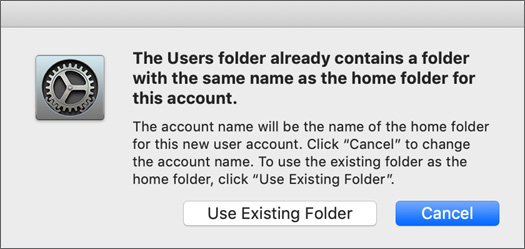
Click Use Existing Folder.
Control-click Emily Davidson’s account, and choose Advanced Options from the shortcut menu.
Open the Screen Shot file on your desktop, and compare the account attributes of Emily Davidson’s new account with her original account (Emily Parker).
You could have used the user ID of the old account for the new account, but the UUID would be different. macOS assigns each account a new UUID when you create it.
Quit Preview.
In the Advanced Options dialog, click Cancel, and then quit System Preferences.
Try to reopen the Desktop folder in Emily Davidson’s home folder. If your Finder window is still displaying the Desktop folder, click the Back button, and then double-click the Desktop folder. You no longer have permission to see the files because they are owned by Emily Davidson’s new account.

Close the Finder window.
Verify Emily Davidson’s Home Folder
To make sure Emily Davidson’s files are available, explore her renamed home folder.
Log out as Local Administrator, and log in as Emily Davidson.
Verify that the Project file is on the desktop.
In the Finder, open Emily Davidson’s home folder by choosing Go > Home (or by pressing Shift-Command-H).
Make sure you see the default subfolders: Desktop, Documents, Downloads, Movies, Music, Pictures, and Public.
Open the Desktop folder, and verify that you see the Project document.
Navigate back to the home folder, and then open the Public folder, where you see a Drop Box folder. For more information about these folders, read Lesson 13, “Manage Permissions and Sharing.”
In addition to the visible folders in Emily Davidson’s home folder, it should contain an invisible Library folder.
Press and hold the Option key, and from the menu bar, choose Go > Library.
The Library choice is hidden except when you hold the Option key.
Emily Davidson’s Library folder contains many subfolders. For more information about this folder and its contents, read Reference 14.1, “Examine Hidden Items,” and Lesson 15, “Manage System Resources.”
Close the Library folder and log out as Emily Davidson.