
Building the User Interface Using a Storyboard
Open Main.storyboard by clicking it in the project navigator in Xcode. Open the library with the keyboard shortcut ⇧⌘L and drag a Vertical Stack View onto the Measurement View Controller Scene. Select the stack view and click the Add New Constraints button—the one with a square between two vertical lines—in the lower right of the Xcode editor view. Pin the stack view to the safe area of the super view by entering a value of 10 in the four text fields in the upper third of the constraints pop-up. Click the red constraint markers next to the text fields if they are not active and select the “Constrain to margins” check box. The relevant part of the user interface in the Interface Builder should look like the following image:
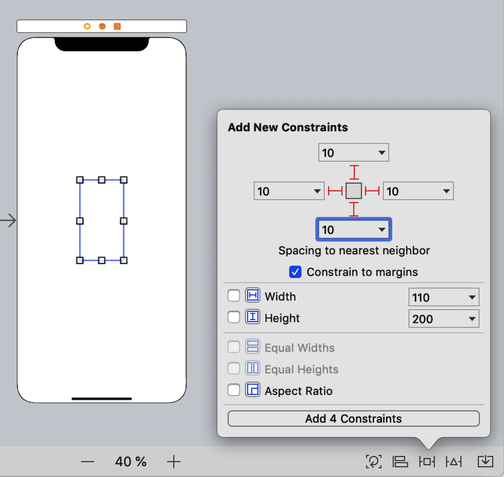
Click the button Add 4 Constraints. With these constraints, we pin the stack view to the safe area of the scenes view. Xcode updates the frame of the stack view according to the new constraints. But because the stack view has no background color, its frame is visible only when it is selected.
The Interface Builder has a setting that helps in such situations. You can activate a thin blue border around all the elements in a storyboard scene through the Xcode menu item Editor > Canvas > Bounds Rectangles. This border helps a lot while you’re setting up the user interface. Don’t worry; it is visible only in the Interface Builder and not in the running app.
Pro Tip: Distances in Interface Builder | |
|---|---|
|
|
If you hold down the option key and hover over elements in a scene, the Interface Builder shows you the distance from the selected element to all its neighbors. This is useful if you need to make the app look like a design given to you by the designer. |
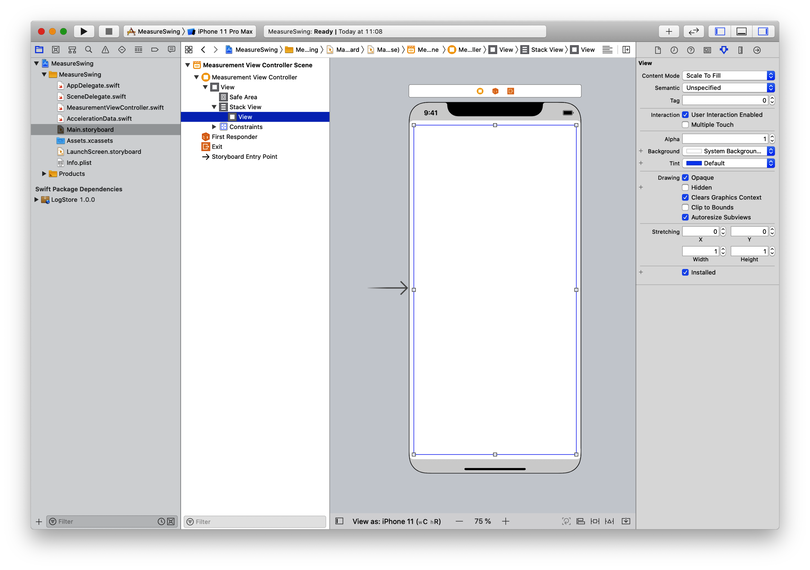
Next we need a view that will draw the acceleration data. Open the library again with ⇧⌘L, search for UIView, and drag a view onto the stack view. The following image shows how this should look. Note the view hierarchy in the structure overview on the left side of the storyboard.
Then open the library with the shortcut ⇧⌘L again and drag a button onto the stack view below the previously added view. Make sure that you drop it into, not below, the stack view. If you drop it at the wrong spot, delete it and try again. With the button selected, open the attributes inspector using the shortcut ⌥⌘5 and change the button title to Start. This button will start and stop the recording of motion events.
The scene now has a vertical stack view with a view and a button. This is enough user interface work for the moment, but we’ll add more elements later in this chapter.
Next, we connect the Start/Stop button with the view controller. The easiest way to do this is to click the button with the five lines in the upper-right corner of the Interface Builder. Xcode opens a menu where you can select Assistant. Alternatively, you can use the shortcut ⌃⌥⌘↩.
Pro Tip: Shortcuts | |
|---|---|
|
|
Whenever you realize that you do the same task in Xcode over and over again, try to figure out if there is a shortcut for it. You can see many of the available Xcode shortcuts in the Xcode application menus. Once you have learned the shortcuts for the tasks you do every day, you work way faster than when you’re relying solely on a mouse or trackpad. |
Xcode opens the file with the code for the currently selected storyboard scene side by side with the storyboard. Press and hold the control key and drag a connection from the button in the storyboard to the view controller right above the closing curly braces. It should look like the following image:

Xcode presents a pop-up for the options of the action we’re going to add. In the Name text field, type startStop and select UIButton in the Type drop-down menu. Whenever you create an action by dragging from an element in a storyboard scene, set the type in the action to the type of the element. If you don’t change the type, Xcode will use the type Any for the sender, and valuable information will be lost. Make sure the connection is set to Action (not Outlet) and then click Connect.
Add the highlighted line to the generated startStop(_:) method:
| | @IBAction func startStop(_ sender: UIButton) { |
| » | startMotionUpdates() |
| | } |
Instead of starting the collection of motion data in viewDidLoad, we’ll start it when the user taps the Start button. Now delete the whole viewDidLoad method; we won’t need it anymore.
In the next section, we’ll build a view that draws the collected data on-screen.