
Fetching the Current Location
When the user taps the button to add the geofence, our app has to fetch the current location and start to monitor a region around that location. Add the following method to LocationProvider to request the current location:
| | func setHome() { |
| | locationManager.requestLocation() |
| | } |
The method requestLocation requests the current location of the device and then stops location updates. This method is a perfect fit if you need a location only once instead of continually. The locationManager delivers the result to its delegate through the delegate method locationManager(_:didUpdateLocations:). Add the following method to LocationProvider:
| | func locationManager(_ manager: CLLocationManager, |
| | didUpdateLocations locations: [CLLocation]) { |
| | |
| | guard let location = locations.last else { return } |
| | printLog("location: (location)") |
| | } |
From the delivered locations, we get the last one because it is the most accurate and print it to the log. We will add the code that sets the geofence later.
Before we can move on, we need to add another method because iOS throws an exception if it is not implemented by the location manager delegate. Add the following method to LocationProvider:
| | func locationManager(_ manager: CLLocationManager, |
| | didFailWithError error: Error) { |
| | |
| | printLog("locationManager didFailWithError: (error)") |
| | } |
Note that this method is marked as optional in the CLLocationManagerDelegate even though the documentation states that we need to implement it. Now let’s see if the request of the current location works.
Open ContentView.swift and add the following property to ContentView:
| | struct ContentView: View { |
| | |
| » | private let locationProvider = LocationProvider() |
| | |
| | var body: some View { |
| | Text("Hello, World!") |
| | } |
| | } |
Then replace the body property with the following code:
| | var body: some View { |
| | VStack { |
| | Text("Into The Wild") |
| | Button("Set Home") { |
| | self.locationProvider.setHome() |
| | } |
| | } |
In SwiftUI, you define the user interface of one view in its body property. The body is the top-level view, which can—and usually does—contain other views. In our case the body contains a vertical stack view, a VStack. This means that as in an instance of a vertical UIStackView, its content views will be arranged from top to bottom.
Pro Tip: Stacking Stack Views | |
|---|---|
|
|
You can create sophisticated user interfaces by stacking stack views. But keep in mind that with each stack view, UIKit adds hidden layout constraints to the user interface. Views that need to be rendered quickly for optimal user experience, like table view cells, should not contain many stack views. |
We add a text for the title and a button for setting the geofence to the VStack. The action of the button calls setHome of the locationProvider.
The big advantage of SwiftUI is that we can see the user interface without running the app on the simulator. If it’s not already visible, activate the canvas with the shortcut ⌥⌘↩. The canvas shows how the user interface will look when the app is running. This is much better than what you get with a storyboard because it is backed by code. If you change the code, the preview in the canvas updates instantly. But you can also change the user interface in the canvas and Xcode will add code to the body to reflect that change.
You might not see the user interface in the canvas yet. Sometimes when you change the code, the live update pauses and you have to click the Resume button at the upper right of the canvas to resume the automatic updates. Click the Resume button if it’s shown and wait until the user interface is updated. The resulting Xcode window should look something like the image.

Before we can test the code we have so far by running it in the simulator, we need to add the usage descriptions for the location access requests. Apple enforces this step because the user should know how this sensitive data will be used. Most users are careful about who they let access their data.
Pro Tip: Make It Clear | |
|---|---|
|
|
A good description increases the likelihood that the user will grant the app permission to access the location. Make it clear to the user what the app does with the data. When most of the app works without that data, ask for permission to access the data only when the app needs it. |
Open Info.plist and add an entry for the key NSLocationAlwaysAndWhenInUseUsageDescription with a value like “The location will be used to register the entrance and exit of the geofence.” We also need to add an entry for the NSLocationWhenInUseUsageDescription key. Set the value of this entry to something like “The location will be used to register a geofence.”
Build and run the app on the simulator. You should see something like the image after the app has loaded.
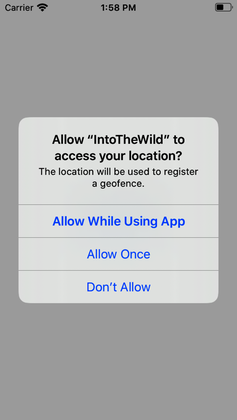
Uh...this is strange. Didn’t we ask for Always authorization? Why are the only options Allow While Using App, Allow Once, and Don’t Allow? Did we miss something?
No, we didn’t. Apple changed the access process for the location data of the user’s device in iOS 13. When an app asks to always access the location of the device, the users are asked for the access only while the app is running. Even if the user selects this option, iOS reports Always authorization to our app and we are expected to use the permission accordingly. Apple calls this Provisional Always authorization in the documentation. When at a later point an event occurs that requires Always authorization, iOS will ask users if they would like to upgrade the permission.
The simulator can simulate its geographic location using the Features > Location > Custom Location... menu item. Set the coordinate to a latitude of 1 and a longitude of 2, or look up the coordinates of your home address and use its latitude and longitude. Tap Allow While Using App and then tap the Set Home button we added to the user interface. Open the console in Xcode with the shortcut ⇧⌘C. In the console Xcode prints the message success and the location we set in the simulator. Nice. So far, everything works.
If you don’t see the output in the console, check if you have set up the locationProvider correctly and if you called setHome in the button action closure.
In the next section, we’ll set the geofence.