
Presenting a Single Day Entry
A single day entry is composed of the outside duration and the first character of the weekday. In this section we’ll build a SwiftUI view that shows a rectangle representing the duration relative to the maximum outside duration in the seven-day period. To start, add a new SwiftUI view using the shortcut ⌘N, select the SwiftUI View template, and click Next. Save the file as DayEntryView.
The day entry view needs the duration for that day, the maximum duration for the shown period, and the weekday. Add the following properties to DayEntryView:
| | struct DayEntryView: View { |
| | |
| » | let duration: TimeInterval |
| » | let max: TimeInterval |
| » | let weekday: String |
| | |
| | var body: some View { |
| | Text("Hello, World!") |
| | } |
| | } |
Xcode shows an error in the DayEntryView_Previews struct. Xcode uses this struct to show the preview when the canvas is activated. To make the error go away, replace the DayEntryView instance in DayEntryView_Previews struct with the highlighted line:
| | struct DayEntryView_Previews: PreviewProvider { |
| | static var previews: some View { |
| » | DayEntryView(duration: 120, max: 240, weekday: "Friday") |
| | } |
| | } |
Activate the canvas if it’s not already active (with the shortcut ⌥⌘↩) and click the Resume button. In the canvas you should see the default view from the SwiftUI View template.
Replace the contents of the body property with the following code:
| | struct DayEntryView: View { |
| | |
| | let duration: TimeInterval |
| | let max: TimeInterval |
| | let weekday: String |
| | |
| | var body: some View { |
| » | GeometryReader { geometry in |
| » | Rectangle() |
| » | .frame(height: geometry.size.height * |
| » | CGFloat(self.duration / self.max)) |
| » | } |
| | } |
| | } |
Rectangle draws a rectangle with the provided frame. The method .frame(height:) is called a view modifier because it modifies the view and returns the modified version. Much of the power of SwiftUI comes from the use of view modifiers.
The rectangle is embedded in a GeometryReader, which takes all available space and passes an instance of GeometryProxy into its closure. The geometry proxy holds information about the available space in the view. We use it here to calculate the height for the rectangle based on the maximal value. If the maximum duration is 240 and the duration is 120, the rectangle’s height is set to half of the available height.
Click the Resume button to update the canvas. You should see a black rectangle in the middle of the screen that spans the whole width of the simulated screen.
The user interface looks better when the rectangle is pinned to the bottom of the screen. Add the highlighted lines of code to the body:
| | struct DayEntryView: View { |
| | |
| | let duration: TimeInterval |
| | let max: TimeInterval |
| | let weekday: String |
| | |
| | var body: some View { |
| | GeometryReader { geometry in |
| » | VStack { |
| » | Spacer(minLength: 0) |
| | Rectangle() |
| | .frame(height: geometry.size.height * |
| | CGFloat(self.duration / self.max)) |
| » | } |
| | } |
| | } |
| | } |
We have embedded the rectangle in a VStack and added a Spacer with a minLength of 0 above it. This way, we move the rectangle to the bottom of the screen.
You don’t have to reindent the code yourself; Xcode can help you with this. Use the shortcut ⌘A to select all the lines in the file and then press ⌃I to reindent them.
We want to add the number of hours and minutes to each rectangle because this is the main information in our app. To format the duration accordingly, add the following method to DayEntryView:
| | func durationString(from duration: TimeInterval) -> String { |
| | |
| | let formatter = DateComponentsFormatter() |
| | formatter.allowedUnits = [.hour, .minute] |
| | formatter.unitsStyle = .abbreviated |
| | |
| | return formatter.string(from: duration) ?? "" |
| | } |
In this code we use a DateComponentFormatter to format the time interval into a string. We set the unitStyle to abbreviated because this results in a compact string perfect for being displayed in our user interface. A time interval of 4,260 seconds results in the formatted string “1h 11m.”
Now we can add that string to the rectangles. In SwiftUI, we can stack views on top of each other using a ZStack. Add the highlighted lines in the following code to the body:
| | struct DayEntryView: View { |
| | |
| | let duration: TimeInterval |
| | let max: TimeInterval |
| | let weekday: String |
| | |
| | var body: some View { |
| | GeometryReader { geometry in |
| | VStack { |
| | Spacer(minLength: 0) |
| » | ZStack(alignment: .top) { |
| | Rectangle() |
| | .frame(height: geometry.size.height * |
| | CGFloat(self.duration / self.max)) |
| » | if self.duration > 0 { |
| » | Text(self.durationString(from: self.duration)) |
| » | .foregroundColor(.white) |
| » | .font(.footnote) |
| » | } |
| » | } |
| | } |
| | } |
| | } |
| | } |
If the duration is greater than zero, we add text with the text color white and the font size footnote to the ZStack. We use the font size footnote because we want to fit seven day entries onto the small screen of an iPhone SE and still keep the text readable. Later, when we change the app to support dark mode, we’ll adjust the text color. Click the Resume button to update the canvas.
Nice. We are nearly finished with the day entry view. The only task remaining is the abbreviation of the weekday below the rectangle. Again we’ll embed the existing structure into a stack view. Replace the existing body content with the following code:
| | struct DayEntryView: View { |
| | |
| | let duration: TimeInterval |
| | let max: TimeInterval |
| | let weekday: String |
| | |
| | var body: some View { |
| » | VStack { |
| | GeometryReader { geometry in |
| | VStack { |
| | Spacer(minLength: 0) |
| | ZStack(alignment: .top) { |
| | Rectangle() |
| | .frame(height: geometry.size.height * |
| | CGFloat(self.duration / self.max)) |
| | if self.duration > 0 { |
| | Text(self.durationString(from: self.duration)) |
| | .foregroundColor(.white) |
| | .font(.footnote) |
| | } |
| | } |
| | } |
| | } |
| » | Text(String(self.weekday.first ?? " ")) |
| » | } |
| | } |
| | } |
We have embedded the GeometryReader and all its contents in a VStack and added a text at the bottom. If the canvas doesn’t update by itself, click the Resume button. This looks good enough. If you’d like to play around with colors and modifiers, go for it—experiment a bit with SwiftUI.
Are you finished with your experiments for now? Then let’s see how the user interface looks in dark mode.
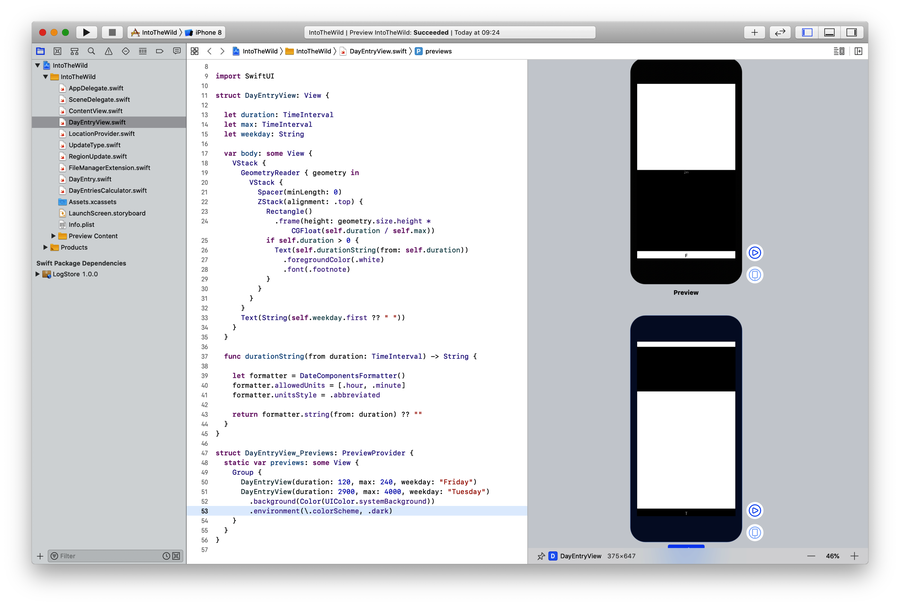
The preview in the canvas on the right side is not limited to one screen. We can add many different screens showing different screen sizes and user interface modes. To see how to add a preview for dark mode, replace the contents of previews in DayEntryView_Previews at the end of the file with the highlighted code:
| | struct DayEntryView_Previews: PreviewProvider { |
| | static var previews: some View { |
| » | Group { |
| » | DayEntryView(duration: 120, max: 240, weekday: "Friday") |
| » | DayEntryView(duration: 20640, max: 30000, weekday: "Tuesday") |
| » | .background(Color(UIColor.systemBackground)) |
| » | .environment(.colorScheme, .dark) |
| » | } |
| | } |
| | } |
This code adds a dark mode preview to the canvas as shown in the image.
Note that we have embedded the previews into a Group. This is necessary because the top-level element in previews needs to be just one element. The user interface mode is set using the environment modifier with the key path .colorScheme.
As you can see in the canvas, the day view doesn’t support dark mode yet. The text we stacked on top of the rectangle is not visible because we set the text color to white. The color of the rectangle is changed in dark mode automatically. But if you set the color of the rectangle to a custom value, you’ll need to adapt it for dark mode.
Let’s add a custom color set to fix the user interface. Open Assets.xcassets and add a color set by selecting the Xcode menu item Editor > Add Assets > New Color Set. Change the name of the color set to durationTextColor.
Next, open the attributes inspector using the shortcut ⌥⌘4 and set Appearances to Any, Dark. Xcode adds color selectors for Any Appearance and for Dark Appearance. Select the color for Dark Appearance and change it in the attribute inspector to a dark gray. Now select the color for Any Appearance and change it to a light gray. The resulting color set should look like the image.

Open DayEntryView again and change the highlighted line in the following code:
| | GeometryReader { geometry in |
| | VStack { |
| | Spacer(minLength: 0) |
| | ZStack(alignment: .top) { |
| | Rectangle() |
| | .frame(height: geometry.size.height * |
| | CGFloat(self.duration / self.max)) |
| | if self.duration > 0 { |
| | Text(self.durationString(from: self.duration)) |
| » | .foregroundColor(Color("durationTextColor")) |
| | .font(.footnote) |
| | } |
| | } |
| | } |
| | } |
Click the Resume button. The text is now visible in both light and dark mode.