
This chapter discusses how to configure the eight or sixteen nodes in your Pi supercomputer. The process involves editing the fstab, rc.local, and hosts files. Additionally, you will be instructed on how to format the slave SD cards using the SD formatter for Windows applications and how to copy the slave1 SD card image, using the win32 Disk Imager application, to the remaining formatted slave SD cards.
In this chapter, you will learn:
- How to edit the
fstabfile on the slave1 node to set up an automatic mount command - How to edit the boot up script
rc.localfile on the slave1 node for automatically mounting the export drive MPI code folder - How to edit the
hostsfile on the master node and slave1 node to reflect, temporarily, the IP address and hostnames of the remaining six or fourteen slave nodes - How to use the SD formatter for Windows applications to format the remaining slave SD cards
- How to use the win32 Disk Imager to copy the image of the Slave1 SD card from the main PC drive to the remaining slave SD cards.
- How to edit/update the
hostsfile on the remaining slave nodes to reflect their actual IP address - How to edit the
interfacesfile on the super cluster nodes - How to update the MAC and IP address on the network switch for the remaining slave nodes
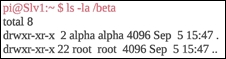
We will now discuss the process of automating the mounting of the gamma drive. Enter exit, you should now be at the pi@Mst0:~$. Now ssh into the slave drive (Slv1). Enter the command; sudo reboot. After reboot, check to see if the beta folder was mounted (see the following screenshot):

Clearly, the beta drive did not mount. You therefore need to edit the fstab file, and set up an automatic mount point command in there, so that you don't have to execute the mount command every time somebody logs in after reboot. Enter the command; sudo vim /etc/fstab (see the following screenshot). Add the text highlighted in red:

The first argument Mst0:/beta is the same as the first argument used in the previous mount command (recall Mst0 has the value of the IP address). The second argument /beta signifies the local drive you want to mount to. The third argument nfs is the type of filesystem being mounted to. The fourth argument is a series of parameters required for setting up the mount, and the last two arguments are simply zeros. Save this updated file by entering the command; Esc :wq. Next, you need to edit the boot up script rc.local. Enter the command; sudo vim/etc/rc.local (see the following screenshot):

Add the text highlighted in red. The mount -a command automatically mounts the drive whenever the node boots up. The sleep 5 command is an added refinement to the system that temporarily delays boot up of the slave to give the master (Mst0) time to completely boot up, so that when the slave comes online, it will mount the exported beta drive from the master node. Enter Esc :wq. Relist the contents in the beta folder (see the following screenshot):
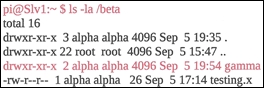
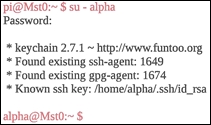
You should now see the gamma folder and testing.x files (see the preceding screenshot) if the drive correctly mounted. You can now test to see if the drive automatically mounts upon reboot. Go ahead and execute the command; sudo reboot, and then ssh back into Slv1. Relist the contents of beta. You should, once again, see the preceding screenshot. Let's run one more test. You want to make sure that files are mounted using the readable, writable, and executable permissions, so ssh back into Mst0, and change the user to the alpha user by using/entering the command; su - alpha (see the following screenshot):
Then change the directory to gamma, and then list the contents in gamma (see the following screenshot):

You now see the requisite files. Go ahead now, and run one core on the master node, and one core on the slave node (see the following screenshot):
