
For this app, our setup process will closely resemble that of the previous chapter.
To create the Xcode project, follow the given instructions:
- Select File | New | Project, and from the templates select iOS App With WatchKit App.
- Name the project C-Quence and deselect the Notification scene and any other scenes that may be preselected, we won't need them here.
The project window should now be looking similar to this:
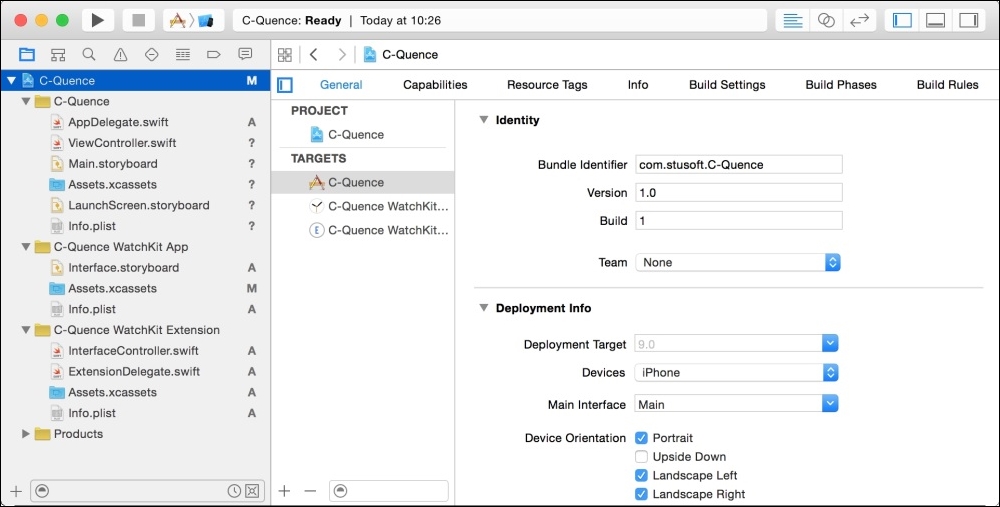
Looking at the project navigator on the left, we see that inside the C-Quence project is a folder also named C-Quence, which contains files that are relevant to the iPhone companion app that we will not be needing to change in this chapter. The next two folders are all about the WatchKit Extension and WatchKit App. We can see here that Xcode's default project structure adheres very closely to the MVC pattern described above.
The MVC's View is the .storyboard file that the template creates for us. Similarly, the Controller is already created, namely, the InterfaceController.swift file.
The only part of the pattern that we need to create from scratch is the Model, which is out next step:
- Select C-Quence WatchKit Extension in the project Navigator and type Command-N to create a new file.
- Select iOS | Source | Swift File, as in the image below:
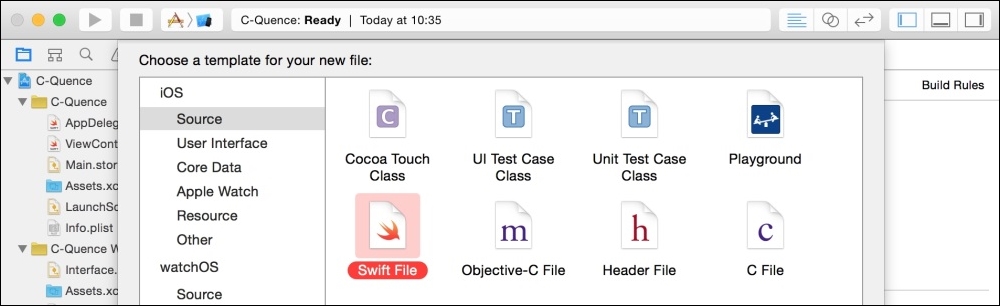
- Hit Next and name the new file
GameLogic.swift, and be sure to check that the Group it is assigned to is the C-Quence WatchKit Extension and that the target selected is also C-Quence WatchKit Extension (since you selected the extension group in the Navigator before creating the file, these should be correctly preselected):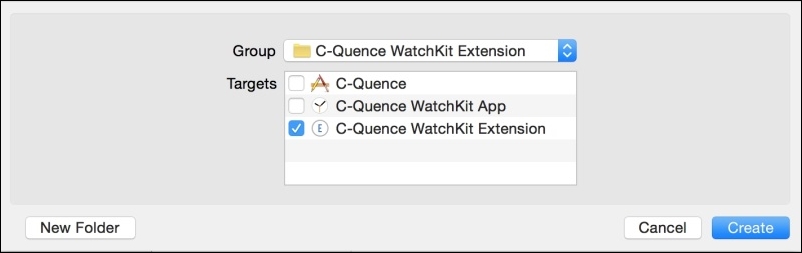
- Hit Create, as shown in the above image.
Note
Capitalization is not a matter of taste.
There are certain conventions around when to use capitals and when not and these conventions can be critical in making your code easier to understand, either for other developers or for yourself later on.
Class names are always capitalized, as in the case of the
GameLogicclass we will create in a moment. Using further capitals for complete words in the name, such as the Logic inGameLogicis called camel case naming and is a great aid to clarity.As we see above with
GameLogic.swift, file names are also capitalized (but not the file type suffix!).Variable names are written in uncapitalized camel case, for example
myVariableName; this includes everything that is declared with thevarandletkeywords, as well as function argument names.
We now have all the files needed for a simple but well-structured app project that follows the Model-View-Controller program design pattern. It is a good idea to have some structure like this, however imperfect and incomplete it may be, before we start to dive into the coding and immerse ourselves in detail. Anything that we have missed, or that turns out quite differently to the way we expect, we can add and alter as we go along. Remember, a plan that may need revising is way better than no plan at all.
The interface we will be building here makes use of the 'bordered' buttons we created in the previous chapter.
We need four such buttons, and we will use a hierarchy of Group objects to lay them out. Most of this layout method falls into the drag-drop-set-value-repeat category, but that does mean we'll be glad of the clear outlines we have already set out earlier.
In the project Navigator, select the Interface.storyboard file from the C-Quence WatchKit App group, and if the Attributes Inspector pane is not open, click Command-Option-4.
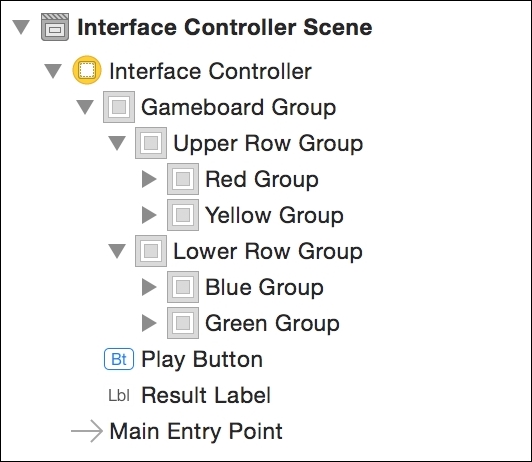
This is how the Group hierarchy that we are aiming to construct will be organized:
But it doesn't look that way yet:
We will drag a Group object into the Interface Controller, to be named Gameboard Group, that will contain all the buttons and groups visible during game play. Inside that we will organize two groups, the Upper and Lower Row groups, each of which will contain two color groups side by side. A button (not shown in the image above) will be placed in each color group.
For setting up the Group hierarchy, follow the given steps:
- To save ourselves a lot of repetition, we will start by creating the Gameboard Group, then the Upper Row Group, and then the Red Group (and its button), and all the rest will be copying and pasting, and some renaming.
- Drag a Group object from the Objects Library (Command-Option-Control-3), select it in the Document Outline, and hit Return to give it the name Gameboard Group.
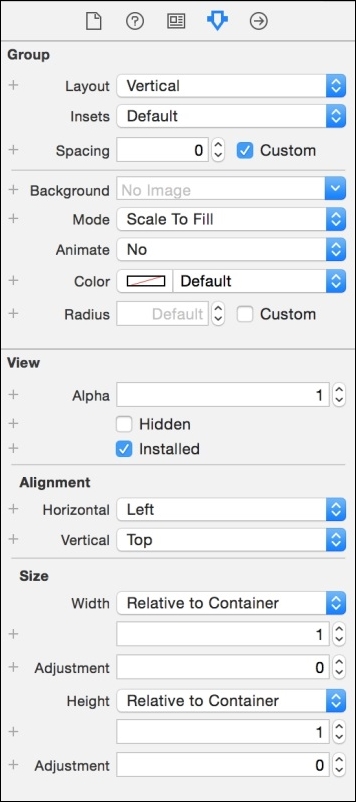
- In the Attributes Inspector:
- Set the Layout property to Vertical.
- Set Spacing to Custom and give it a value of 0.
- Set Size Width and Height to Relative To Container.
- The Attributes Inspector should look like this:
- Now drag a Group object into the Gameboard Group and name it Upper Row Group.
- Set its Insets to Custom, and for each entry, Top, Bottom, Left, and Right, enter a value of 2. You may like to tweak these values later on to your own tastes, but they are reasonable enough for the time being.
- Set Background Color to Black Color.
- Set the Alignment's Horizontal and Vertical setting to Center.
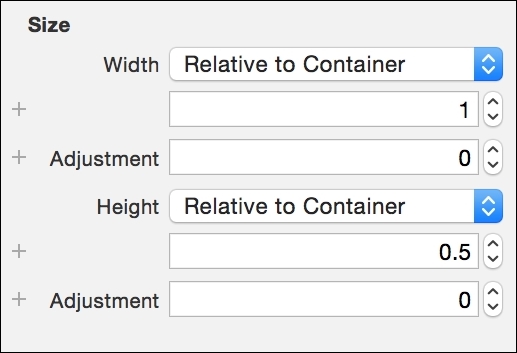
- Now set Size Width to Relative To Container. Do the same for Height – set it to Relative To Container, but give it a value of 0.5, meaning that it will always resize to be half the height of its containing view (in this case, the Gameboard Group), as pictured below:
- Next, drag a Group object into the Upper Row Group, and name it Red Group.
- Set Insets to Custom, again with a value of 2 for each of the four insets.
- Set the Background Color to a red that you find appealing.
- The Radius property we will set to a Custom value of 8, and this value you may well choose to alter once we see the UI on screen.
- Set Alignment Horizontal and Vertical to Center.
- Set the Size Width to Relative To Container with a value of 0.5, set Height to Relative To Container.
Finally, drag a Button into the Red Group, erase its Title, since we have no need of a text title, and set its Background Color to Black Color.
- Set its Size Width to Relative To Container.
- Set its Height to Relative To Container but with an Adjustment of -2 (that's a minus sign, not a hyphen!).
This is where the Document Outline really shines. Select the Red Group.
- Key in Command-C and then Command-V and you'll have the next color group automatically placed below the Red Group in the Document Outline, which in turn means it will be drawn second on the screen, and therefore to the right of it. Rename it Yellow Group and change its Background Color to something yellow, and we're done with the upper row.
- Select the Upper Row Group in the Document Outline, hit Command-C and then Command-V, and rename the new Group Lower Row Group. Inside that group we will need to rename the color groups to Blue Group and Green Group and change their Background Color properties to something appropriate. One might suggest blue and green.
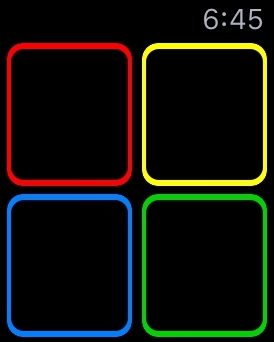
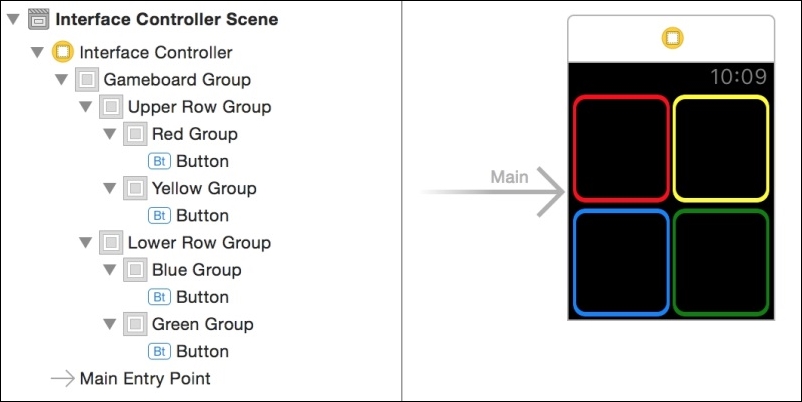
Your Document Outline and interface should now look like these:
Select Gameboard Group in the Document Outline and set its View | Hidden setting (below the Alpha setting) to selected (ticked) in the Attributes Inspector.
It promptly disappears from the interface, so why did we do that? The game's interface is actually very simple, either we are looking at the gameboard that we have just built, or a play button (and possibly results label), and, rather than create different views, it is much simpler to hide whichever of the two 'views' that we don't need. At the launch of the app, we want to see the play button, but not the gameboard. So we hide it.
Setting the hidden property to true conveniently allows us to drag UI objects from the library onto (what is now) an empty view in Interface Builder, so let's do that now. Drag a Label object into the interface, and name it Result Label. Set its Text Alignment to Center and the Lines property to 0. This will allow the label to show as many lines of text as is necessary, in case we decide to present something like "Hey, awesome, you just scored an amazing score of 128" when we show the user his result.
Set both Horizontal and Vertical Alignment to Center, and Width to Relative To Container. We'll set View | Hidden to true, since we don't need the result label when the app first launches. Now drag a Button into the (once again empty) interface, change its Title to Play, and set both Horizontal and Vertical Alignment to Center.
You're done! The interface is now complete. You could hit Run, but there won't be much to see apart from a Play button that doesn't do anything. First we need to create a game logic class and populate the InterfaceController.swift class with some code. Since the InterfaceController.swift code will need to call methods of the game logic class, we will implement the latter first. You'll see that the game's actual logic is really very simple, and this class will comprise little more than two dozen lines of code.