
Submission of an app to the App Store requires some preparation in three areas:
- The Member Center of Apple's Developer website
- Xcode's project settings
- iTunes Connect, Apple's portal for app administration
As stated already, this section is not intended to be a catch-all guide to App Store submission, but rather aims to provide the context in which additional watch-related steps must be taken.
We are assuming here that you have registered as a developer, that your Development Program membership is valid and up to date, and that you have currently valid development and distribution certificates. Please refer to Apple's documentation for further information.
The first thing we need to do is create a distribution provisioning profile for our app with the following steps:
- Log into the Member Center at https://developer.apple.com/membercenter/index.action and click on the Certificates, Identifiers & Profiles link.
- Select Identifiers from the iOS Apps list.
- On the left of the following page, Identifiers should already be selected.
- Click + to create a new App ID.
- Set the new ID's Explicit App ID value to the bundle identifier in Xcode's project window under General | Bundle Identifier as illustrated here:

- Click Continue.
- Review the details you have entered and, if all is well, click on Submit and then Done.
- Now select Provisioning Profiles | Distribution from the list on the left of the page.
- Click on + to create a new provisioning profile.
- Select App Store from the Distribution list and click on Continue.
- Select the new App ID you just created in the steps above and click on Continue.
- Select your iOS Distribution certificate (not the iOS Development certificate) and click on Continue.
- Enter a name for the certificate, something like "MyApp Dist", into the Profile Name text field and click on Generate.
You can now download the certificate. Once you have double-clicked the downloaded file, Xcode will launch (if it is not running already) and add it to its list of available provisioning files.
Switch back to Xcode, bring up the project window, and perform the following:
- Select the PROJECT's Build Settings | Code Signing, as illustrated here:
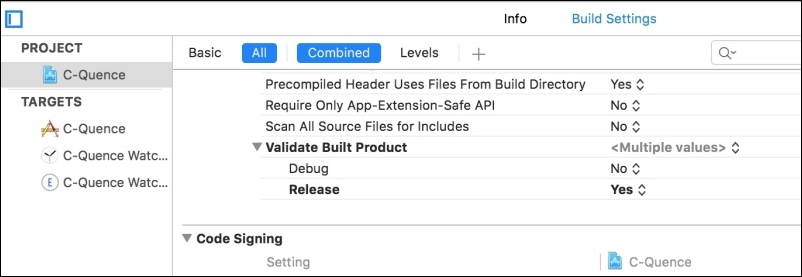
- Select your iOS Distribution Certificate from the Code Signing Identity list.
- From the Provisioning Profile list, select the new one that you have just downloaded.
Your app will now be code-signed with a distribution certificate. The whys and wherefores of the whole certificates thing could be the subject of a book in itself, but suffice to say here that, with this certificate in place, you will be able to upload your app to the App Store once you have setup the app in iTunes Connect.
If you don't see the new provisioning file, follow these steps:
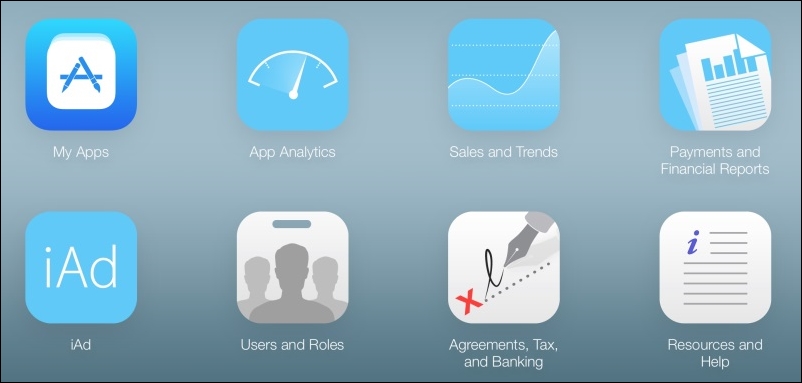
iTunes Connect is the portal through which you deal with all matters pertaining to your app on the App Store and requires membership of the Developer Program. As you can see in the following image, it offers you everything you need in terms of uploading your app in addition to the administration of all aspects of various tasks involved in dealing with the App Store:
Before we go any further, we'll take a look at the information and resources that you'll need to complete the iTunes Connect app setup process. Preparing this stuff can be a lot of fun, you are about to become product manager, graphic artist, and publicity guru, all rolled into one.
Take some time over this, which in effect means do it now before you start the submission process. This isn't the place to discuss the do's and don'ts of advertising your app, except to say—do give it all the attention it deserves and don't leave it to a hasty ad hoc burst in the middle of the submission.
You will need an internet page somewhere to support your app. The level of support you offer, from a single page of how-to text, up to a fully fledged marketing and support website, is entirely up to you, but you do need the URL for submission. It is also up to you where you host that URL, so it can be, for example, a GitHub page, or a freebie web page, it doesn't need to be anything flash.
Of course, your users may form an opinion on your app's professionalism when visiting that URL (if they do), but that's a different discussion entirely.
The App Store needs a single icon image file, which will then be resized and reformatted as necessary. This doesn't actually have to be the same as the icon on your iOS (or watchOS) home screens, but it it stands to reason that this will probably be the case.
The specifications for the image are as follows:
- The size must be 1024 x1024 pixels. Remember what we said about re-using the image that you create for the watch icons? Bet you're glad you followed that advice and started with a 1024 x 1024 pixel image.
- The image resolution must be 72 dpi, the color format must be RGB, the image must be flattened (i.e. contain only one layer) and contain no transparency. If all of that sounds like you need a PhD in graphics, simply export a
.pngfile of your image and 99% of the time you'll find that these are the default settings. Using OS X's ownPreviewapp is a pretty safe bet. - The image must be in PNG or high-quality JPEG format. In all your graphics work with Apple platforms, you'd be well advised to stick with .png files.
- The system will apply a circular mask, your image should be square (but containing no important visual elements in the corners, where they would be lost). Do not upload a circular icon.
- If your icon is designed with a white or light background, a hairline stroke will be added for display on the App Store, so there is no need to add anything of that sort.
- You can upload up to five screenshots for the WatchKit app, in addition to the screenshots for the various iPhone screen sizes.
- The screenshots must be 312 x 390 pixels and should contain only the screen of the watch – do not embed it in a visual representation of the watch itself.
- The first two screenshots are immediately visible on the App Store carousel, the others become visible when scrolled to, so use those first two images wisely.
- You can choose the order that the screenshots appear in and you may wish your screenshots to tell a story. Certainly you will want to give the potential user a clear and engaging idea of what your watch app has to offer.
- Don't include any visual material for which you don't own the copyright, including logos and trademarks. This will get your app rejected.
There are also a number of optional items that you may wish to include.
It is possible to upload a movie file of your app in action. This preview should be between 15 and 30 seconds long and is displayed as the first image on your App Store iPhone product page, followed by the app screenshots.
Although it is not yet possible to add a video of your Apple Watch app, it may well be worth considering whether it makes sense to include at least some footage of your iOS app interacting in some way with the watch, even if that means no more than showing some UI element that clearly implies the presence of the watch app.
Making such a video requires no software that you do not have already and could hardly be easier: Just connect the iPhone to your Mac via USB, launch OS X's Quicktime Player app, and select File | New Movie Recording. In the window that opens, your Mac's built in camera will be preselected as the active input, so you'll need to select your phone using the disclosure triangle next to the Record button, as shown here:

You can then hit the Record button and begin to reveal to the world not only how great your app looks in use, but also the fact that the watch app is included.
You also have the opportunity to add some comments to the Apple reviewer who is handling your app's submission. Depending on the nature of your app, you may wish to include important information here, to avoid any misunderstandings and the subsequent rejection of your submission. This may include confirmation that you are the copyright owner of any visual elements like book covers and websites: it may mean giving the reviewer access to a user account if your apps require a login, or something equally essential to fully reviewing the app.
We will now prepare iTunes Connect to expect the upload of your app.
- Go to https://itunesconnect.apple.com and sign in, using your Apple ID.
- Click on the My Apps link.
- Click on + and select New App, which will allow you to enter the resources and information necessary to enable your new upload.
- Fill in the Name text field; this will be the name as it will appear on the App Store. Your app name must be unique - you can't use the same name as another app on the Store.
- From the Primary Language drop-down menu, choose your app's primary language.
- From the Bundle ID drop-down menu, choose the new provisioning profile that you created in the Member Center (and which you selected in Xcode's Build Settings).
- The SKU is an ID for your administrative use only, nobody else sees it. It must be unique among your apps and can include letters, numbers, hyphens, periods, and underscores. Use it for whatever purpose you choose, but if you don't use it, you still need to fill in this field.
- Click on Create.
You will now be taken to the App Information section of App Store Information Page. The Bundle ID should be correctly selected, so you just need to choose your Category (and optional Second Category, if you wish) and then click on Save.
Now move on to the Pricing and Availability section of the App Store Information Page and name your price.
Select the Prepare for Submission section of the App Store Information Page.
You should already have everything you need for this section, as outlined in this chapter.
Once you've added the app to iTunes Connect, it'll show the status Prepare for Upload on the app summary page. Click on View Details then, on the app info page, click Ready to Upload Binary.
Answer the question as to whether your app contains encryption and click on Save. Now, on the app summary page, your app status should be Waiting for Upload.
In Xcode, select Product | Archive, as shown below:
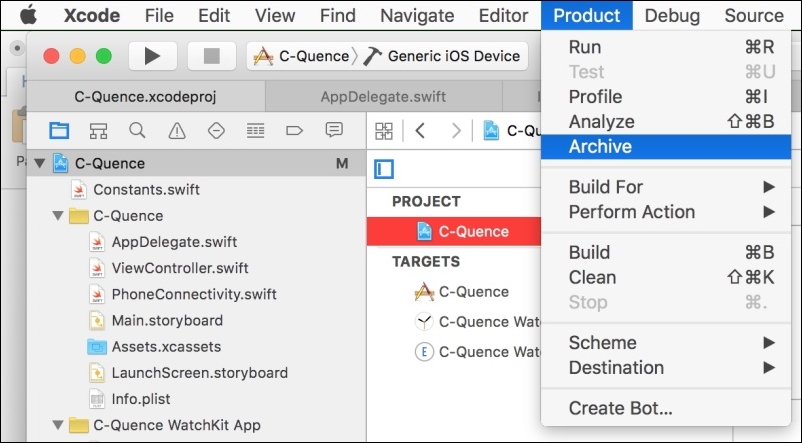
If the Archive item is grayed out, you probably have a Simulator device selected under the Run settings, so select Generic iOS Device instead (see illustration above).
The archiving will last a few moments and then you'll be presented with the Organizer window, with which you can upload the archive to the App Store.